
The Bene Gesserit (or the Sisterhood) are an ancient and mysterious organization of powerful women who wield enormous political influence in the Dune universe through their use of the Voice and their mastery of the mind.
In Dune Awakening, the Bene Gesserit class is focused on Wierding Way (short blade specializiation), The Voice (mind control gap closer) and Body Control (passive physical benefits). If you want to start progressing the Bene Gesserit skill trees then you will need to complete a series of quests provided by Bene Gesserit Trainers.
Rewards: Completing the Bene Gesserit Quest Chain will reward you with a Unique Adept Disruptor Pistol, The Bene Gesserit Archetype Armor Set and the Bene Gesserit Archetype Armor Variant.
IMPORTANT: This quest line is tough, with even the basic quest starting in zones with Aluminum level enemies. It's also easier if you have an ornithopter, although not required.
Quick Links:
- Quest 1: The Missing Pieces (Basic Quest)
- Quest 2: Sacred Records
- Quest 3: The Missionaria Protectiva
- Quest 4: The Impact of Ecology
- Quest 5: Secrets of the Syndicate
- Quest 6: The Rogue Bene Gesserit
Quest 1: The Missing Pieces (Basic Quest)
Note: This quest will already be completed if you selected Bene Gesserit as your starting class, so if that's you - just skip to the next one.
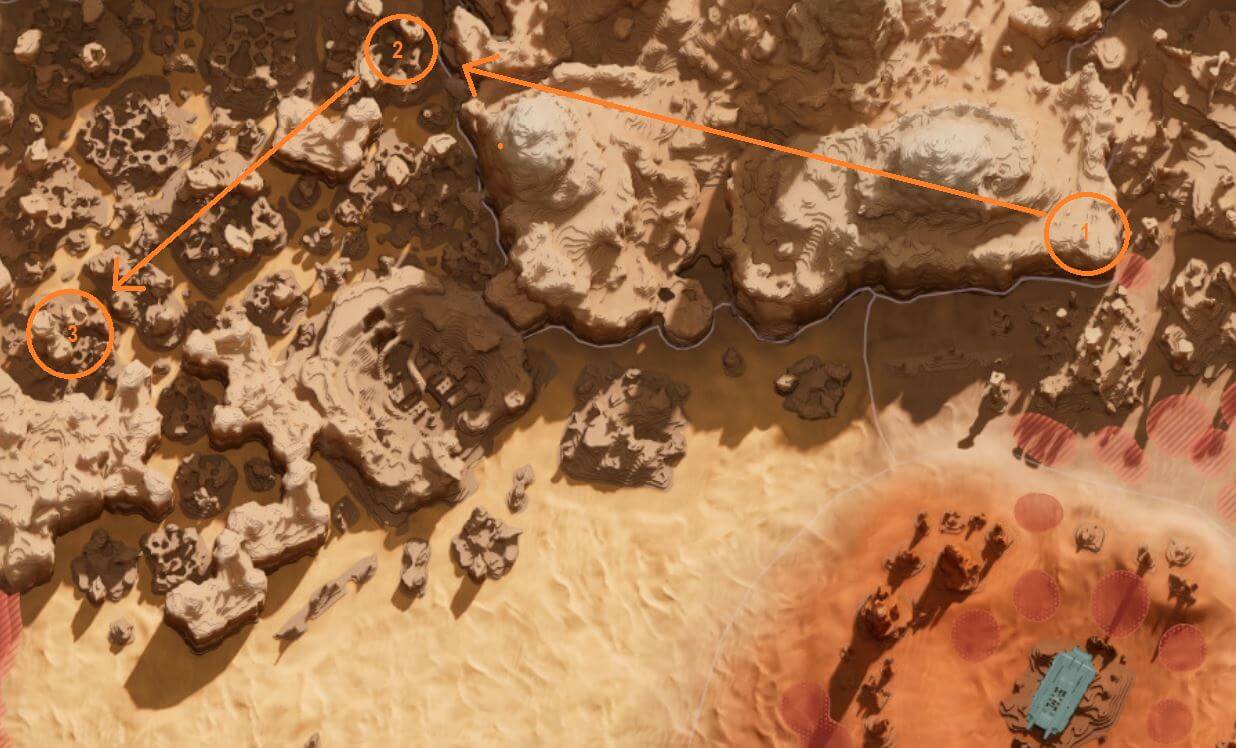
Head to Helius Gate and speak to Sister Mesa. You'll see the purple Bene Gesserit class icon on your compass at the top of the screen so she's easy to spot. Head next to Stonestep Village where you will have to climb up the tower a bit to grab the Text sitting on a ledge, as shown in the image.
If you scale all the way to the top of the tower, there's a great loot chest.

Once you have the text, head to the second location which is just west of Rockwarren Village. You'll need to scale the tall rock structure until about half way where you'll see a clearly marked entrance with glowing red lights.
There's 4-5 enemies in here, if you can kill them then you should for the Stillsuit Tubing and Sandtrout Leather they drop but don't worry if not. Just head up again and grab the Text near the end of the climb. It's before you enter the final room, on your right. Hidden in the final room is another great loot chest.

Return to Sister Mesa and hand in both texts, completing your basic training and gaining access to the Bene Gesserit skill tree.
Quest 2: Sacred Records

Next, we're heading to Harko Village. You can either fly there from the Overworld map, or you can fast travel there from any Tradepost. You'll find the Advanced Trainer Jocasta just a little north of the weapons trainer, speak to her and grab the quest.
Time to head to Mirzabah at Suk Alusus. Run in from the north entrance until you reach the room with the Purple ID band, it's fairly early on. Don't go any further, turn left and go through the door you unlock with the band.
When you are in this room, look up and to the right and you will see a small gap in the roof. Climb through to enter the final room which contains the quest item and a rare chest.

We have quite a long journey to our next location, Stone Sentinel near the Pinnacle Tradepost in the Eastern Shield Wall. Approach the location shown on the map and then it will task you with finding your way up.
Be warned, this is a hefty climb! It will be much easier if you an ornithopter to get you half way up or at least a Full Suspensor Belt. Once at the top, grab the chests and Records then head back to Harko Village to hand it in to Jocasta, also accepting the next Contract.

Quest 3: The Missionaria Protectiva
IMPORTANT: You will need a handheld scanner for this quest so make sure you have one equipped before you set out.
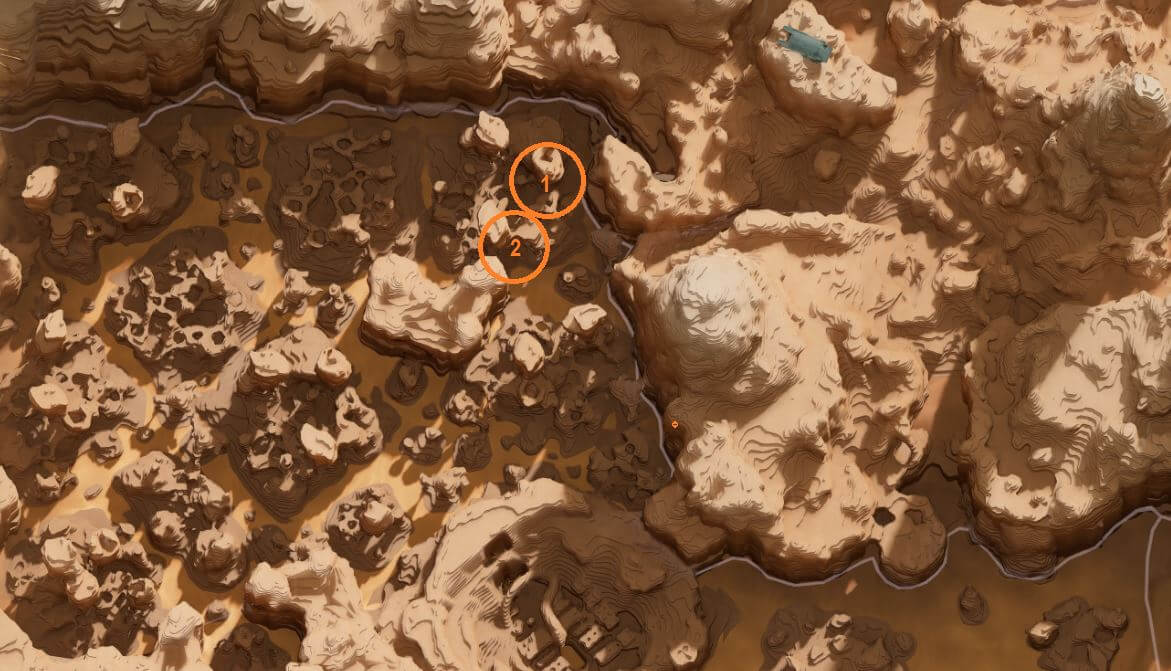
We're heading back to Stonestep Village, the same location as the first quest. If leaving Harko Village via Overworld then re-enter from the northwest, otherwise fast travel to the Crossroads Tradepost and head north.
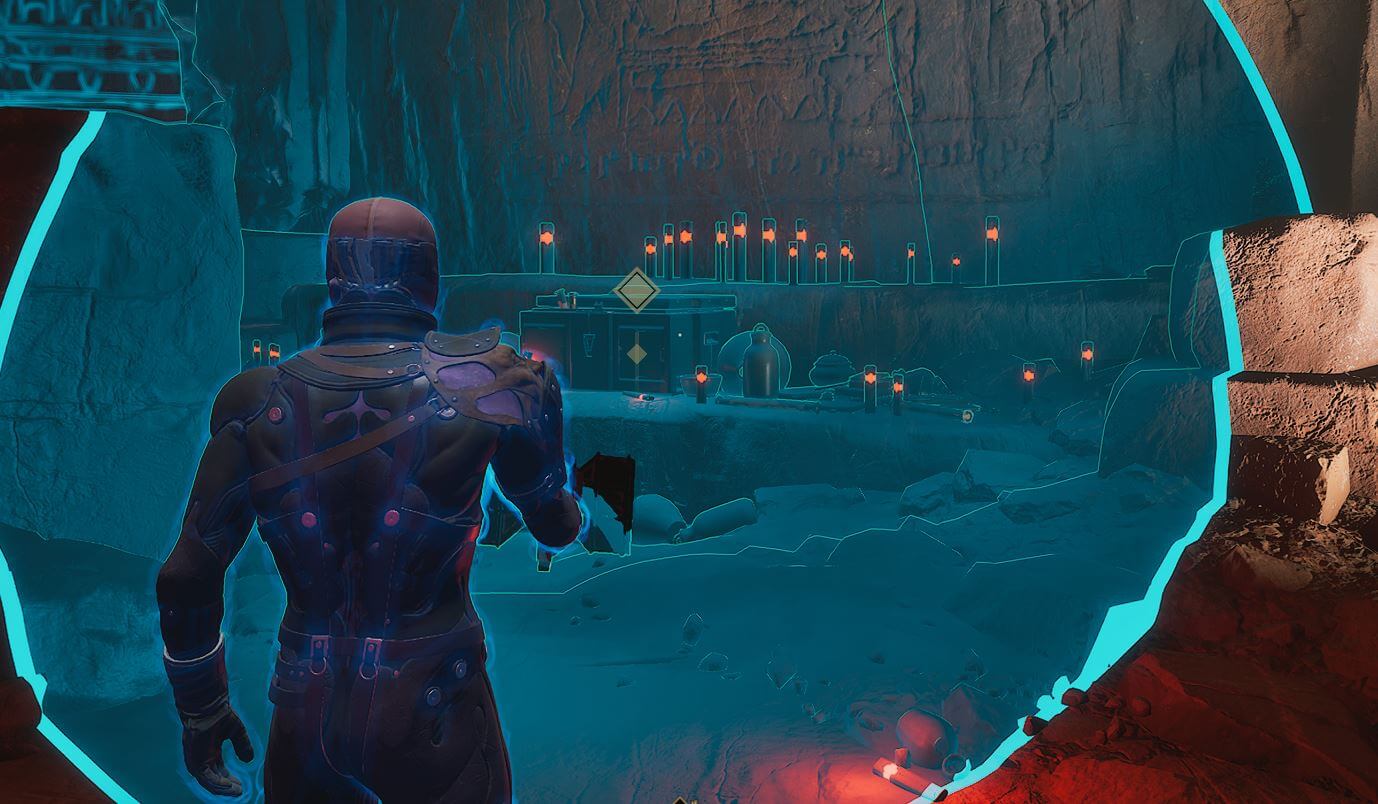
Work your way up to the top room of the Stonestep Village pillar and use your scanner on the chest and records as shown in the image below. Be careful as there are some dangerous enemies in this room.
Exit and head a little further south to the 'House of Ilm'. There's not much to this part really, you just grab the fragment in the first room after you enter and it's time to head back to Harko Village to hand the quest in to Jocasta again.

Quest 4: The Impact of Ecology

We're getting a nice new zone this time: Testing Station 71. It is in The O'odham again though so you know what to do - enter from Overworld at northwest or fast travel to the Crossroads Tradepost.
This Testing Station is pretty straight forward, enter and clear the left side to grab the first ID band, return to the atrium and then clear the right side to get the second ID band.
The final room is a sort of sacrificial chamber in the centre of the Testing Station where you will find a bunch of pretty tough enemies which can be a little spicy. There's a small room on the right hand side when you enter where the book you need is located.
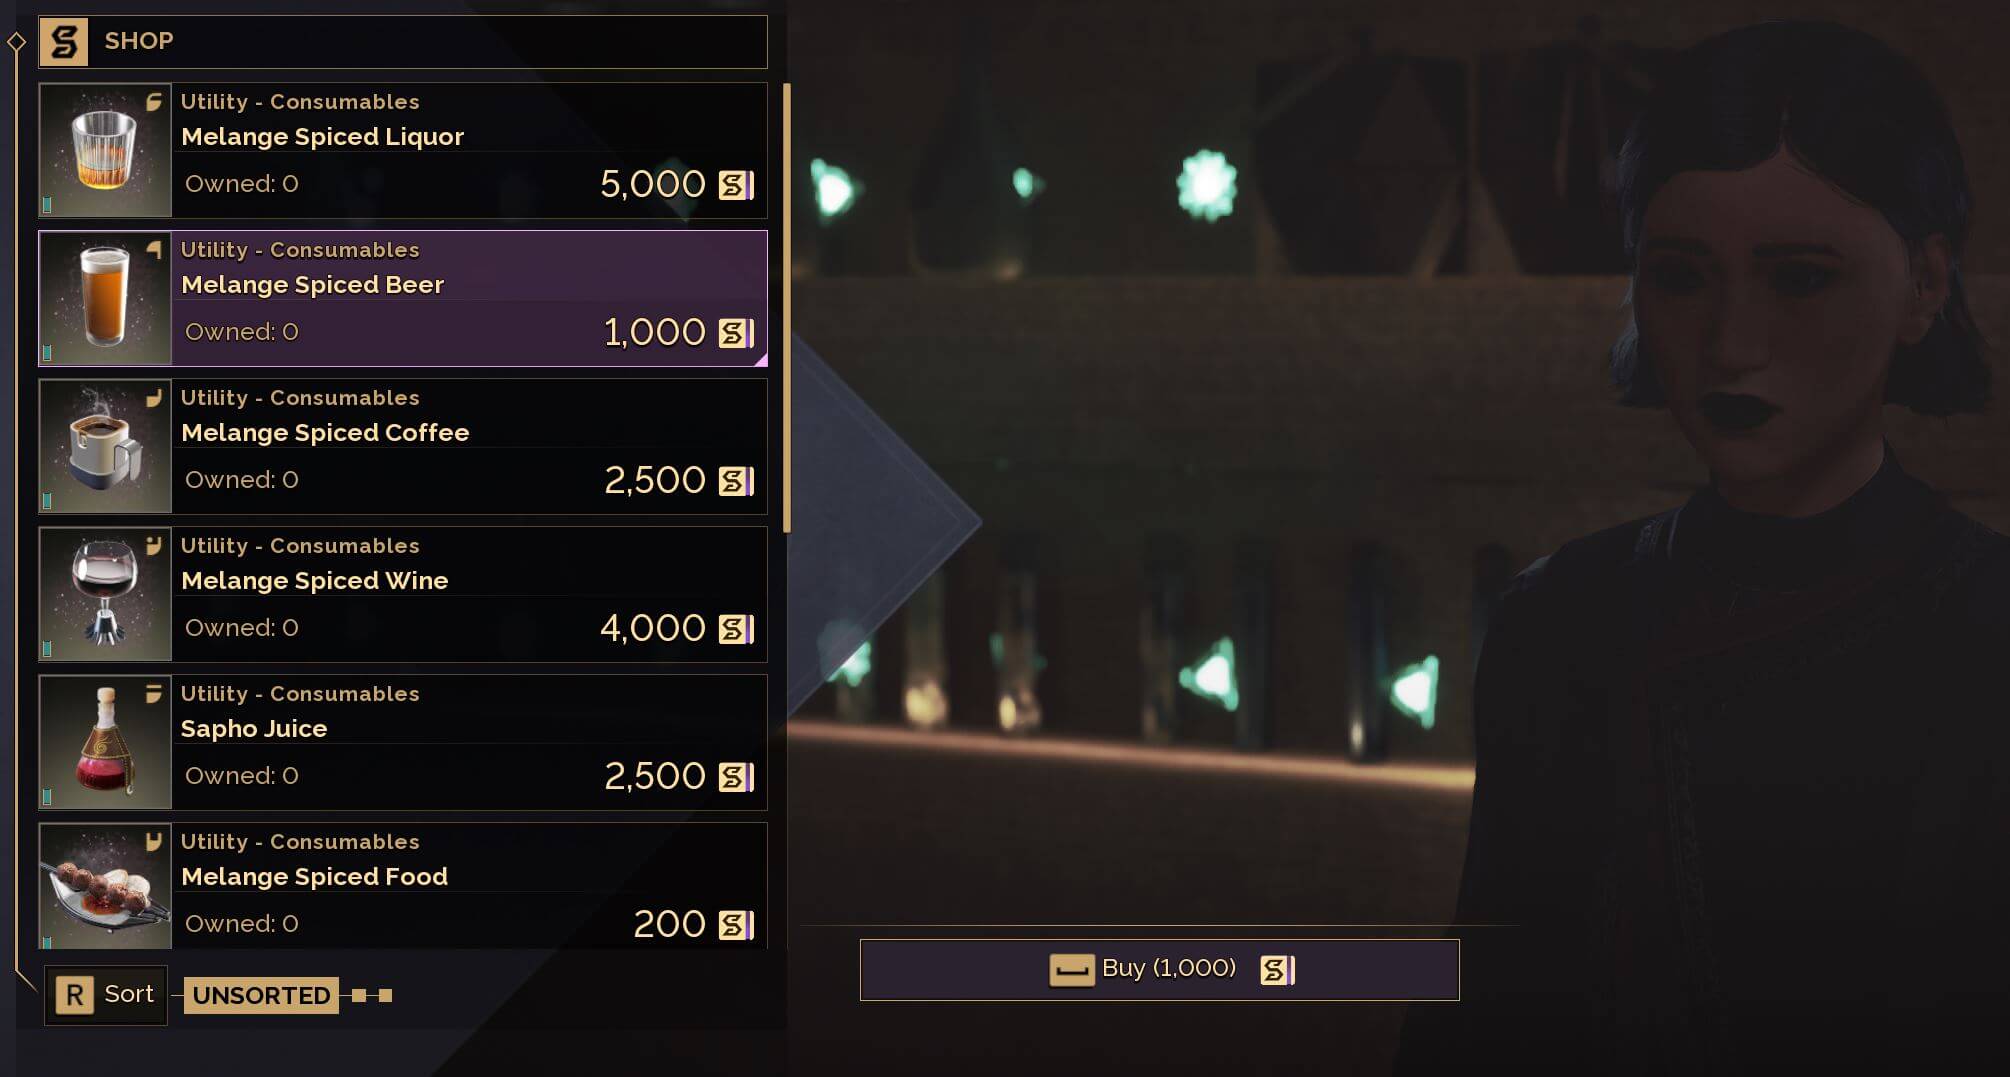
Return to Jocasta in Harko Village, or at least where she should be, and then turn around and speak to the citizen indicated on the map. He will direct you to Hannivar's bar, at the back of which you will find a mercenary. He won't speak to you unless you give him a 'Spiced Beer' so buy one from the barkeep and then speak to him. Then head back to the O'odham once again.
Travel to the location indicated on the map, the ambush site, and that part of the journey will complete. You then need to travel another 250m to find Jocasta hiding under a cliff, again this will be indicated as a marker on your map so should be easy to find.
Speak to Jocasta, return to Harko Village and speak to her again in her original location to hand over the books and complete the quest.
Quest 5: Secrets of the Syndicate

This quest is going to kick off at The Slant in the Hagga Rift, so if travelling from the Overworld that will mean entering the Hagga Basin from the northeast, if fast travelling then you will want to fast travel to The Pinnacle. The Slant is a small outpost, run into the main building and grab the Intel, the book is on a little table just beside it.
Next we're flying back to an outpost in the Eastern Shield Wall just at the base of the Stone Sentinel, the large cliff we climbed in Quest 2. There's a tunnel leading down to a cavern in the centre of the main building. Just before you enter the tunnel look right at the top of the ramp and you'll see a scroll. Grab it.
The third investigation is at the nothernmost point of the Sheol at the Wreck of Ourea. Make your way there and park your vehicle just northwest of the wreck, outside of the PVP and radiation zone. Unless you have a Radiation Suit with you and some high level armour + weapons, I'd just suggest that you just run straight in, hang left and read the book on the table at the back and then get out of there as fast as you can.
It wouldn't be a Bene Gesserit quest if we didn't have to visit The O'odham, so back we go to Khala Cavern. Once you pop the plastic wrapping on the door to the Cavern, three syndicate assassins will appear, eliminate them. Head up to the platform just above you that's about half way up the rock format and the Syndicate Leader will spawn with some other enemies.
The leader is pretty tough actually so you might want to park your vehicle nearby incase you need the respawn. Kill him, loot his body for the quest item and head back to Jocasta in Harko Village to complete Quest 5.
Quest 6: The Rogue Bene Gesserit
We have to use the Voice here to Compel, so head back to South Hagga Basin where the enemies are weak and just spam it on the first one you find. Honestly this quest is pretty grim as the Voice has a 30+ second cooldown and you need to use it... a lot. Maybe put a show on your second monitor or your phone and just buckle in.
Next you have to do the same thing with Litany against Fear, the last skill in the 'Body Control' tree. At least you don't need a target for this one.
Once done, return to Harko Village and speak to Margot Fenring. She's in the Imperial Consulate building (location marked on your map) then to end the quest chain go speak to Jocasta.
Your reward, a powerful Mk5 Adept Disruptor Pistol, the Bene Gesserit Archetype Armor Set and The Bene Gesserit Archetype Armor Variant!
Hope this helped! We also have full Advanced Trainer Quest Guides for: