Ensuring that you build your base in the right location is critical to progressing at a decent pace, and honestly, for your enjoyment of the game.
Building your base in an awful location and realising you are going to need to move everything again can be a real pain. In this guide we'll show you what makes a base location great and when you might want to think about moving on.
Please note that this guide has been drafted with solo players or small groups in mind and if you are playing with a large guild then there are some other factors to consider given the requirement for much greater amounts of resources (water). You might for example want to settle near or on one of the giant dew fields.
Contents:
What Makes A Base Great?
Before we get into the article, we want to outline some key things to think about when choosing your base location:
- Proximity to enemy camps/bases (you will need a steady supply of bodies for your Deathstills)
- Proximity to key crafting materials (ores) for your current progression tier; and
- Proximity to a Tradepost for contracts & fast travel.
How Many Bases Will I Have?
There is a lot of choice for how many bases to build and where to build them, in this guide we cover a Three Base Strategy and a Two Base Strategy.
Three Base Strategy
- Base One: South Hagga Basin - Griffin's Tradepost (Granite, Copper)
- Base Two: East Vermillius Gap (Iron, Carbon, Erythrite)
- Base Three: Eastern Shield Wall (Aluminum, Erythrite)
Two Base Strategy
- Base One: South Hagga Basin - Griffin's Tradepost (Granite, Copper)
- Base Two: West Vermillius Gap (Iron, Carbon, Erythrite, Aluminum)
In each Strategy section below, we will include an ideal "area" for a base, explaining our thinking. We will also offer one alternative base for each, these are more for those looking to push, or maybe play in a larger group.
You can, of course, play the game however you like, and you might want to really take your time working through Hagga Basin, but if you are focused on efficient progression, then we'd probably recommend the Three Base Strategy.
Three Base Strategy
Bases Order:
- Hagga Basin South (Griffin’s Reach)
- East Vermillius Gap (Anvil Tradepost)
- Eastern Shield Wall (Pinnacle)
This is our preferred setup. You build up slowly, with each base covering the right resources for your tier. It also keeps you close to a Tradepost each time, and lets you ramp up naturally. This does mean you will have to move location an extra time; however, you can also stick with the second base for some time.
Base One: Hagga Basin South (Griffin's Reach)
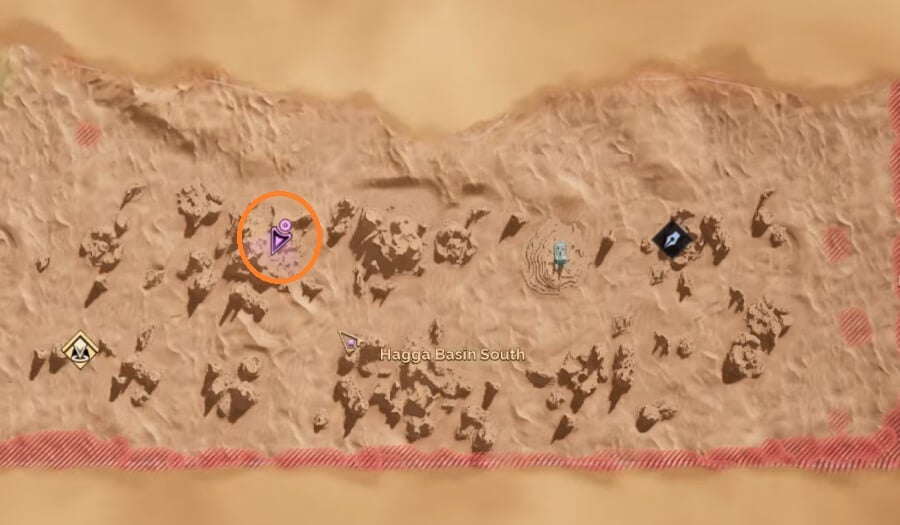
Your first base should be around Griffin’s Reach Tradepost. It gives you access to Copper and Granite, early mobs, and a clear route through the questline. You’ll also get used to your Sandbike and early combat here.
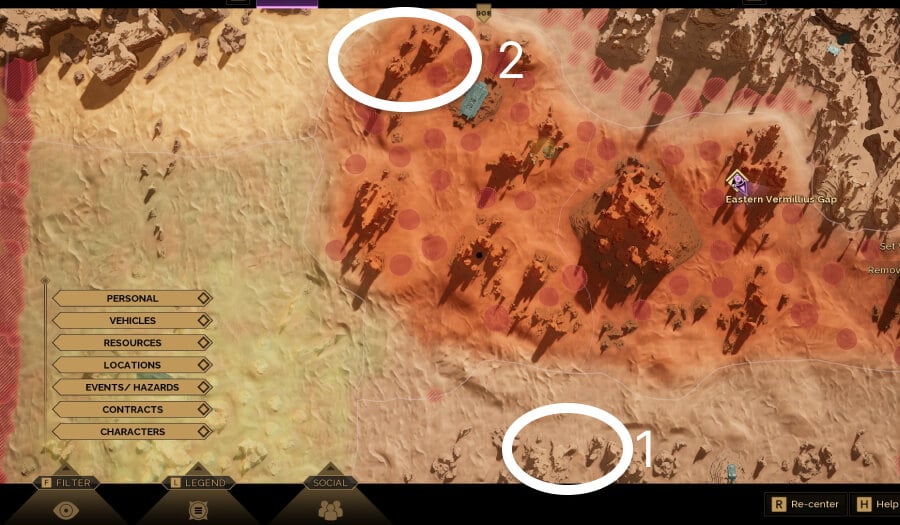
Base Two: East Vermillius Gap (Anvil Tradepost)
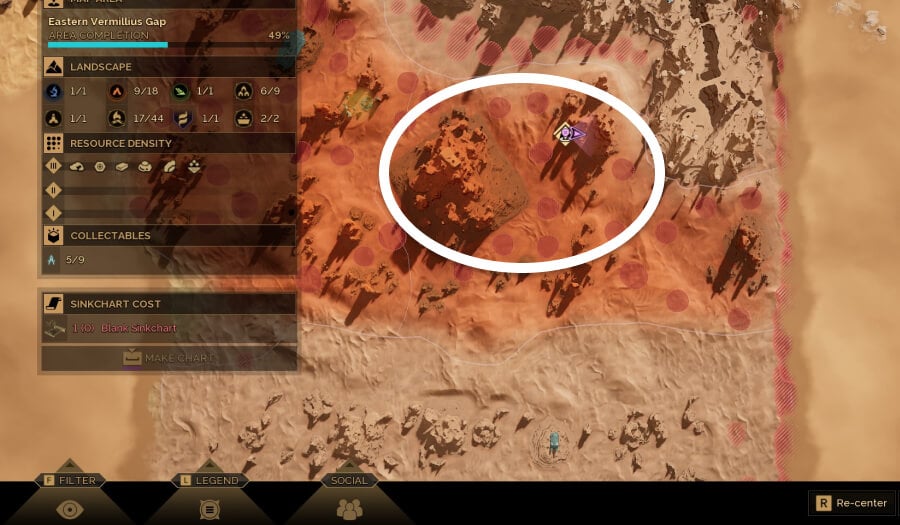
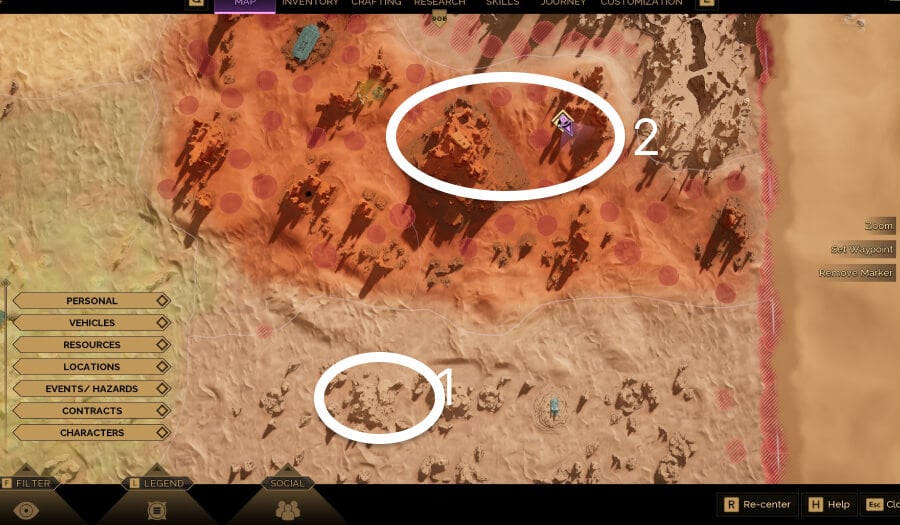
East Vermillius Gap presents a pretty natural stepping stone for your second base. The game's questline will lead us to this area next, and it also features plenty of enemy camps and a Tradepost, which means it ticks key early boxes. Vermillius Gap is also all about Iron and Steel, so both our options for this area will feature those heavily in our thoughts.
In the image above, we've circled an area that features both of our base options. Option one is a base on the right-hand side, where the purple marker and our home are. Anywhere on this rock is good, but we suggest sticking to the West and North sides.
The second base option is on the left side of the image. Anywhere other than the South side of the rock is a good spot.
Option One: Settle close to the Anvil Tradepost
This location is where we opted for when playing ourselves. At the time, the area was almost barren, with most people opting instead to settle slightly to the West on the larger rock. For us, however, the advantage of being close to Anvil Tradepost, while also having multiple big enemy camps and great Sandbike/Buggy access, meant we could get everything we needed.
The location also gives us great access to Iron to the West and Steel to the North. One drawback is that our access to the Vermillius Gap West is slightly further away.
Option Two: Stick to the rock
For basically the same reasons as above, but flipped. This time, we want to build on the West side, on the large rock formation where you will likely gravitate towards after you leave the first zone in the game. This location is incredible for early Ore, water, blood, and mobility. The major downside is that your access to the Tradepost potentially requires you to cross paths with the Sandworm. It does, however, open up the option of travelling north to Pinnacle Tradepost or further west to Crossroads Tradepost more easily.
Option two is also much more heavily contested, with lots of people opting to settle at the first location they land after the tutorial. However, the location gives us great access to the Western side of the Vermillius Gap, which is great for those looking to do the Planetologist quest chain. While it might be more crowded than option one, it is also a much larger area.
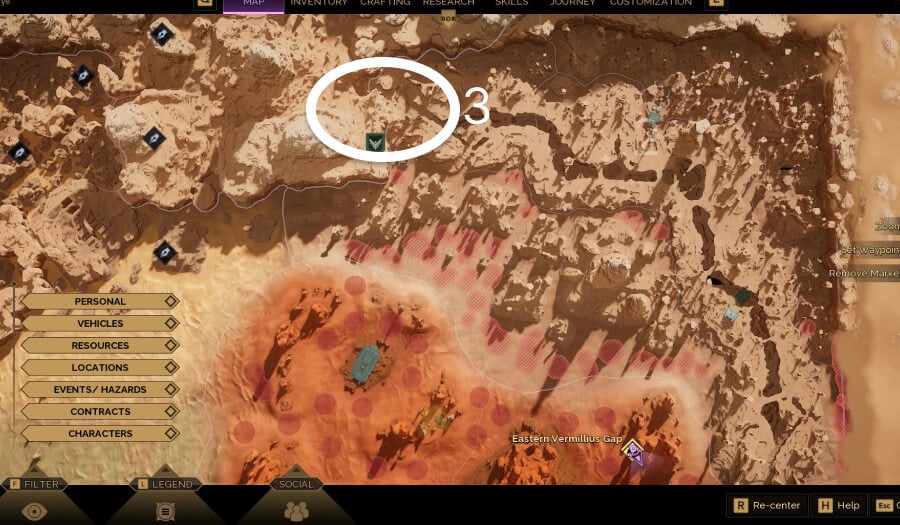
Base Three: Eastern Shield Wall (Pinnacle)
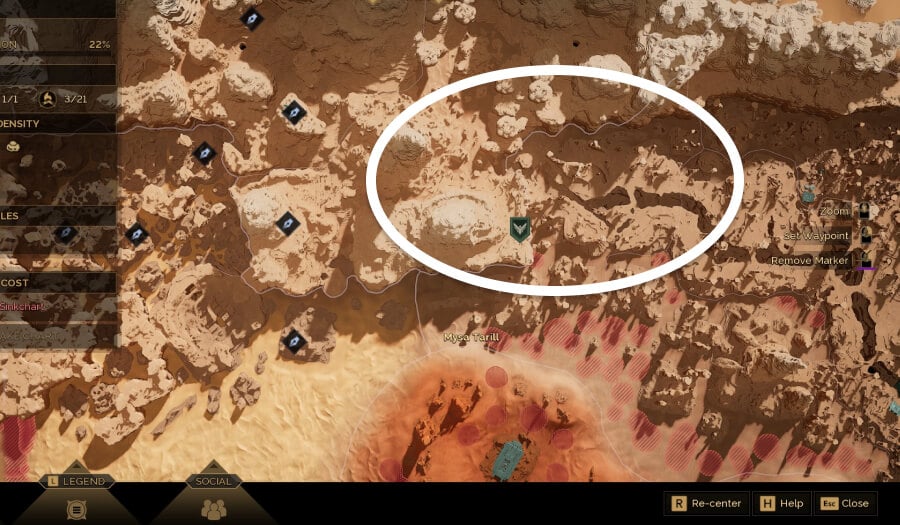
We're now at our third base location, and we’re looking to settle into our “forever home” with this one. Look for the Pinnacle Station located in the Jabal Eifrit Al-Gharb, this is the place you’ll find the Swordmaster Basic trainer. It’s located just to the East of the Eastern Shield Wall. Pinnacle Station will act as our “border” for base three, don’t look to build too far to the East of it as we need to think about resources in the West.
Option One - Settle at the Tradepost
For the first base, we want to focus on the Tradepost again. The area around it is huge, and we can either build on the low area or the high area. If you plan on playing the game as an Atreides, then we would suggest sticking high, this then gives us access to Hellius Gate. We have included a good area in the image above, which gives us access to the Tradepost, while also keeping us close to the Hagga Rift to the East, this is a major quest location and farming spot. But we also have access to the West, so we can farm tier 4 and 5 resources easily.
Option Two - Take the high ground into the Eastern Shield Wall
For this location, we want to move more West and into the areas where we start to see the crossover between Steel and Aluminium. This gives us a leg up on the next set of resources, but comes at the cost of moving further away from our current tier of resources. Another positive is that this location is great for the Trail of Aql later quests, which require a lot of travel around this area.
Two Base Strategy
Bases Order:
- Hagga Basin South (Griffin’s Reach)
- North West Western Vermillius Gap (Crossroad Tradepost)
A Two Base Strategy will mean that progress is a little slower when you move from South Hagga Basin to Vermillius Gap and you won't have great access to a Tradepost, but it does mean that you will have access to Iron, Cobalt, Erythrite and Aluminum from your second base, so you likely won't need to build a 3rd base until you want to start thinking about the Deep Desert.
Base One: Hagga Basin South (Griffin's Reach)
Much like with the Three Base strategy, our first base is a simple one. Your first base should be around Griffin’s Reach Tradepost. It gives you access to Copper and Granite, early mobs, and a clear route through the questline. You will also get a good opportunity to get used to your Sandbike and early combat.
Base Two: North Western Vermillius Gap (Crossroad Tradepost)
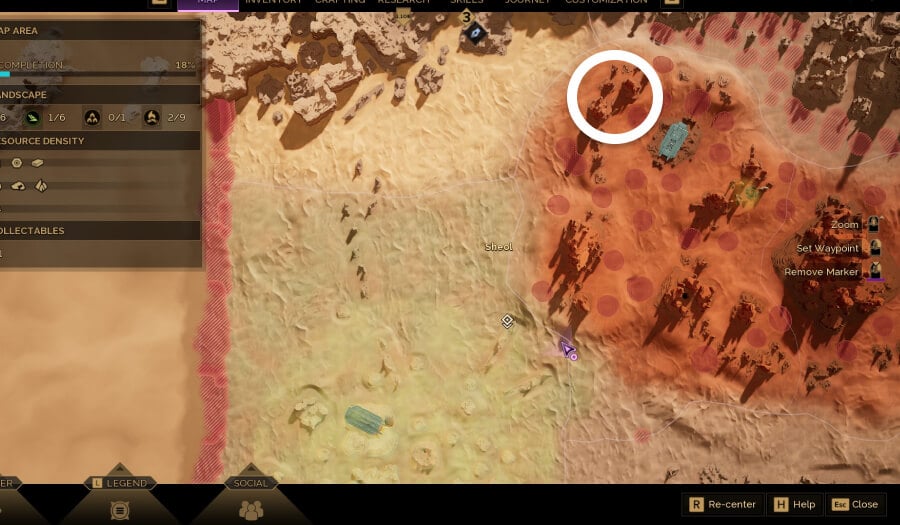
This base location aims to place us in the most optimal location for high-tier resources and access to the Crossroad Tradepost. With the 2 Base Strategy, the fact that Base Two is our new permanent base, makes selecting the best location crucial.
With this in mind, we recommend building on the Western tip of the Western Vermillius Gap.
This location gives us great access to late-game quest chains like the Aql Trails, Planetologist Quests, and the Wreck of the Pallas. Due to our proximity to so many other zones, we also get to cheat our way to higher-tier resources while also staying close to the low-tier ones. Directly around our base, we will have plenty of Iron, and with only a short travel northeast, into Jabal Eifrit Al-gharb (Pinaccle Tradepost) and Jabal Eifrit Al-janub, you have access to a lot of Carbon Ore; which we need to make Steel Ingots. In this location you are also relatively close to Aluminum Ore, Basalt Stone, and even Jasium Crystal, which are all found around us and will be easy to access.
Regarding Erythrite Crystal, which is found in the Hagga Rift valley, it is slightly further away from this location. Thankfully, the valley extends way out of where Hagga Rift starts and actually runs through multiple zones, meaning that with a short trip North, we can claim this resource as well.
Really, the worst part of this base, and therefore the Two Base Strategy, is that due to its central location, we will need to travel a fair way before we make it to the border of the map and travel into the Deep Desert.
While we have opted for the Three Base strategy, there is a real risk and reward to playing the Two Base strategy. By positioning yourself in such an optimal overall location, you can make your second base your final base, letting it take over the area you decide to place it in. And if the Deep Desert travel becomes an issue, you can just set up a small satellite base on the edge of Mysa Tarill and use it as a storage point.
Closing Thoughts
If you want a smoother progression, go for the Three Base Strategy. If you want to fast-track your access to the end game, then go for the Two Base Strategy. Both options are valid, and will work for different people.