Raid Setup


Introduction
Welcome to our Mythic Sszorak guide, a boss fight in The Venomous Abyss Raid in Midnight Season 2. This guide covers the fight mechanics and the strategy we recommend to defeat this boss on Mythic difficulty.
Fight Style: Single Target / Damage check with forced movement
Recommended Setup: 2x Tank / 4x Healer / 14x DPS
Required utilities: Two soak groups, speed boosts, grips/rescues for crosswinds. NSRT addon strongly recommended.
Hero/Lust usage: On Pull
Easy Mode
- One big Mythic addition, Serpent's Fury, changes how the whole fight is paced.
- Serpent's Fury: A player gets a red circle and the boss gains energy. Stack 14 players in the circle to pop To The Slaughter and reset it. Hitting 100 energy is an enrage that kills the raid.
- Each Apex Predator set ends with one Serpent's Fury pop. Timing is strict, use NSRT for the exact stack timer.
- Popping the 2nd Serpent's Fury (before intermission) even 2 seconds early makes the first post-intermission Fury impossible to survive. Be accurate.
- Every pop gives the stack Virulence, which bursts in 4 directions if clipped. Spread immediately, speed boosts help, personal every other set.
- Raging Crosswinds now has 4 direction lines, still just match your arrows; they also work at right angles. Avoid using cancels unless both people can cancel.
- Place the Viscous Cyst in the correct places, just like in Heroic. Your raid leader will likely indicate to you which markers to place them on, or you will use the NSRT assignment.
- The Two biggest wipe causes are tornado deaths and failed Serpent's Fury pops.
Mechanics

Sszorak marks a player and gains rage over time. When at least 14 players stack within 8 yards of the marked player, he casts To The Slaughter and consumes his rage. If his rage reaches 100, he gains Unbound Ferocity and starts slaughtering the raid.

When the 14-player stack is met, Sszorak consumes his rage and charges the marked player, damaging everyone struck and applying Virulence. This is the "reset" you're pooling the stack for.

A 5 second Nature DoT on the players hit by To The Slaughter. When it's removed it bursts in 4 directions, and anyone clipped by a line takes heavy damage and gets Virulence themselves, with even longer lines the second time. Spread out before it comes off.

The enrage. If Serpent's Fury reaches 100 rage, Sszorak gains 500% damage and 50% attack speed until the raid is dead. This is what a missed pop leads to, so never let his rage reach 100.
Strategy
Sszorak adds only one notable change on Mythic, but it fully alters how you play the fight.
Serpent's Fury, the core Mythic Mechanic
At the start of the fight, one player gets marked with Serpent's Fury. It’s the player furthest from the boss, so you can bait it onto a specific player if you want a reliable person handling it.
The mark itself does nothing to the player beyond giving them a large red circle. At the same time, the boss starts gaining energy, and if that energy ever reaches 100, he enrages and kills the raid fast.
To reset the energy, you need 14 players stacked in the red circle to trigger To The Slaughter.
Because the timing here is tight, we strongly suggest running the NSRT addon. It gives you a timer for exactly when to pop Serpent's Fury, and also feeds you inputs so you always know which marker to place your Viscous Cyst on.
Setup
Your setup is exactly like Heroic:
- Make two equal groups for the Mutilate soaks, a melee/ranged split is a good start.
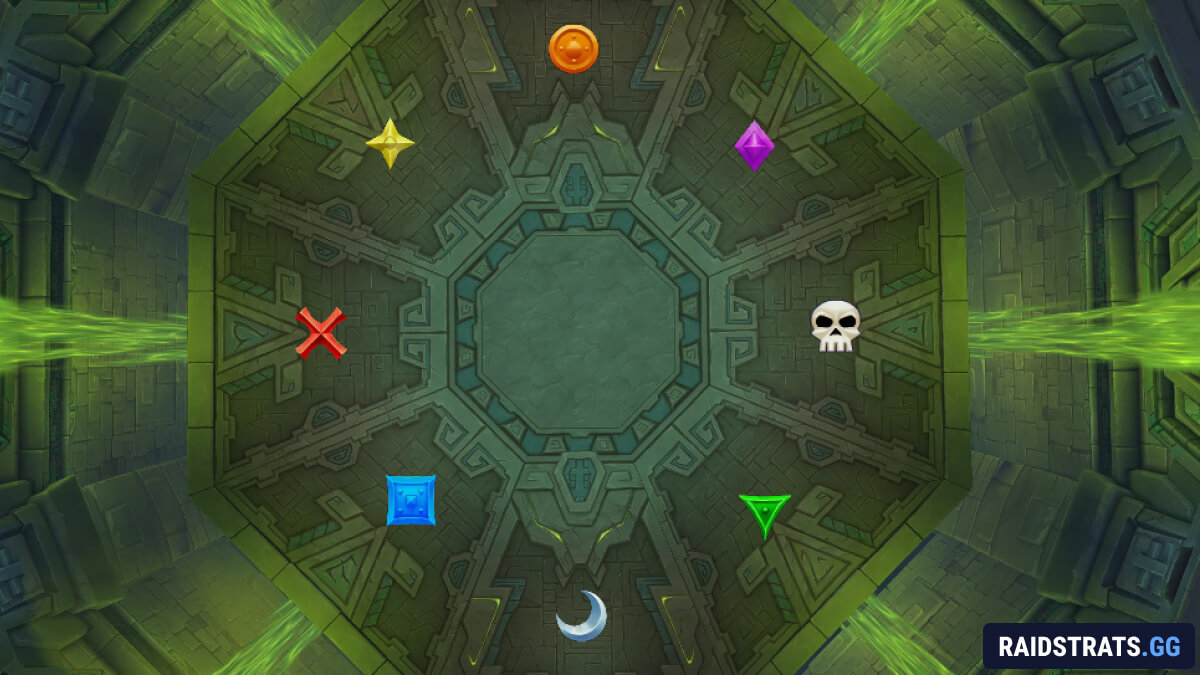
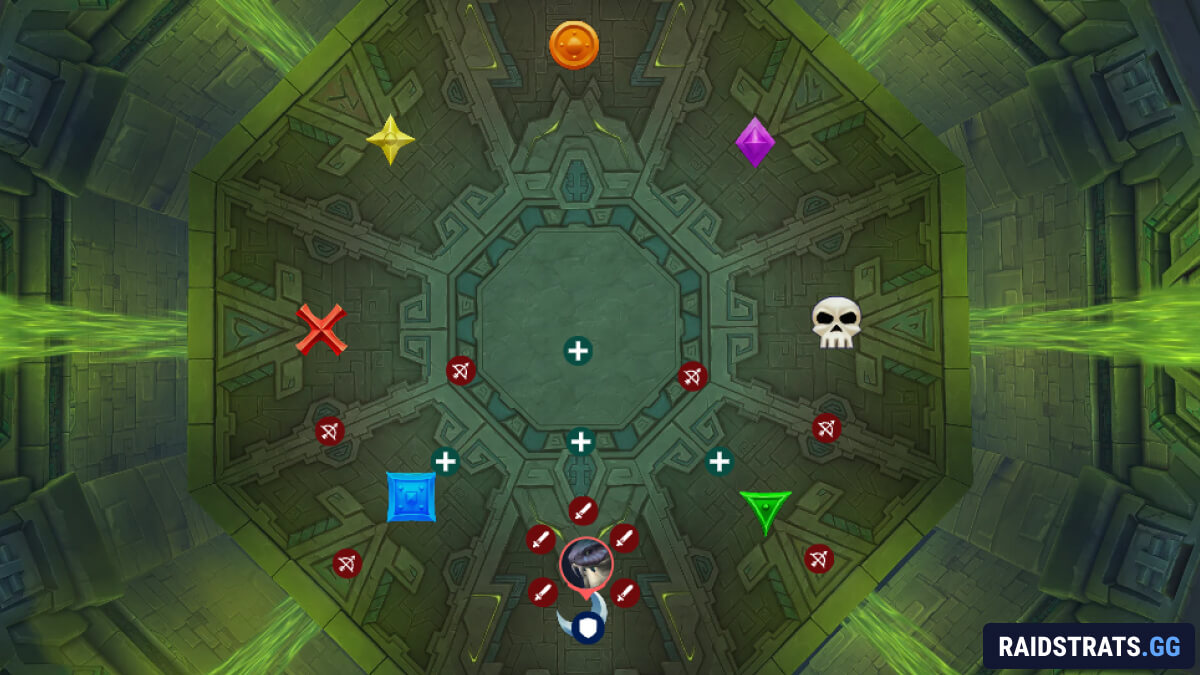
- Place markers around the room and tank the boss at one of them, usually the one you start the fight on.
- Move around the room from there as the boss contaminates the floor with puddles.
- Place Viscous Cyst on the correct markers, based on where the winds show around the room, which will be where your raid leader calls or based on NSRT assignments.
Timing the Serpent's Fury Stack
Each Apex Predator set ends with one Serpent's Fury pop, and just like Heroic you get 2 Apex Predator sets before the intermission. There are two scenarios for how the Fury behaves:
- Serpent's Fury on pull / just after intermission: pop it "early", meaning right as the last tank combo ends. If Ravage is the last cast, you can pre-stack.
- Serpent's Fury on the 2nd Apex Predator combo (just before intermission): here the Fury is delayed by a few seconds after the last combo.
The critical detail: if you pop that 2nd Serpent's Fury even 2 seconds too early, it becomes impossible to avoid enraging the boss on the first Fury after the intermission. So you need to be very accurate, which is exactly why the NSRT Serpent's Fury timer is such a valuable tool here.
Handling Virulence
Each time you pop Serpent's Fury, everyone in the stack receives Virulence, which deals damage and then bursts in 4 directions. Anyone clipped gets Virulence reapplied, this time with even longer lines. So spread out as soon as possible, use speed boosts to do it, and use a personal for every other set to stay safe.
Raging Crosswinds
The only other difference is Raging Crosswinds, which now has more directions, but you play it essentially the same: collide with someone in the air, or call for grips and rescues.
A good tip is to pre-assign something for Paladins, Priests and Shamans, since they don’t have a reliable cancel and Shaman Gust of Wind is not good for dealing with this because of the slow-fall effect it puts them under. These players can also call or ping themselves so the other person they want to collide with doesn’t use anything to cancel the knock up.
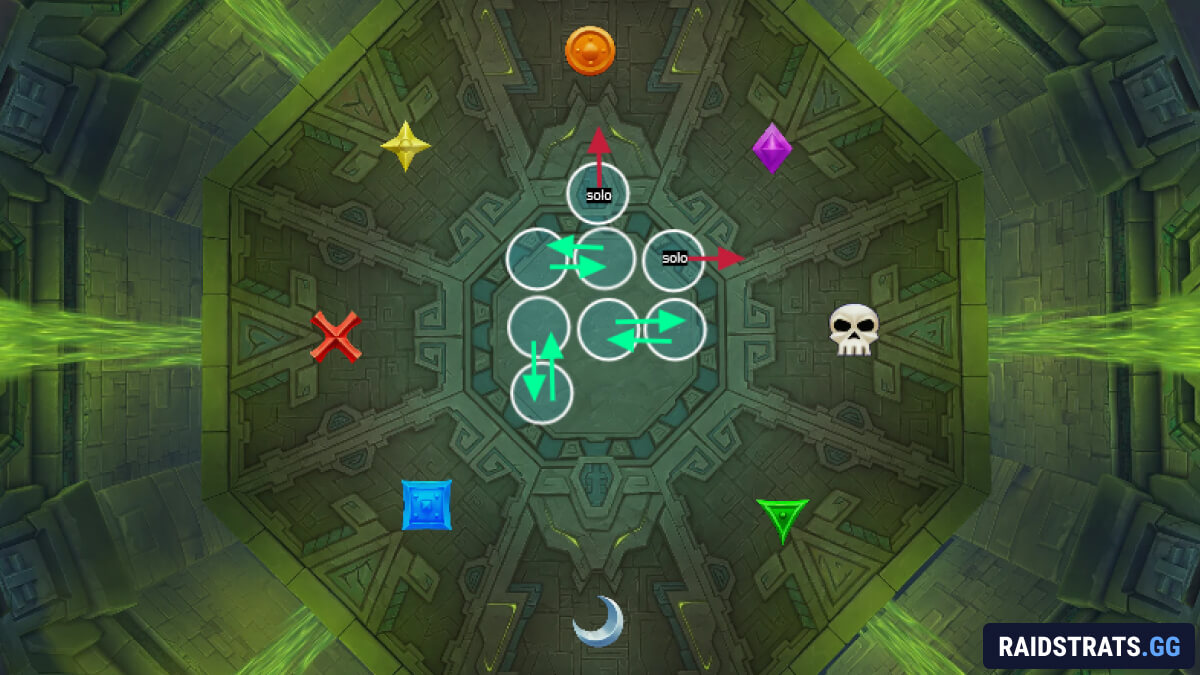
Note: You can also collide with someone if the winds are at a right-angle to each other, so don’t be afraid to use that as well.
Intermission
The intermission plays the same as Heroic, with one small important addition: Serpent's Fury. One player still has it during this phase, but it cannot be triggered while the boss is casting Dig In. So as the intermission starts, that player waits for Dig In to begin before stacking with everyone, and after the 3rd knock they move out of the group so it doesn't pop as Dig In ends.
Assign a mage or anyone with good mobility to pop the last Viscous Cyst, while the tank is already moving the boss to the opposite side of it. That's ideal, because you can use the knockback to get into position.
The fight repeats from here.
The Two Things that Wipe you
It's worth stressing that the two biggest wipe causes on this fight are tornado deaths and failed Serpent's Fury pops. Be clean with both and the kill follows.
The Serpent's Fury pops do not have to be perfect on the timer before the 3rd intermission as the enrage happens afterwards anyway.