Introduction
Hey everyone, and welcome to the Voidscar Arena dungeon guide for season 2 of Midnight! In this guide I’ll be going over the abilities of all the trash mobs and bosses throughout the dungeon, as well as how I recommend you handle them. I’ll be focusing on the mythic and M+ versions of the dungeon, but most of this article will apply to both normal and heroic difficulties as well. I’ll also be including my recommended, PUG friendly route via the Mythic Dungeon Tools addon for anyone interested.
Some background on myself, my name is Tactyks and I am an avid M+ player, achieving the 0.1% M+ title numerous times on 5 different specs, as well as competing in The Great Push in season 4 of Shadowlands. I also create M+, Raid, and tank guide content on my YouTube and Twitch channels, so be sure to stop by and say hi!
Socials:
- YouTube: https://www.youtube.com/@Tactyks
- Twitch: https://www.twitch.tv/tactyks
- Twitter: https://twitter.com/tactyks
Important Abilities








New: Try out the Mythic+ Dungeon Ability Tracker to filter for specific abilities within Voidscar Arena!
Ability TrackerVoidscar Arena Mythic+ Dungeon Route
If you are using the Mythic Dungeon Tools (MDT) Addon, you can import our PUG Friendly Route for the Mythic+ difficulty of Voidscar Arena below.
Voidscar Arena M+ Dungeon Route: https://wago.io/1s56kmJ_N
Video Guide
Unique Mini Boss Buffs
At the start of the dungeon you’ll be faced with the choice of moving down the left or right path, where outside of different pack compositions you’ll also face a unique mini boss on either side which will give your group a different buff for the remainder of the dungeon upon defeat.
Going right has more Enthralled Shamans as well as Raj’kess the Spellstorm, who grants players Proof Of Mastery on death.
Going left has more Dominated Brawlers along with Aegyra the Unyielding, who instead gives players Proof Of Endurance when defeated.
I recommend most groups go left since it requires less interrupts and gives a more generally useful buff.
Taz’Rah Trash
Assuming you go left, these are the mobs you’ll encounter before entering the arena:
Lost Sethrak
- Avoid the circle and puddle created by Venomous Spit
Feral Saberon

- Savage Leap targets a random player, use defensives or bleed cleanses as needed
Enthralled Shaman


- Use spare interrupts on the random target Lava Bolt cast
- Swap to Magma Totem when they spawn and quickly destroy them
Dominated Brawler



- Make sure to interrupt every cast of Demoralizing Shout
- Tanks beware of the mobs Bloodsurge Stacks, use defensives, CCs, or kiting as needed if you don’t have a soothe
Brutal Overseer

- This mob is immune to CC
- Destroy the shield this mob gains during the Brutal Slams channel to stop the AoE damage
- Avoid the Macestorm AoE and run from the mob if fixated
Aegyra the Unyielding
- This mob is immune to CC
- Ferocious Leap bleeds a random player, move towards the outside of the room if possible as it is always followed by the Earthsplitter AoE
- Champion's Spear tethers all players, destroy it quickly so that you can spread out for Savage Smash
- Upon defeat, all players gain Proof Of Endurance for 30mins
If you opt to go right at the start, you’ll instead encounter the following mobs:
Longtooth Tuskarr
- Use soothes to remove the Bolster enrage if you have them
Voidtouched Magi
- This mob is immune to CC
- Use interrupts on every cast of Shadowbolt Volley
- Null Eruption targets 2 random players, move away from your group as it forms a puddle underneath you on expiration
Raj'kess the Spellstorm
- This mob is immune to CC
- Forked Lightning targets the tank and bounces to 2 random players, beware of this extra damage
- Swap to the Orb Of Disruption spawns ASAP and destroy them before their cast completes
- Healers make sure to prepare for the heavy channeled damage from Thundering Storm
- Upon defeat, all players gain Proof Of Mastery for 30mins
Regardless of which path you take initially, you’ll eventually make your way into the arena which has several new mobs mixed in with some of the previously mentioned ones. After the initial wave is defeated, the mobs spawn in as you pull packs, allowing you to go at whatever pace you choose.
Sycophantic Tarasek

- Melt Armor applies a stacking armor reduction to your tank, use Magic dispels or defensives if needed
Chitigoth
- This mob is immune to CC
- Avoid the Ravenous Swarms that spawn nearby and roam around the room
- Healers be ready for the AoE damage from the Insidious Aura channel
Raging Raptor
- Feral Rage enrages nearby allies, tanks beware of this additional damage intake and use soothes if you have them
Protective Turtle
- Stay away from this mob and its Shell Guard for the duration, then swap to it while its stunned as it takes extra damage
Brutok

- This mob is immune to CC
- Try to move this mob as little as possible to reduce damage done by Fel Steps
- Tanks aim the Smashing Charge line at a nearby wall and step out of the effect
- Head Bash targets the tank, beware of the knockback and use a defensive if needed
Abducted Drakonid
- Avoid the circles created by Fire Spit
Angry Krolusk
- Make sure to interrupt every cast of Violent Sand
Taz’Rah Boss Fight
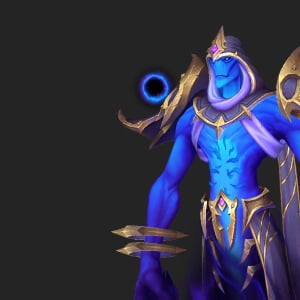
Nether Dash does a line attack through each player, loosely spread near the edge of the room to avoid cleaving allies while positioning shades close together, which clumps the Umbral Rupture puddles.
Void Blast targets the tank, be ready with a defensive and don’t get knocked into existing puddles.
Dark Bloom causes puddles to shoot out multiple orbs that you need to avoid, keep rotating around the room after Umbral Rupture to make these easier to dodge.
Atroxus Trash
Savage Shredclaw
- Tanks beware of the Shred Defense hit and damage increase, using defensives as needed
Killvore Screamer
- Mass Shriek does an AoE fear, make sure it is always interrupted
This area also splits into two paths, with each side containing a different Lieutenant mob. In general I recommend heading down the right path, especially if your group has access to multiple poison dispels.
Agitated Voidscythe

- This mob is immune to CC
- Corrosive Essence debuffs 3 players, use Poison dispels or defensives and healing cooldowns as needed
- Rip And Slice targets the tank, use defensives or Bleed cleanses if you have them
Blistercreep
- Avoid the circles these mobs create on death
If you choose to head down the left side, instead you’ll encounter the following mob:
Watchful Harrower
- This mob is immune to CC
- Stack in the random target Sky Strike soak to split the damage, then run out of the AoE that follows
- Void Beam channels into a random player, focus healing into them and use defensives or combat drops if you have them
Atroxus Boss Fight
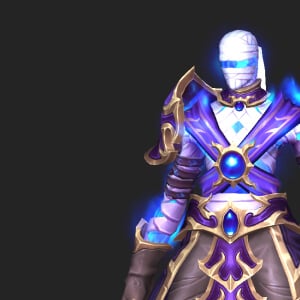
Healers be ready for the AoE damage from Poison Splash and avoid the puddles it spawns as they apply Mind-Numbing Poison to anyone who touches them.
Noxious Breath aims a frontal at a random player, stay close to the boss so you can easily avoid it.
DPS be ready to swap to the Toxic Creeper that spawns after Monstrous Roar, as it pulses for AoE damage while alive. This mob just Fixate the tank, who needs to kite as every melee hit applies a stack of Sickening Bite, which makes surviving the Hulking Claw tank buster extremely difficult
Charonus Trash
After defeating Atroxus, you’ll enter a large open area with many familiar mobs in it. In order to open the arena to Charonus however, you’ll need to kill all three Devouring Brutalizer mobs nearby.
Devouring Brutalizer
- This mob is immune to CC
- Healers be ready for the Dreadbellow AoE and make sure you don’t get pushed into a nearby pack
- Brutalize channels into the tank, use defensives as needed
- When Devour begins, find the low health mob that its targeted and kill it before the cast completes
Voidminder
- Dimensional Shred targets a random player, before of this extra damage intake
- Mending Void channels healing into a nearby mob, use an interrupt or CC to stop it
Scavenging Siphoid
- These mobs deal additional shadow damage on their melees thanks to Void Tentacles
Charonus Boss Fight
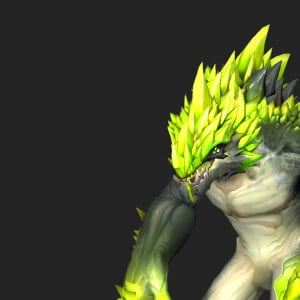
Avoid getting pulled into any of the Unstable Singularity orbs as they apply Atomized if touched. These pulse for AoE damage while they persist, so healers beware.
Cosmic Crash does an AoE around all players, loosely spread to prevent cleaving your allies.
Gravitic Orbs spawn near DPS players and fixate them, applying stacks of Condensed Mass. Kite them through an Unstable Singularity to destroy them both, using defensives or freedom effects to clear your stacks as needed.
Dark Waves aims a frontal at the tank, use a defensive and point this away from the rest of your group.
Void Cascade shoots out projectiles towards a random player, run away from the boss to give yourself time to dodge, while the rest of your group moves out of their path.