Introduction
Hey everyone, and welcome to the Temple of Sethraliss dungeon guide for season 2 of Midnight! In this guide I’ll be going over the abilities of all the trash mobs and bosses throughout the dungeon, as well as how I recommend you handle them. I’ll be focusing on the mythic and M+ versions of the dungeon, but most of this article will apply to both normal and heroic difficulties as well. I’ll also be including my recommended, PUG friendly route via the Mythic Dungeon Tools addon for anyone interested.
Some background on myself, my name is Tactyks and I am an avid M+ player, achieving the 0.1% M+ title numerous times on 5 different specs, as well as competing in The Great Push in season 4 of Shadowlands. I also create M+, Raid, and tank guide content on my YouTube and Twitch channels, so be sure to stop by and say hi!
Socials:
- YouTube: https://www.youtube.com/@Tactyks
- Twitch: https://www.twitch.tv/tactyks
- Twitter: https://twitter.com/tactyks
Important Abilities













New: Try out the Mythic+ Dungeon Ability Tracker to filter for specific abilities within Temple of Sethraliss!
Ability TrackerTemple of Sethraliss Mythic+ Dungeon Route
If you are using the Mythic Dungeon Tools (MDT) Addon, you can import our PUG Friendly Route for the Mythic+ difficulty of Temple of Sethraliss below.
Temple of Sethraliss M+ Dungeon Route: https://wago.io/1pqM1h0ez
Video Guide
Adderis and Aspix Trash
Storm Adept

- Lightning Bolt targets a random player, keep interrupts on this cast
Sandswept Hunter

- Arrow Barrage channels into a random player, use CCs to stop it
- Avoid the circle created by Sandburst Arrow
Barbed Krolusk

- Beware of the random target Serrated Charge bleed, and use a bleed cleanse or defensive if it overlaps with other damage
Shrouded Fang

- These mobs start in stealth, usually near a neutral Rogue Krolusk mob
- If their stealth is not broken they will use Poisoned Cheap Shot, interrupt this or use a Poison dispel to remove the stun
- Beware of the additional random target damage from Slither Strike
Sandfury Stonefist

- This mob is immune to CC
- Beware of the Ground Pound AoE hit and knockback
- Tanks make sure to use a defensive for the Sunder Slam hit and damage amp
Adderis and Aspix Boss Fight
Keep an eye on the Storm Blessed immunity buff, which starts on Aspix and passes between the bosses when one hits 40% health.
Healers watch out for the players targeted by Gust and focus spot healing into them.
Gale Force puts a line on each player, loosely spread to avoid cleaving allies, but beware the knockback it does is strong, so if you don’t have a way to cancel it then use the walls to stop yourself. This is always followed by the Thunder And Lightning soak, so everyone should quickly collapse in melee after the knockback to split this damage.
Tempest Winds debuffs 2 players, move out of the group and drop these puddles out of the way.
Tanks beware of Adderis when they gain the Overload buff and use a defensive if needed.
After killing Adderis, Aspix will enter a Frenzy, causing Gust, Gale Force, and Tempest Winds to happen more frequently, so position accordingly to deal with these mechanics.
Merektha Trash
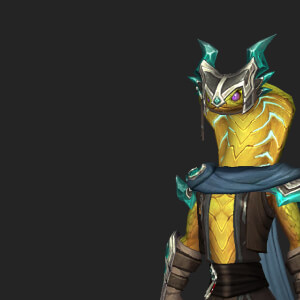
After defeating Adderis and Aspix you can head through the first gauntlet of the dungeon, where the bridge you have to cross is just full of swirlies you want to dodge between as you make your way across it.
Sand-Sworn Rider

- This mob is immune to CC
- Beware of the adds spawned by Swarming Krolusks, which use the same Serrated Charge bleed from earlier
- Play close to the mob to make it easier to avoid the random target Scouring Sand frontal
Poisonous Viper
- Cytotoxin debuffs a random player, use Poison dispels if you have them or a defensive if needed
Lightning Serpent
- Tanks beware of the Serpent's Stormcall buff, using defensives if needed
Dutiful Tamer
- Beware of the adds spawned by Swarming Krolusks, which use the same Serrated Charge bleed from earlier
Krolusk Matriarch
- This mob is immune to CC
- Play close to the mob to make it easier to avoid the random target Scouring Sand frontal
- Head Butt targets the tank, though this isn’t particularly dangerous
Brood Tender
- Venom Bolt targets a random player, use spare interrupts on this
Faithless Subjugator

- Addle Mind targets a random player, use interrupts or Curse dispels to remove the disorient
Merektha Boss Fight
Lightning Bite targets the tank, be ready with a defensive for every cast.
Knot of Snakes targets 2 players, stack in melee so that a single AoE CC can destroy them, then cleave down the Snakes that spawn under the boss.
If targeted by Thunder Spit drop your circles near the outside of the arena and use a defensive for the DoT damage if needed.
Healers be ready for the Serpentstorm AoE damage, and everyone watch your positioning so you aren’t knocked into any puddles.
At full energy the boss will summon 3 Toxic Vipers and a Storm Serpent, then Burrow until they are defeated, dealing constant AoE damage and occasionally charging at players and stunning them if not avoided.
For the adds, keep interrupts on the Poison Spit cast, and use a Poison dispel to remove DoTs as needed. Tanks should try to tank Storm Serpents near existing puddles or the edge of the room as they drop one when casting Storm Catalyst.
Galvazzt Trash
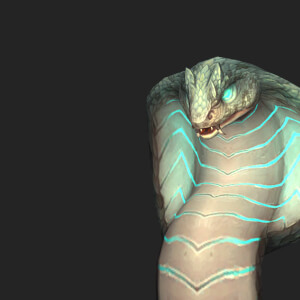
After Merektha you’ll encounter the first Loose Spark gauntlet, where orbs of lightning spiral in various patterns that you need to dodge through to progress forward and kill a nearby Spark Channeler, which stops more of the stunning orbs from spawning.
Agitated Nimbus

- This mob is immune to CC
- Beware of the stacks of Accumulate Charge, using purges if you have them
- Release Charge does a large hit, be ready to use defensives if the boss has multiple Accumulate Charge stacks
- Avoid the circles created by Call Lightning
Imbued Stormcaller

- Make sure you dispel every Imbued Conduction debuff to avoid the stun it does on expiration
- Keep an interrupt rotation on the random target Lightning Bolt cast
Static Anomaly
- Loosely spread when fighting these mobs to avoid cleaving the Spark Step AoE
- Tanks beware of the extra magic damage from the Static Shock passive
Galvazzt Boss Fight
Lightning Spire spawn in sets of three, make sure a non-tank quickly steps between them and the boss to prevent him from gaining energy. Spread out defensives and healing cooldowns here to make this consistent heavy damage easier to manage for your healer. If the boss gets to full energy he casts Consume Charge, which likely leads to a wipe.
Tanks just move the boss around the room, shifting to make spires easier to soak, or whenever the Induction cast leaves behind a puddle.
Avatar of Sethraliss Trash
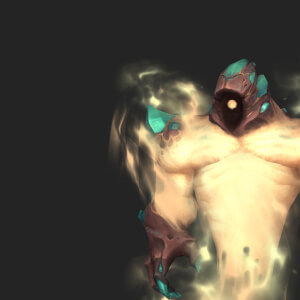
After passing through another Loose Spark gauntlet, players will be in a large room filled with Faithless Conscripts, which aren’t worth any count and don’t do anything but hit your tank.
In order to progress forward, players will need to energize the two Eyes of Sethraliss, which will open up the skull at the far end of the room and allow you to head towards the final boss. To energize the eyes a player must click on them, causing them to take ticking damage while the energy bar fills, which also spawns a couple new trash mobs in the process.
Orb Watcher

- This mob is immune to CC
- Venomous Slash targets the tank, be ready with a defensive and watch out for the circles this spawns
- Healers make sure to prepare for the Caustic Stomp group hit and DoT
Temple Disruptor
- Essence Disruption channels into the nearest eye, use interrupts and CCs to stop it
Twisted Hexxer
- This mob is immune to CC
- Keep an interrupt rotation on the random target Flame Shock cast
- Move the Latent Hex AoE away from your group and avoid the puddle it leaves behind
Faithless Tormentor
- These mobs fixate a random player, favouring the healer if possible, just beware that their melees stack up the Shadowlash debuff
Avatar of Sethraliss Boss Fight
Prioritize damage into the Corrupted Guardian, using a defensive if targeted by Vile Charge. Tanks should also watch out for their Tainted Strike buster. On death these mobs do a 20yd AoE and leave behind three Corrupted Lifeforce soaks, which players need to grab before they explode after 6s in a Corruption Burst. Soaking applies the Corruption debuff to the player, so DPS players or a Tank with a defensive ready should prioritize getting these.
Keep interrupts on the Twisted Hexxer’s Flame Shock ability, and drop the Latent Hex puddles on the outside of the room if targeted.
When the Essence Defiler is defeated, the healer should focus on the Avatar while kiting the waves of Faithless Tormentors that continuously spawn in over 30s to avoid their Shadowlash debuff. DPS and Tanks should use CCs and AoE them down, as each one heals the Avatar for 0.7% of her health.