Introduction
Hey everyone, and welcome to the Blinding Vale dungeon guide for season 2 of Midnight! In this guide I’ll be going over the abilities of all the trash mobs and bosses throughout the dungeon, as well as how I recommend you handle them. I’ll be focusing on the mythic and M+ versions of the dungeon, but most of this article will apply to both normal and heroic difficulties as well. I’ll also be including my recommended, PUG friendly route via the Mythic Dungeon Tools addon for anyone interested.
Some background on myself, my name is Tactyks and I am an avid M+ player, achieving the 0.1% M+ title numerous times on 5 different specs, as well as competing in The Great Push in season 4 of Shadowlands. I also create M+, Raid, and tank guide content on my YouTube and Twitch channels, so be sure to stop by and say hi!
Socials:
- YouTube: https://www.youtube.com/@Tactyks
- Twitch: https://www.twitch.tv/tactyks
- Twitter: https://twitter.com/tactyks
Important Abilities












New: Try out the Mythic+ Dungeon Ability Tracker to filter for specific abilities within The Blinding Vale!
Ability TrackerThe Blinding Vale Mythic+ Dungeon Route
If you are using the Mythic Dungeon Tools (MDT) Addon, you can import our PUG Friendly Route for the Mythic+ difficulty of The Blinding Vale below.
The Blinding Vale M+ Dungeon Route: https://wago.io/HLI3Wq7sA
Video Guide
Light-Starved Blossom and Baby Grovecrawler Buffs
To start the dungeon you’ll be given the choice of heading right towards Ikuzz the Light Hunter, or left towards the Lightblossom Trinity. Outside of deciding which boss you face first, this choice also affects which buff you encounter.
Left - The Light-Starved Blossom can be interacted with by Paladins, Priests, and Herbalists with at least 25 Midnight skill points to grant your group Flourishing Stride, increasing speed by 20% and haste by 5% for 2mins.
Right - The Baby Grovecrawler can be freed by Hunters and Druids, causing it to aid you in combat for 1min.
Generally the Light-Starved Blossom buff has a more value, which combined with some more favourable trash packs causes me to recommend most groups go left.
Lightblossom Trinity Trash
Lasher


- Tanks beware of the Spore Spines DoT these mobs apply with their melees, using defensives, freedom effects, or magic dispels as needed
Lightgorged Lasher


- Focus these mobs when they gain the Lightbloom Pollination buff until their shield is destroyed
Radiant Spellsower

- Make sure to interrupt every cast of Light Bolt Volley
- Light Bolt targets a random player, use spare interrupts on this
- At low health these mobs attempt to awaken nearby Dormant Lashers with Call The Grove, use CCs and focus them down to prevent this
Underbrush Stalker

- Thornblade targets a random player, focus healing into them and use defensives or bleed cleanses as needed
Virid Grovekeeper
- This mob is immune to CC
- Earthrupture Strike targets the tank, use a defensive if needed and place the puddle away from your group
- Beware of the AoE hit and knockback from Uproot
Sporeblight Belcher

- This mob is immune to CC
- Healers be ready with cooldowns for the Spouting Floret damage pulses
- Avoid the circles created by Belch Spores
Thorny Saptor

- Avoid the random target Hunting Leap frontal channel or use a CC to stop it
Lightfeather Petalwing
- Make sure to interrupt every cast of Disorienting Screech
Leafy Grovecrawler
- Seed Shot targets a random player, use spare interrupts on this
Overgrown Hydra
- This mob is immune to CC
- Lightmaw Beams channel into 3 random players, avoid allies and use defensives or combat drops to avoid it
- Avoid the random target lines from Bullet Seeds
Spineshield Beetle
- Beware of their Spiny Shield which deals damage to attackers
Lightblossom Trinity Boss Fight
Keep an interrupt rotation on Kezkitt’s random target Light Bolt ability.
If targeted by Thornblade, move to avoid cleaving allies then run out of the effect when Lekshi jumps to you. If needed use a defensive or bleed cleanse to remove the DoT this applies.
Tanks be ready with a defensive for Bedrock Slam, then position the bosses near one of the 3 Fertile Loam circles this spawns, just be ready to avoid the Lightsower Dash line attack that passes through all 3 circles.
When Lightblossom Beam is cast the circles become soaks which deal ticking damage to players inside. These must be soaked to prevent the Lightbloom Overgrowth AoE damage, so I recommend the tank and 2 other players step into them ASAP. After the end of the channel the circles turn into Light-Scorched Earth as area denial, so tanks need to be ready to quickly reposition the bosses away before the next Bedrock Slam.
Ikuzz the Light Hunter Boss Fight
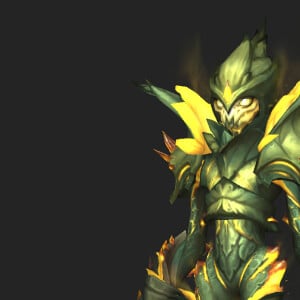
Healers be ready for the pulsing raid damage from Thorncaller Roar, while all players should make sure to avoid the Bloodthorn Roots on the ground. This is especially dangerous when the boss has entered a Lightcrazed Frenzy, which happens at 50% health.
If roots are stepped on you can cleave them down or use a freedom effect to remove them from the player. You can also use freedom effects to clear multiple roots if needed.
Watch your position during Verdant Stomp so you don’t get pushed into a root, and either use a freedom effect or group up near the boss so that the root that spawns on all players after a short delay can be easily cleaved.
Bloodthirsty Gaze causes the boss to fixate a random player, run from the boss and if possible kite him over existing roots to cause them to be destroyed.
Lightwarden Ruia Trash
After defeating both initial bosses you’ll be able to interact with a nearby bird to fly down towards Lightwarden Ruia’s area. While there are many familiar mobs here, many of them are now infected with Lightwarden’s Blight, causing them to do an AoE hit on death and leave behind a puddle, so keep that in mind when pulling in this part of the dungeon.
Outside of the familiar mobs, there’s also a new Lieutenant in this area, Luminous Thornmaw.
Luminous Thornmaw
- This mob is immune to CC
- Grievous Gash targets the tank, use bleed removals or self-healing to mitigate it
- Avoid the random target frontal attack in Solar Breath
Lightwarden Ruia Boss Fight
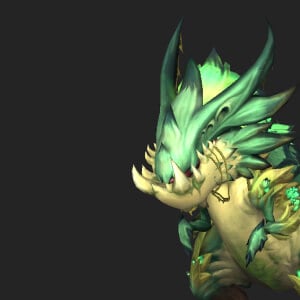
On pull until 70% health the boss is Moonkin Form. Keep interrupts on Warden's Wrath to mitigate tank damage and avoid the circles created by Lightfall. Lightfire debuffs 3 players, use defensives as needed and be ready to avoid the tornadoes that shoot out on expiration. If possible I recommend having the debuffed players stack up to make it easier to dodge.
From 70% to 40% health the boss enters bear form, gaining the Mangling Claws passive which tanks should be aware of. Use self-healing, bleed cleanses, or other defensives to help remove the Bleed applied by Grievous Thrash. If targeted by Pulverizing Strikes make sure to spread out to avoid cleaving allies with the frontal.
From 40% health until defeated the boss goes into his Haranir form, channeling Spirits Of The Vale to rotate through Lightfire, Grievous Thrash, Lightfall, and Pulverizing Strikes every 8s for the rest of the encounter.

Ziekket Trash
After defeating Lightwarden Ruia and making your way towards the final boss your group will be ambushed by a new mini boss, though once again there are several other mobs we’ve already seen before in this area as well.
Potatoad Matriarch

- This mob is immune to CC
- Tongue Toss targets the tank, watch your positioning as this launches you high into the air
- Healers be prepared for the Toxic Spew group DoT and use poison dispels to remove as many as possible
- Focus down the eggs created by Toadspawn and destroy as many as you can before they hatch into Newborn Potadpoles
Newborn Potadpole
- Potad-Toss targets a random player, beware of this damage hit and push effect
Ziekket Boss Fight
Healers beware of the Oozing Xylem passive, causing pulsing group damage for the duration of the encounter.
Cleave down the adds created by Awaken The Lightbloom, using interrupts and CCs to reduce the number of Lightspore Shot casts. Once defeated, hit their bodies with the Concentrated Lightbeam frontal to permanently destroy them. Note that this creates a large puddle on the ground, so I recommend positioning the boss and adds towards the edge of the platform.
Soak the orbs created by Lightbloom's Essence before they reach the boss, evenly spreading them out so the DoT doesn’t get out of control.
Tanks be ready for the Thornspike hit and knockback, using a defensive or bleed cleanse as needed.