Raid Setup


Introduction
Welcome to our Heroic The Lost Explorers guide, the third boss in The Venomous Abyss Raid in Midnight Season 2. This guide covers the fight mechanics and the strategy we recommend to defeat this boss on Heroic difficulty!
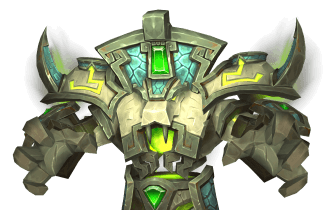
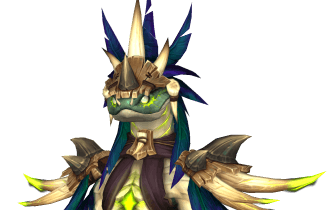
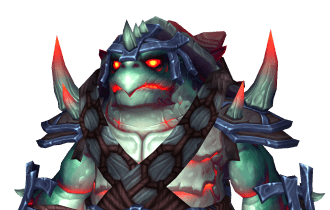
Heroes in a half shell, except nobody asked to be a hero and the shell is full of venom. Meet Gebbo, Iku and Nama, three tortollan explorers who came down here looking for treasure and got possessed for their trouble. No radioactive ooze, no pizza, no cool sensei. All you have to do to free one is hit them in the face with a disgusting fish, which is somehow the least weird thing that happens in this fight.
Fight Style: Council (three explorers + one puppet master)
Recommended Setup: 2x Tank / 4x Healer / 14x DPS. Heavy cleave and multi-dot make this much smoother.
Required utilities: Interrupts, bleed removal for boxes, immunities / mobility for the bomb wave
Hero/Lust usage: On Pull
Method Boss Review
This is the one. If you only prog one boss in the first half of this raid for the fun of it, make it the Explorers. It's pure controlled chaos: three empowered ultimates that all play completely differently, a puppet master pulling the strings, and a fish economy holding the whole thing together. Nothing about it feels recycled.
The Gebbo bomb is the star. Bouncing off a mushroom to sail over a lethal shockwave at the last possible second is the kind of moment that ends up in every guild's highlight reel, and the fight is full of instants like that. On top of the spectacle, the council structure and the death enrages turn the kill into a real damage-balancing puzzle, so your DPS players actually get to flex, juggling cleave, targets and burst timing instead of tunneling one health bar. It's engaging for everyone in the raid at once.
Well-designed, genuinely fun, and it earns its epic moments instead of scripting them. Easily one of the highlights of the tier.
Method Boss Rating: (5/5)
Video Guide
Easy Mode
General:
- Council fight. United Defense gives all three turtles 99% damage reduction while they're within 30 yards, so keep only 2 turtles in cleave range.
- Track the Mor'zahi energy bar. At 100 he casts Final Ascension and you wipe. Feed a Disgusting Fish (from Gebbo's boxes) to a turtle to reset his energy.
- You get 3 fish feeds total. The 4th time he hits 100 energy is your hard enrage, so all three turtles must be dead by then.
Always-on jobs:
- Cleanup crew pops every box: unlocks fish and prevents Relic Rupture. Use physical-resist and bleed-removal players for the Splinters bleed.
- Dodge Shell Spin stuns, spread 30 yards for Blink Nova, interrupt Icebound Flames, swap tanks on Shredding Shards and Steady Strikes.
Feeding a turtle empowers its ultimate:
- Nama, Mighty Thud: 3 marked players, 3 soak groups, no empty marks. Avoid the Aftershock craters.
- Iku, Frostfire Volley: clear your fire/frost DoT in the opposite patch before the next set, or Elemental Explosion wipes the raid.
- Gebbo, bomb + mushroom: place the bomb at the edge, then ride the Bouncy Mushroom (or blink/teleport/leap) over the lethal Blast Wave.
Kill them together:
- Every turtle has a death enrage, so balance their HP. If forced to stagger: Gebbo first, Nama second, Iku last.
Mechanics

If all 3 of the Explorers are within 30 yards range. They gain 99% damage immunity until moved apart. Means you can have 2 bosses in cleave range at all times, but never 3.

Mor'zahi's whispers compel one tortollan to follow his commands, granting that explorer a set of empowered abilities while the control lasts.
Only the controlled explorer uses the dangerous versions listed below, so at any moment you're dealing with one puppet plus two normal tortollans.

When you break his control, Mor'zahi violently repossesses a target, spending all his energy to grab a new explorer and hand them their empowered kit. So control never just ends, it jumps to someone else, and the puppet you have to deal with changes.

Disgusting Fish
A fish found inside Trader Gebbo's crates. Toss it to the possessed tortollan to interrupt Mor'zahi's concentration, which forces a Mor'zahi's Command and resets his charge toward Final Ascension.
This is your main tool in the fight, and the whole loop runs on having a fish ready when you need one.

Mor'zahi slowly gathers power in the background, and if he ever finishes channeling it, he blasts the entire raid with Shadow damage every 0.5 seconds until you're dead. Feeding a fish resets his progress, so this is less a cast you dodge and more a timer you keep pushing back.

Breaking his concentration isn't free. Every time you fish him, the backlash hits the raid with Shadow damage plus a DoT for 12 seconds. So plan your breaks, don't drop one on top of another heavy raid hit if you can help it.

Constant raid-wide Shadow damage every 2 seconds for the whole fight. Just healer background pressure.

The statues around the chamber shoot spirit flames that leave impact zones dealing Shadow damage to anyone within 3 yards. Dodge the puddles as they land.
While controlled, Gebbo chucks crates that slam down for heavy Physical damage to anyone nearby. Stepping on a crate breaks it and gives you Splinters, but you also want these crates, since they're where the Disgusting Fish comes from.
Deal with them on purpose, don't just avoid them.

Stomping a crate inflicts a stacking bleed for 8 seconds. Fine in small amounts, painful if one person is breaking every crate, so share the job.

A crate left completely untouched for 25 seconds ruptures for raid-wide Shadow damage. So crates are on a clock, someone has to pop each one before it goes off, which conveniently is also how you dig out fish.

Gebbo tosses Bouncy Mushrooms onto the ground at player locations. Touching one launches you into the air, and these exist as a tool for the bomb mechanic below.

Jumping on a mushroom bounces you high up but perturbs it, and shortly after it bursts for Nature damage to anyone within 5 yards.
So use the Bounce when you need the air, then clear off the mushroom's spot before it pops.

Gebbo lobs a bomb to a player's location for Physical damage on impact, then it sends out a Blast Wave.

A deadly Fire shockwave rolls out from the bomb, hitting anyone it touches for a huge chunk plus a burning DoT.
The counter is the Bouncy Mushrooms, Bounce into the air and let the wave pass underneath you.

If any explorer dies, Gebbo grabs a shovel and starts swinging for extra Physical damage with knockbacks on every hit. One of three reasons you don't kill a single explorer way ahead of the others.

While controlled, Iku rains elemental missiles on several players, hitting them with either Burning Flames (fire) or Piercing Frost (frost) and leaving a matching patch on the ground.
The catch: if a missile strikes someone already carrying the opposite element, it sets off Elemental Explosion.
So fire and frost are tools you use to clear each other, but crossing them at the wrong time blows up the raid.

The two debuffs from the volley. Burning Flames is a fire DoT, Piercing Frost is a frost DoT that also slows you by 40%.
Each lasts 60 seconds, but a fire debuff is cancelled by standing in a Frost Patch, and a frost debuff is cancelled by a Fire Patch.
Clear yours in the opposite element.

Iku teleports onto a player and detonates Arcane damage on the entire raid, dropping off the farther you are from her target.
Move away so she blinks further.

An interruptible cast on one player, dealing Frostfire damage plus a lingering, dispellable DoT and a slow. Interrupt it if you can, dispel the leftovers if you can't.

Iku's tank mechanic. A burst of ice shards where each shard stacks 50% increased Shredding Shards damage taken for 80 seconds.
That amp climbs fast, so tanks swap on it.

If an ally dies, Iku unleashes a massive Fire explosion on the raid, and it hits harder every time she casts it.
The second reason to keep the explorers' health even.

While controlled, Nama marks three players and leaps to each one. Every impact splits massive Physical damage among players within 6 yards and knocks them back, and if a marked spot has nobody standing in it, the whole raid takes the full hit instead.
So marked players need bodies stacked with them to share it.

Each Mighty Thud landing leaves quaking ground that ticks Physical damage to anyone within 6 yards for 30 seconds. Clear out of the craters after the leaps.

Nama throws three spinning shells in a frontal cone that stun on contact for 4 seconds. Don't stand in front of him, a stun during any of the other overlapping mechanics gets people killed.

Nama's tank mechanic, stacking 4% Physical damage on his current target with every hit. Standard tank-swap trigger.

Strategy
The mechanics section covers what each ability does. This section is about running the fight, and the Lost Explorers really comes down to four jobs: pop boxes for fish, survive whichever ultimate is out, and bring all three down together at the end.
Room Layout and the Two Tanked Turtles
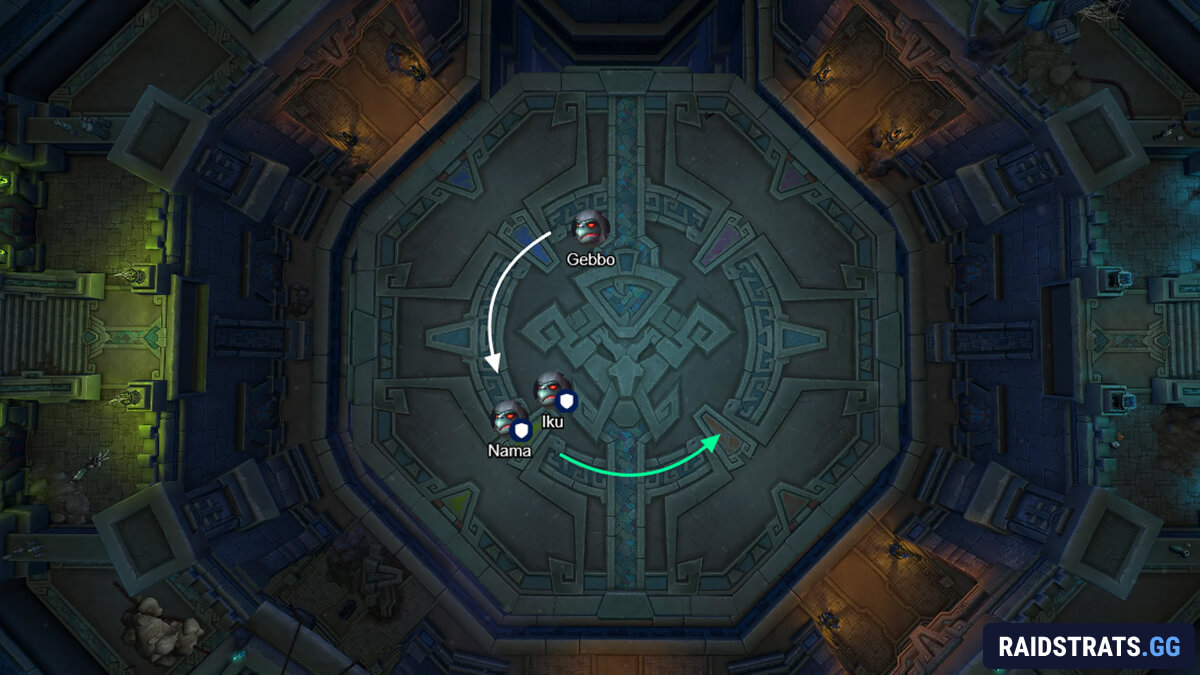
Because of United Defense, the three turtles cannot be near each other or they all turn immune. You can always have 2 in cleave range, but due to the nature of Iku Blinks, and Gebbo just wandering around, this will be challenging and require the tank to adjust on the fly.
Two tank swaps to track: Shredding Shards on the Iku tank and Steady Strikes on the Nama tank. Both ramp, so trade when either starts hurting.
Box Duty is Fish Duty
Gebbo's boxes are the engine of the whole fight, so assign a permanent cleanup crew before the pull.
They serve double duty: every box popped is a check against Relic Rupture (the 25 second raid explosion), and one of them contains the Disgusting Fish you need.
Put players with physical resistance or bleed removal on this job so the Splinters stacks don't pile up on one person, and remember Evoker dispels and racials clear the bleed cleanly.
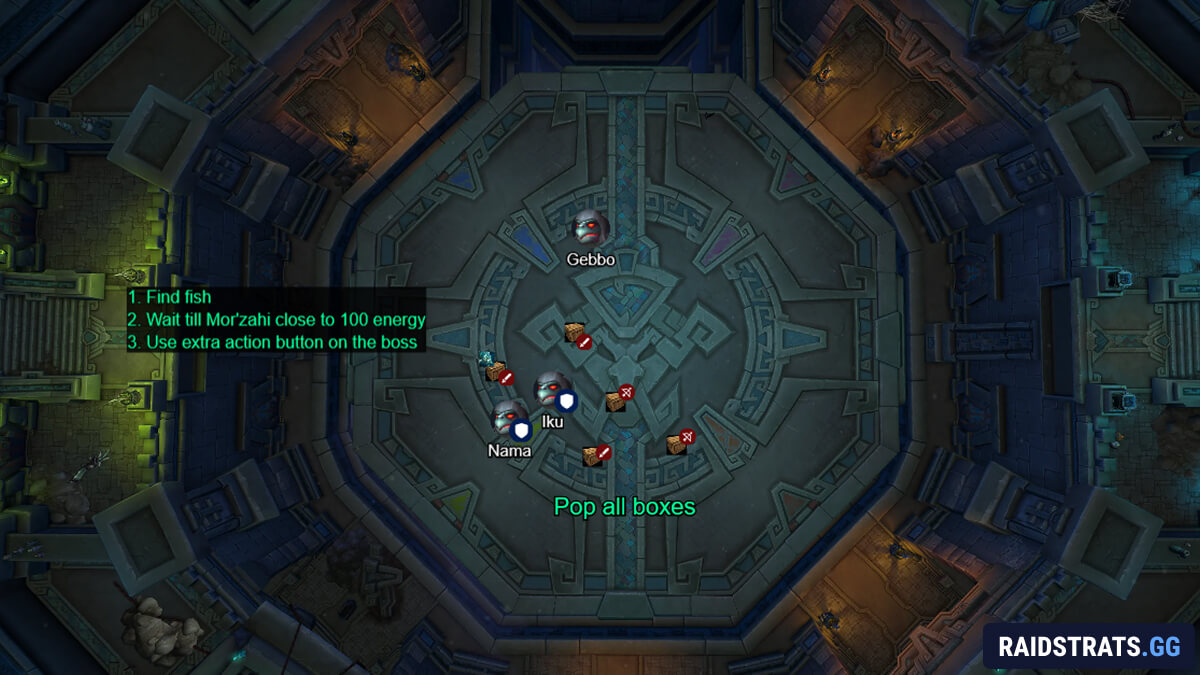
The fish is your interrupt for Final Ascension. Mor'zahi charges to 100 energy, you feed a turtle, his energy resets, and you eat a Fishy Feedback hit as the cost.
Feed Order and the Enrage Clock
Feeding a turtle empowers it with its ultimate, so the feed order decides which ultimate you face and when.
The recommended order is Iku, then Nama, then Gebbo, but it's preference, run what your raid handles best.
What matters is the math: you get exactly three fish feeds, and the fourth time Mor'zahi hits 100 energy you have no fish left. That uninterrupted Final Ascension is your hard enrage, so all three turtles need to be dead before it lands.
Surviving the Three Ultimates
Whichever turtle is empowered, you're dealing with one of these ultimates: Mighty Thud (Nama), Frostfire Volley (Iku) or Bomb and Mushroom combo (Gebbo).
Nama (Mighty Thud)
Nama's ultimate is Mighty Thud. Three players marked, and Nama leaps to each in distance order, closest first.
Run three soak groups so each marked spot has bodies to split the hit, an empty mark hits the whole raid instead.
There's no soak debuff, so the same people technically can eat all three, but the knockback plus the fast follow-up leaps make three separate groups the safe play.
Avoid Aftershock craters once he's done leaping.
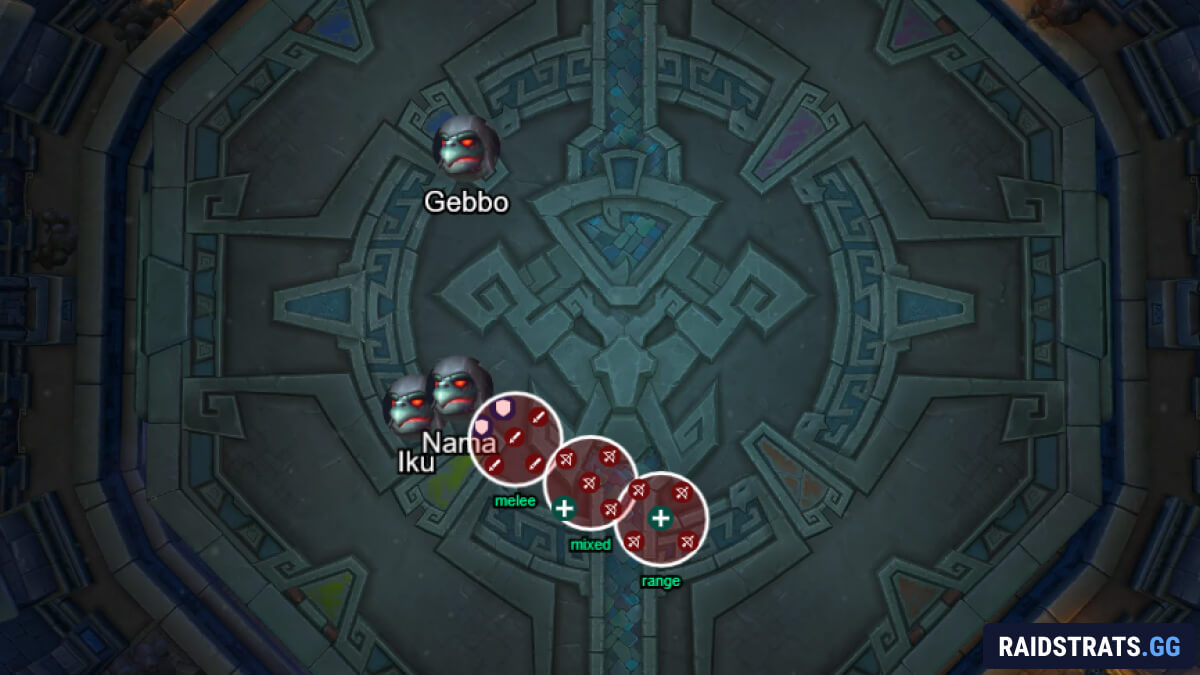
Iku's (Frostfire Volley)
Iku's ultimate is Frostfire Volley. Two sets of fire and frost missiles, each leaving a patch and a one minute DoT. Everyone hit clears their debuff by stepping into the opposite element's patch before the second set goes out.
This is not optional: if a player still has their debuff when the next set hits them with the opposite element, Elemental Explosion goes off and very likely wipes the raid. Clear early, clear every time.
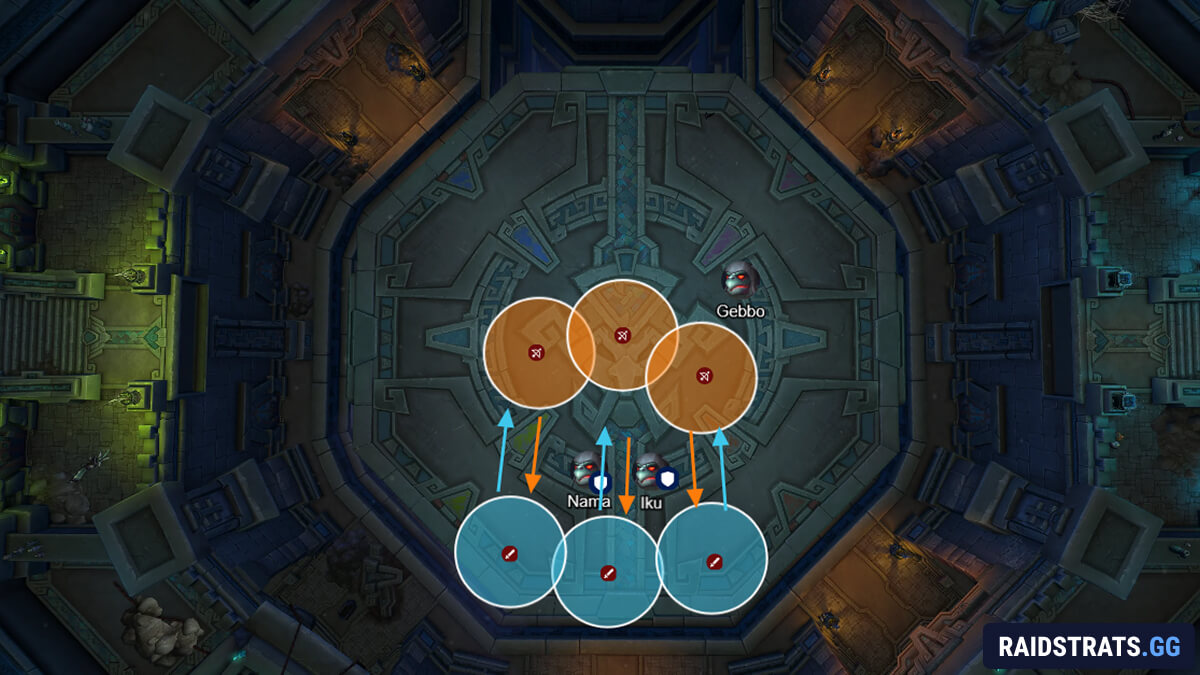
Note: Frost prioritizes melees, while Fire prioritizes Ranged.
Gebbo (Explosive Surprise)
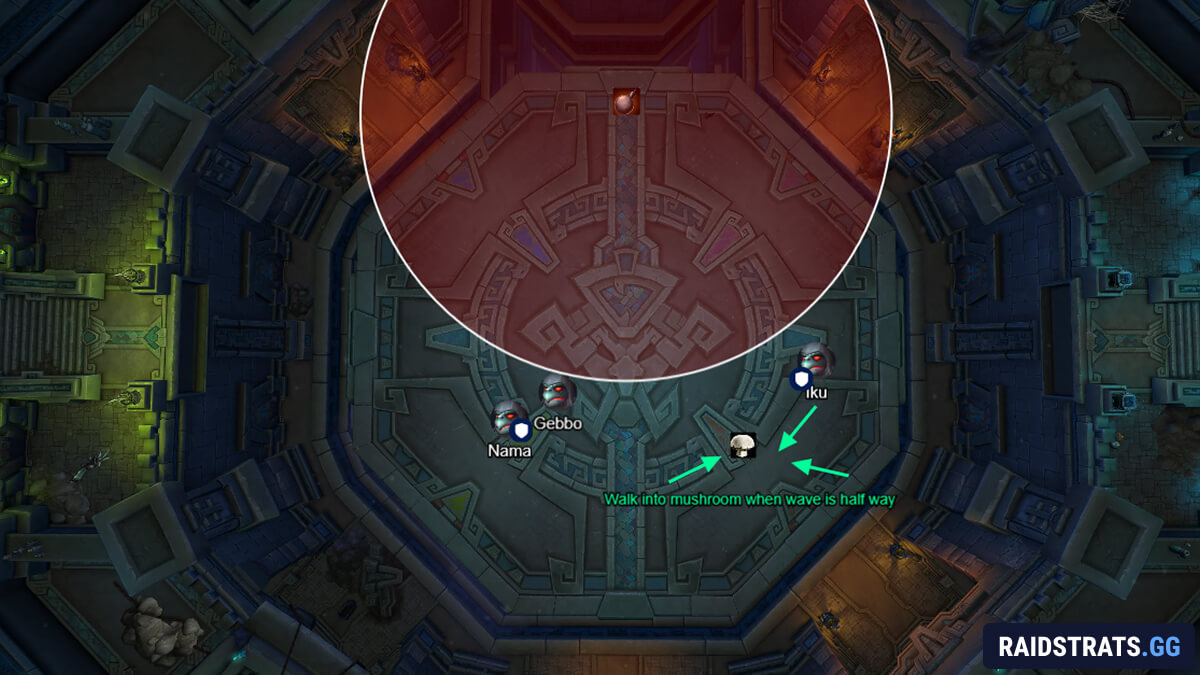
Gebbo's ultimate is the bomb and mushroom combo. One player gets a bomb from Explosive Surprise, dropped at the edge since it leaves a shrinking puddle.
When it detonates, the Blast Wave is lethal to anyone it touches, and the counter is Gebbo's Bouncy Mushroom, jump it to ride over the wave.
Blinks, teleports and leaps also clear it for anyone without a mushroom handy.
Time your move onto the mushroom for when the wave is close, since it expires fast and anyone brushing it sets it off early and it will despawn shortly after.
Killing Them Together
All three have a death-triggered enrage, so a single early kill snowballs fast. Balance their health through the whole fight and bring them down in the same window.
If you're forced to stagger, kill in this order:
- Gebbo first, since his shovel ping-pong is the most survivable.
- Nama second, before his per-second ramp starts one-shotting people.
- Iku last, because her explosion is the deadliest and gets worse with every cast, so you want the fight ending right as it starts, not building.