Up to 84% Off VPN


Raid Setup


Introduction
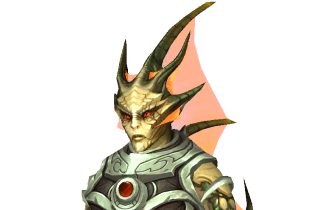
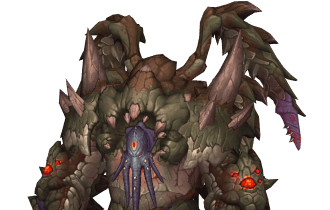
Welcome to our Heroic & Mythic Guide for Kith'ix, the single-boss in The Unbinding of Kith’ix Raid. This guide covers the fight mechanics and the strategy we recommend to defeat Kith'ix on Heroic and Mythic difficulty!
For thousands of years, the Amani kept Kith'ix locked in the basement, and Ula'tek was the one guarding the door. Then you killed Ula'tek. Nobody stopped to ask what she was actually guarding down there, and now a C'Thraxxi general with a swarm of aqir is very awake and very annoyed about the wait.
Thankfully Lady Liadrin showed up with a flashlight. She'll hold back the darkness, patch you up and save the day at the very end. All you have to do is keep the bugs away from the boss, stay inside her Light, and kill him before the lights go out for good.
Fight Style: Single Target with add control, 2 phases plus a recurring intermission
Recommended Setup: 2x Tank / 4x Healer / 14x DPS
Required Utilities: A Death Knight grip (or similar) for Bomber Beetles, dispels for Overwhelming Fear, immunities and strong defensives for Extinguish
Hero/Lust Usage: Phase 2
Method Boss Review
I like that Blizzard keeps experimenting with single-boss raids, and Kith'ix is a clear step up from the ones we've had in the last few seasons. Where the earlier ones felt like light, approachable bosses, this one plays more like a mid-tier raid boss, with a real add phase, a proper intermission check and a burn phase that punishes bad play.
My guess is that this is intentional. It gives guilds access to a fairly challenging boss right away, without making them spend time clearing early bosses first. For a more casual guild with limited raid nights, that's a big deal. You can jump straight into something meaningful instead of using half your evening on reclearing.
It'll be interesting to see how the Mythic version turns out, and how Blizzard handles single-boss encounters going forward. If this is the direction, I'm all for it.
Method Boss Rating: (4/5)
Easy Mode
General:
- 2 Phase fight. Phase 1 and the Suffocating Darkness intermission alternate until the boss hits 25%, then Phase 2 is a burn race. Hero in Phase 2.
Phase 1:
- Keep every add at least 25 yards from the boss, or Commanding Presence gives them 75% damage reduction.
- Tank the Venomous Hulk and drag it onto the Voidweaver, which can't be moved. Kill the Voidweaver fast, its Nightfall keeps ramping.
- Grip Bomber Beetles onto the Hulk one at a time, waiting for Digestive Juices to drop between each one.
- Break the eggs from Incubation before they hatch into Mindstingers.
- Grab a Light's Embrace mote near the boss before every Extinguish, or use an immunity. On Mythic, Bomber Beetles drop eggs too, so gripping them onto the Hulk keeps all eggs in one place.
- Feared players move away from the raid before being dispelled.
- Tanks swap on every Dark Devastation and stack the Voidscars close together.
Intermission:
- All adds dead before 100 energy, or they get Dark Frenzy.
- Stand in Liadrin's Light in the middle.
- Heal off Abyssal Grasp absorbs within 8 seconds.
- Intercept Eclipse Fragment, mainly with tanks, before they reach Liadrin and shrink the safe zone.
Phase 2:
- At 25%, everything resets. If you're close, ignore what you safely can and push.
- Luminous Grace gives 50% increased damage and healing. Use Hero and all cooldowns.
- Avoid Nullshards, 5 stacks of Nullify kills you. Drop Null Gate away from the raid and spread them out.
- Tanks remove Negation by touching a Null Gate before it expires (8 seconds on Heroic, 12 on Mythic) .
- Kill him before the 8th Eightfold Eclipse.
Mechanics

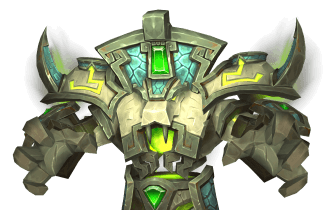
Kith'ix tears open void portals over 6 seconds, dealing raid-wide Shadow damage and summoning three types of aqir: the Venomous Hulk, the Voidweaver and Bomber Beetles.

Any aqir near Kith'ix take 75% less damage. Always pull the adds away from the boss before killing them. This does not affect Eggs.

The Venomous Hulk's frontal, dealing heavy Nature and Physical damage in a cone and knocking players back.
The Hulk needs to be tanked, so aim the cone away from the raid.

The Voidweaver channels void energy on random players, ticking Shadow damage for 8 seconds.

The Voidweaver hits the whole raid with Shadow damage and stacks a debuff that makes each following Nightfall hit 20% harder. The longer it lives, the worse it gets.

Both the Venomous Hulk and the Voidweaver drop Mindstinger Eggs when they die. If the eggs aren't destroyed in time, they hatch into Mindstingers, which fly to players and stun them with Mindsting.
On Mythic: Bomber Beetles also carry Mindstinger Eggs, and since a beetle dies when it explodes, every Gut Reaction leaves eggs behind as well.

Bomber Beetles Fixate on random players and explode on contact with any player, or after 30 seconds. The explosion covers the whole raid in Digestive Juices, a short stacking DoT, so multiple beetles going off at once can hit very hard.

Kith'ix charges up a shockwave that hits the whole raid for near-lethal Shadow damage and removes Light's Embrace.

Liadrin scatters motes of Light that reduce Shadow damage taken by 90% for up to 8 seconds when picked up. These are how you survive Extinguish.

Several players are overwhelmed for 6 seconds and then fall into Overwhelming Fear. When the fear expires or is dispelled, the player screams and deals Shadow damage to the raid, with less damage the farther away you are.

Shadow tentacles lash out near Kith'ix and hit anyone in their path. Just avoid them.

Kith'ix hurls a mass of darkness at his tank, hitting everyone within 15 yards with heavy Shadow and Physical damage.
The target is left Devastated, taking 150% more Physical and Shadow damage for 25 seconds, so Tanks swap every cast.

On Heroic, Dark Devastation leaves a Voidscar behind. Touching it deals damage and knocks you back.
More importantly, Voidscars release Eclipse Fragments during Suffocating Darkness, so where they land matters.

At 100 energy, Kith'ix fills the room with a storm of darkness that slowly closes in and ticks raid-wide damage.
Anyone caught inside suffers Suffocation: pacified, slowed and taking heavy damage every second.

Any aqir still alive when Suffocating Darkness starts will become enraged with doubled attack and movement speed, crowd control immunity, and a raid-wide damage aura. Kill every add before 100 energy.

Liadrin creates a barrier of Light in the middle of the room that holds back the darkness. This is the safe zone for the intermission.

Void tendrils grab random players, pull them toward the darkness and apply a large healing absorb. If the absorb isn't healed off within 8 seconds, the player is dragged into the darkness.

Suffocating Darkness energizes the Voidscar, which release fragments that drift slowly toward Liadrin. Touching one destroys it, dealing AoE damage around you and applying a stacking DoT.

If an Eclipse Fragment reaches Liadrin, it hits the raid and shrinks Refulgent Bulwark. Enough of these and the safe zone disappears.

When Liadrin reaches 100 energy, she clears the darkness and stuns Kith'ix for 8 seconds, ending the intermission.
Each cast also leaves her Exhausted, weakening Light's Embrace and Refulgent Bulwark and increasing Suffocating Darkness damage, so every intermission gets a bit harder.

At 25% health, Kith'ix stuns the entire raid, absorbs all his adds and abilities, and starts casting Eightfold Eclipse. Everything active at that point ends.

Liadrin fully heals the raid and grants Luminous Grace, increasing damage and healing done by 50% for the rest of the fight.

The hard enrage. Kith'ix creates eclipses one at a time, each dealing raid-wide Shadow damage. When the 8th eclipse forms, they converge on Liadrin and kill everyone.

Kith'ix targets random players for 5 seconds, then opens a Null Gate at their location. It damages nearby players and scatters Nullshards around the room. Every gate hit and every shard applies a stack of Nullify, and at 5 stacks you die.

The current tank gets 100% movement speed, 100% more Physical damage taken, and immunity to Nullshards for 8 seconds or 12 seconds on Mythic. When it expires, the Tank dies.
The only way to remove it is to touch a Null Gate, which triggers Explosive Restabilization: a heavy raid-wide hit that also destroys every Null Gate and Nullshards within 10 yards.
Strategy
Kith'ix is a 2 phase fight with an intermission every time he reaches 100 energy. In practice, the encounter is a loop: you fight him alongside his adds, he fills the room with darkness, Liadrin pushes it back, and you go again until he drops to 25%. At that point everything resets into a final burn phase where it's just your raid, Liadrin's buff, and a ticking enrage.
There are a lot of abilities on this boss, but very few are complicated. If your raid understands roughly what each one does and keeps a few simple habits, there isn't much that can go wrong.
Save Hero for Phase 2. The first phase and intermission are about control and consistency, while Phase 2 is a pure survival race where every extra second of damage matters.
Before the Pull
A little preparation goes a long way here. Most of the fight runs on a handful of jobs that should be clear before anyone touches the boss:
- Tanking: one tank takes the Venomous Hulk every time it spawns and keeps its frontal pointed away from the raid, the other is on the boss. Taunt swap every Dark Devastation.
- Beetle grip: a Death Knight, or anyone with a reliable grip, brings Bomber Beetles in one at a time.
- Fear dispels: decide which healers handle the feared players, so nobody dispels a player who's still standing in the raid.
- Fragment soakers: your tanks are the main soakers in the intermission, but add a few backup players who can safely take one or two.
- Voidscar area: pick one spot where tanks place every Dark Devastation, ideally on the edge of the room and away from Liadrin's middle position.
With those covered, the rest of the fight is mostly about the raid reacting cleanly.
Phase 1: Darkness' Domain
Handling the Swarm
The heartbeat of Phase 1 is Voidswarm. Every cast hits the raid and opens portals that summon a new set of aqir, and how quickly you handle them decides how relaxed the rest of the phase feels.
The Venomous Hulk is the anchor of your add control. Your add tank picks it up immediately and drags it away from the boss, because any aqir within 25 yards of Kith'ix gets Commanding Presence and takes 75% less damage. That one detail is easy to forget in the chaos, but an add sitting next to the boss can take three or four times longer to kill. Keep the Hulk's frontal facing away from everyone else, since Venom Roar hits hard and knocks players around the room.
The Voidweaver is where your damage should go first. It spawns at a random spot, can't be moved or gripped, and keeps stacking Nightfall on the raid, with each tick hitting harder than the last. Since you can't bring it to you, bring everything to it. The Hulk tank drags their add over to the Voidweaver, the raid stacks on top, and both die together through cleave. This keeps your damage efficient and stops your raid from splitting all over the room.
The Bomber Beetles are the add that punishes a messy raid. They fixate on random players and explode on contact with anyone, or after 30 seconds, coating everyone in Digestive Juices. One explosion is manageable. Several in a row stack the debuff and suddenly your healers are in trouble. The clean way to handle them is to have a DK grip one beetle at a time onto the Hulk, let it explode, wait for the debuff to fall off, then bring in the next. It turns a random, chaotic mechanic into a controlled rhythm your healers can plan around.
On Mythic: the beetles are also filled with Mindstinger Eggs, so every explosion leaves eggs on the ground. Gripping them onto the Hulk helps a lot here too, because all the eggs end up in one spot where your cleave is already focused, instead of being scattered across the room wherever the beetles happened to catch someone.
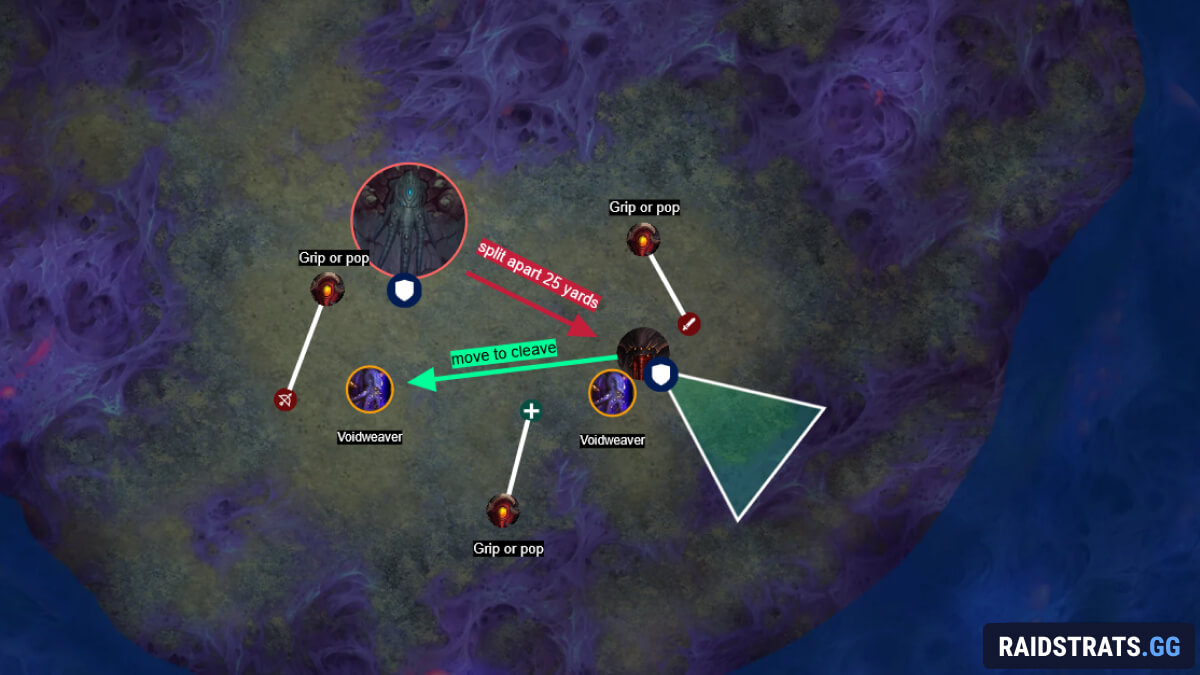
Once the Hulk and Voidweaver die, they leave eggs behind through Incubation. Don't move on and forget them. Switch over and break the eggs before they hatch, because a Mindstinger flying into your raid and stunning players with Mindsting is exactly the kind of small mistake that snowballs.
On Mythic: the number of eggs adds up quickly, so make egg cleanup a habit after every kill and every beetle explosion. The eggs aren’t protected by Commanding Presence, so they die quickly.
Layering in the Boss
While the adds are going on, Kith'ix keeps adding pressure, and the most important cast to respect is Extinguish. It hits the whole raid for lethal damage, so everyone needs a mote from Light's Embrace before it lands.
The motes always spawn near the boss during the cast, so when you see it coming, everyone moves toward Kith'ix and grabs one. Players who can't reach a mote in time can survive with an immunity or a strong defensive, but that should be the backup plan, not the default.
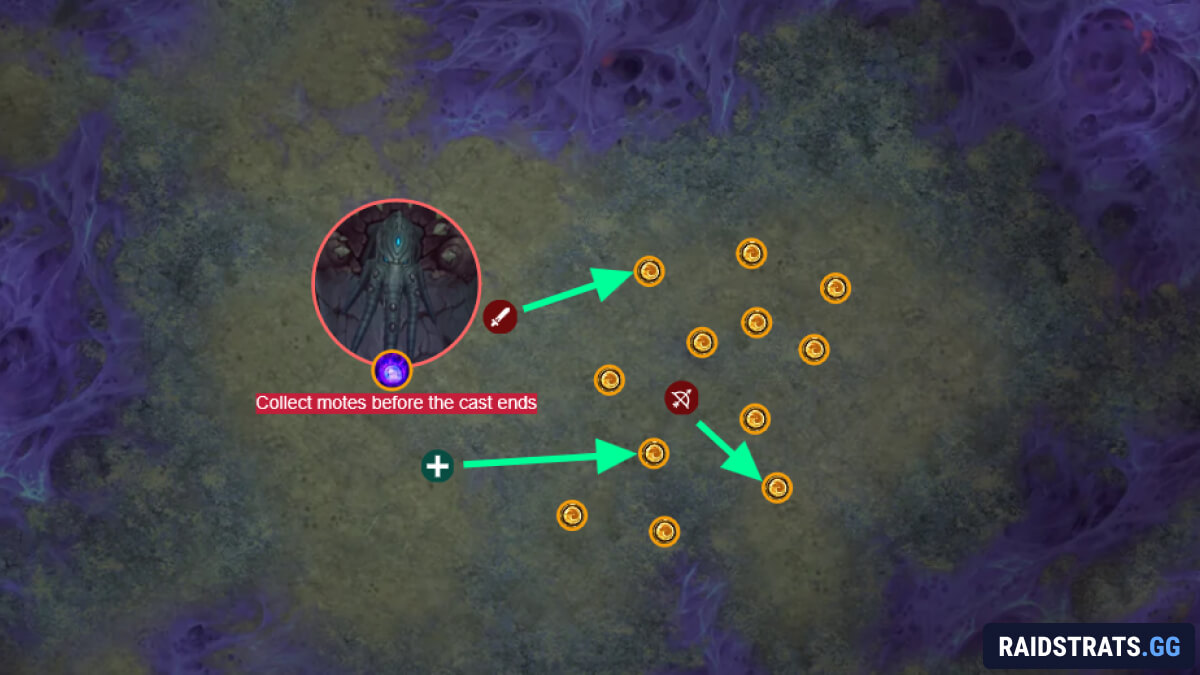
Unspeakable Horrors sends a few players into Overwhelming Fear. The important part is where they get dispelled. Every dispel releases a scream that damages the raid based on distance, so feared players should move out of the group first and only then get dispelled. A dispel in the middle of the stack can be a big hit on the raid. A dispel at range is almost harmless.
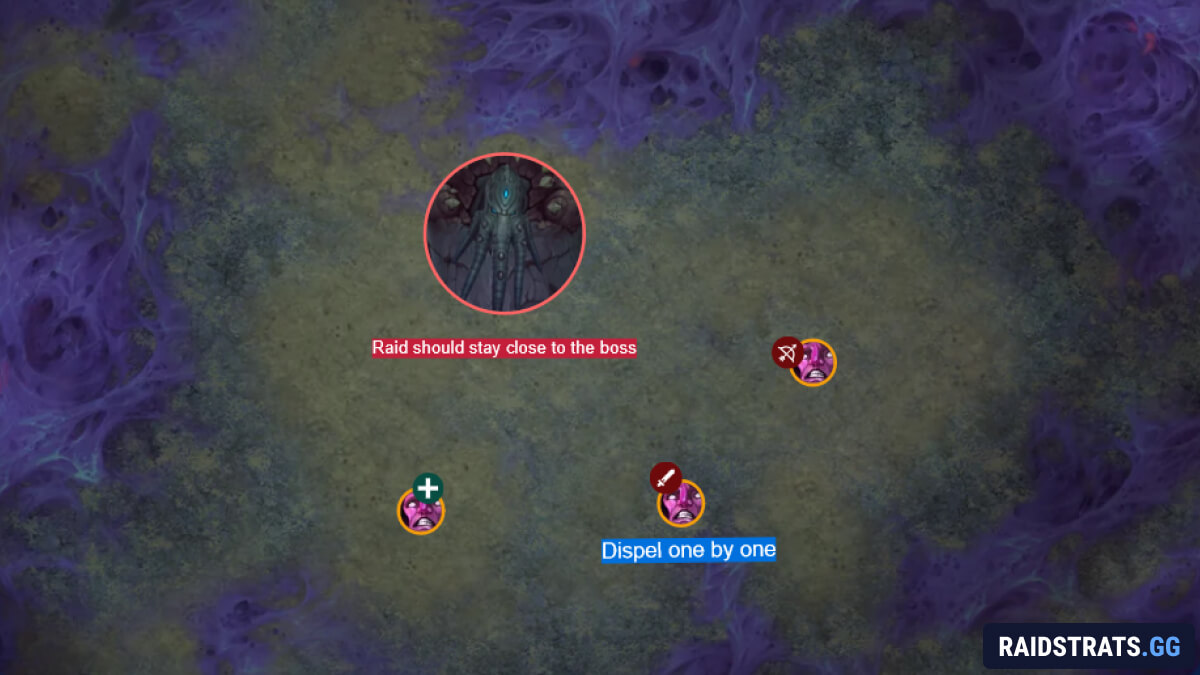
Also keep an eye out for Twisted Appendage. The tentacles mostly matter for melee and tanks near the boss, so simply step away from them when they appear.
Tanking and Voidscars
Your boss tanks have the most important long-term job in this phase.
Dark Devastation leaves the target Devastated, so tanks swap after every cast. But the bigger responsibility is where each cast lands, because every Dark Devastation leaves a Voidscar behind, and those are what release Eclipse Fragment during the intermission.
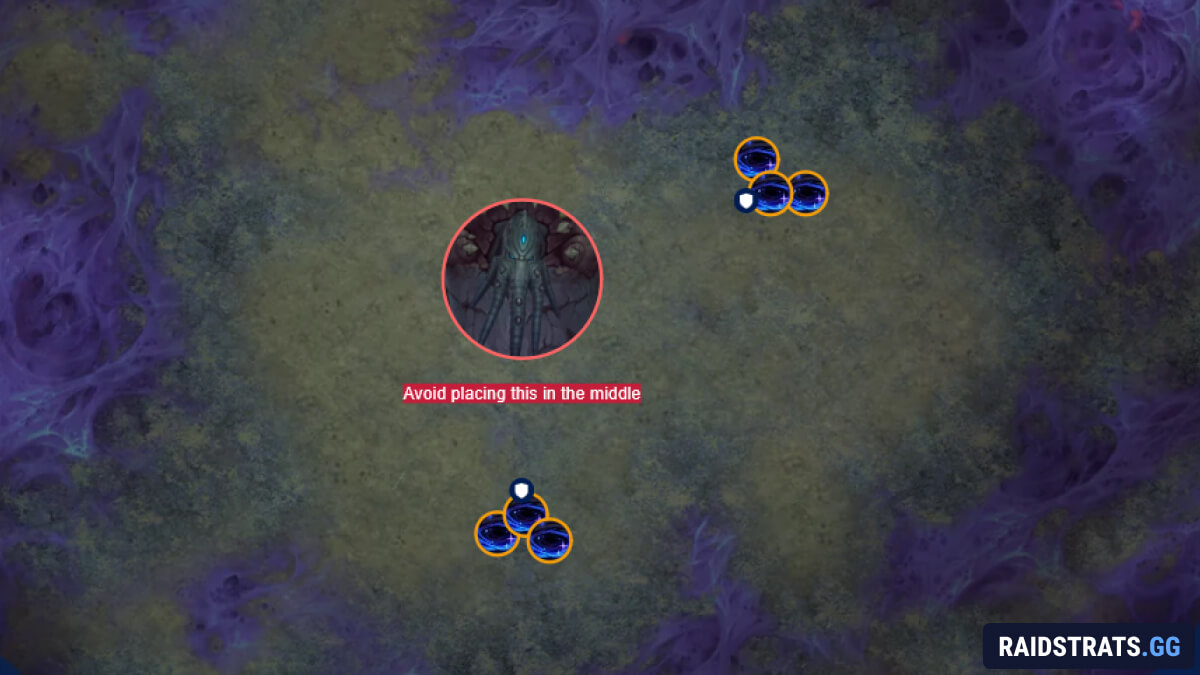
The goal is to stack the Voidscars close together in one area. If they're spread around the room, the fragments come from every direction and your soakers can't cover them all. If they're grouped up, the fragments come from one predictable side and the whole intermission becomes far easier. Good scar placement in Phase 1 is honestly the biggest factor in a smooth intermission.
Intermission: Suffocating Darkness
Getting Ready for 100 energy
As Kith'ix approaches 100 energy, look at what adds are still alive. Anything still standing when Suffocating Darkness starts gets Dark Frenzy, gaining huge speed, crowd control immunity and a raid-wide damage aura. Clean up every add and egg before the cast, even if it means losing a bit of boss damage.
Living Inside the Light
When the darkness rolls in, most of the room becomes unsafe, and Lady Liadrin creates a pocket of Light in the middle with Refulgent Bulwark. Everyone collapses into that zone.
There are no adds to worry about here, but most of the boss's own abilities continue, so Extinguish motes, fear dispels and tank swaps all still apply. The difference is that you're now doing all of that inside a much smaller space.
Abyssal Grasp
Healers have one critical job in this phase; Abyssal Grasp grabs a few players and slowly drags them toward the darkness while putting a large healing absorb on them. If the absorb isn't healed through within 8 seconds, that player gets pulled into the darkness and takes lethal damage.
Make these players your top healing priority every time, and don't spread healing evenly across the raid while someone is being dragged away.
Eclipse Fragments
The real check of the intermission is the Eclipse Fragment. They come out of the Voidscars your tanks placed earlier and drift slowly toward Liadrin. Every fragment that reaches her damages the raid and shrinks the safe zone through Lost Refulgence. Let enough slip through and the Light disappears completely, leaving your raid with nowhere to stand.
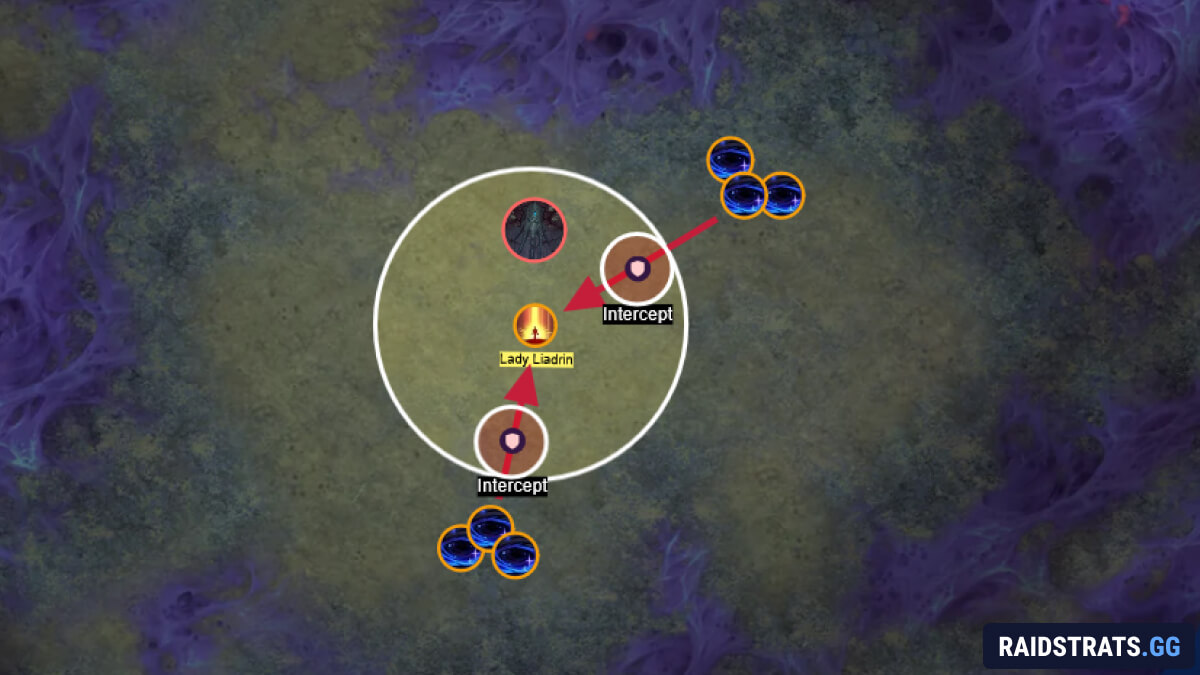
Your tanks are the main interceptors since they're the most durable, but anyone can help. Each soak deals AoE damage around the soaker and applies a stacking DoT, so it's better to spread the work across several players than to let one person soak everything. Soakers should also step away from others before touching a fragment, so the splash doesn't hit nearby players.
This is where good Voidscar placement pays off. If the Voidscars are grouped, your soakers can stand in one line between them and Liadrin and catch everything. If they're scattered, you'll be sending players in all directions, which leaves gaps.
Leaving the Intermission
The intermission ends when Liadrin fills her energy and casts Divine Radiance, clearing all darkness and stunning Kith'ix for 8 seconds. Use that stun window to reset positions, get the boss back into place and prepare for the next Voidswarm.
Each Divine Radiance also makes Liadrin Exhausted, so her Light gets weaker and the darkness hurts more every time. Later intermissions will feel harder even if you play them the same way, so try to make your early ones as clean as possible.
Pushing into Phase 2
At 25% health, Kith'ix casts Stygian Howl and stuns the entire raid.
Everything active at that moment ends: adds despawn, any intermission stops, and his old abilities are gone. You can use this to your advantage. If the boss is close to 25%, you don't need to play every mechanic perfectly anymore. Ignore what you safely can and push him over the threshold, because the transition clears everything for you anyway.
Phase 2: Last Light
The Final Stand
As the stun ends, Liadrin casts Last Light, fully healing the raid and giving everyone Luminous Grace, a 50% increase to damage and healing for the rest of the fight. This is the moment you've been saving for. Use Hero, every DPS cooldown and your potions here. Phase 2 is a race, and how much damage you push in the first moments often decides whether you finish it.
The race has a clear finish line. Eightfold Eclipse creates eclipses one by one, each hitting the raid, and once the eighth forms, the whole raid dies. Between that hard enrage and the growing damage, this phase is about killing him quickly while losing as few players as possible.
Null Gates
The main mechanic of Phase 2 is Null Gate, and it's designed to slowly wear your raid down.
A few players are targeted, and after 5 seconds a gate opens at their location and sprays Nullshards across the room. Every shard that hits you adds a stack of Nullify, and at 5 stacks you die instantly.
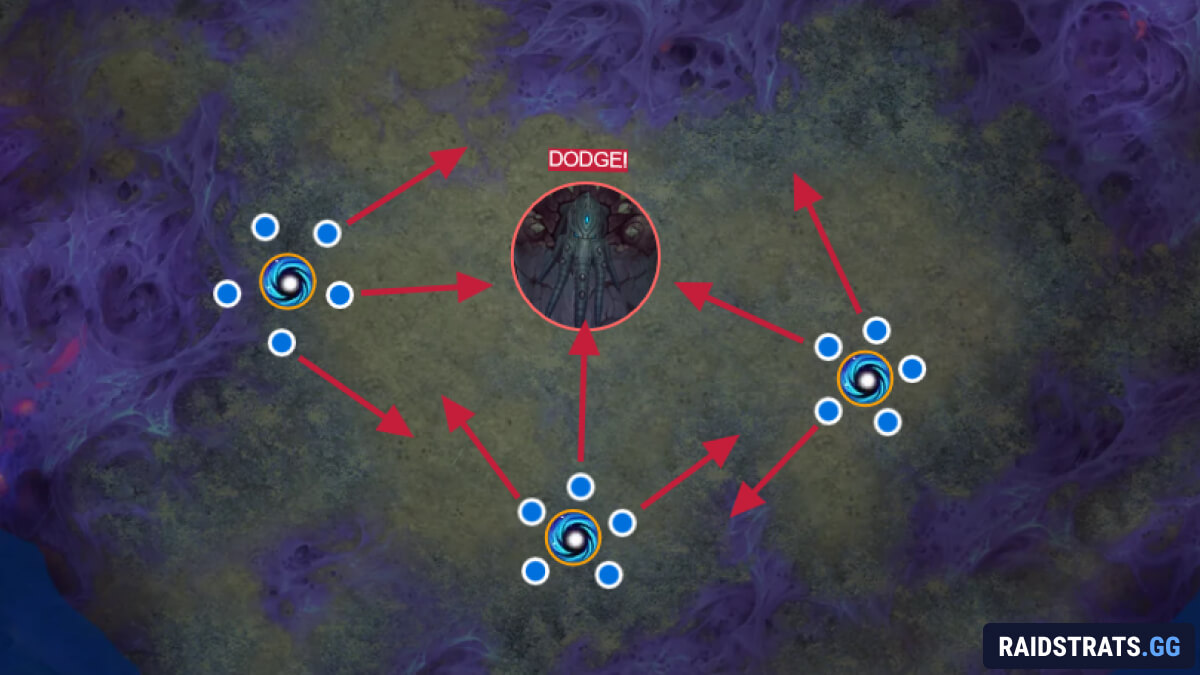
There are a lot of shards flying around, so it's difficult to avoid all of them. The goal isn't perfection, it's survival long enough to kill the boss. Targeted players should drop their gate away from the raid, and everyone should focus on dodging the shards they can see coming.
Healers should watch Nullify stacks closely, since a player on 4 stacks is one mistake from dying.
Negation and the Tank Dance
Your tanks have the most interesting job in this phase. The active tank gets Negation, which makes them faster, immune to Nullshards, and much more vulnerable to Physical damage. After 8 seconds or 12 on Mythic, it kills them unless it's removed.
The only way to remove it is to run into a Null Gate, which triggers Explosive Restabilization: a heavy raid-wide hit that also destroys every gate and shard within 10 yards.