Raid Setup


Introduction
Welcome to our Heroic Entombed Sentinels guide, an early boss in the Venomous Abyss raid in Midnight Season 2. This guide covers the fight mechanics and the strategy we recommend to defeat this boss on Heroic difficulty!
Remember sitting in math class thinking "when will I ever need this in real life"? Well, Blizzard heard you. The Sentinels are two venom-filled golems who guard the temple vaults, and their final exam is making twenty raiders add up to four without panicking. It goes about as well as you'd expect.
Outside of the arithmetic, this is a classic council fight: two bosses, two teams, and a very simple deal. Keep them apart, keep their health even, and don't fail the test.
Fight Style: Council / Split raid on two bosses
Recommended Setup: 2x Tank / 4x Healer / 14x DPS
Required utilities: Magic dispels, immunities are a nice bonus for toxin mistakes
Hero/Lust usage: On pull
Method Boss Review
On paper this is a standard council fight, and then the intermission happens. Helical Toxins is one of those mechanics that is genuinely trivial once everyone calms down, and completely unsolvable while twenty people are sprinting around like the floor is lava. Watching a raid fail "make the green orbs add up to 4" three pulls in a row is a humbling experience, and honestly, a pretty funny one.
The rest of the fight is well built too. The health balancing rule gives the two groups an actual reason to talk to each other, the red side's puddle management rewards raids that plan their space, and the side swaps keep both teams playing the whole encounter instead of camping one golem all night.
It's not a hard boss once the math clicks. But it's the first fight in the raid where coordination beats raw damage, and the intermission alone will produce more clips than the rest of the tier combined. Quick math.
Method Boss Rating: (4/5)
Easy Mode
General:
- Two rules all fight: golems stay 40+ yards apart, and both stay at similar HP. Uneven damage gets refunded by Vitriolic Stasis.
- Split into two equal teams, one per golem, tanked left and right. Both groups and tanks swap sides at every intermission to drop their stacking DoTs.
Green Golem (Breath):
- Pop Toxic Droplets orbs, one/two per player, before they explode.
- Venom Coagulation blob is the instant priority target, it pulses raid damage until dead.
- Dodge the Living Venom lines, they come back to the boss, so watch both directions.
- Empowering Slam ramps on the same tank, reset happens via the intermission tank swap.
Red Golem (Blood):
- Start the group in a corner. Everything on this side drops puddles.
- Soak Unstable Miasma as a group, then walk out and drop the Blood Venom puddles somewhere harmless.
- Tank swapping away from red walks out before Bloodvenom Injection expires, it drops a massive puddle.
Intermission (100 energy):
- Everyone gets 4 orbs overhead, red and green. Touch one partner so your combined green orbs equal exactly 4.
- Don't panic, you have plenty of time and the bosses are immune anyway.
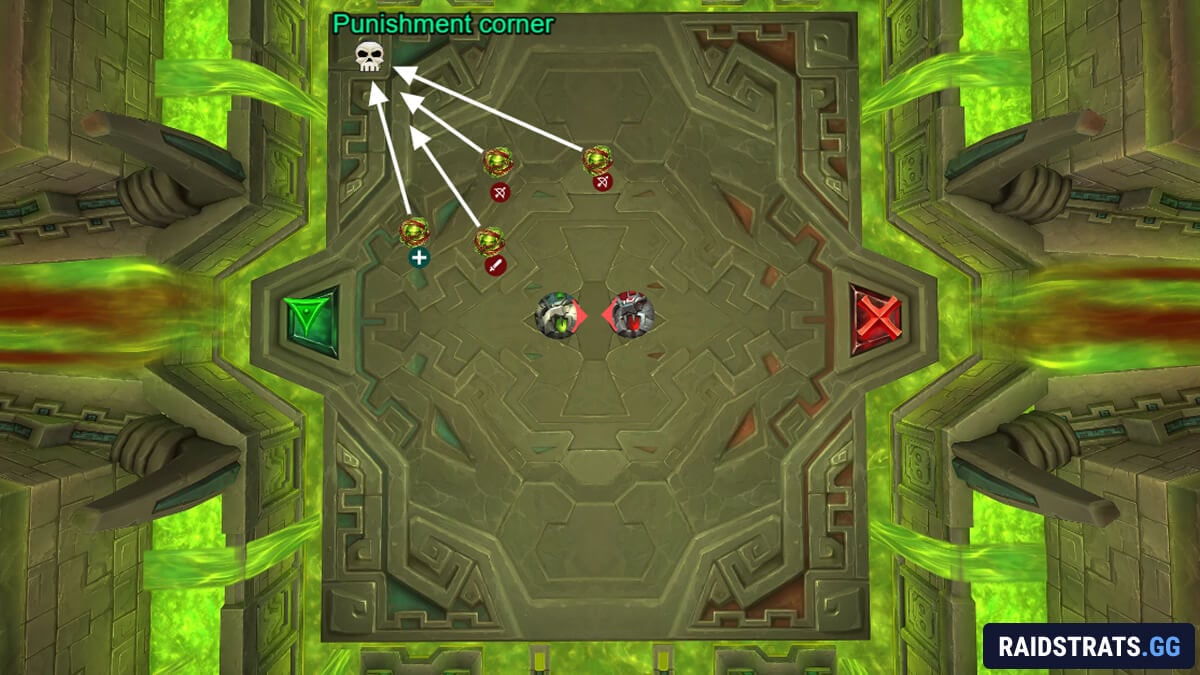
- Wrong pairing causes Cultivated Burst. Send mistakes to the punishment corner, or cheat death with an immunity.
- After the intermission: swap sides, repeat until dead.
Mechanics

The golden rule of this fight. While the Sentinels are within 40 yards of each other, they buff each other with 99% damage reduction. So the golems live on opposite sides of the room at all times, and the raid splits into two groups, one per boss.

Each golem applies its mark to every player within 40 yards of it, every 5 seconds. It's a stacking DoT that runs for 40 seconds, acid flavored on the Green side (Mark Of Acid), blood flavored on the Blood side (Mark Of Blood).
You can't avoid getting marked, but the stacks keep climbing for as long as you stay parked next to the same golem. This is the pressure that forces your groups to eventually rotate sides and let stacks fall off.

The Breath of Ula'tek sprays a bunch of venom droplets in front of itself. Each droplet explodes into a Noxious Blast after 16 seconds, which is heavy raid-wide damage per droplet.
You defuse a droplet by stepping on it, eating a chunk of Nature damage in the process. So this is a soak assignment: spread the droplets across your group, one/two per player, or use a mobile immune, because letting several blast off at once is how healers develop trust issues.

The golem vomits up a sticky mass that animates into a big living slime. While it's alive, it pulses Contaminate, raid-wide damage every 3 seconds until the slime is dead.
Kill priority number one for the Green group, every extra second it lives is free damage on your raid.

Heroic: Venom slime ejected by the Breath of Ula'tek comes flying back to the golem after 4 seconds, hitting anyone in its return path hard. Watch where the goo lands, don't stand between the slime and the boss.

Tank mechanic. The Breath of Ula'tek slams its current target for big Physical damage, and every slam on the same target empowers the golem with 15% extra Physical damage. That buff only resets when it slams a different target, so this is a hard tank swap.

The Blood of Ula'tek infects players with a dispellable Shadow DoT. Simple enough, except for the Heroic twist, Blood Venom, so healers don't get to just spam dispel on cooldown.

Heroic: when Blood Venom expires (or gets dispelled), it leaves a toxic pool on the ground, and the more venom applications the player had, the bigger the pool.
Dispels become a positioning requirement: walk out to the edge, get cleansed there, keep the pools out of the playable space.

One player gets marked with Unstable Miasma. After 8 seconds it erupts, splitting a truly disgusting amount of Shadow damage between everyone within 8 yards. This is a mandatory group soak, and everyone hit gets Clinging Murk, a short stacking DoT.
So the movement is: stack to split the hit, then spread back out so the Murk doesn't overlap with everything else.

The Blood of Ula'tek's tank mechanic. Big Physical hit plus a stacking Shadow DoT that runs for 40 seconds per application.
Same story as the other side: taunt swap before the stacks get spicy.

At 100 energy, both Sentinels rush together in the middle and spend 30 seconds balancing their fluid levels. During this they take 99% reduced damage, and here's the kicker: the weaker Sentinel gets healed up until it matches the healthier one.
Translation: every bit of uneven damage you did gets refunded. Keep both golems at similar health all fight long, or watch the Vitriolic Stasis undo your hard work in real time.

During the Vitriolic Stasis, every player gets infected with Helical Toxins, a 28 second Plague DoT. Running into another player combines your venoms into one stronger stack, and reaching exactly 4 applications neutralizes the whole thing harmlessly.
Not 3. Not 5. Exactly 4. Anyone whose toxin expires without hitting 4 applications gets Cultivated Burst, a violent explosion plus a lingering DoT that will probably kill them.
So the raid splits into pre-assigned groups of 4 and merges up. Treat it like a fire drill: know your group, know your meeting spot, walk there calmly.
Strategy
The Sentinels are a one phase council fight with a repeating intermission at 100 energy, and the whole encounter runs on two rules: keep the golems apart, and keep their health even.
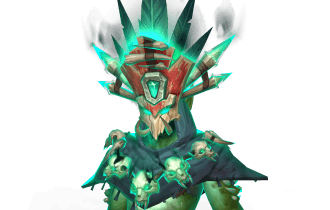
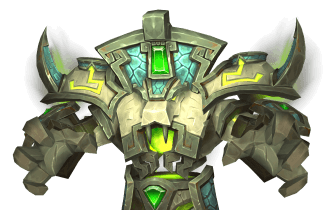
You are fighting two golems at once: the Breath of Ula'tek (the acid one) and the Blood of Ula'tek (the blood one). Each has its own kit, they share an energy bar event, and the entire fight is built around where you position them.
Split the raid into two equal teams before the pull. Each team fights one golem, tanked at least 40 yards from the other, so left side and right side of the room works fine. Keep both bosses at similar HP the entire fight, because Vitriolic Stasis heals the weaker one up to match the healthier one. Any damage lead one group builds just gets refunded, so balance beats padding here.
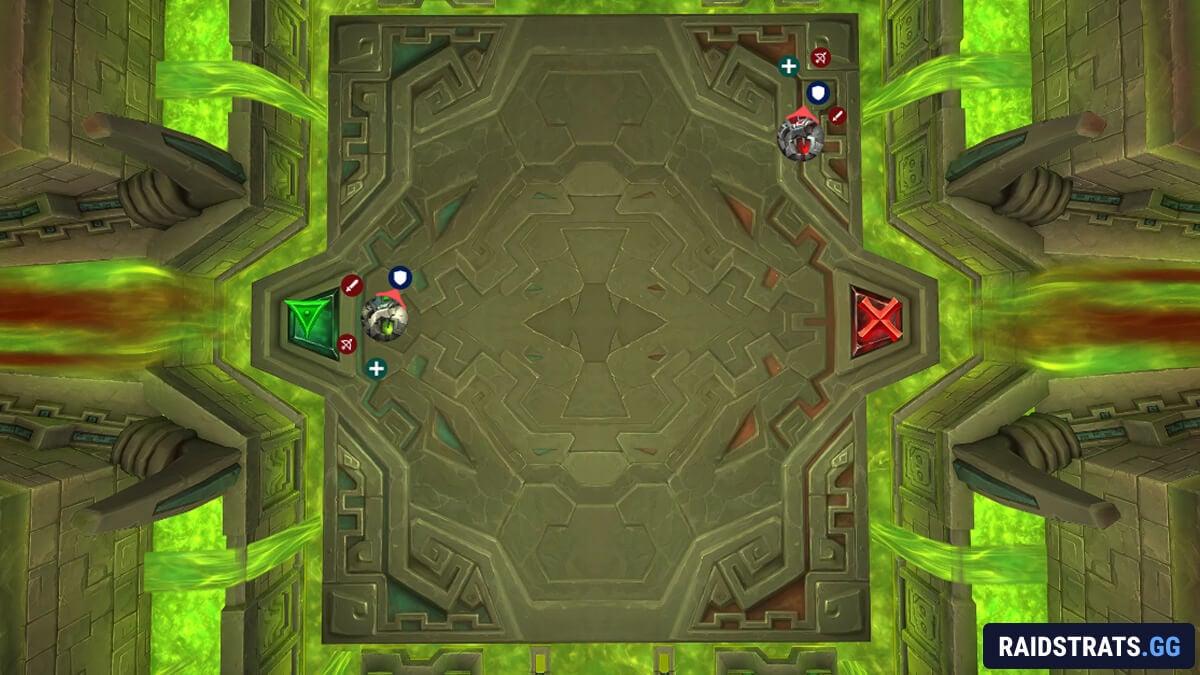
Each golem also applies its own stacking 40 second DoT to everyone in range. You can't avoid it, but it's the reason both groups swap sides at every intermission, letting the old stacks fall off. Multi-dot players standing in the middle to hit both bosses collect both DoTs, so keep that greed short.
Breath of Ula'tek (Green Golem)
Toxic Droplets spawn as orbs on the ground and explode after 16 seconds for massive raid-wide damage if ignored. Pop them by stepping on them, taking a hit and a small DoT per orb. Spread the work out, one orb per player, and don't let anyone hero-soak three of them.
Venom Coagulation spawns a big green blob that pulses raid-wide damage until it dies. The moment it appears, it's the priority target for the entire green group.
Living Venom is a mini frontal that shoots out green lines which return to the boss after a short delay. Dodge them on the way out and on the way back, the return trip catches more people than the first pass.
The tank mechanic is Empowering Slam, heavy physical damage that ramps 15% per slam on the same target and only resets on a new one. There's no second tank on your side to swap with, which is exactly why tanks trade golems at the intermission.
Blood of Ula'tek (Red Golem)
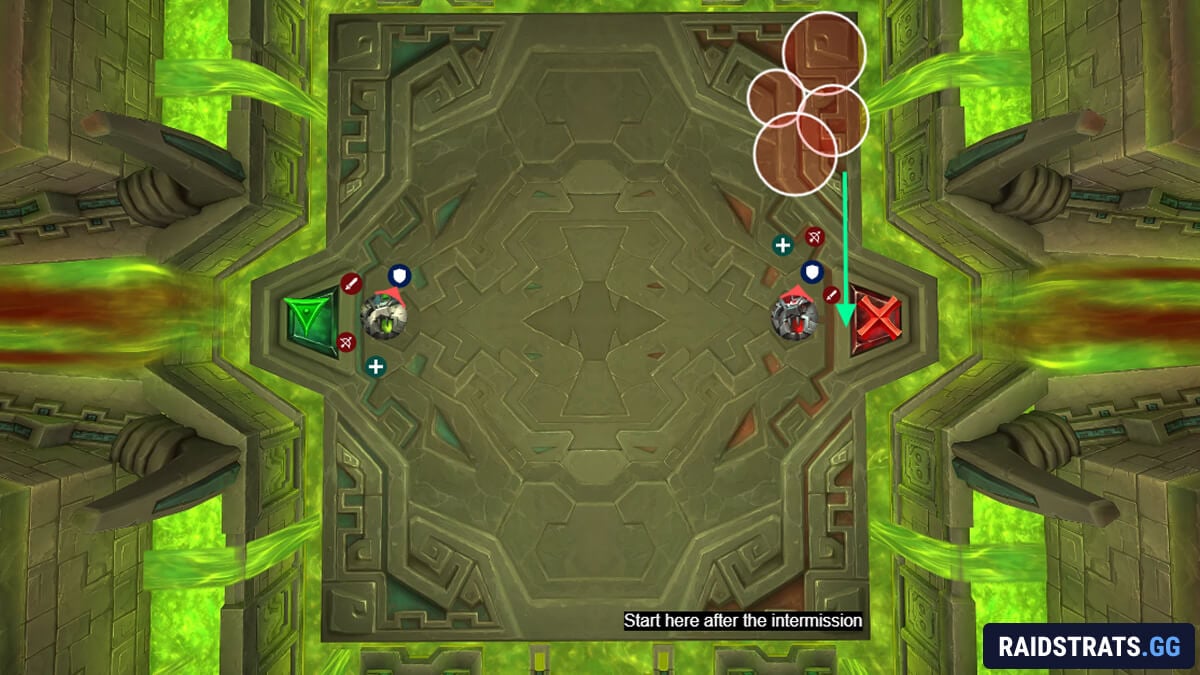
The harder side. Start this group in one of the corners of the room, it makes puddle placement much cleaner.
The core loop is Blood Venom: whenever it expires or gets dispelled, it drops a puddle. You get infected either by the Blighted Blood cast or by soaking Unstable Miasma, so puddles are constant on this side and the corner start gives you room to place them along the wall instead of in the playable space.
Unstable Miasma hits a random player for lethal damage unless the group splits it. The routine: everyone on the red side stacks to soak, then the group walks to a designated drop spot for the puddles that follow, and the tank repositions the boss to keep the area clean.
Bloodvenom Injection is the red tank mechanic, same ramping idea as the green side with one extra job: when the debuff expires, it drops a massive puddle. So the tank who just swapped away from the red golem walks to a safe spot right before their debuff runs out. Don't park that puddle in the middle of the room out of habit.
Intermission: Vitriolic Stasis (100 Energy)
Both golems rush to the middle, become 99% damage resistant for 30 seconds, and the weaker one heals up to match the other. Meanwhile, every player gets Helical Toxins: 4 orbs above your head, some red, some green.
The puzzle: touch exactly one other player so that your combined green orbs equal exactly 4. You have 1 green? Find someone with 3. You have 2? Find another 2. That's the whole game, and you have plenty of time, so the only real enemy here is panic. The bosses are immune anyway, walk around, read heads, pair up calmly.
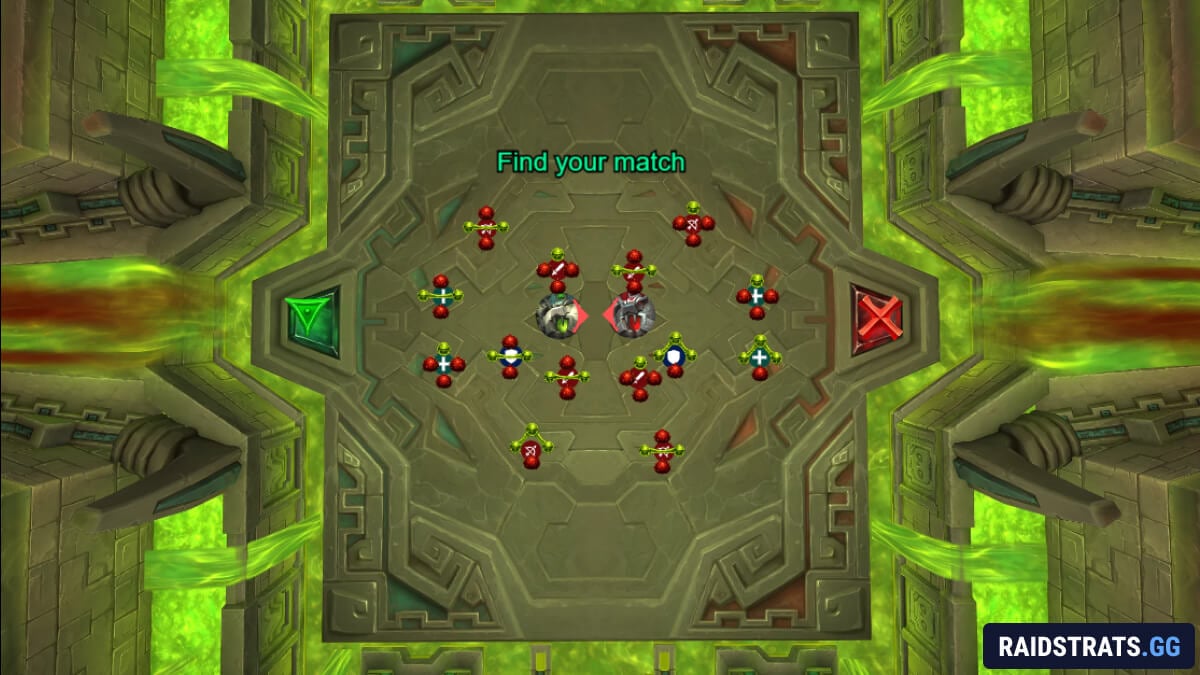
Get it wrong and both players receive Cultivated Burst, lethal damage on expiration plus a large puddle. Set up a punishment corner where mistakes go to die, so at least the puddle lands somewhere useful. A strong personal or a full immunity does survive it.
When the Vitriolic Stasis ends, both groups and both tanks swap sides, stacks drop, and the whole process repeats until the golems are dead. Hero is best used on the pull, since there's no burn phase and the intermission is just downtime.