The Secret Garden Abyss Island puzzle in Crimson Desert may look like an intimidating laser light show, but it is a straightforward mechanical challenge once broken down into manageable phases. To reach this area, you must first complete the Sanctorum of Insight and unlock the Spire of Stars.
Puzzle Overview
| Category | Information |
| Rewards | Abyss Artifact - Fast Travel Location - Access to Vault of Vengeance |
| Required Skills | Axion Force - Force Palm - Flight |
| Required Quests | Sanctorum of Insight Chapter 4 |
Essential Mechanics
You will need these skills:
- Axiom Force: Hold L3 / Tab to aim, release to fire. (Can be upgraded to "Charge" plates).
- Force Palm: Press R3 / Middle Mouse (Use while jumping for the final button).
- Flight: Press Square / Space in mid-air.
Walkthrough: Activating the Crystals

The Secret Garden is located on the southeastern side of the Abyss Map (on the normal map, it sits above Scholastone).
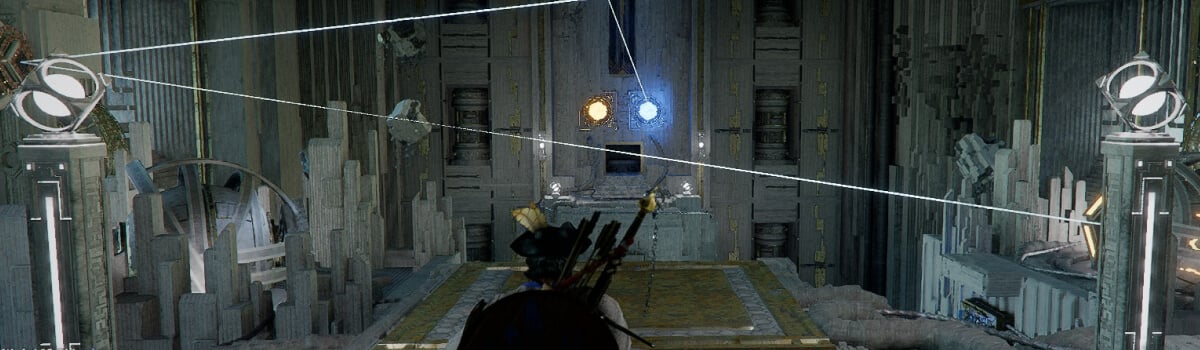
The core objective is to keep both crystals on the south side of the main room consistently activated by lasers. This can be a fiddly fit, but you can use the camera control to check on the end switch.
Phase 1: Powering the Eastern Laser
- Step 1: After activating the Secret Garden Abyss Nexus, drop down onto the southern platform.
- Step 2: Use Axiom Force to grab the large floating cube. Position it directly between your position and the distant, blue-glowing plate.
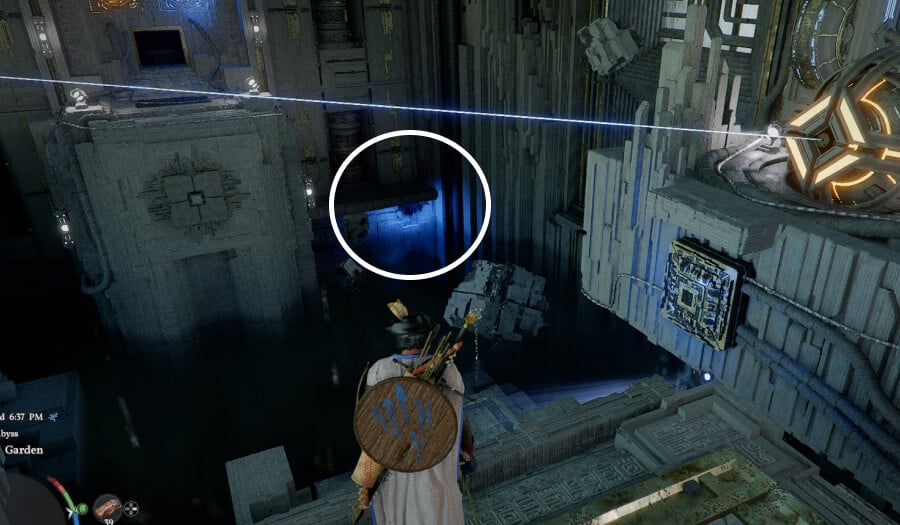
- Step 3: Jump onto the cube. Use Axiom Force to grab the blue plate and move it east towards the platform you started.
- Step 4: Move the large cube again so it sits between you and the new location of the blue plate.
- Step 5: Jump back onto the cube and use Axiom Force to slot the blue plate into the housing surrounded by flowing leaves.
- Step 6: Use Force Palm to push the blue plate into position, or use the upgrade Axion Force to "charge" the plate into position.
Phase 2: Aligning the Beams
Once the laser is active, you must move the laser to hit specific mirrors.
- Step 7: The Eastern Sphere. Go behind the eastern sphere. Use Axiom Force on the rear button to unlock its movement.
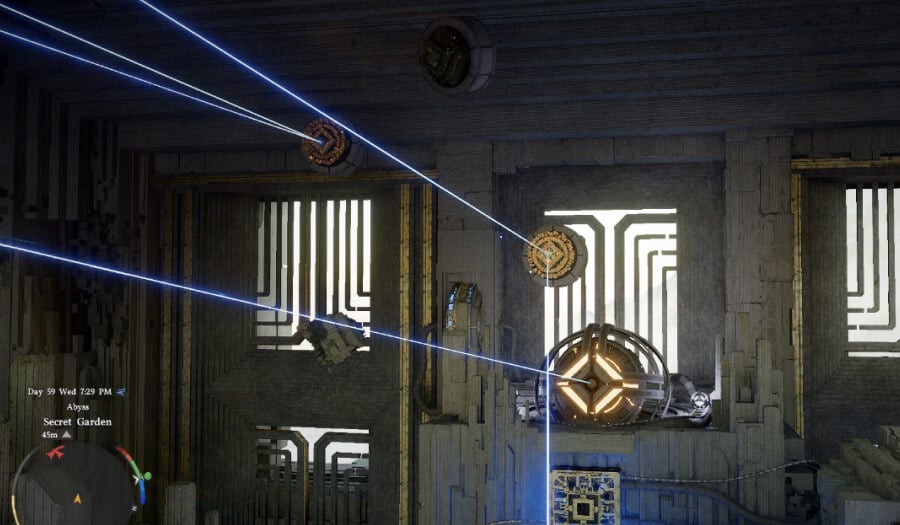
-
- Target: Align the laser with the lower of the two unused mirrors on the wall in front of the laser.
- Goal: The reflection must hit a mirror on the eastern wall, which then reflects into the right-hand crystal (South side).
- Step 8: The Western Sphere Move to the western laser sphere and activate the rear button with Axiom Force.
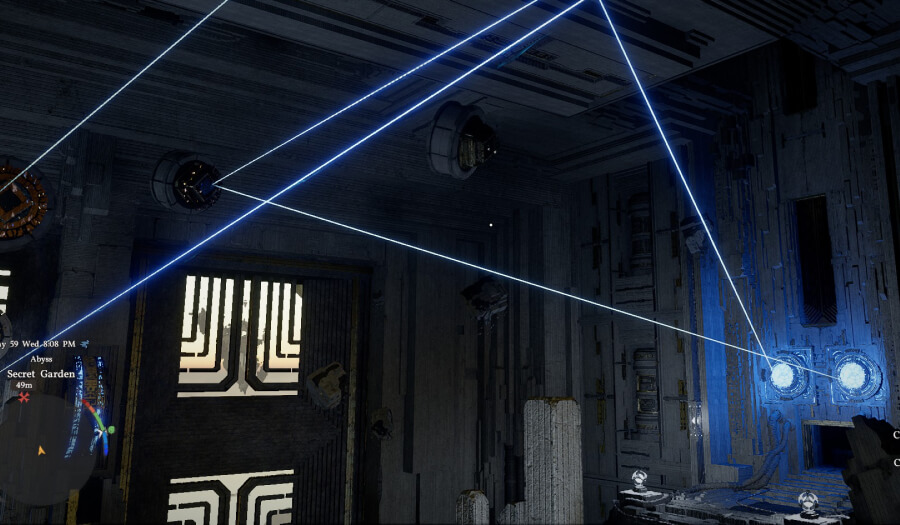
-
- Target: Align this laser with the upper mirror on the eastern side shown above.
- Goal: This requires a "blind angle" adjustment. You need the reflection to hit the mirror directly above your head and then land in the left-hand crystal (South side).
Phase 3: The Final Sequence
- Step 9: Once both crystals are glowing blue, use the air vent between the two blue power sections to fly up and exit the main puzzle chamber.
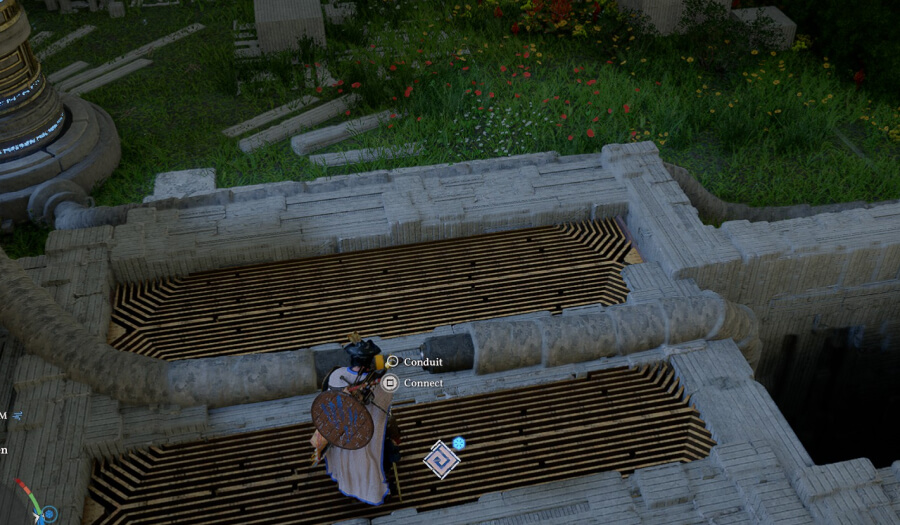
- Step 10: Locate the disconnected power conduit on the south end of the upper outer area. Reconnect it to provide power to the final mechanism.
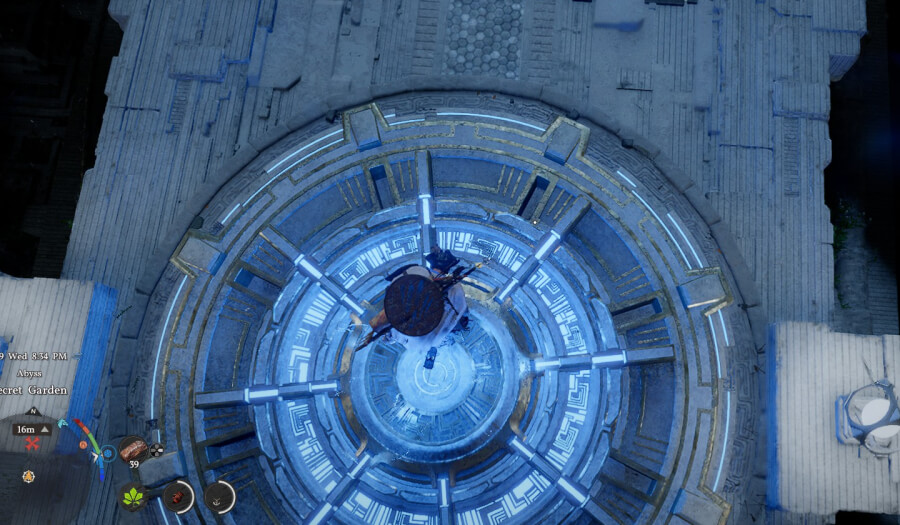
- Step 11: Head north to the large circular button in the centre of the upper area. Perform a Jumping Force Palm to activate it.
Completion & Next Steps
Upon activating the central button, you will receive the Secret Garden Complete notification.
- Claim your Reward: Approach the large altar to collect your Abyss Artifact.
- Progression: Unlock the nearby node (the pyramid-shaped portal) to access the next Abyss Island in the chain.
- Next: Completing this puzzle opens up the next travel network, giving you access to the Vault of Vengeance. Travel through the power grids (the Sonic-style rings in the sky) after activating the next pyramid gate.
Check out our other content for more in-depth Crimson Desert coverage and expert tips.