
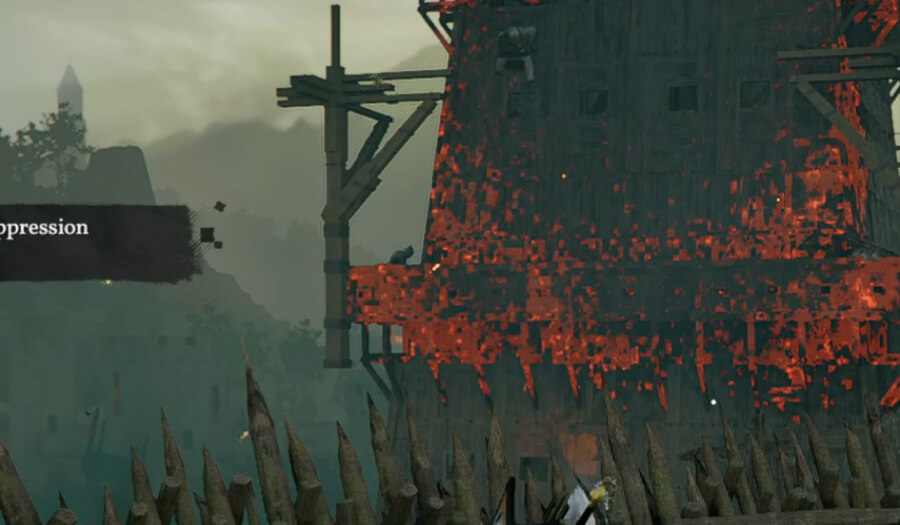
Crimson Desert's Chapter 8 Quest, Rebel Suppression, puts you right in the middle of a massive battlefield in the Hernand region, in the area of Demeniss. While the goal is simply to eliminate the rebel forces, doing it efficiently requires a solid strategy, especially when it comes to the formidable Siege Towers.
In this guide, we'll give you the knowledge you need to tackle the quest and more specifically, how to deal with the Siege Towers which contribute massively towards the quest's progress.
Pro Tip: This is an endurance battle. Bring plenty of consumables (like meat and elixirs) to maintain your health. While the encounter ends with a mini-boss, the sheer volume of rebel soldiers can wear you down before you even reach him.
Rebel Suppression Quest: Overview
The main objective of the quest is simply to retake the tower from the rebel army that has taken it. However, if you are just killing rebels in the base just kill rebels in the base, it will take you a long time to complete the progress bar. The large Siege Towers that loom over the castle can accelerate this process, but how do you take them out?
Rebel Suppression Quest: How to Destroy the Siege Towers
While destroying the three Siege Towers is technically an optional objective, it is highly recommended. Each tower destroyed reduces the enemy's strength and also exposes the soldiers inside, even killing some in the process. These can be taken down with a single arrow and save you a lot of time.
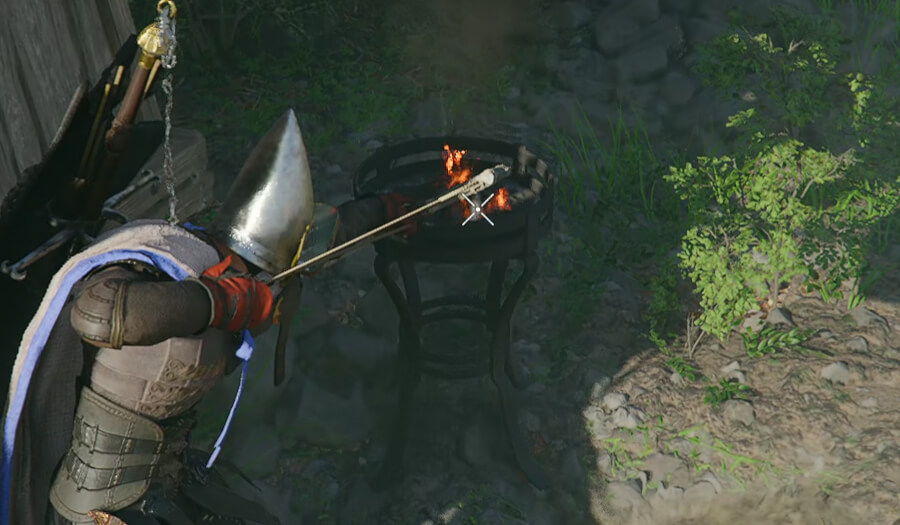
- Utilize the Braziers of Fire: The most effective way to take down these wooden Siege Towers without wasting your own resources is to utilise the environment. Throughout the castle grounds, you will find Braziers of Fire.
- Locate the Brazier: Find a lit Brazier near the base or on the platforms adjacent to a Siege Tower. The towers all have a brazier near them, though they can fall over.
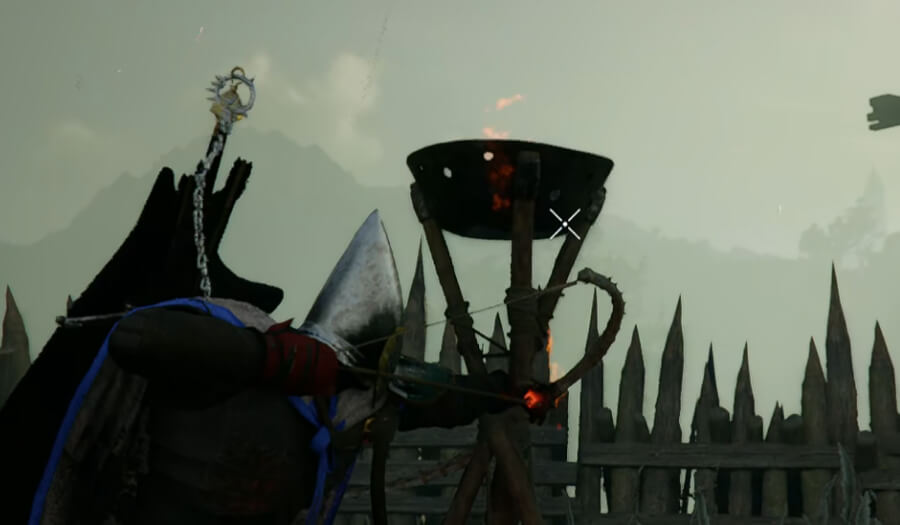
- Ignite Your Projectiles: Stand close to the brazier to dip your arrows in the flame. The larger braziers shown above in the right image are easier to ignite.
- Target the Supports: Aim for the tower, and the fire will spread.
- The Burn Effect: Once the fire catches, the tower will take damage over time. Unlike standard arrows, fire-buffed attacks create a "Burning" status that bypasses the tower's high physical defence.
Pro Tip: We found that aiming at least one arrow at the base layer of the Siege Tower made sure the towers fell. If the fire fails to spread to the lowest level, the tower isn't certain to fall.
Alternative Methods
There are a few other ways to take out the towers if you would prefer.
- Cannons: Look for stationary cannons positioned near the towers. A few well-placed shots will crumble the structure instantly.
- Concentrating Light: Use your ability (L1+R1 / LB+RB / CTRL+Left Click) to beam heat onto the wood.
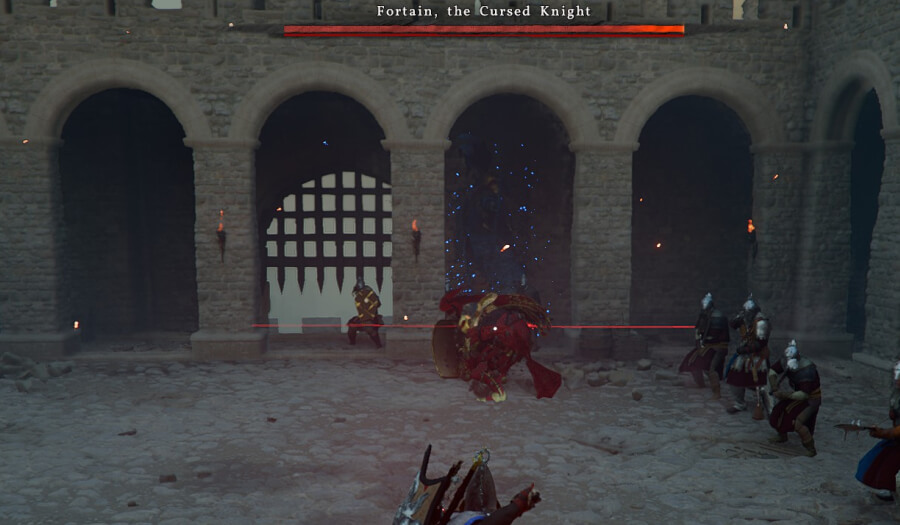
- Cursed Knight Encounter: Be aware that the Cursed Knight Boss guards the towers, and once you defeat him, he will fly away to the next tower.
Combat Strategy & Cursed Knight Boss Fight
To bring the progress bar to 0% as fast as possible and defeat the Cursed Knight, follow these tips:
- Speed: Using dual-wielding is key in this area, as there are many weak enemies. The Tauria Curved Sword from the Crowcaller boss fight is amazing for this, with its heavy attack (RT/R2/Right click) being amazing at clearing enemies fast.
- Beware of Cavalry: The cavalry units are deadly if they catch you, easily knocking you down. Take them out as a priority.
- Siege Towers: If you don't plan to take down the Siege Towers, then avoid fighting near them because the towers are full of gunners who will stutter you in combat.
- Cursed Knight: A fairly easy fight overall, just wait for him to engage before attacking him. He has a "spirit" that watches over him that will punish you if you get caught by the Knight himself.
And that’s a wrap on our Rebel Suppression guide. Check out our other content for more in-depth Crimson Desert coverage and expert tips.