The Twisted Thicketway Puzzle in Crimson Desert is a little more involved than some of the other puzzles we have faced on our adventures so far in Pywel. This puzzle has a few "phases" we need to complete, including fighting a boss.
In this guide, we'll show you where you can find the puzzle and then run you through it step-by-step.
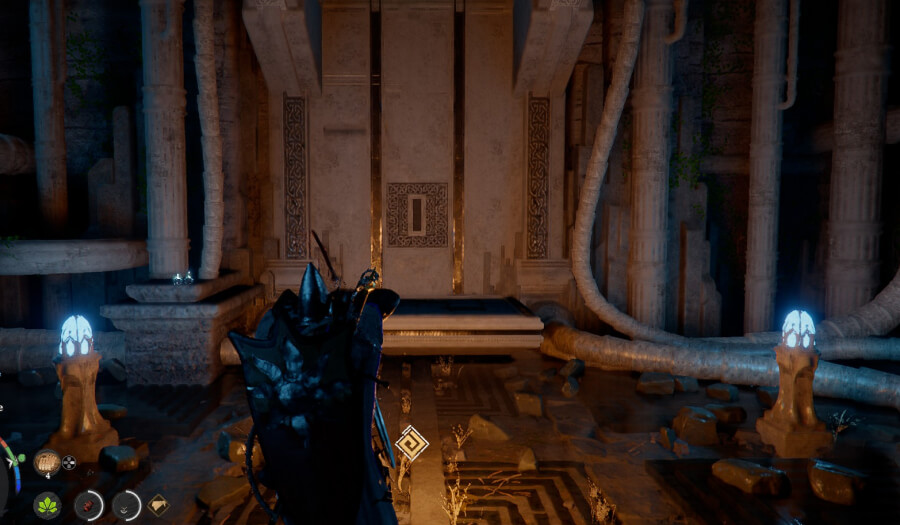
Twisted Thicketway Puzzle Location
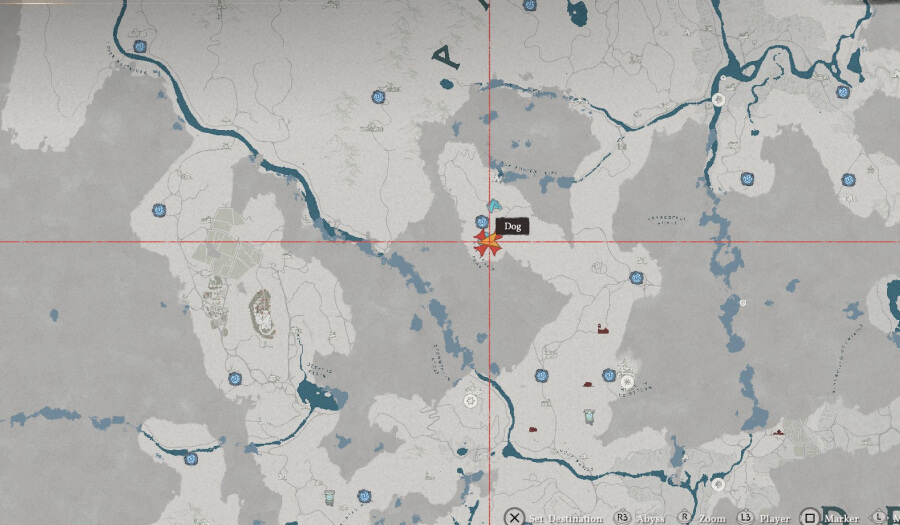
There are a few different ways you can access this puzzle:
- You can access the puzzle via the Root's End Ruins shown above, which is the easiest way. Use Blinding Flash to follow the cables and enter the cave near the ledge.
- Use the teleporter in the Altar of Solitude, which takes you to a giant fan which you can use to reach the Twisted Thicketway.
- The Twisted Thicketway can also be located via the Skybridge in the Abyss and is located on the Twisted Thicketway "island"
Pro Tip: The puzzle room contains two Palmer's Pills near the lift.
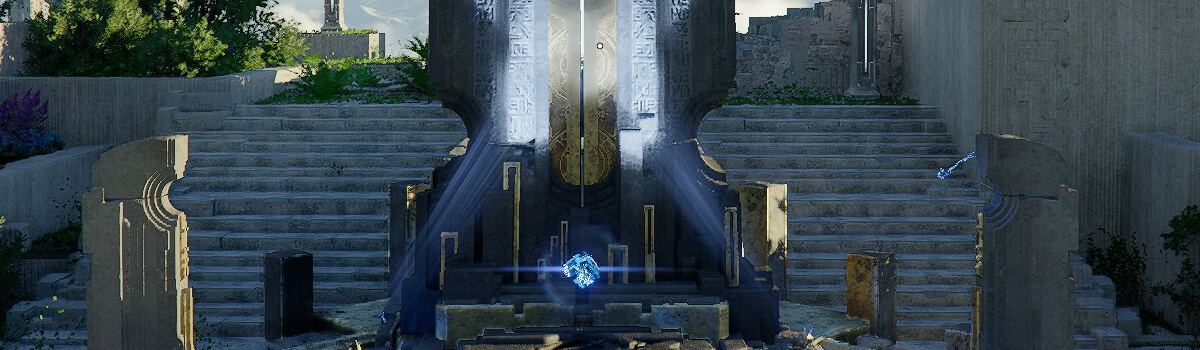
Step 1: Activate the Elevator and Pillars
This phase of the puzzle involves activating the elevator and surrounding pillars.
- Start the Elevator: Press the button at the base of the lift to ride the small platform up to the main puzzle area.
- Controlling the puzzle: Approach the central interactable object and use your Axion Force to interact with it. This will transform you into a Pillar, allowing you to move across the abyss platforms.
- The Three Outer Pillars: You need to lock the pillar into the three circular platforms surrounding the centre. Follow these tips to do this:
-
- Move your "Pillar" over a platform and press Operate to lock in. Note that the pillar is weird to move; the best way is to move your camera to an angle as if you were looking directly up at it.
- Rotate the pillar (Left or Right) until you hear a distinct "chime sound" You will also hear a "crunch" when the pillar locks into one of the sections. It appears you can stop the pillar the second you hear the chime, but we also made it work by locking it into place on the first "crunch". This indicates the pillar is correctly aligned.
- Press Operate again to exit and move to the next platform.
Note: The order in which you turn the dials doesn't matter, only that all three are done. You'll know it's done once the central pillar is lit up as shown below.

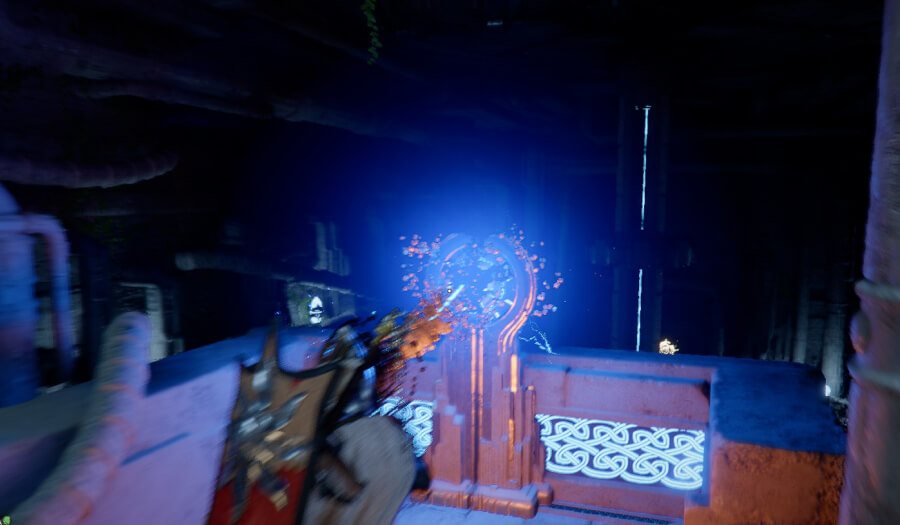
Step 2: Power the Central Fan
Next we need to power the central fan, whilst still in our pillar form.
- Navigate back to the centre platform while still in your pillar form.
- Interact with the central pillar to "turn it on."
- Now, leave the room and head up to the "top side" level where we came from.
Step 3: Head to the Abyss
In this step, we're going to activate the fan in order to make our way to the Twisted Thicketway.
- Once top-side, head to the middle of the platform shown in the cutscene after you completed the puzzle.
- Stand in the centre of the location to activate it and engage the fan.
- Use Glide while on the fan to take you to the Twisted Thicketway area above you in the Abyss.
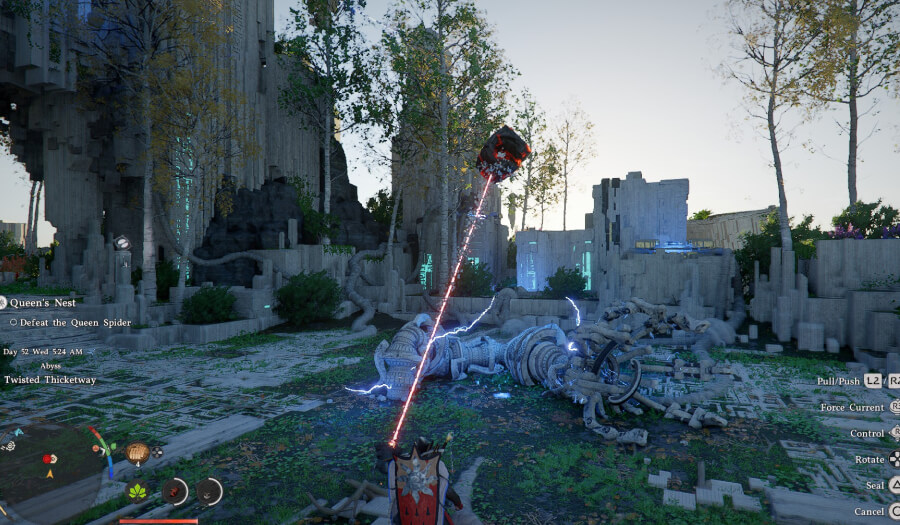
Step 4: Kutum Boss Fight
There are two ways we recommend to defeat this boss but it's only a single phase fight so it's fairly simple.
- Use your bow and the Focused Shot to deal damage to Kutum's eye to build stagger, and then, once stunned, dish out damage normally.
- Find a nearby tree without triggering the boss and carry it into the fight. Once started, slam it into him and it should one-shot the boss.
Pro Tip: Make sure to loot the "Power Core - Spire of Defiance' after beating Kutum and store it in your cauldron.
Step 5: Activate the Device
Finally, we need to activate the device.
- Climb onto the large circular power core above you.
- Once in the middle of it, use Force Palm to activate the device.
- Once done, loot the Abyss Artifact located at the end of the area.
And that’s a wrap on our Twisted Thicketway Puzzle Guide. Check out our other content for more in-depth Crimson Desert coverage and expert tips.