Testing Station No. 24 is one of five new 'Challenge Mode' Testing Stations to appear in Dune Awakening's Chapter 3 instalment. These Testing Stations are repeatable at increasing difficulty levels, with higher levels awarding more powerful weapons, armor and Augmentations.
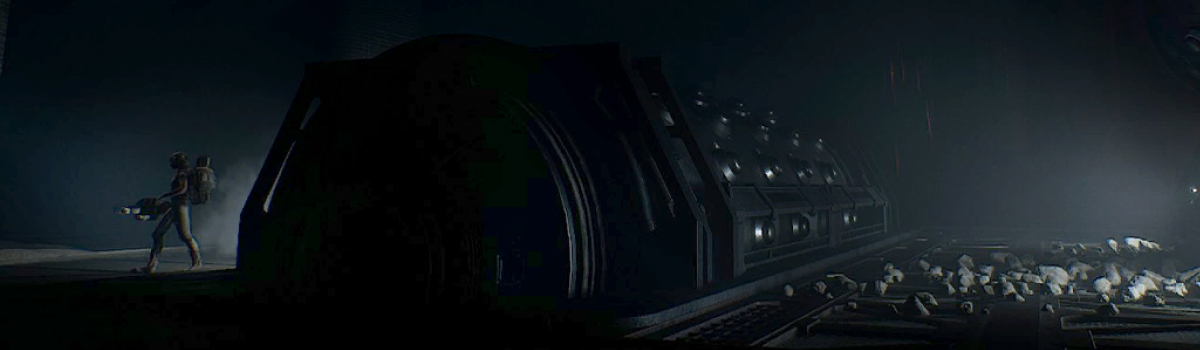
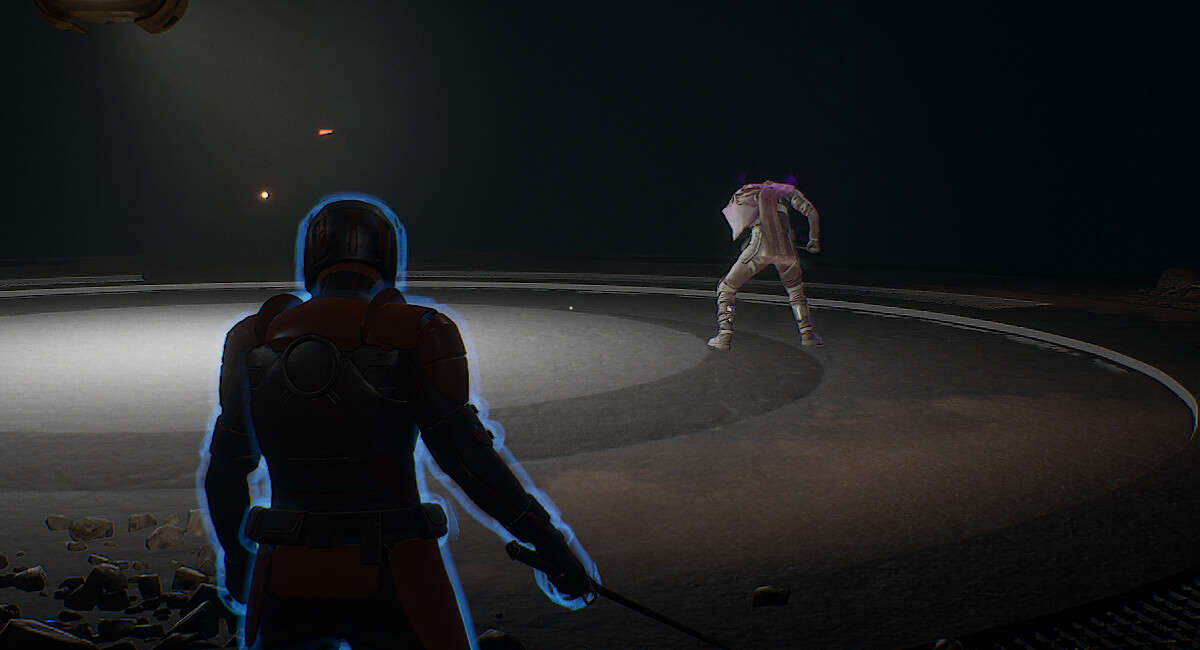
Testing Station No. 24 is the 'Dark' Bene Gesserit-themed Testing Station where you will have to navigate an environment plunged into the darkness and fight off multiple waves of enemies.
- Length: ~25-30 Minutes+
- Difficulty: Medium - Hard
- Challenge: 2x Lock-ins + Boss
Read on for a simple-to-follow walkthrough of the Testing Station, including the map/layout and detailed boss guide.
Quick Links
- Testing Station No. 24 Layout
- Testing Station No. 24 Walkthrough
- Testing Station No. 24 Boss Guide (Doctor Lemenger)
- Testing Station No. 24 Loot Table
Testing Station No. 24 Video Guide
Prefer watching rather than reading? No problem, check out our video guide below!
Testing Station No. 24 Layout
The following image shows the layout of Testing Station No. 24.
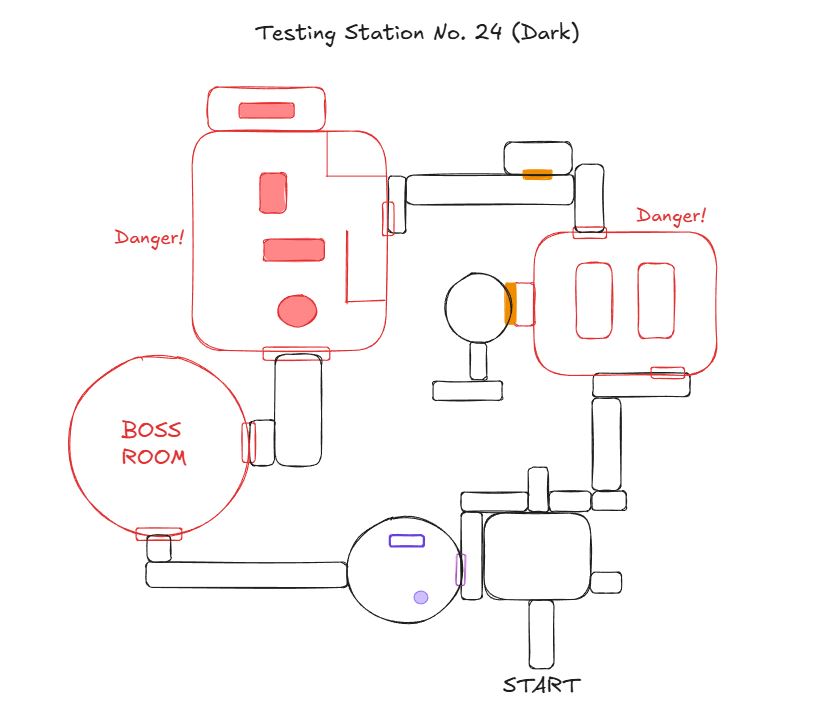
Testing Station No. 24 is a dark warren, difficult to navigate and littered with rubble, fire and quicksand. Once you've done it a few times you will get your bearings, but until then you can reference the layout above.
There are two lock-in rooms and a final boss room at the end, same as the rest of the Challenge Mode Testing Stations.
Testing Station No. 24 Walkthrough
Preparing For Testing Station No. 24
Before we begin, you'll want to ensure you come well prepared for the challenge, especially on harder difficulties.
Make sure you have:
- Personal Light (you won't be able to see anything in this Testing Station without it)
- Bandages and/or Medkits (though you can also find many inside)
- Gear that has decent durability
- Sufficient water in your Literjon to stay optimally hydrated for Stamina buff
- Cutteray for optional loot rooms
Section 1: Up To And Including First Lock-in
Head down into the first chamber with the introduction hologram and proceed straight through to the end of the room, turning right and then pressing the button to go through the door.
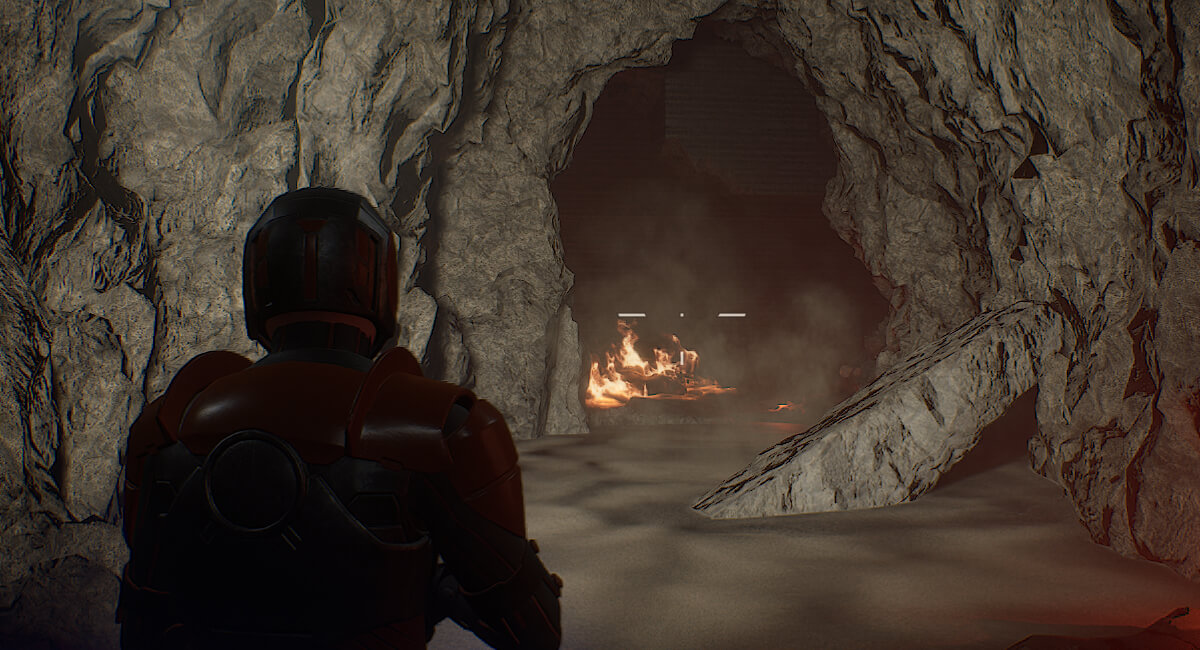
Take a left and Suspensor jump/glide over the quicksand, turning right when you reach the corridor. You've now reached the first lock-in room.
Despite the huge playing area of the room, this lock-in is actually very simple with only three small waves of enemies including a couple of heavy enemies.
There's an optional Cutteray-locked door on the left side of the room (from entry) that is worth visiting as it contains a lot of great materials. After that, proceed through the now unlocked shield door.
Section 2: Up To And Including Second Lock-in
Take a left and then Suspensor jump or glide across the large quicksand patch ahead. There's another optional Cutteray-locked door on your right here if you need the medkits, ammo or materials.
Progress down the corridor to reach the second, slightly more challenging lock-in. To spawn the first wave, you'll need to clear around 8-10 'Subies', the unarmoured melee enemies that live down here in the shadows.
After that, there will be a wave of two normal enemies and 6 Subies, then a final wave of 3-4 normal enemies. The Subies and normal enemies will engage each other if you let them.
Tip: There are explosive canisters littered around the room, but be careful as the blast radius is huge.

Progress through the unlocked shield door and through the tunnel to reach the boss room.
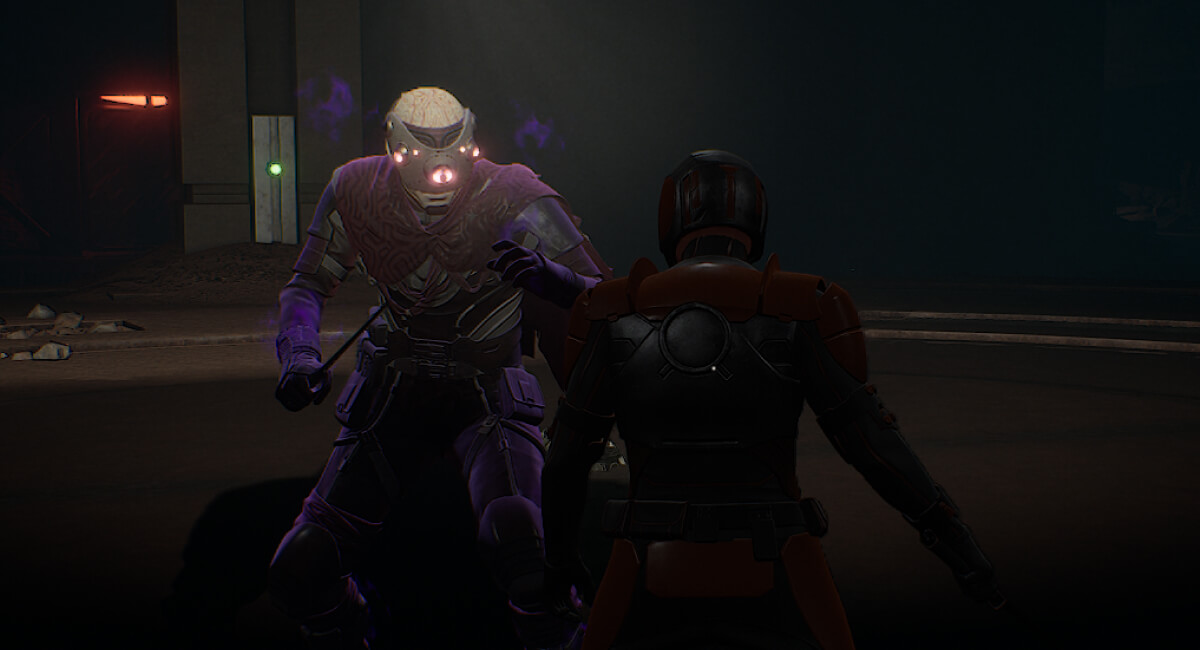
Testing Station 24 Boss Guide (Doctor Lemenger)
Overview
Lemenger has a Bene Gesserit kit and uses a short blade for fast attacks. As the boss fight is currently, we'd recommend using a shotgun or another ranged weapon like Seethe or the Regis Tripleshot Repeating Rifle that allows you to deal huge damage at close range.
For most of the fight you will want to basically backpedal, chunking him down while staying just out of range of his attacks.
Throughout the fight, Lemenger will disappear (he has two 'vanish' abilities). You can press the light switches around the room to reveal and stun him.
Phase 1: Basic Abilities
In Phase 1, Lemenger has three key abilities:
- Bindu Push
- Lemenger fires a bolt of energy in a straight line towards the target, dealing moderate damage that pierces shields.
- Alpha Strike
- Lemenger teleports behind the target, attacking immediately.
- Bindu Blast
- Lemenger deals damage in an area around him, applying a debuff to anyone caught within the blast that drains energy on dash.
This fight will be fought at close quarters so you need to stay on your guard as the cast time on Lemenger's abilities are very short. Lemenger will pair Alpha Strike and Bindu Push, to teleport right behind you and fire out a frontal ability that will kill you on higher difficulties if you get caught in it. Dash is your best friend in this fight.
Phase 2: Summon Suboids
In Phase 2, Lemenger will gain a new ability, 'Summon Suboids', teleporting away to another location of the arena and summoning two Suboids to aid him. On higher difficulties, this is where things start to get challenging.
You will want to wait until the Suboids are nearby and then hit one of the light switches that surround the room (they look like green buttons). This will stun both Lemenger and all Suboids for a few seconds, giving you time to kill the Suboids before the fight restarts.
The cooldown on the lights is quite long so you will likely get another Summon Suboids phase without the aid of the lights. Just take your time and work on killing the Suboids before turning your attention back to the boss.
Phase 3: Vanish
In Phase 3, Lemenger will gain his final ability, 'Vanish'. As it is currently, this ability is very underwhelming and can actually be beneficial. Lemenger will disappear in a puff of black smoke and then auto attack you when he reaches you, invisible, a few seconds later.
You can use this time to heal, reload, or proc an ability like Energy Capsule. Just dash away when he pops out of Vanish to attack you.
You'll also have to deal with all of Lemenger's other abilities in this Phase.
Testing Station 24 Loot Table
Congratulations on completing Testing Station No 24! Check out our Testing Station No. 24 information page for the full loot table!