
Testing Station No. 195 is one of five new 'Challenge Mode' Testing Stations to appear in Dune Awakening's Chapter 3 instalment. These Testing Stations are repeatable at increasing difficulty levels (up to 100), with higher levels awarding more powerful weapons, armor and Augmentations.
Testing Station No. 195 is the 'Poison' station where players will have to navigate through a maze of poisonous blooms while fighting the enemies within. This Testing Station has one of the most challenging and engaging boss encounters.
- Length: ~20 Minutes
- Difficulty: Hard
- Challenge: 2x Lock-ins + Boss
Read on for a simple-to-follow walkthrough of the Testing Station, including the map/layout and detailed boss guide.
Quick Links
- Testing Station No. 195 Layout
- Testing Station No. 195 Walkthrough
- Testing Station No. 195 Boss Guide (Burrbridge)
- Testing Station No. 195 Loot Table
Testing Station No. 95 Video Guide
Prefer watching rather than reading? No problem, check out our video guide below!
Testing Station No. 195 Layout
The following image shows the layout of Testing Station No. 195.
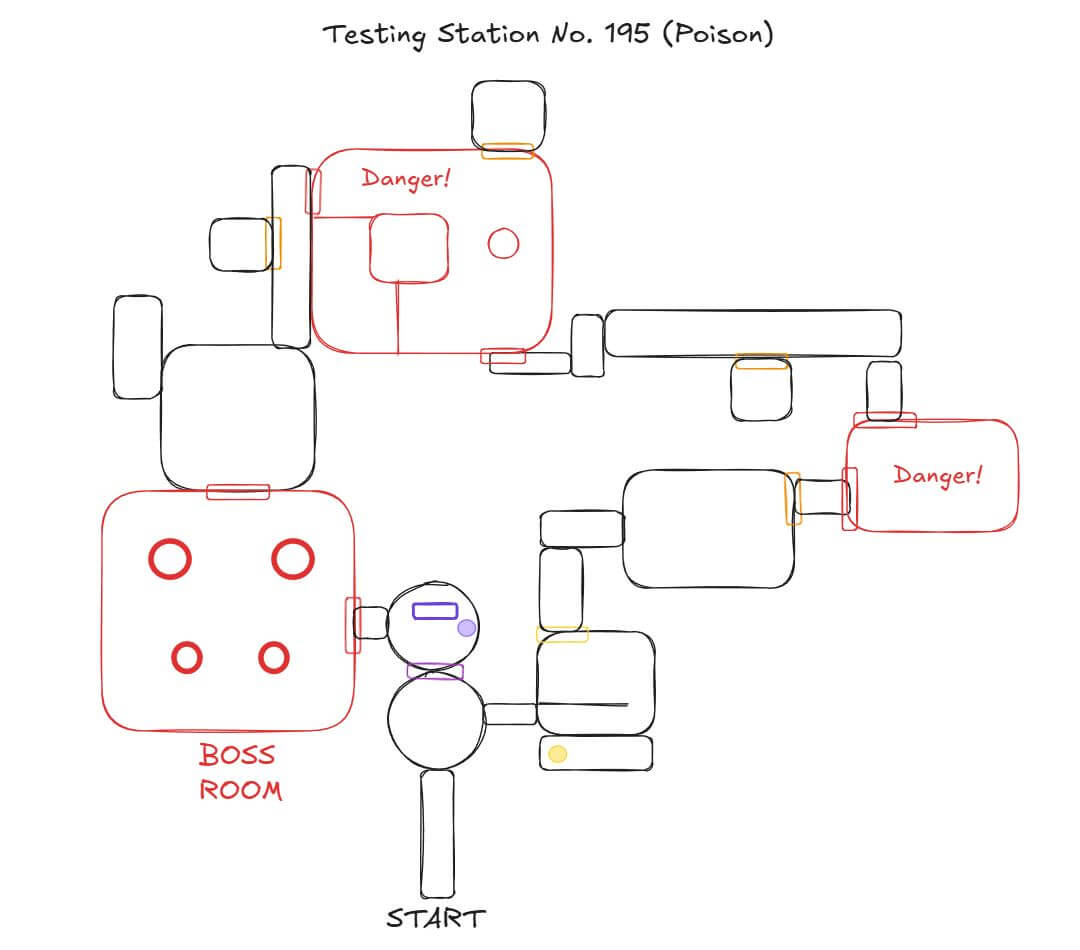
As you can see in the image above, the Testing Station has a fairly simple and linear structure with two lock-in rooms, and a final boss room.
Testing Station No. 195 Walkthrough
Preparing For Testing Station No. 195
Before we begin, you'll want to ensure you come well prepared for the challenge, especially on harder difficulties.
Make sure you have:
- Static Compactor for clearing poison
- Cutteray for locked doors
- Bandages and/or Medkits (though you can also find many inside)
- Gear that has decent durability
- Sufficient water in your Literjon to stay optimally hydrated for Stamina buff
For pushing higher difficulties and optimization also consider:
- Bene Gesserit Poison Tolerance Passive Skill
- The Forge armor set for Poison Mitigation
- Experimental Toxin Pills (only obtained by defeating the boss)
Note: none of these are required as you can pretty much entirely avoid becoming poisoned.
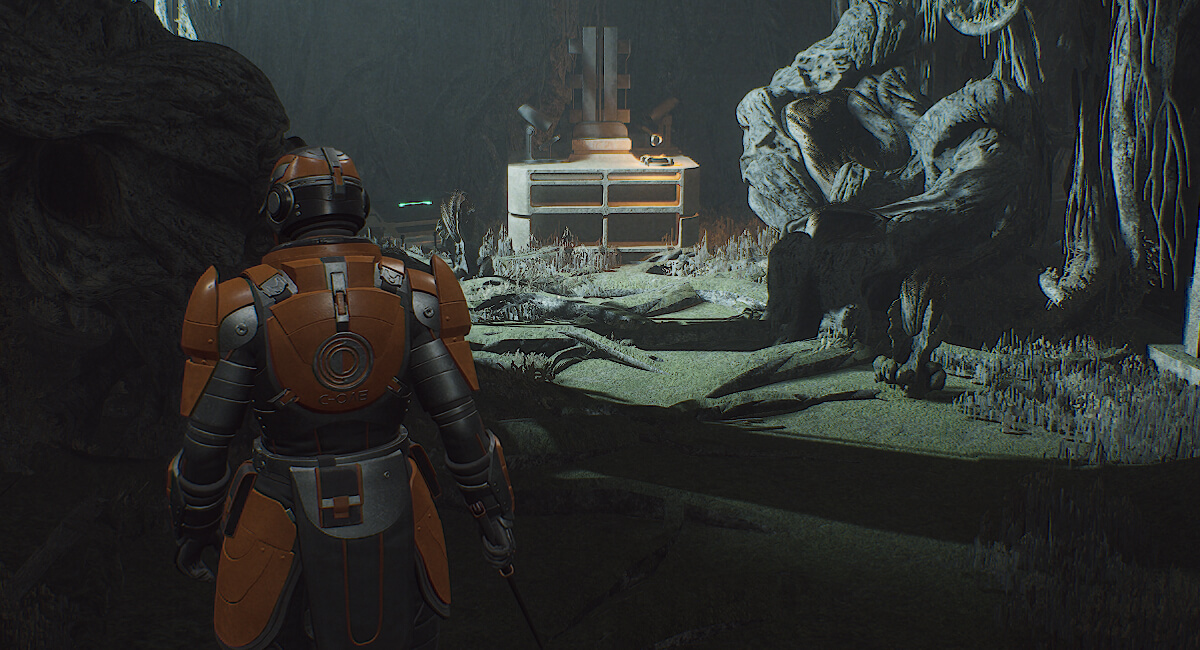
Section 1: Up To And Including First Lock-in
Head down through the entrance and then make your way down the corridor on the right, slicing through the webs blocking the way until you enter the first room with two enemies.
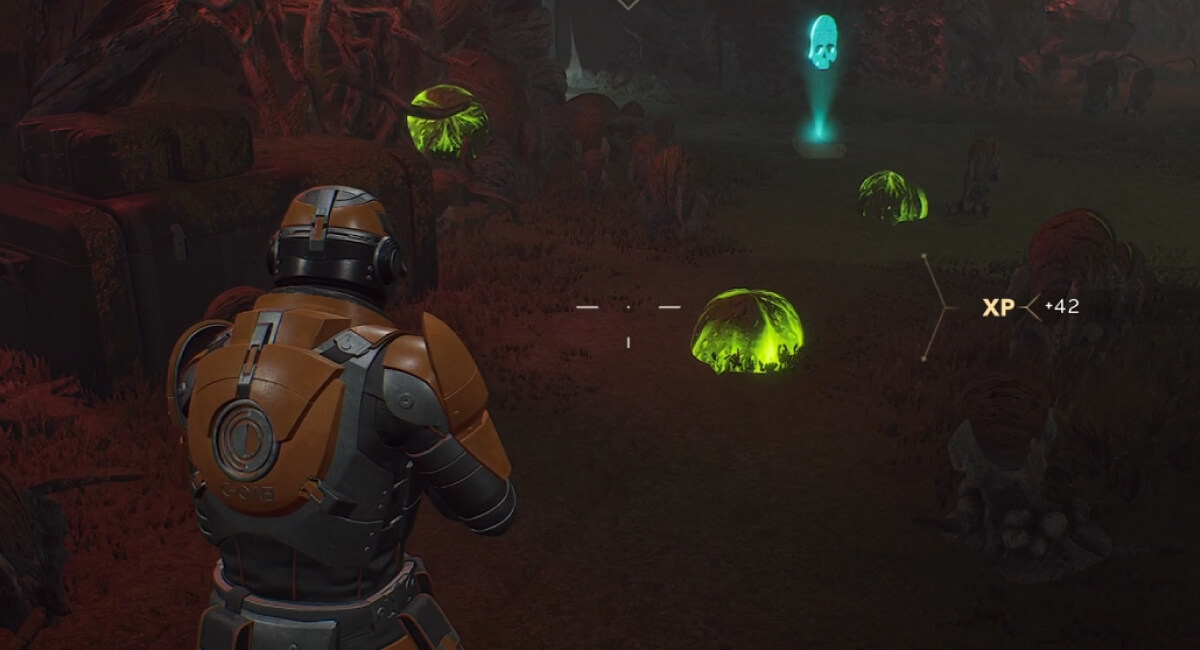
Clear the enemies and then grab the Yellow ID Band which is at the back of the room, behind the stairs. Be quick to avoid becoming Poisoned by the poisonous blooms that will erupt when you grab it.
Continue through the Yellow-locked shield door, through the webs and you'll enter a room with a locked door that you will need to Cutteray through. There's a bunch of poisonous blooms around the door so you can either pop them and wait for the poison to go away or use your Static Compactor to clear them.
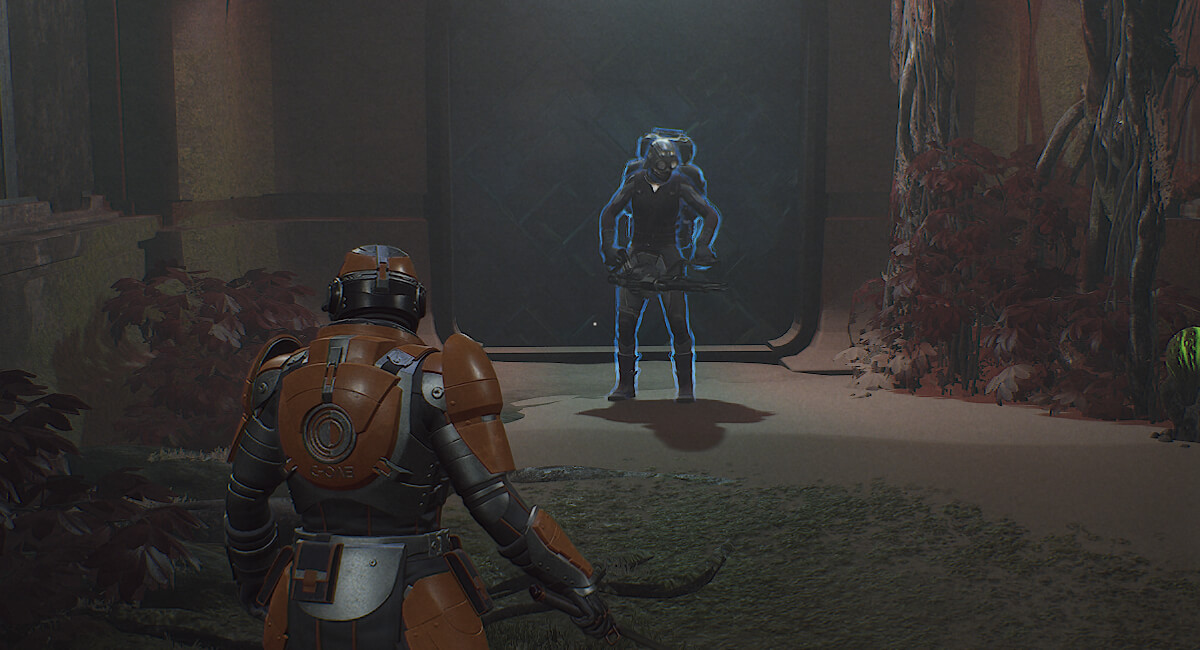
Head through to the first lock-in. This is a very simple lock-in room with only 6 enemies, three sets of one melee and one unshielded trooper. Clear the three waves and then progress on.
Section 2: Up To And Including Second Lock-in
As you head through the corridor, you'll notice a locked door on your left that you can Cutteray through. It contains pretty good materials so is worth the stop.
After that, just head through to the next Lock-in directly ahead. This lock-in is slightly harder, with eight enemies total including two heavy machine-gun enemies.
We advise that you camp in front of the spawn location that is to your right as you enter the room. The heavy enemy will always spawn there so you will get a chance to kill them before the other two ads reach you.
There's another optional loot room (Cutteray-locked) directly opposite the door you entered from. Otherwise, head on through the unlocked door at the top of the stairs and you'll enter the final room with two enemies, before the boss room.
Testing Station 195 Boss Guide (Burrbridge)
Overview
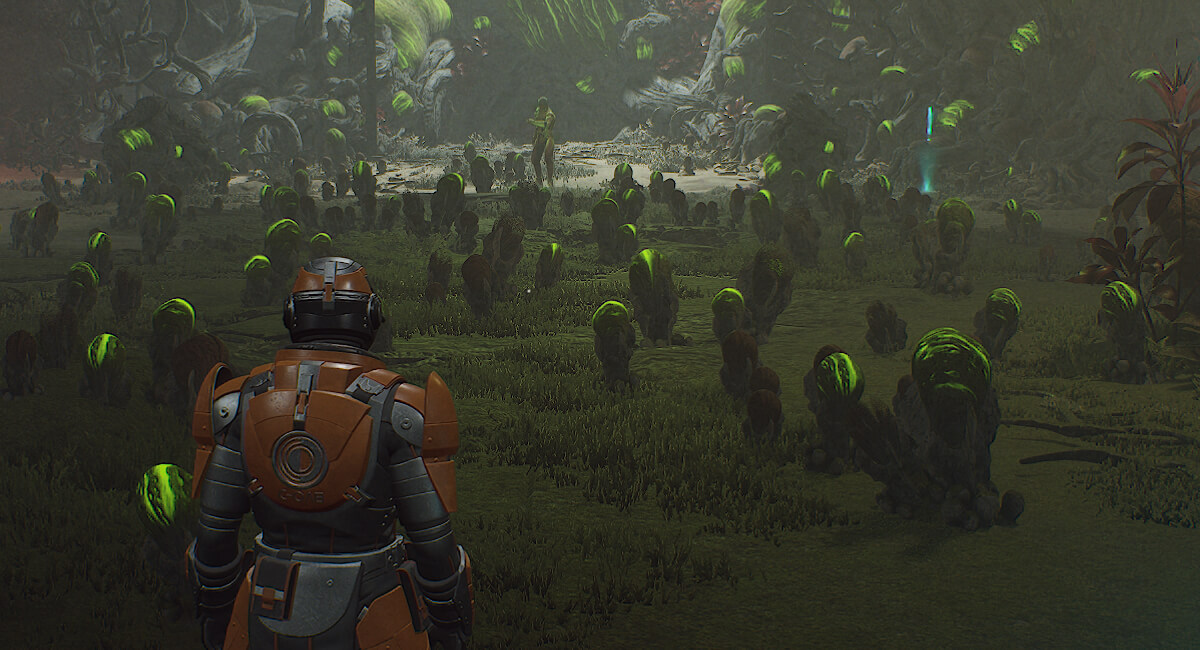
Burrbridge is definitely one of the more challenging bosses, mostly because of the challenging environment.
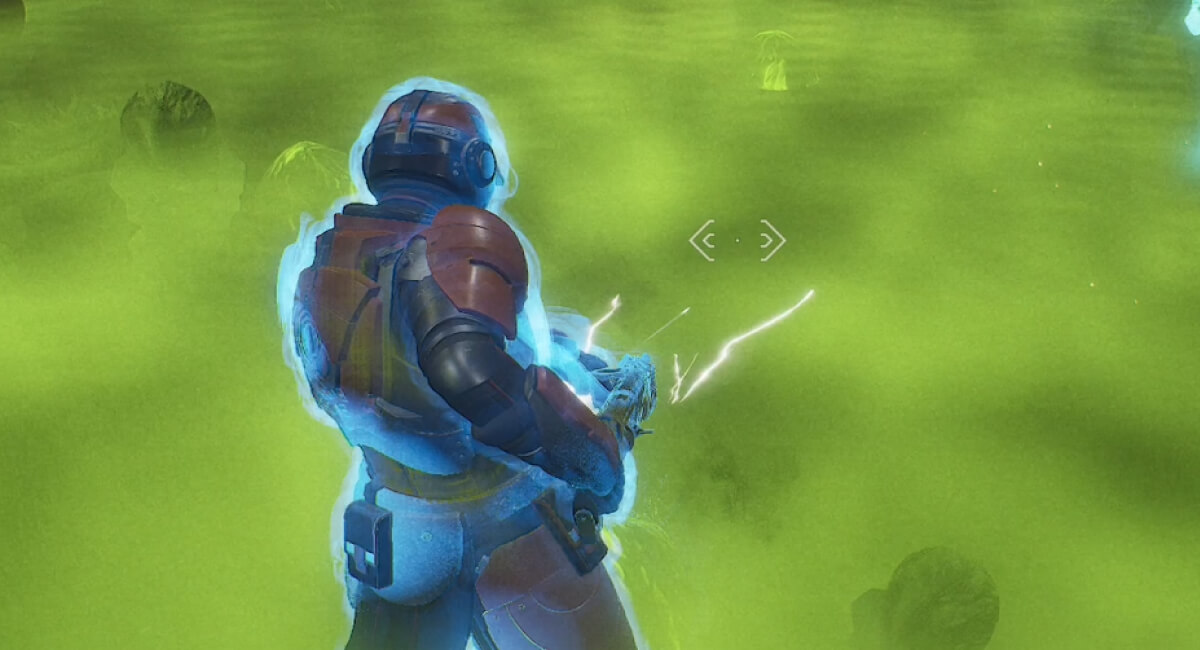
The entire boss room is littered with poisonous blooms/spores that will trigger if you get close, popping after 1 second or so. If you are caught in the blast you will take a chunk of damage that goes straight through your shield and also be staggered. These spores continue to respawn throughout the encounter so you have to continue moving carefully through this minefield.
All of the toxin/poison in this encounter deals high damage so if you become poisoned then you have to try and bandage/heal fast. Bandages & medkits remove poison on use.
Phase 1: Basic Abilities
Phase 1 is a pretty relaxed introduction to the encounter without any adds or difficult boss abilities.
Burrbridge is a Swordmaster-style boss with Swordmaster abilities including Knee Charge and Eye of The Storm. All of his abilities can be dodged but they have a short cast time so you will need to be quick.
This is one of the boss encounters where melee is viable, but ranged is still easier.
We recommend doing a couple of laps of the room, clearing out all of the poisonous spores/blooms before engaging the boss. This will give you way more room to play with and he won't spawn them again until Phase 3.
Phase 2: Add + Single Mines
The boss will move to the back of the room for the intermission and a shielded melee add will spawn at the right side of the room (when facing from the entrance). Try and kill this add as quickly as possible after it spawns.
The boss will gain a new ability in Phase 2, the ability to throw 'Poison Mines' at you. These are large green globules that trigger in the same way as the spores do. However, if you do not move when they are thrown at you then they can trigger instantly, dealing huge damage through shields.
In Phase 2 he only throws one at a time so they are pretty easy to dodge. Just be careful because they remain on the ground. Push the boss to Phase 3.
Phase 3: Add + Cluster Mines
Phase 3 is mostly the same as Phase 2, however in this Phase Burrbridge will throw 3x Poison Mines instead of 1x and he will also regrow all of the poisonous spores in the room every now and again.
Dispatch of the melee enemy as soon as possible then return to Burrbridge, being careful to avoid triggering any of the Poison Mines he throws at you.
Phase 4: Add + Poison Nova
Finally we get to the real challenge of the encounter, Phase 4. As soon as Phase 4 starts, Burrbridge will cast Poison Nova, covering the entire outer edge of the playable area in a noxious cloud which rapidly applies stacks of Poison.
The good news is that the middle of the arena is safe, other than the toxic spores. Again, we recommend you do a couple of laps of the area to pop all of the active spores before turning your attention back to the boss.
This Phase can be tricky because you have much less room to work with but just focus on taking shots at Burrbridge when you can, dodge his Knee Charge and be patient.
Testing Station 195 Loot Table
Congratulations on completing Testing Station No 195! Check out our Testing Station No. 195 information page for the full loot table!