Testing Station No. 152 is one of five new 'Challenge Mode' Testing Stations to appear in Dune Awakening's Chapter 3 instalment. These Testing Stations are repeatable at increasing difficulty levels (up to 100), with higher levels awarding more powerful weapons, armor and Augmentations.
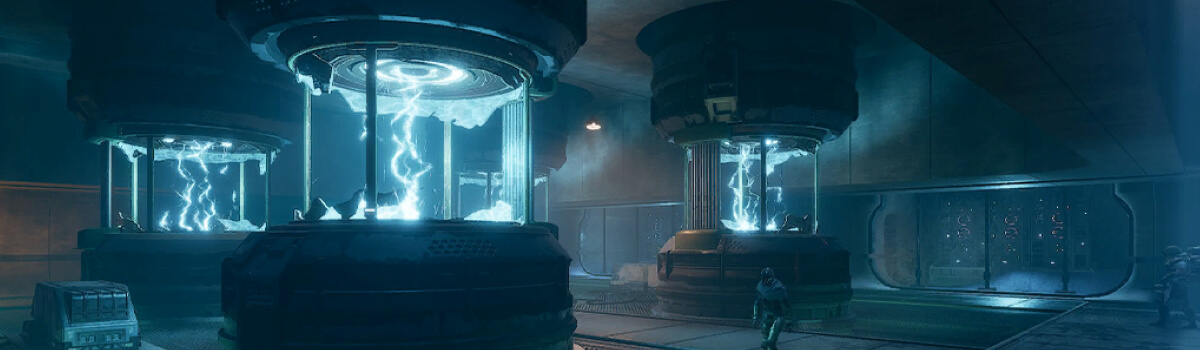
Testing Station No. 152 is the 'Lightning/Electric' station and players will be required to navigate various electric traps, culminating in a challenging boss fight. This Testing Station is one of the two easiest Testing Stations along the 136 (Fire) as there are no adds and once you lock down the pattern, the boss becomes very manageable.
- Length: ~15-20 Minutes
- Difficulty: Easy - Medium
- Challenge: 2x Easy Lock-ins, 1x Boss
Read on for a simple-to-follow walkthrough of the Testing Station, including the map/layout and detailed boss guide.
Quick Links
- Testing Station No. 152 Video Guide
- Testing Station No. 152 Layout
- Testing Station No. 152 Walkthrough
- Testing Station No. 152 Boss Guide
- Testing Station No. 152 Loot Table
Testing Station No. 152 Video Guide
Prefer watching rather than reading? No problem, check out our video guide below!
Testing Station No. 152 Layout
The following image shows the layout of Testing Station No. 152.
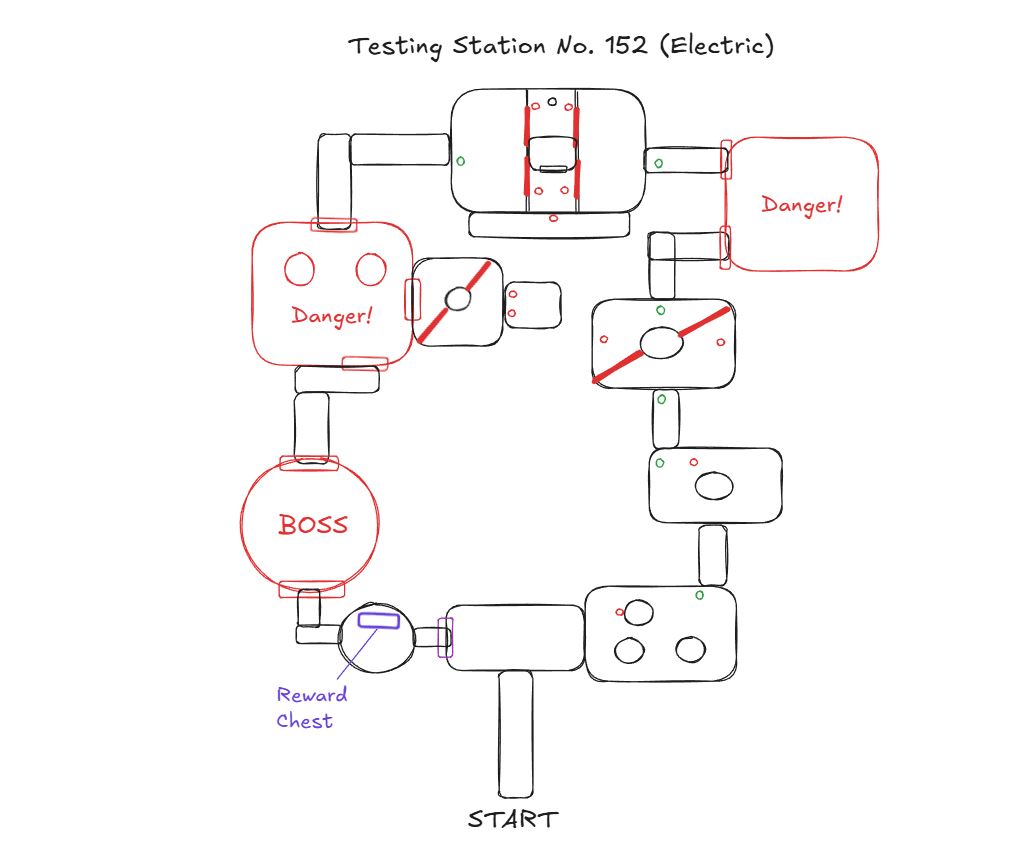
As you can see from the map, there are two 'Lock-in' rooms, a few trap rooms to navigate and then a final boss room. We'll go through each of these below.
Testing Station No. 152 Walkthrough
Preparing For Testing Station No. 152
Before we begin, you'll want to ensure you come well prepared for the challenge, especially on harder difficulties.
Make sure you have:
- Bandages and/or Medkits (though you can also find many inside)
- Gear that has decent durability
- Sufficient water in your Literjon to stay optimally hydrated for Stamina buff
Section 1: Up To And Including The First Lock-in
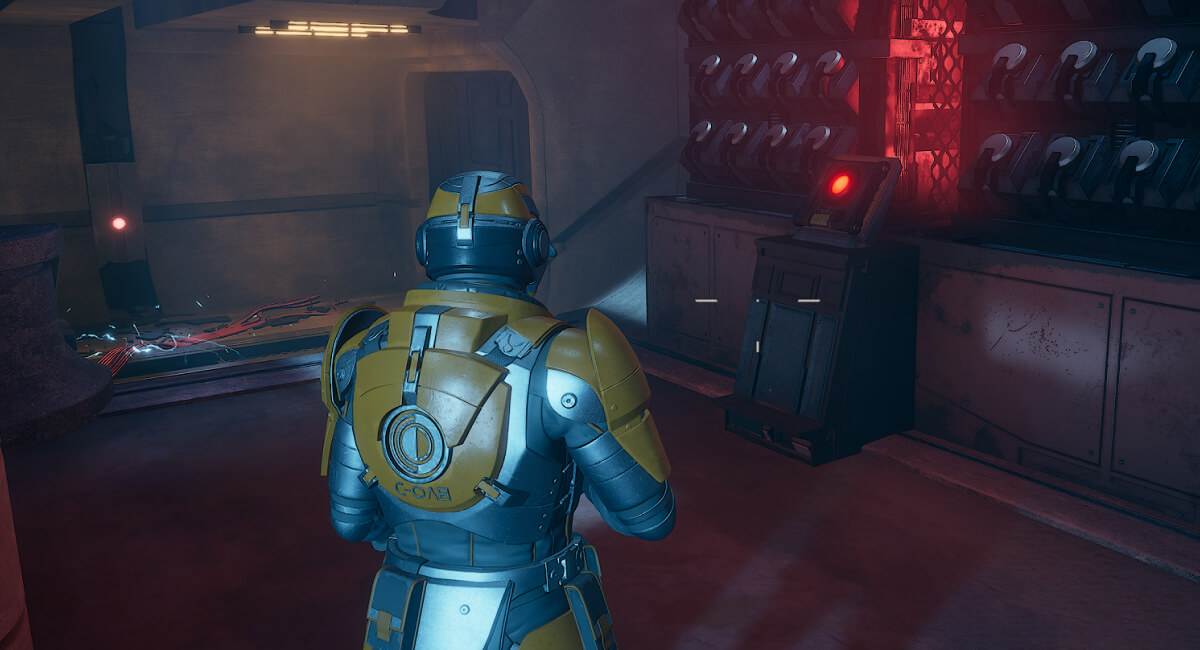
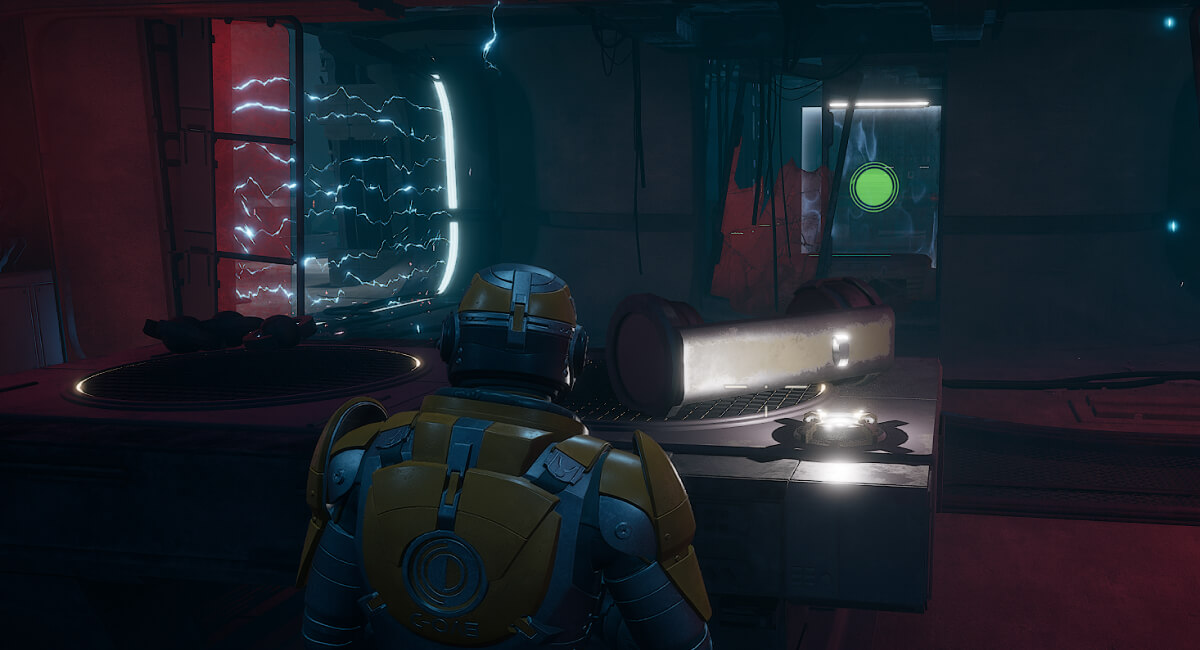
Head into the Testing Station and attune to the palm lock, selecting your preferred difficulty. Head down the stairs and through the first room into the second room, where you'll find the next door blocked by an electric current on the ground. To disable the current, hit the red button at the back of the room, shown in the image below.
Progress through to reach the first circular 'trap' room where you'll find rotating pillar shooting out electric bolts. You have to hit the two red buttons on each side of the room before you can open the door at the opposite end. To do this, just wait until the electric bolts pass the door then follow them, using your suspensor belt to jump over the electric currents on the floor.
Once you've done that, you'll reach the first lock-in room. This is one of the easier lock-in rooms with only 3 waves of 2 enemies (assuming you are solo, the numbers will scale with group size). Each wave contains one ranged and one melee enemy. Clear the waves and progress onwards.
Section 2: Puzzle Room
The next room you will enter will be the puzzle room where you'll find four electric 'gates'. These are represented in the image below.
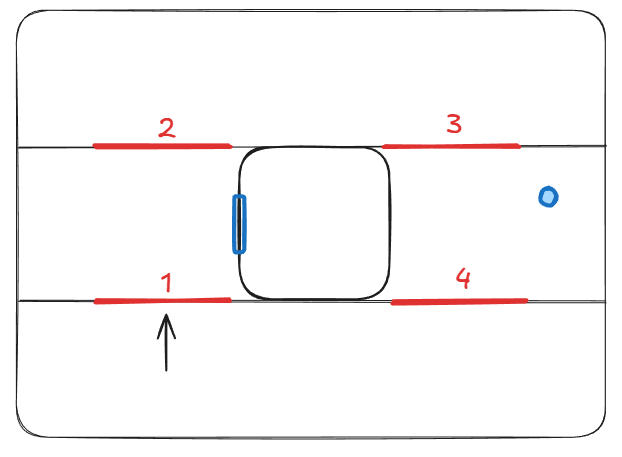
Gate 1 and 3 will occasionally disable and allow you to walk through.
Optional Loot: There's an optional loot room in the middle. To reach this, wait for Gate 1 to disable, then enter through and disable Gate 2 using the red button. Wait for Gate 3 to disable and then run through and grab the White ID Band on the table. Disable Gate 4 and run back through to the start. Wait for Gate 1 to disable and then enter the locked room on your right.
To progress, pass through Gate 2 and you'll find a set of stairs at the back end of the room on your left. Follow them up until you reach a red button that will disable the electricity for the central unit in the main room. Now you have to head back to the start of the room (through Gate 3 and then Gate 4) and climb or suspensor jump up onto the upper level (shown in the image below). Run around to the other side and hit the red button to disable the electric current blocking the door at the end of the room.
Progress through.
Section 3: Second Lock-in Up To Boss Room
You've now reached the second lock-in room which is slightly harder than the first but still easy given the low number of enemies you will encounter. You'll fight two enemies initially, then another wave of two enemies and a final wave of three enemies. The wave of three will contain one melee, one trooper/ranged and one machine-gun heavy. Clear them out and you'll notice you unlock two doors.
The door on your left will lead to another circular trap room, similar to the one you navigated earlier. You'll have to follow the rotating unit as it passes and reach the room on the opposite side where you can then disable the currents with two red buttons. There's only one small loot chest in there and some ammo etc so it's not a big deal to skip it.
Finally, head through the now unlocked door to reach the boss room where the real challenge begins.
Testing Station 152 Boss Guide (Planetologist Takulki)
Planetologist Takulki is a boss that is one of the easier bosses to tackle, especially at lower difficulty levels. He has four phases that we will break down below.
Throughout all phases, Planetologist Takulki attacks will be the same - slow, charged pistol shots that you can both predict and dodge easily by continuously moving. The real challenge comes from navigating the electric traps which increase in intensity with each phase.
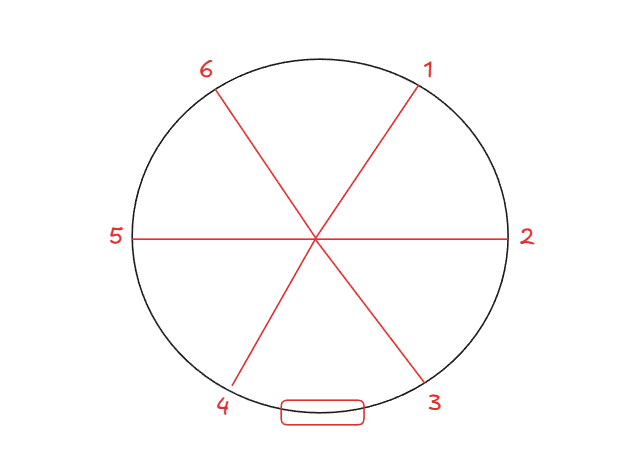
It's easiest to think about this boss room as a pizza split into six equal slices, split by the columns of lightning conduits that you see along the walls. This is illustrated in the image below:
Phase 1: Static Lines
Phase 1 is very simple. Electric bolts will rotate around the room in straight lines between conduits, rotating from one conduit to the next. Electric bolts will then descend vertically from the the top set of conduits, to the middle set to the bottom set, twice.
That means that you can think about it simply as 6 rotating electric bolts and then 6 vertical bolts. As these are straight lines, you can avoid them fairly easily.
Phase 2: Rotating Lines
Phase 2 is similar to Phase 1 with two key changes:
- The pattern reduces to 3 rotating and 3 vertical
- The conduits on the outside of the room begin rotating themselves.
It's still easy enough to follow around and avoid the lines.
Phase 3: Static Sections
Phase 3 is where things start to get challenging. A pillar will drop from the centre of the room and from now on, instead of lines of electric bolts, entire sections of the room will become electrified.
The good news is that the pattern is quite simple and is illustrated in the image below.
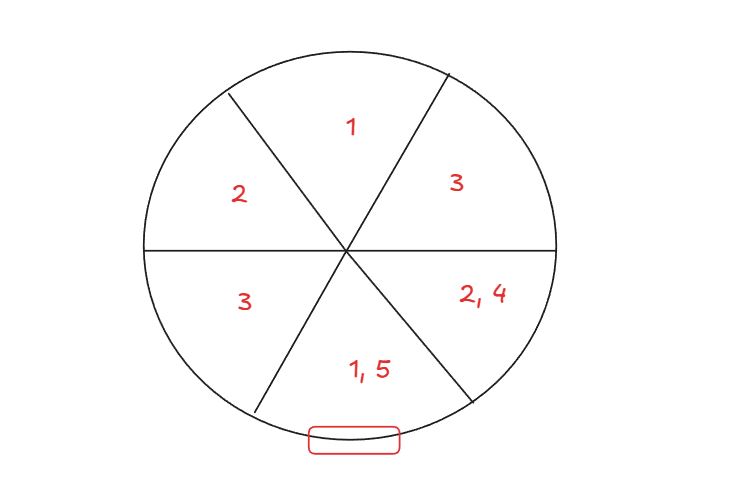
The sections that become electrified will always be opposite each other, leaving a lot of space to dodge them. The sections will rotate counter-clockwise twice from the start, and then clockwise on the fourth and fifth strike, as indicated in the image above.
After five sections have been electrified, it will move to a vertical rotation, again starting from the top, then going to the middle and finally the bottom. When it reaches the bottom, you have to suspensor jump and stay suspended until the lightning clears.
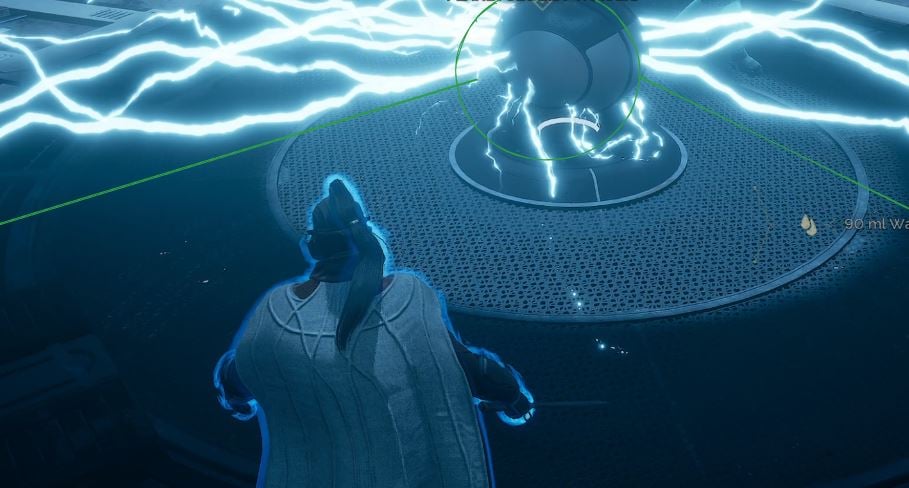
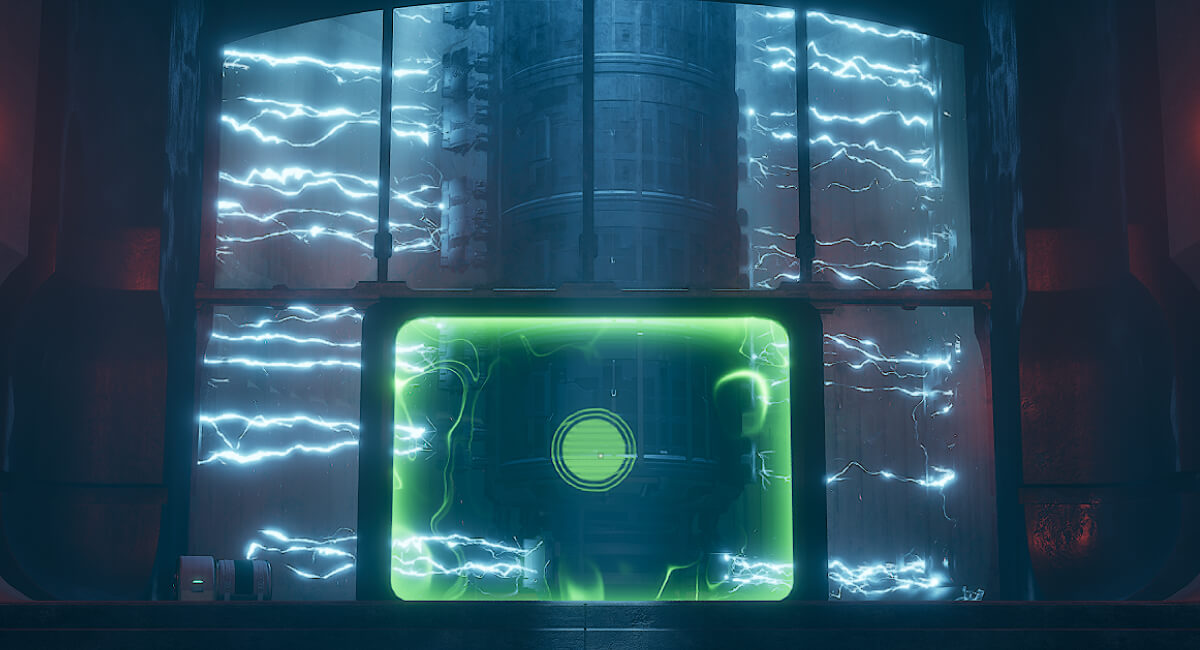
The good news is that in both Phase 3, and Phase 4, there is a safe zone! At the start of every 'ground' rotation, as long as you are standing in front of the circular pattern on the orb in the middle of the room, you'll be safe from the first strike. This is shown in the image above.
Finally, when we consider the shape of the lightning, we can see that it arcs out to fill the sector. This means that it's much wider at the outside of the room than it is near the middle. For this reason, you will mostly want to stay close to the centre for Phase 3.

You can see this illustrated in the image above. Staying in the green area will allow to dodge the lightning much more easily. In Phase 3, you know that any area that's just been hit by lightning is safe from the next hit.
In Phase 3 and Phase 4, you are going to do most of your damage when the lightning is coming down from the top.
Phase 4: Rotating Sections
Phase 4 is, as you would expect, the hardest. It is very similar to Phase 3 except for the following:
- The pattern reduces to 3 rotating and 4 vertical (striking twice at the bottom each time)
- The conduits on the outside of the room begin rotating.
The pattern is similar to Phase 3 in that it will rotate twice counter-clockwise from the initial section, but this time it won't then revert to clockwise, it will go immediately to vertical. Make sure you suspensor jump twice for the bottom repeat.
In Phase 4, the safe zone will be the same as in Phase 3, stand in front of the circular pattern on the orb.
You'll want to get in as much damage as possible when the vertical rotation starts, since you know you have a good few seconds before it will reach the bottom.
Testing Station 152 Loot Table
Congratulations on completing Testing Station No 152! Check out our Testing Station No. 152 information page for the full loot table!