The Duskwood Hill Ruins puzzle in Crimson Desert is a geometric logic challenge that requires specific skills to initiate. Located in the northern Witchwoods, solving this puzzle rewards you with an Abyss Artifact.
This puzzle is fairly hard to do if you go into it blind; however, read on to learn how to navigate it easily.
Critical Update: Bug Prevention
Save your game before starting. If you leave the area mid-puzzle, the vines may bug out and fail to respawn, making the pillars non-functional. If this happens, reload your manual save to reset the mechanism.
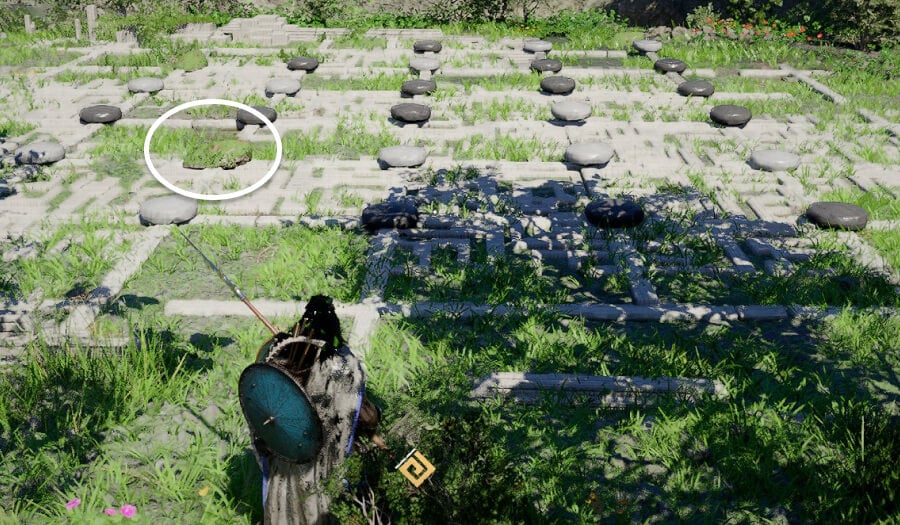
Note: There are a few Duskwood Puzzles. If you are on the one that looks like a "checkers" board, then you are actually at the "Duskwood Riverside" puzzle. We'll give you the solution to that before we move on to the Ruins puzzle.
Remove the grass "crabs" from the board so they run away. Go to the Abyss fragment pedestal and loot the small white stone on the floor. Place that in the missing spot in the puzzle to complete it. This is shown above with the white circle. This puzzle is located directly north of the Duskwood Hill Ruins puzzle along the river (around 500m away)
Duskwood Hill Ruins Location
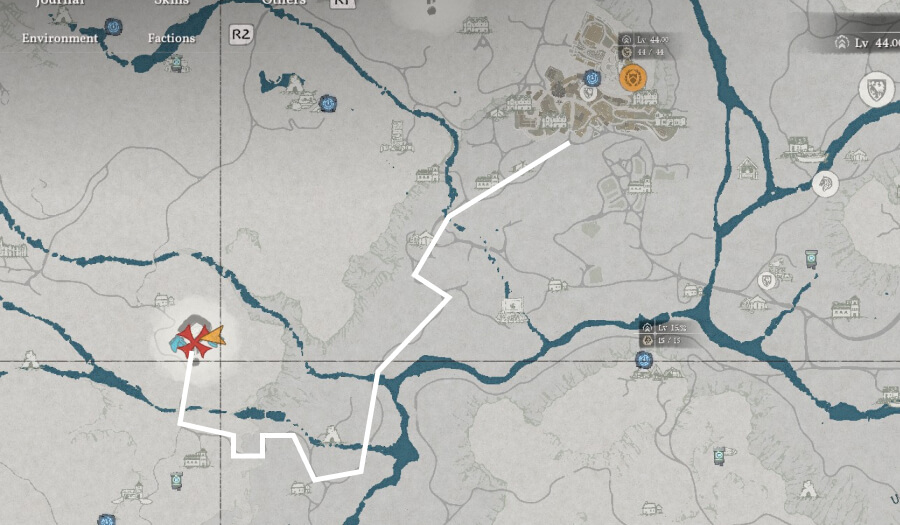
- Region: Northern Witchwoods, Hernand
- Coordinates: Approximately 700m South West of Hernand City
- Nav Route: Exit Hernand via the Western road, follow the road north alongside the river to your west. Once the road hits a bridge to cross the river, take that south, then head west into the forest, and you will see the large "?" on your map
Requirements & Recommended Skills
To interact with this puzzle, you must have the following skills unlocked in your talent tree:
- Blinding Flash: Used to clear environmental obstacles
- Stab Skill: Used to Stab the central mechanism, allowing you to rotate it
Phase 1: Clearing the Corruption
Before the mechanism moves, you must remove the "creepers" (vines) clinging to the five stone pillars and the central device.
- The Trick: Use Focus Light during a Blinding Flash while the sun is out
- Result: This creates a hotspot that ignites the vines, clearing the path for your sword
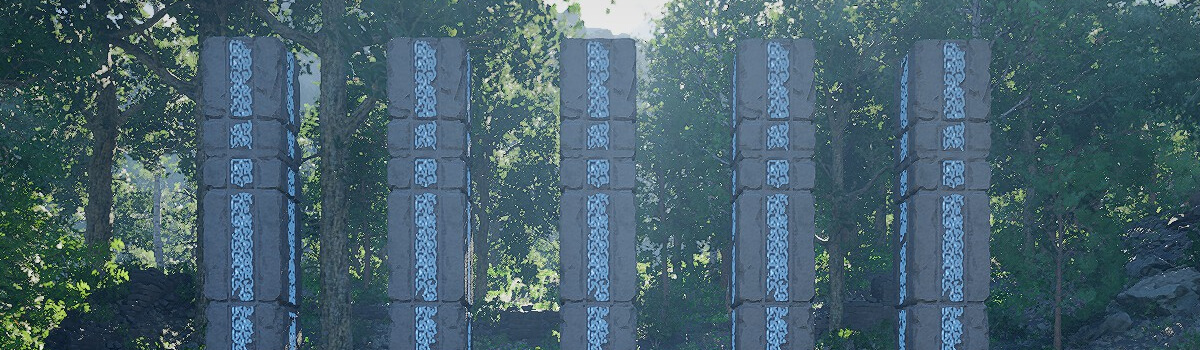
Phase 2: Solving the Pillar Logic
The goal is to make all five pillars reach the same height. The central device has four slots (holes). Inserting your sword into a slot raises specific pillars by half a block.
The Layout Map
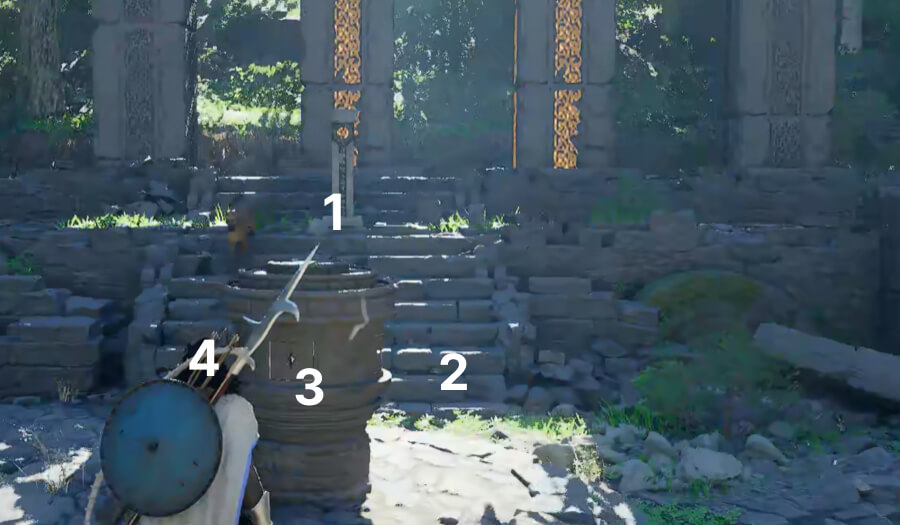
The left image is the Holes - the right image is the Pillars
To follow this solution, imagine the central device as a clock:
- Hole 1: Facing closest to the pillars - turns pillar 2 & 4 (we won't use this one)
- Hole 2: Right side (Clockwise) - turns pillars 2 & 5
- Hole 3: Facing furthest away from the pillars - turns pillars 3, 4 & 5
- Hole 4: Left side - turns pillars 2, 3 & 4
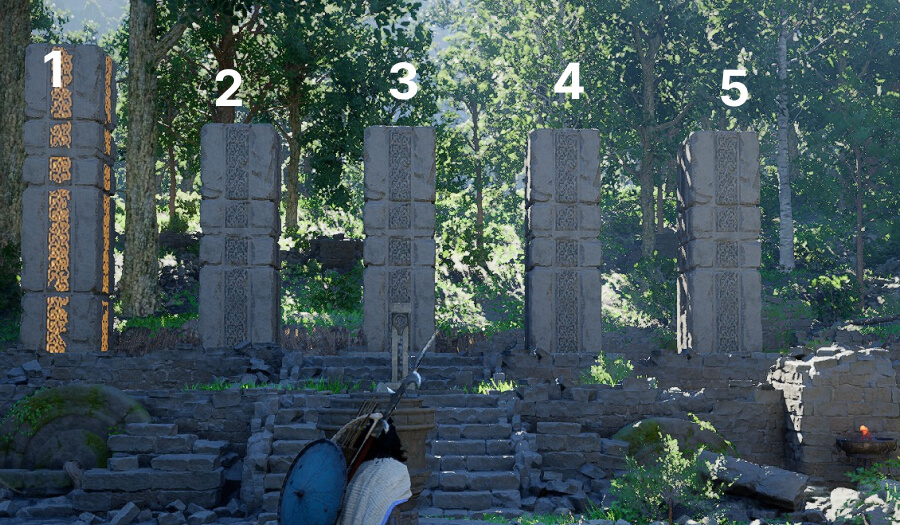
The pillars are numbered 1 to 5, from Left to Right.
The 3-Step Winning Sequence
If you haven't touched the puzzle yet, perform these actions in order: The images under each entry show what it should look like.
-
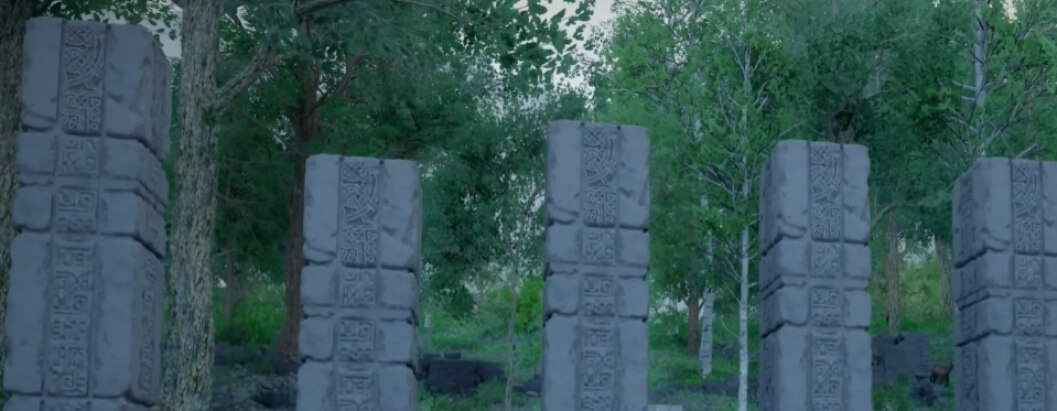
Stab Hole 3: (Raises pillars 3, 4, and 5) - Turn it half a segment clockwise
-
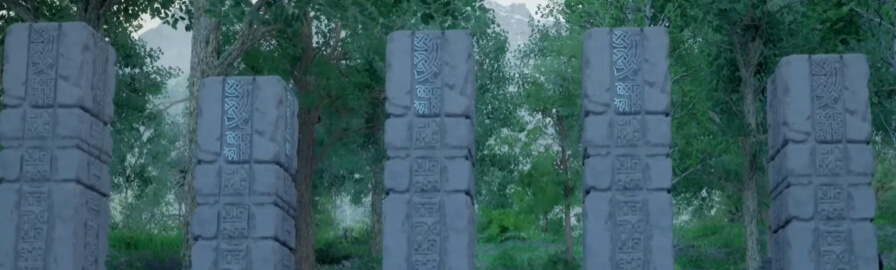
Stab Hole 4: (Raises pillars 2, 3, and 4) - Turn it half a segment clockwise
-
Stab Hole 2: (Raises pillars 2 and 4) - Turn it half a segment clockwise
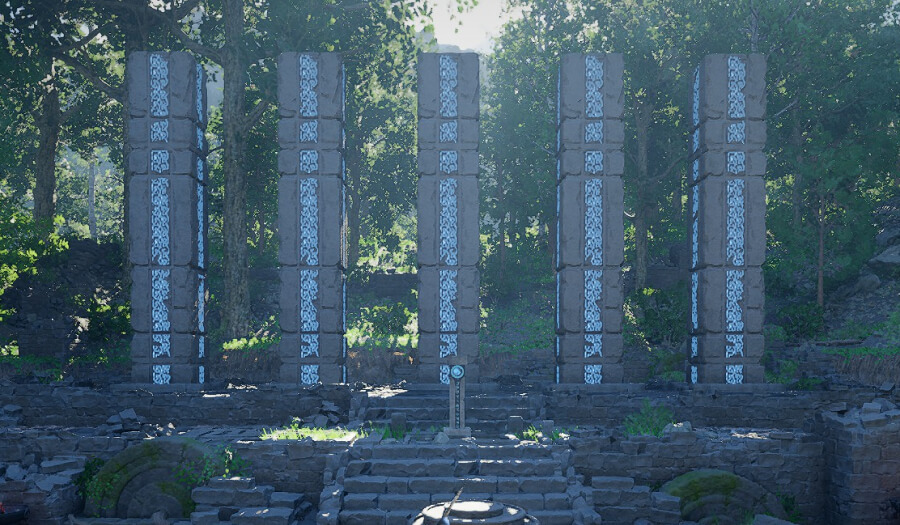
Once the third stab is complete, all pillars will align, and the seal will break.
This puzzle is a bit fiddly but just check in with each of the images above after each action to make sure you're on the right track.
Duskwood Hill Ruins Puzzle Rewards
Successfully aligning the pillars grants the following:
-
Abyss Cresset: Collect this to obtain your Abyss Artifact