Raid Setup
Introduction
Welcome to our Mythic Fallen-King Salhadaar Boss Guide, for The Voidspire Raid. Learn about the Mythic specific fight mechanics and the strategy we recommend to defeat this boss on Mythic difficulty!
This guide focuses on a Mythic strategy, and won’t explain the basics of the fight, so make sure you read through the Heroic version of the guide for this boss if you are unfamiliar with the encounter.
Fight Style: Heavy Cleave Fight
Recommended Setup: 2x Tank / 4x Healer / 14x DPS
Required utilities: None
Hero/Lust usage: On Pull
Addons: Northern Sky Raid Tools
Easy Mode
Same script as Heroic, but Mythic punishes mistakes harder and you have a tight enrage if you lose people.
Enduring Void:
- Killed orbs come back during every Void Convergence with less HP.
- They still wipe you if they reach the boss.
- Tanks should kite so orb deaths are stacked, so the reactivated orbs are stacked for AoE.
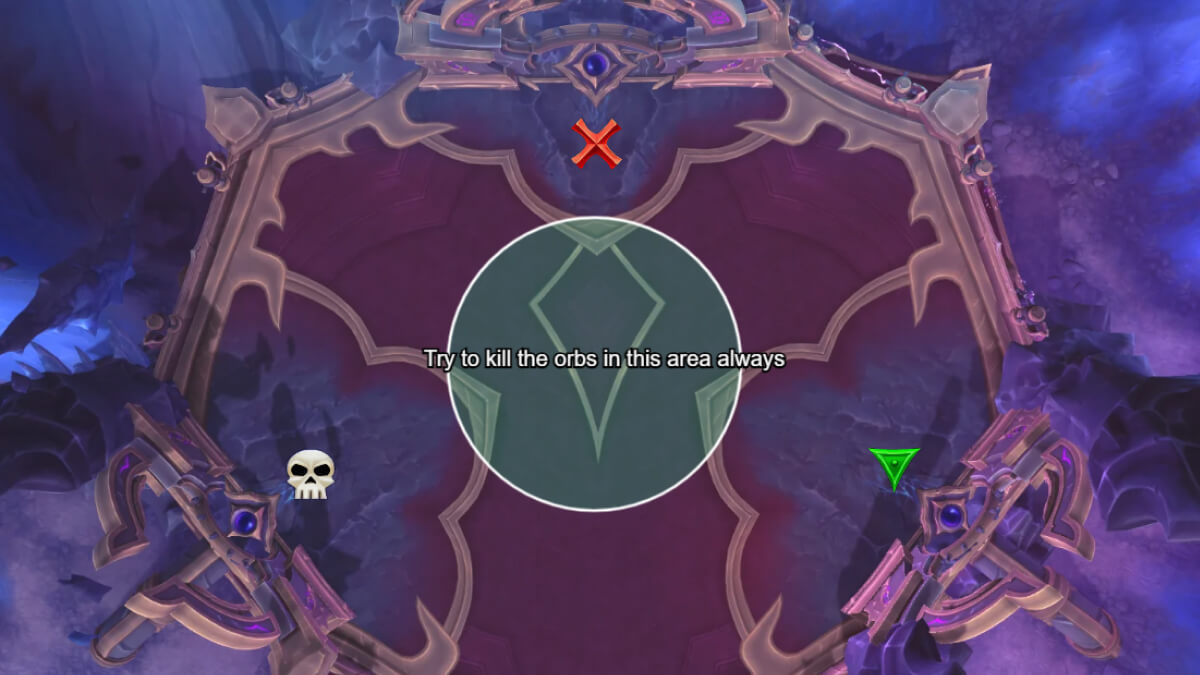
Orb kill rule still matters:
- New Concentrated Void orbs still give Dark Radiation when killed.
- Kill one orb, wait for Dark Radiation to drop, then kill the second.
- Do not double-kill orbs unless you want to delete your raid (wait for debuff to drop).
Shattering Twilight danger window:
- Boss is not movable for a few seconds during Shattering Twilight.
- Make sure there is distance between boss and nearest orb before this happens, or an orb will reach him while he’s planted and you wipe.
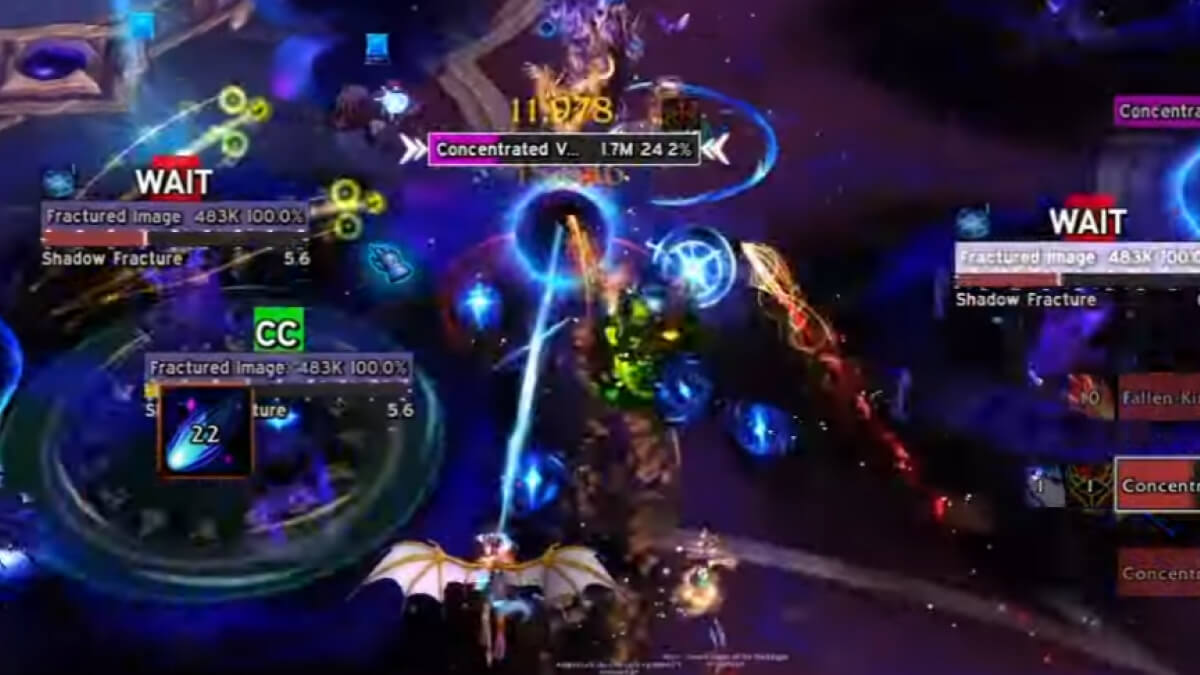
Fractured Images and Nexus Shield:
- Some Images spawn with Nexus Shield and cannot be interrupted.
- You must interrupt other Images first to remove the shield, so kicks have a required order.
- If even one Image finishes its cast, you wipe. This is not a “we got a puddle” situation anymore.
Entropic Unraveling and enrage:
- Entropic Unraveling hurts, plan healer cooldowns.
- Boss enrages after the third Unraveling, so kill by the third cast, ideally during the last burn window.
Mechanics
Enduring Void
Destroyed Concentrated Void orbs return during each Void Convergence, coming back with less HP.
They still follow the boss, and they still trigger a wipe if they reach him, so you now have to deal with “new” orbs and “previously killed” orbs every wave.
Some Fractured Images spawn with Nexus Shield, which prevents them from being interrupted.
Interrupting other Images removes the shield, meaning you have to kick the Images in a specific order instead of just mashing interrupts on whatever is closest.
Strategy
This fight is a noticeable step up compared to the previous bosses. On Heroic you could get away with a bit of chaos and still recover. On Mythic, if you start losing players early, you’ll very quickly feel the tight enrage.
The overall flow is still the same as Heroic. You’re still doing orbs, you’re still handling Shattering Twilight, you’re still doing Entropic Unraveling at 100 energy. The difference is that two Mythic mechanics make mistakes a lot more punishing, and they also force cleaner planning from your tanks and interrupt team.
Enduring Void Changes How you Move the Boss
The main Mythic mechanic is Enduring Void.
Any Concentrated Void orb you destroy doesn’t just “go away.” It becomes inactive where it died, and then it reactivates during every future Void Convergence cast. These reactivated orbs come back with less HP, but they still do the same important thing: if they reach the boss, you wipe.
So on Mythic, every orb wave is basically two problems at once:
- The two new orbs spawning from the gates
- The old orbs waking back up and joining the wave again
A really important note here, killing Enduring orbs does not add extra raid debuffs. The raid debuff pressure still comes from the normal orb kills through Dark Radiation, so you still need to respect the timing between killing the first and second orb.
Orb rule is still the same as Heroic:
- Kill one orb
- Wait for Dark Radiation to fall off
- Then kill the second orb
If you ignore this and kill both too close together, you’re going to turn a “stable pull” into “why is everyone dead?” instantly.
Because Enduring Void keeps bringing back old orbs, tanks have to be way more intentional with boss movement. Your goal is to kite in a way that keeps orb deaths stacked in the same general area, so when they reactivate, they’re already grouped and you can just delete them with AoE instead of chasing them all over the room.
If your tanks kite randomly, you’ll end up with a trail of orb corpses all around the room, and when they reactivate, the raid has to spread and chase. That’s how you lose time and hit the enrage.
Also, be aware of one specific danger window. Right before and during Shattering Twilight, the boss is not movable for a few seconds. That means you need to make sure there is distance between the boss and the nearest orb before that happens. If you let an orb reach the boss while he’s planted, you’re not “unlucky,” you’re just dead.
Fractured Projection Becomes a Real Fail Condition
The other Mythic mechanic is Nexus Shield on Fractured Images.
Some Images spawn shielded, meaning they cannot be interrupted. The only way to remove the shield is to successfully interrupt other Images first. So instead of everyone kicking whatever they see, you now have to kick in the correct order.
This is also much more serious than Heroic. On Heroic, missing an interrupt usually just meant you got another permanent puddle and the room got annoying. On Mythic, if even one Image finishes its cast, you wipe. So you need a real interrupt plan, not vibes.
We strongly recommend using Northern Sky Raid Tools for this, because it shows you exactly which Image needs to be kicked next. Without it, you’re basically relying on people to communicate perfectly mid pull, and that’s just not how raids work.
Entropic Unraveling and the Kill Timer
At 100 energy you still get Entropic Unraveling. It hurts a lot on Mythic, so plan healing cooldowns here and don’t be greedy.
The fight has a hard end point. After the third Unraveling, the boss will enrage, so you need to kill him by the third cast, and ideally during the final burn window.
So the general Mythic rhythm becomes:
- Clean orb kills with correct Dark Radiation timing
- Kite to keep Enduring orbs stacked
- Make space before Shattering Twilight so orbs don’t reach the boss while he’s planted
- Kick Fractured Images in the correct order, every time
- Use healing cooldowns for each Unraveling
- Kill by the third Unraveling or you’re done
If you do those things cleanly, this boss is very manageable. If you don’t, it snowballs fast and you’ll hit the enrage and need to go again.