Introduction
Hey everyone, and welcome to the Pit of Saron dungeon guide for season 1 of Midnight! In this guide I’ll be going over the abilities of all the trash mobs and bosses throughout the dungeon, as well as how I recommend you handle them. I’ll be focusing on the mythic and M+ versions of the dungeon, but most of this guide will apply to both normal and heroic difficulties as well. I’ll also be including my recommended, PUG friendly route via the Mythic Dungeon Tools addon for anyone interested.
Some background on myself, my name is Tactyks and I am an avid M+ player, achieving the 0.1% M+ title numerous times on 5 different specs, as well as competing in The Great Push in season 4 of Shadowlands. I also create M+, Raid, and tank guide content on my YouTube and Twitch channels, so be sure to stop by and say hi!
Socials:
- YouTube: https://www.youtube.com/@Tactyks
- Twitch: https://www.twitch.tv/tactyks
- Twitter: https://twitter.com/tactyks
Important Abilities
New: Try out the Mythic+ Dungeon Ability Tracker to filter for specific abilities within Pit of Saron!
Ability TrackerPit of Saron Mythic+ Dungeon Route
If you are using the Mythic Dungeon Tools (MDT) Addon, you can import our PUG Friendly Route for the Mythic+ difficulty of Pit of Saron below.
Pit of Saron M+ Dungeon Route: https://wago.io/ychDjUfcX
Video Guide
Quarry Trash
In this initial open part of the dungeon you have the option of making your way left towards Ick and Krick or right towards Forgemaster Garfrost, where both directions have the same set of trash mobs but in different compositions.
While I generally recommend heading towards Garfrost, regardless of which path you choose, you’ll want to make sure that you are pathing past the 6 Quarry Camps spread throughout this area as you’ll need to liberate all of them in order to progress to the final boss.
Quarry Tormentor
- Use curse dispels on the random target Curse Of Torment or heal the absorb to remove it
- Tanks beware that their melee attacks deal bonus shadow damage if you are above 65% health
Wrathbone Enforcer
- Melee attacks have a chance to apply Sunderstrike, tanks watch your stacks and use defensives as needed
Rotting Ghoul
- Melee attacks apply a stack of Rotting Strikes, tanks watch you stacks and be ready to kite if you don’t have a disease dispel
Gloombound Shadebringer
- Shadow Bolt targets a random player, use spare interrupts on this cast
Leaping Geist
- Loosely spread to avoid cleaving allies with the Leaping Maul attack
Dreadpulse Lich
- This mob is immune to CC
- Icy Blast targets the tank, keep interrupts on this cast as it hits extremely hard
- Torrent Of Misery targets a random player, be ready with a defensive and focus healing into them
- At 50% health the mob does Dread Pulse hits every 2s, beware of this extra damage and use group defensives or healing cooldowns as needed
Deathwhisper Necrolyte
- Make sure to focus this mob as it’s minions are immune until you defeat it due to Deathless Bond
- Necromantic Infusion buffs a random minion, use a purge to remove it if you can
Risen Soldier
- Beware of the random target charge and physical hit from Charging Slash
Arcanist Cadaver
- Netherburst does a large AoE hit, make sure to interrupt every cast
Ymirjar Graveblade
- This mob is immune to CC
- Frostbane Slash targets the tank, be ready with a defensive
- Avoid the circles created by Dark Rupture
Lumbering Plaguehorror
- Avoid the Blight Splatter puddles these mob spawns intermittently
- Use a soothe to remove the Plague Frenzy enrage if you have one
Rimebone Coldwraith
- Use spare interrupts on the random target Icebolt cast
- Permeating Cold debuffs 2 random players, use magic dispels or freedom effects to remove them
Iceborn Proto-Drake
- This mob is immune to CC
- Frost Breath targets a random player, be ready to move out of this cone
- Tanks beware that this mobs melees deal bonus Frost damage thanks to Icy Strikes
Forgemaster Garfrost Boss Fight
Throw Saronite targets 2 players at a time, don’t cleave your allies and try to avoid having your circles touch, as when Ore Chunks are destroyed they leave a large puddle on the ground as area denial.
Orebreaker targets the tank, use a defensive and make sure to overlap one of the Ore Chunks to destroy it, allowing you to avoid being stunned.
At full energy the boss channels Glacial Overload into the closest forge, hide behind the remaining Ore Chunk to avoid the damage this does. After this channel ends the boss uses Cryostomp, destroying the remaining chunk and debuffing 2 players with a Magic debuff. Dispel this as quickly as possible to reduce the damage they take from the Siphoning Chill passive, using freedom effects if you have them.
Ick and Krick Boss Fight
These bosses share health with Necrolink, so do your best to cleave both whenever possible.
Shade Shift creates 2 Shades of Krick nearby, prioritize cleaving these mobs while using spare interrupts, freedom effects, or curse dispels to mitigate their random target Shadowbind cast. The more important interrupt comes from Krick himself, who casts Death Bolt on random players.
Tanks use a defensive for the Blight Smash hit, and do your best to drop the puddle this creates out of the way. More puddles spawn under 4 random players when Plague Explosion is cast, so try and pre-position for this and use defensives as needed.
Eventually Krick jumps onto Ick’s back with Get 'em, Ick!, forcing him to fixate a random player for 7s at a time over 28s. Kite the boss if targeted, otherwise try and save damage CDs to maximize boss cleave.
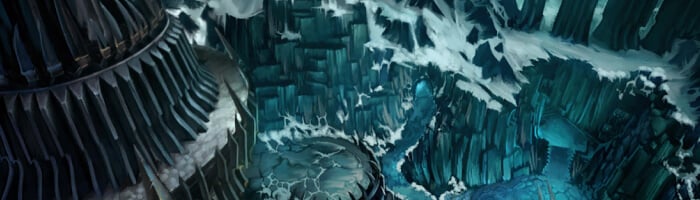
Scourgelord Tyrannus Trash
After both previous bosses have been defeated and all 6 camps have been liberated, you can make your way up the hill and through an ice cave towards the final boss, where you’ll encounter many familiar mobs as well as a single new mini boss.
Glacieth
- This mob is immune to CC
- Cryoburst targets all players, loosely spread to avoid cleaving each other and move as a group away from the puddles you spawned
- Focused Guard points at a random player, avoid the shield and try to save damage for this channel as you get guaranteed crits while behind the mob
Scourgelord Tyrannus Boss Fight
Players targeted by Rime Blast should try to cleave one of the five Bone Piles, indicated by a pillar of green light.
When Army Of The Dead is cast these Bone Piles come to life, with the regular ones spawning Rotlings and the infused ones spawning Scourge Plaguespreaders. Rotlings stack up the Rotting Strikes disease on the tank, so watch your stacks and dispel them as needed. Plaguespreaders have the Festering Pulse passive which deals heavy group damage, plus they have a random target cast in Plague Bolt. Swap to this mob ASAP to and keep an interrupt rotation on its cast.
Scourgelord's Brand targets the tank with a large knockback, followed by a leap attack at their new position, so be ready with a defensive and movement to avoid the second hit.
Outside of this there are several circles to dodge, created by the Death's Grasp cast and Ice Barrage channel, so make sure you are avoiding them.