
Raid Setup
Introduction
Welcome to our Heroic Lightblinded Vanguard guide for The Voidspire. This fight feels like you accidentally queued into a 3v3 arena and the enemy team is a Ret Paladin, a Prot Paladin, and a Holy Paladin.
You’ve got wings, bubbles, shields flying at your face, random silences, and constant holy damage while you’re trying to pretend this is fine. The only difference is you can’t /forfeit, so you’re just going to have to play it out and win.
Fight Style: 3-Target Cleave / Multi-Dot Fight
Recommended Setup: 2x Tank / 4x Healer / 14x DPS
Required utilities: None
Hero/Lust usage: On Pull
Method Boss Review
This is a really unique take on a council fight. The bosses use a bunch of familiar paladin-style abilities, but the encounter still feels fresh instead of just being “three mobs with health bars”.
It forces a lot of movement, dodging, and little bits of micro-management, and the visuals are actually fun to play around.
Definitely a nice addition to the list of council bosses, and I’m hoping it really delivers on Mythic too.
Method Boss Rating: (4/5)
Easy Mode
General:
- Use Hero on pull, but Bellamy and Senn will bubble for 8 seconds, so don’t send all cooldowns instantly.
- Start by hitting Commander Venel, wait 8 seconds, then pop cooldowns and do big cleave damage on all three.
- Keep boss HP fairly even. If one dies early, the others ramp their damage fast.
Tank Swaps:
- Venel does Judgment into Final Verdict. Swap as soon as Judgment hits.
- Bellamy does Judgment into Shield Of The Righteous. Swap as soon as Judgment hits.
Energy and Puddle Placement:
- Bosses hit 100 energy in a set order, starting with Bellamy.
- The boss that's about to hit 100 energy needs to be tanked on the edge, because during the ultimate they can’t be moved and they drop a permanent Consecration puddle where they stand.
General Bellamy:
- Aura Of Devotion reduces damage taken for allies in the circle by 75%. Don’t tunnel targets inside it.
- Divine Toll sends waves of shields that silence. Dodge them, especially as a healer.
- Avenger's Shield hits in a small radius, so don’t stack on top of each other.
- Light Infused is constant raid damage that ramps up by 25% each time any boss uses their ultimate.
Commander Venel:
- Execution Sentence gives 3 soak circles. Soak each with multiple players, but do not overlap circles.
- After the soaks, dodge the spiral hammers.
- Sacred Toll is a big raid nuke, use healer cooldowns.
Chaplain Senn:
- Aura of Peace pacifies you if you attack protected allies. Don’t hit into it.
- Dodge the Elekk Charge.
- Sacred Shield needs to be burned, then interrupt Blinding Light or the raid gets blasted and disoriented.
- Tyr's Wrath puts stacking absorbs on the 3 closest players. Rotate who stands closest, so it doesn’t stack on melee forever.
- Searing Radiance is raid damage for 15 seconds. Heal through it.
Mechanics
When Venel reaches 100 energy, he gains Aura Of Wrath, increasing Holy damage done by allies within 40 yards by 100%.
When the aura expires, it leaves a permanent Consecration puddle on the ground.
Marks several players with a circle, dealing heavy damage split between players soaking.
Players hit by this take 500% increased damage for 5 seconds, which means you cannot stack these circles together.
After each impact, three Divine Hammer spiral outward from the location.
Judgment hits the tank with Holy damage and increases damage taken from Final Verdict by 200% for 5 seconds.
Final Verdict is cast immediately after, so tanks need a fast swap here.
At 100 energy, Bellamy casts Aura Of Devotion for 25 seconds, reducing damage taken by her allies within 40 yards by 75%.
When the aura expires, it leaves a permanent Consecration puddle.
Fires volleys of Holy shields every 2 seconds for 18 seconds.
Shields that hit players deal Holy damage and silence for 4 seconds
Targets several players with Holy shields, dealing heavy damage on impact to all players within 5 yards.
Deals low raid-wide damage every 2 seconds for the entire fight.
This damage increases by 25% each time a member of the Vanguard unleashes their aura.
Judgment hits the tank and increases damage taken from Shield Of The Righteous by 200% for 5 seconds.
Shield Of The Righteous is cast immediately after, so tanks need a quick swap.
At 100 energy, Senn casts Aura Of Peace for 25 seconds, protecting allies within 40 yards.
Players who attack those protected allies become pacified for 4 seconds.
When the aura expires, it leaves a permanent Consecration puddle.
Applies a heavy stacking absorb to the three nearest players.
Players need to rotate positions to not repeatedly be the closest, so the same people aren’t gaining stacks forever.
Senn shields herself, absorbing the next 1.4 million damage and becoming immune to interrupts.
She then charges in a random direction and begins casting Blinding Light.
Heavy raid-wide damage and a 5-second disorientation unless interrupted.
This can only be interrupted after Sacred Shield is broken.
Each time a boss uses its signature defensive ability, it cannot be affected by Avenging Wrath or Divine Shield again for 2.5 minutes.
Strategy
This fight throws a ton of abilities at you, but the good news is they happen in a pretty consistent order, so once you’ve seen a few pulls it starts feeling very scripted.
Opener and Cooldown Plan
Use Hero on pull, but keep in mind that when you do, General Bellamy and Chaplain Senn will both Divine Shield and be immune for 8 seconds.
Your main target on pull is Commander Venel. He also uses Avenging Wrath, which makes him deal 30% more damage, but also take 20% more damage for 20 seconds.
Best opener:
- Hero on Pull
- Start single-targeting the Commander
- Wait out the 8-second bubbles
- Then pop your big cooldowns and do a full cleave rotation on all three
Tank Combos
All three bosses need to be tanked, but only two of them have the Tank combo.
Commander Venel:
- Judgment happens first
- Immediately followed by Final Verdict
- Swap right after Judgment, because it makes Final Verdict hit 200% harder on that tank
General Bellamy:
- Same idea
- Judgment into Shield Of The Righteous
- Swap right after Judgment
Energy Bars and Boss Positioning
Each boss has an energy bar and they start at different amounts. The first one to reach 100 energy is General Bellamy.
The most important positioning rule in the whole fight:
- The boss that is about to hit 100 energy needs to be tanked on the edge.
- During their ultimate aura window they are not movable.
- When it ends, they drop a permanent Consecration puddle right where they were standing.
So you’re basically rotating who is on the edge based on who is about to hit 100 energy next.
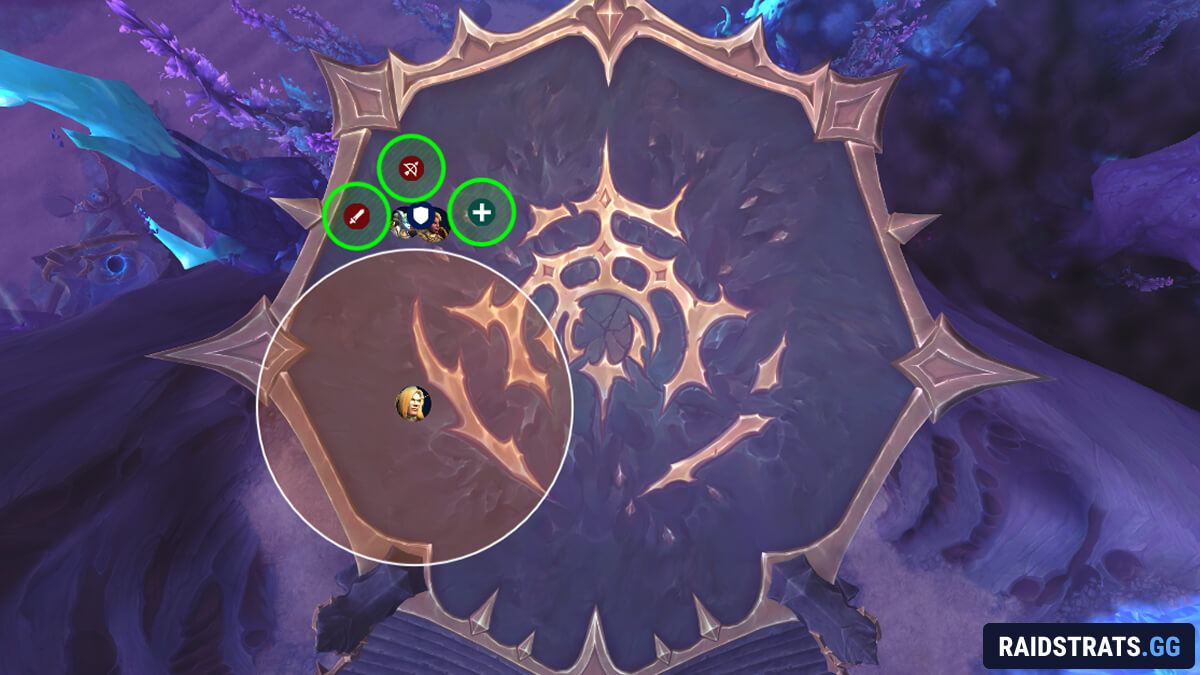
As shown in the picture, the energy order goes like this:
- General Amias Bellamy goes first
- Commander Venel Lightblood goes second
- War Chaplain Senn goes third

General Bellamy
General Bellamy’s ultimate is Aura Of Devotion, reducing damage taken by allies within 40 yards by 75%. So during this, you are not getting any real value hitting whatever is inside that circle.
At the same time, she casts Divine Toll, sending out waves of shields that silence anyone hit. Don’t get clipped by these, especially healers.
Other notable mechanics are Avenger's Shield and Light Infused:
- Avenger's Shield forces people to spread because of the 5-yard hit zone
- Light Infused is always ticking, and it ramps by 25% every time any boss does their ultimate, so healing gets harder as the fight goes on.
Commander Venel
Commander Venel’s ultimate is Aura Of Wrath, boosting Holy damage done by allies within 40 yards by 100%.
His main raid mechanic is Execution Sentence:
- Three players get circles that must be soaked by multiple players.
- You cannot overlap circles, because players that get hit take a massive damage taken debuff from the same ability.
After the soaks, Divine Hammer spirals happen from the impact points, so soak cleanly and then immediately dodge the hammers.
Sacred Toll is your big healer moment. It’s an unavoidable raid nuke, so plan healing cooldowns around it.
Chaplain Senn
Chaplain Senn’s ultimate is Aura Of Peace.
This protects her allies within 40 yards and pacifies anyone who attacks those protected targets. So during this window, don’t tunnel something inside the aura.
After the ultimate, she mounts the Elekk and charges a random player. Just dodge it.
Then she puts Sacred Shield on herself, which makes her immune to interrupts. Right after that she begins casting Blinding Light.
The way to deal with the Sacred Shield & Blinding Light mechanic is to hard swap to the shield, burn it down and then interrupt Blinding Light.
If Blinding Light goes through, the raid takes heavy damage and everyone gets disoriented for 5 seconds, which usually turns into a wipe.
Other healer mechanics:
- Searing Radiance is steady raid damage for 15 seconds.
- Tyr's Wrath is the annoying one: it puts a huge absorb on the three closest players and it stacks.
Because the bosses are stacked, your melee will naturally be the closest and will get stacked absorbs that become impossible to heal through.
To handle this, rotate who is closest to Senn each time Tyr's Wrath goes out, so people only take one stack and then step out.
Final Notes
The fight repeats from here, and honestly reading a guide might feel harder than playing it, because most abilities are clearly telegraphed.
What actually matters is:
- Moving the correct boss to the edge before their ultimate.
- Not messing up Execution Sentence.
- Rotating Tyr's Wrath targets.
- Breaking Sacred Shield and interrupting Blinding Light.
Everything else is mostly just a case of dodging the mechanic.
And keep in mind: when a boss dies, the others gain a damage increase that ramps every 2 seconds. So don’t kill one super early compared to the others, keep their HP relatively even and finish them cleanly.