
Introduction
Hey everyone, and welcome to the Windrunner Spire dungeon guide for season 1 of Midnight! In this guide I’ll be going over the abilities of all the trash mobs and bosses throughout the dungeon, as well as how I recommend you handle them. I’ll be focusing on the mythic and M+ versions of the dungeon, but most of this article will apply to both normal and heroic difficulties as well. I’ll also be including my recommended, PUG friendly route via the Mythic Dungeon Tools addon for anyone interested.
Some background on myself, my name is Tactyks and I am an avid M+ player, achieving the 0.1% M+ title numerous times on 5 different specs, as well as competing in The Great Push in season 4 of Shadowlands. I also create M+, Raid, and tank guide content on my YouTube and Twitch channels, so be sure to stop by and say hi!
Socials:
- YouTube: https://www.youtube.com/@Tactyks
- Twitch: https://www.twitch.tv/tactyks
- Twitter: https://twitter.com/tactyks
Important Abilities
New: Try out the Mythic+ Dungeon Ability Tracker to filter for specific abilities within Windrunner Spire!
Ability TrackerWindrunner Spire Mythic+ Dungeon Route
If you are using the Mythic Dungeon Tools (MDT) Addon, you can import our PUG Friendly Route for the Mythic+ difficulty of Windrunner Spire below.
Windrunner Spire M+ Dungeon Route: https://wago.io/FAa-klR60
Video Guide
Starting Trash
When you initially enter the dungeon, before deciding which wing to head into first you’ll need to take down a few different types of spectral mobs.
Dutiful Groundskeeper
- Melee attacks apply a stack of Shear Armor, tanks watch these and use defensives or kite as needed
Restless Steward
- Keep as many interrupts as possible on the random target Spirit Bolt cast
- Soul Torment debuffs 2 random players, use a Magic dispel to remove on ASAP then focus healing or use defensives for the other
Spellguard Magus
- This mob is immune to CC
- Healers be ready for the group damage from Arcane Salvo
- At 50% health these mobs use Spellguard's Protection to drop a 99% DR zone, tanks be ready to move them and any other mobs you’re fighting away when this happens
Emberdawn Trash
Eventually you’ll need to choose between heading north towards Emberdawn, or south towards the Derelict Duo. Generally I recommend heading up towards Emberdawn, which contains some additional spectral mobs alongside some beasts.
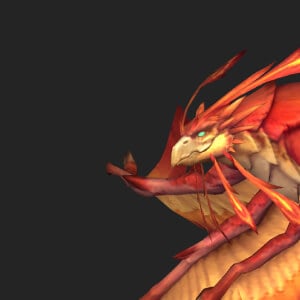
Territorial Dragonhawk
- Fire Spit channels into a random player, use a CC to stop the cast
- Watch out for the Bolstering Flames buff and use a Purge to remove it if you have one
Spindleweb Hatchling
- Move out of the puddles these mobs create on death with Acidic Demise
Creeping Spindleweb
- Poison Spray targets a random player, use Poison dispels to remove them
- Move out of the puddles these mobs create on death with Acidic Demise
Apex Lynx
- This mob is immune to CC
- Puncturing Bite targets the tank, use a defensive or bleed cleanse if you have one
- Ferocious Pounce causes the mob to leap between 3 players, loosely spread near the pack to prevent splashing to allies while allowing you to still cleave the mob
Scouting Trapper
- Avoid the Freezing Trap these mobs occasionally throw at random players
Bloated Lasher
- Fungal Bolt targets a random player, keep interrupts on this cast
- Healers be ready with cooldowns when Spore Dispersal is cast, and tanks beware that this will empower the melee swings of nearby Pesty Lashlings for 8s, so use defensives as needed
Emberdawn Boss Fight
Flaming Updraft debuffs 2 players, move towards the outside of the arena to drop your puddle, as these spawn Flaming Twisters during Burning Gale which you’ll need to avoid.
This intermission also deals heavy party damage so healers be prepared, plus the boss will shoot out 4 Fire Breath frontals to dodge, which always start on the tank and then rotate counter-clockwise.
Also on Tanks is the Searing Beak attack, so make sure you use a defensive such that it covers the initial hit and the DoT that follows.
Derelict Duo Trash
After Emberdawn is defeated you can click on the nearby Soul Conduit to go back to the start of the instance, where you can now head down towards the Derelict Duo, who are guarded by a few new undead mobs.
Windrunner Soldier
- Melee attacks have a chance to apply stacks of Precise Cut, tanks watch these and use CCs or kite as needed
Ardent Cutthroat
- Make sure to interrupt every cast of Poison Blades
- Shadowrive targets a random player, try to play closer to the pack to make cleaving these mobs down easier
Fervent Apothecary
- Avoid the AoE and puddle created by Phial Toss
Zealous Reaver
- Tanks beware that the melee attacks of these mobs have a chance to deal bonus damage with Fierce Slash
Devoted Woebringer
- This mob is immune to CC
- Keep as many interrupts on the random target Shadow Bolt as possible
- Focus this mob during Pulsing Shriek so you can break the shield and interrupt the cast ASAP, healers be ready with cooldowns to keep your group healthy
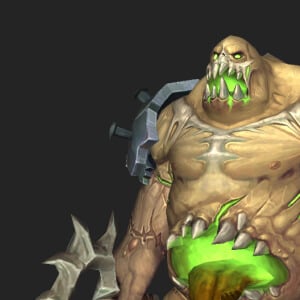
Flesh Behemoth
- This mob is immune to CC
- Loosely spread to avoid cleaving allies with Fetid Spew, ideally dropping these puddles out of the way
- Tanks be ready with a defensive when Brutal Chop is cast
Derelict Duo Boss Fight
Make sure to cleave these bosses evenly as the remaining one will gain stacks of Broken Bond which get out of hand quickly.
Keep an interrupt rotation on Kalis’ Shadow Bolt cast, and use Curse dispels to remove the Curse Of Darkness debuff from both targets. If you can’t remove these debuffs then be ready with CCs to keep the Dark Entity away from the target for the 12s duration.
When Kalis uses Debilitating Shriek, make sure the player targeted by Latch’s Heaving Yank runs behind her to stop the group damage.
When targeted by Splattering Spew loosely spread along the outside of the arena to take up as little space as possible, overlapping puddles if you are healthy enough and have a defensive running. Otherwise tanks just need to be ready with a defensive for the Bone Hack channel.
Commander Kroluk Trash
Just like with Emberdawn, after defeating the Derelict Duo a Soul Conduit will form nearby that you can click on to return to the beginning of the dungeon, where you’ll now find a new path has opened up, allowing you to progress towards Commander Kroluk. The exact location of this path varies depending on the order you killed the previous bosses, however either option has the same set of mobs.
Swiftshot Archer
- Shoot targets a random player, beware of this additional damage intake
- Avoid the circles from Arrow Rain or use a CC to stop the channel entirely
Phalanx Breaker
- This mob is immune to CC
- Break Ranks causes the mob to charge towards a random player, try to aim this at a nearby wall to maximize cleave and step out of the effect itself
- Beware of the AoE hit from Interrupting Screech and make sure to stop spellcasting
Haunting Grunt
- Tanks beware that if you leave melee range these mobs will use Intercepting Charge to close the gap
Spectral Axethrower
- Throw Axe targets a random player, use defensives or bleed cleanses as needed, plus it can also be beneficial to chain AoE CCs in order to delay additional casts
Loyal Worg
- Shred Flesh targets the tank, be ready with defensives, bleed cleanses, or self-healing to remove the healing absorb it applies
Lingering Marauder
- Avoid the Gore Whirl AoE or use a CC to stop the channel entirely
Phantasmal Mystic
- This mob is immune to CC
- Chain Lightning targets a random player, make sure to interrupt every cast
- Beware of the group hit in Flame Nova, especially when there’s other sources of random target damage in a pull
- At 50% health this mob enrages everything nearby with Ephemeral Bloodlust, if you have them use soothes on this mob or axethrowers to minimize group damage
Commander Kroluk Boss Fight
Reckless Leap is cast back-to-back and always targets the furthest player. Have one person bait the first cast with a defensive, then have your tank bait the second. Tanks should also be ready to use a defensive for the Rampage channel.
Stand near an ally when Intimidating Shout is cast, you don’t need to stack your entire party so feel free to have both a ranged group and melee group.
At 66% and 33% health the boss uses Rallying Bellow to spawn a Spectral Axe Thrower, a Phantasmal Mystic, and 4 Haunting Grunts. Tanks collect these adds and cleave them down while keeping interrupts on the Chain Lightning cast. At the same time, the player fixated by the bosses Bladestorm needs to kite to avoid the damage.

The Restless Heart Boss Fight
Occasionally the boss prepositions and applies a stack of Squall Leap to your group. You can clear these stacks by standing on a Turbulent Arrows, which are spawned by Arrow Rain and knock you into the air while creating a puddle on the ground.
You’ll also need to use these arrows to avoid the Bullseye Windblast cast, where I recommend pre-positioning and using a ping to tell your party members which arrow you plan to use so that no one doubles up.
For tanks there’s the Tempest Slash hit which also has a large knockback attached to it, so if needed put your back to an arrow to cancel the knockback and remove your Squall Leap stacks at the same time.
If targeted by Gust Shot, spread out to avoid cleaving your allies and do your best to overlap any existing puddles as this will clear them from the arena.
Bolt Gale channels a frontal at a random player, stand still if you are the target and use a defensive or combat drop to stop the channel.
