Raid Setup
Introduction
Welcome to our Heroic Belo’Ren guide for March on Quel'Danas. This guide covers the fight mechanics and the strategy we recommend to defeat this boss on Heroic difficulty!
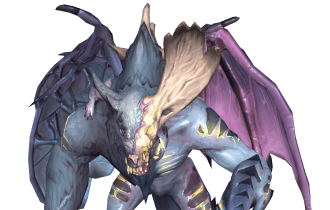
Belo’Ren is the shiny phoenix boss that we face before the final boss of the final raid of Midnight Season 1. This boss definitely plays like it wants to teach your raid one thing before you reach the final boss: pay attention, because colors matter and the room will absolutely punish you if you lose focus.
Fight Style: Single Target fight with heavy add pressure and frequent target swaps
Recommended Setup: 2x Tanks / 4x Healers / 14x DPS
Recommended utilities: Warlock Gateway
Hero/Lust usage: During Egg Phase (around 30%)
Method Boss Review
Since this is the first boss of March on Quel’Danas and it unlocks a bit later into the season, it’s basically a straight-up gear check, in the best way. Think Sludgefist vibes, with one simple question: do you have enough damage and healing?
And honestly, that’s a good thing here. If you overgear this boss enough, you can realistically delete it in the first egg phase, which would skip the part where the fight actually starts getting spicy.
Mechanic-wise, nothing feels annoying. The abilities are mostly fair, the rules are consistent, and Phase 2 is just chef’s kiss. The whole color dance is one of those moments where it feels hectic, but in a fun “we’re gaming” way, not a “why does this exist” way.
Also, it’s a huge win that the fight doesn’t punish players just for touching each other with opposite colors. I’m very happy we’re not going back to Anduin from Sepulcher, where standing near the wrong person creates a full panic.
Method Boss Rating: (4/5)
Easy Mode
General:
- Heroism/Bloodlust is not for the Phoenix Phase. Save it for the egg burn phases when it actually matters.
- Light Feather and Void Feather get assigned throughout the fight:
- Match your color to the mechanic color.
- If the opposite color hits you, you’re probably not fine.
- Tanks will always have opposite colors.
- Set up markers (see strategy section) and use them every time.
Phase 1:
- Pull boss, get ready for the first Light Dive / Void Dive right away.
- The Dive target goes to the correct marker and gets soaked by matching color players.
- Bring the boss to the marker for cleave if it’s clean.
- The Dive puddle stays forever and grows, so place it properly.
- Kill the Ember add, then hard swap to the egg and finish it before it does a Rebirth.
- Infused Quills
- A matching color player intercepts the beam.
- Do not let the wrong color eat it for no reason.
- Radiant Echoes
- Pop orbs with matching color to make safe gaps.
- If the wrong color pops one, they usually die from the 20 second damage.
- Tank frontal
- Tanks get hit by their matching color frontal.
- If a frontal hits nobody, the boss gets a stacking 30% damage buff for 30 seconds.
Phase 2:
- Boss hits 0% and does Death Drop.
- Everyone goes near the last puddle.
- Place a Warlock gateway, take it right after the crash to break the knock-up and get positioned.
- During egg phase:
- Stand in and take your matching color cones.
- Pop Radiant Echoes to create gaps.
- Use big DPS cooldowns here.
- After 30 seconds the boss returns to phoenix form and phase 1 repeats.
As the fight goes on:
- Each egg phase adds a permanent 10% healing reduction.
- Later Phase 1 cycles spawn two Embers instead of one, so swaps and add control matter a lot more.
Mechanics
Several times during the fight, this gets cast for 6 seconds, dealing raid-wide damage and assigning everyone either Light Feather or Void Feather.
Each Feather reduces damage taken from its type by 50%:
- Light Feather: 50% less Holy damage taken
- Void Feather: 50% less Shadow damage taken
The boss constantly radiates heat, dealing damage to the entire raid every 3 seconds.
This ramps up during Rebirth phases, so healers should expect the egg phases to feel more challenging than normal uptime.
Two add types spawn during the fight: Light and Void.
They share the same abilities, but the damage type differs (Holy vs Shadow).
This forces you to split the raid so players handle the add that matches their Feather, since you take 50% reduced damage from your own color.
Used to spawn the Embers.
One random Light Feather player and one random Void Feather player each get a soak circle that deals heavy damage split by players inside it.
Ideally, only soak if the color matches your color.
Raid-wide hit unless interrupted.
Only players with the matching color can interrupt the cast, so if the “wrong” people are trying to kick it, nothing happens.
When an Ember dies, it turns into an egg. The egg radiates damage and revives after 15 seconds unless it gets killed. You want to prevent this.
Orbs move across the area and burst on contact, dealing damage to the player who hits them. Your goal here is to create gaps by popping the orbs.
If the player who pops one has the opposite color, it also applies a heavy damage effect for 20 seconds.
Tank combo mechanic that sends out several cones of Light and Void attacks.
The tank with the matching color needs to be hit by the matching cone. If this fails, Belo’Ren gains a 30% damage increase for 30 seconds.
This stacks, so missing these more than once gets ugly fast.
Applies a large absorb to all players and deals constant damage until the absorb is healed through.
Targets a random player with a beam. After 6 seconds, it hits the first player in its path.
Getting clipped by the opposite color is the big danger here, since you don’t have the 50% reduction against that damage type.
When the boss’s health is depleted, it flies up and crashes down, dealing heavy Physical damage and knocking players up.
The damage and knock-up are reduced based on distance from the impact point, so don’t be hugging the middle unless you really need to.
For 30 seconds, Belo’Ren turns into an egg. The egg’s health is the boss’ health, and killing the egg is how you complete the fight and kill the boss.
You can’t finish it in a single egg phase, so expect multiple Rebirth phases before the boss actually goes down.
During the egg phase: Burning Heart continues, but at an increased rate, so raid damage ramps hard.
Each Rebirth also applies Ashen Benediction, a permanent debuff that reduces healing done by 10% for the rest of the fight.
Phase 1
This fight is super repetitive. It starts out feeling almost too easy, but it gets harder and harder as it goes on, because you’re doing the same mechanics with less healing and more mechanics happening.
You start by fighting Belo’Ren in phoenix form. This form does not remove HP from the actual boss egg, so you do not want to blow Hero or big DPS cooldowns here if they won’t be ready for the burn phase. Depending on timers, you may even want to stop damage once the phoenix is low, so that cooldowns line up again.
The Light Feather and Void Feather assignments are random, but they generally try to keep the raid split fairly evenly. Tanks are guaranteed to have opposite feathers.
The one rule that matters for the entire fight: Never get hit by anything that’s the opposite color.
Players can freely touch and move through each other, there’s no “don’t stack with opposite” punishment, and you don’t need to avoid anything that matches your color. The real danger is only from hitting mechanics of the wrong color.
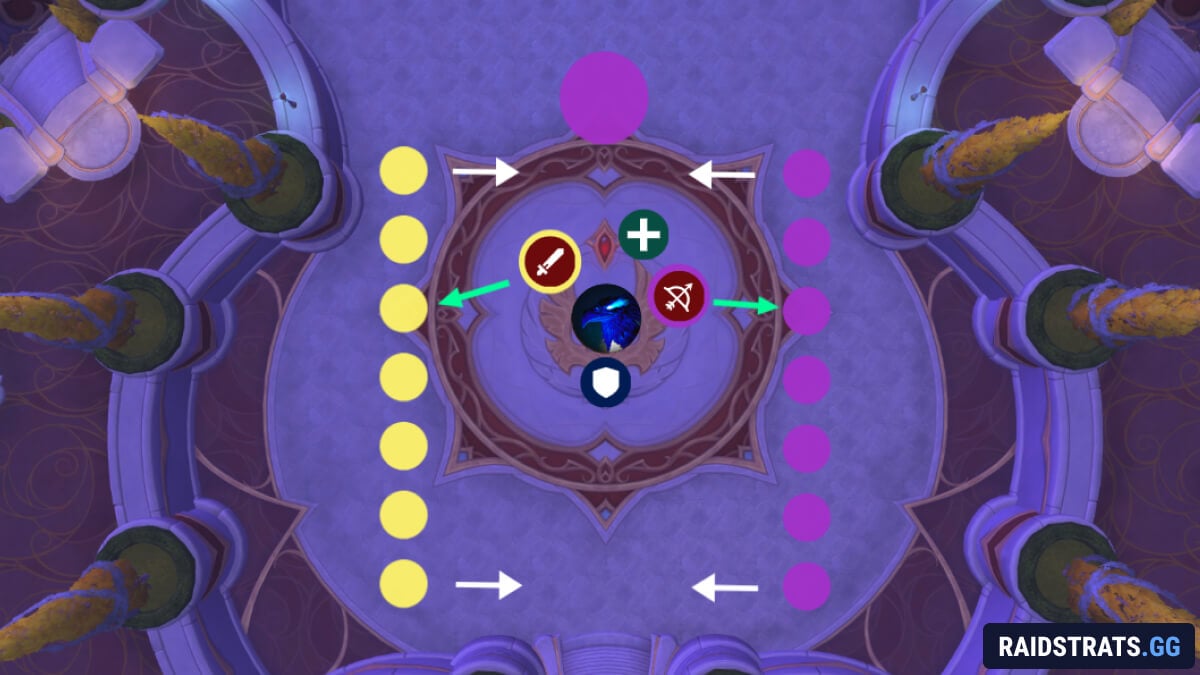
Place markers around the room like this:
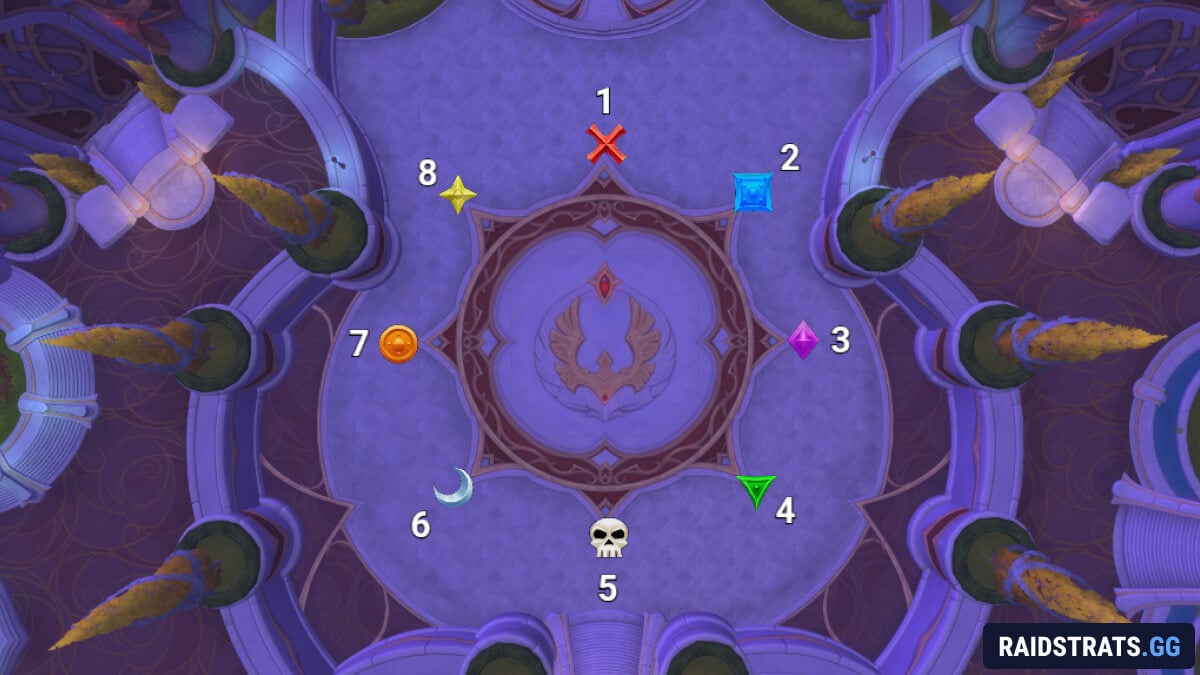
You can do a different order if you prefer.
Right after the pull, one player will get Light Dive or Void Dive. Move to the correct marker and soak it with matching color players. You can bring the boss to the marker for extra cleave damage.
The Dive leaves a permanent Light or Void puddle on the ground that expands over time, so don’t just drop these randomly, make sure to put them on the markers.
Kill the Ember, and once it turns into an egg, have everyone swap to it and single target it down so it dies before it can Rebirth. Letting an Ember respawn is not recommended.
During all this, you’ll deal with a few repeating mechanics:
Infused Quills - This targets a random player and creates a beam from the opposite color. The fix is simple: have a player with the matching color step in and intercept it, since they take 50% reduced damage. If you don’t, it just hits someone who takes way more damage than they needed to.
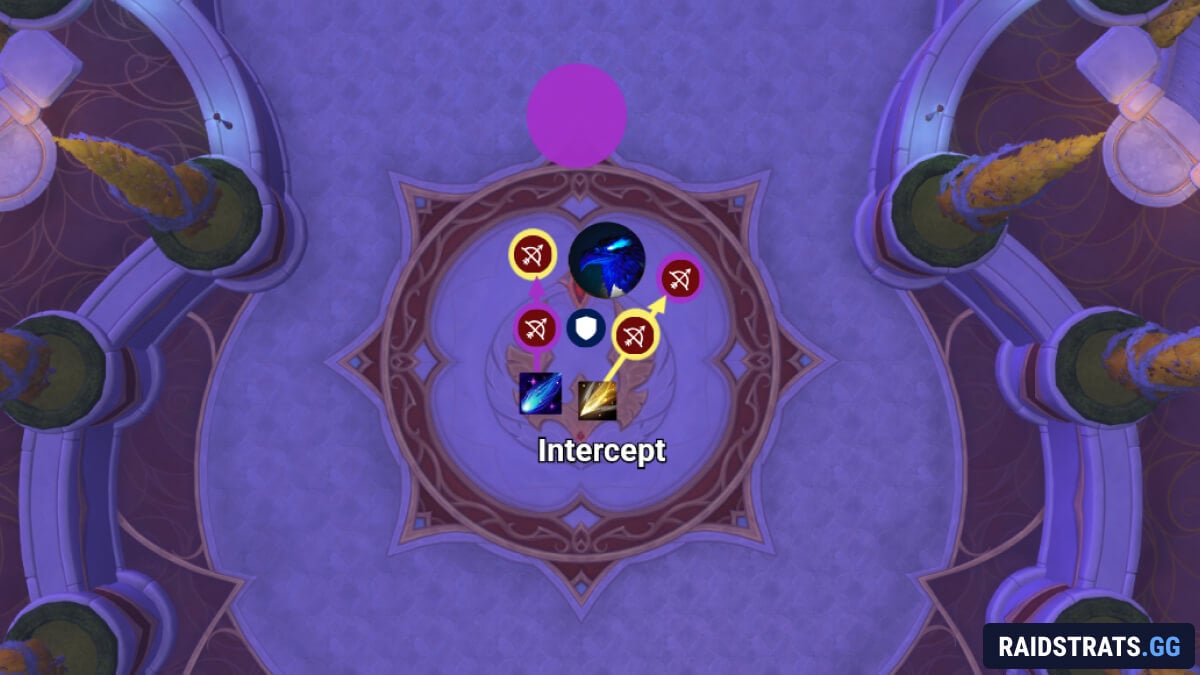
Radiant Echoes - Orbs spawn on one side of the room and move across it. Touching one pops it, which creates a gap, and deals damage to the player who popped it. Same rule as always: you want someone with the matching color to pop these. If the wrong color hits it, they take a nasty damage effect for 20 seconds and it usually leads to deaths.
Tank frontal mini game - The boss fires out several Light and Void frontals. The tank with the matching color needs to be the one getting clipped by the matching frontal. If a frontal hits nobody, the boss gains a 30% damage buff for 30 seconds. These stack, so missing more than one is how you turn it into a very short pull.
Phase 2
Eventually, the boss reaches 0% health (in Phoenix form) and casts Death Drop, flying up and crashing down.
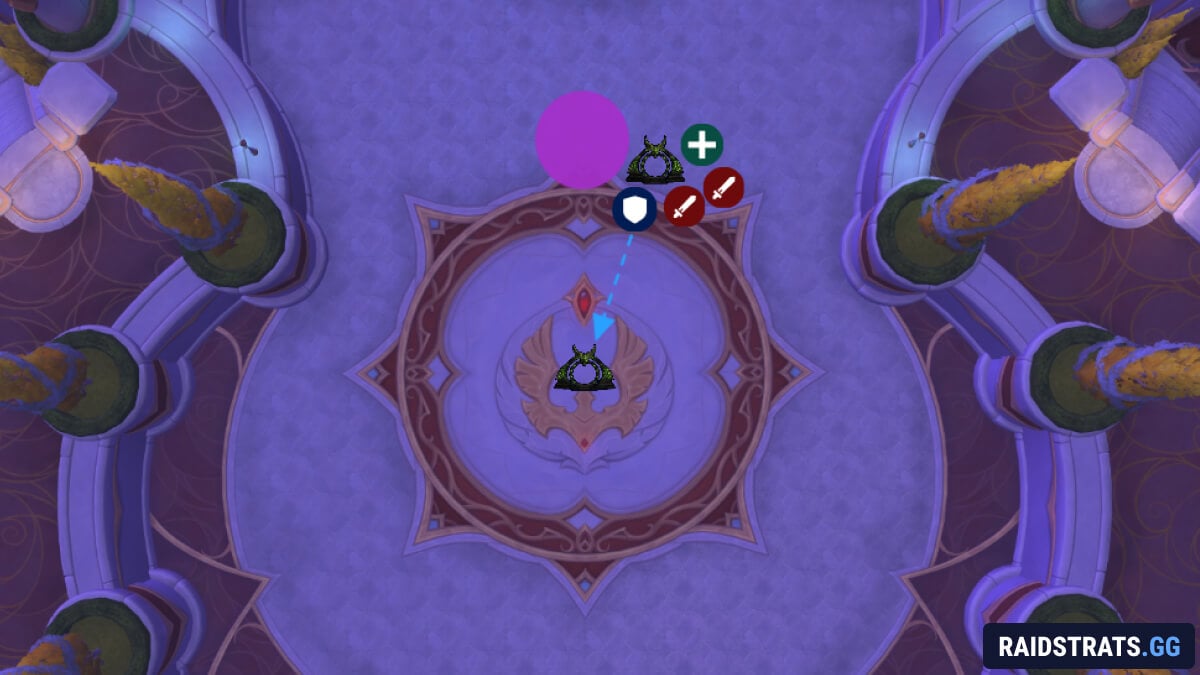
Your plan here:
- Go near to the most recent puddle.
- Place a Warlock Gateway.
- As soon as the boss crashes down, take the gateway instantly.
This is mainly to break up the knock-up and get everyone re-positioned right away for the dance mechanic.
From here it’s pretty straightforward:
- Get hit by your matching color cone.
- Be ready to pop Radiant Echoes to make a gap.
- Use your best DPS cooldowns for maximum Egg damage.
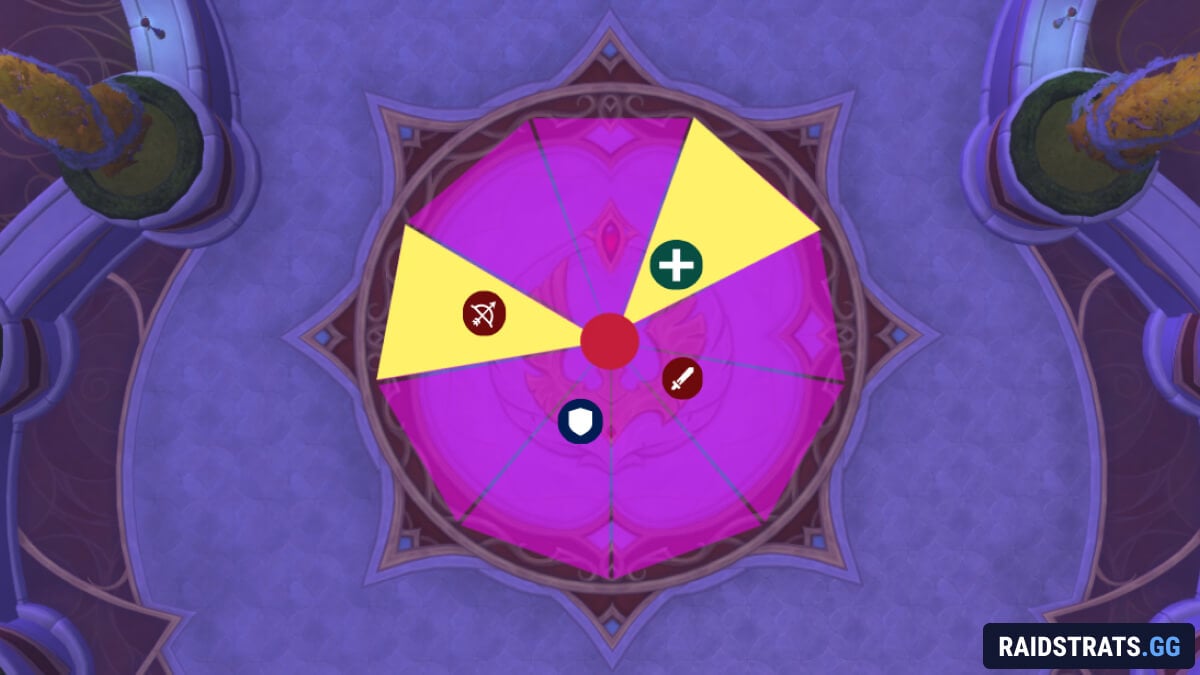
Note: The pattern is completely random.
We recommend using Hero/Lust once you get a good timer for it, ideally later in the phase when execute damage is high.
After 30 seconds, Phase 2 ends, the boss reappears in phoenix form, and the whole fight restarts.
The differences as the fight continues:
- You now have Ashen Benediction, a permanent healing reduction debuff. It stacks every time you go back into Phase 1, so healing gets harder the longer the fight goes on.
- The Dive ability now targets two players, meaning two Embers spawn instead of one. Phase 1 instantly becomes much harder because you now have double the add pressure and more overlaps.
Follow the marker picture for Dive placement to prevent the room running out of space or causing unnecessary issues with the other mechanics.