Raid Setup
Introduction
Welcome to our Heroic L'ura guide for the Midnight Falls encounter of March on Quel’Danas. This guide covers the fight mechanics and the strategy we recommend to defeat this boss on Heroic difficulty!
You know that moment in a TV quiz show where someone says “oh this is easy,” and then their brain turns off the second the lights start flashing? Yeah. That’s basically Death's Dirge (Memory Game), except instead of losing points, you lose 20 people.
So if your raid can handle a memory game and knows how to dodge some bayblades, you’re already halfway there.
Fight Style: Single Target fight
Recommended Setup: 2x Tanks / 4x Healers / 14x DPS
Required utilities: CC (interrupts)
Hero/Lust usage: On Pull
Method Boss Review
This is a high-octane fight from start to finish and it feels genuinely epic to play.
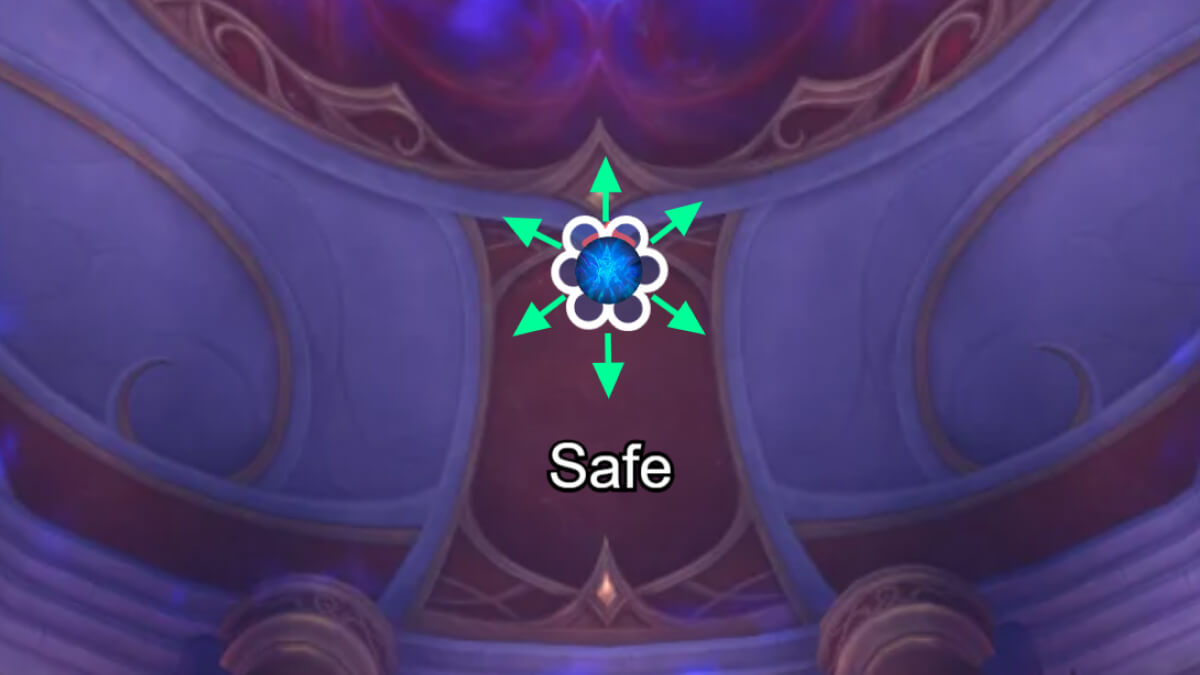
You’ve got some familiar ideas, like the Fyrakk seed style “safe zone” gameplay, but it’s way more polished here and a lot less annoying to deal with.
And then there’s Death's Dirge, which is basically a world first in WoW. A full-on memory game in a raid encounter. It’s cool, but it also kind of begs the question why Blizzard made an ability that leans so hard on WeakAuras, especially in the season where the whole message was “you don’t need addons to kill bosses”.
Still, that doesn’t take away from how good this fight is. Congrats on another successful endboss encounter.
Method Boss Rating: (5/5)
Easy Mode
- Do not step in The Darkwell. It kills you.
Phase 1:
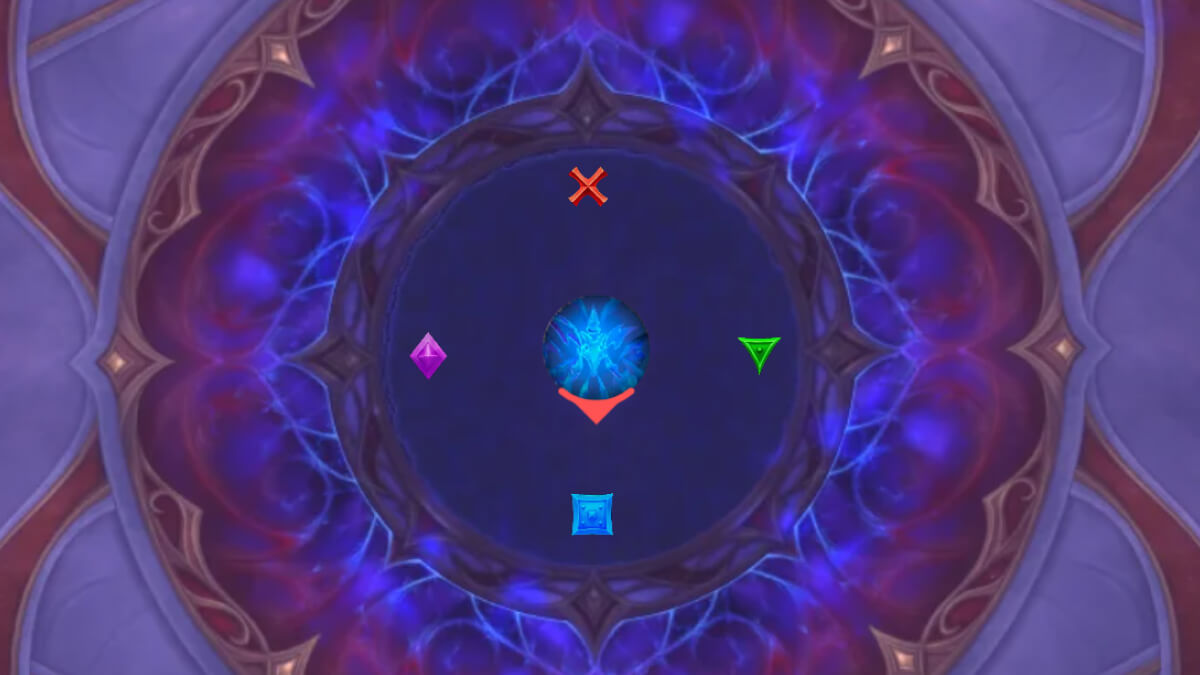
- Death's Dirge is the memory game. Five rune players get hit by the rotating laser in the order the symbols were shown.
- The correct order is Resonance and low damage.
- Wrong order is Dissonance and you usually wipe.
- Dodge Heaven's Glaives the whole time. They ricochet around and are the main cause for a random death.
- Dodge Dark Quasar rotating laser from The Darkwell.
- During Safeguard Prism, the boss takes 33% reduced damage and you must interrupt or dispel the rotating Safeguard Matrices to remove the stacks.
- When Matrices break:
- Grip and kill Midnight Crystals before Cosmic Fracture finishes.
- Healers must heal Dusk Crystals to full or they also trigger Cosmic Fracture.
- Healed Dusk Crystals become Dawn Crystals, assign players to pick them up for Phase 3.
- Crystal rules:
- Getting hit by Cosmic damage triggers Tears Of L'ura soak circles. If nobody soaks, Naaru's Lament hits hard.
- Don’t leave crystals on the ground longer than 3 seconds or Glimmering starts.
- Tanks swap after Heaven's Lance hits 5 stacks and applies Impale.
- Healers plan for Shattered Sky raid damage.
Intermission:
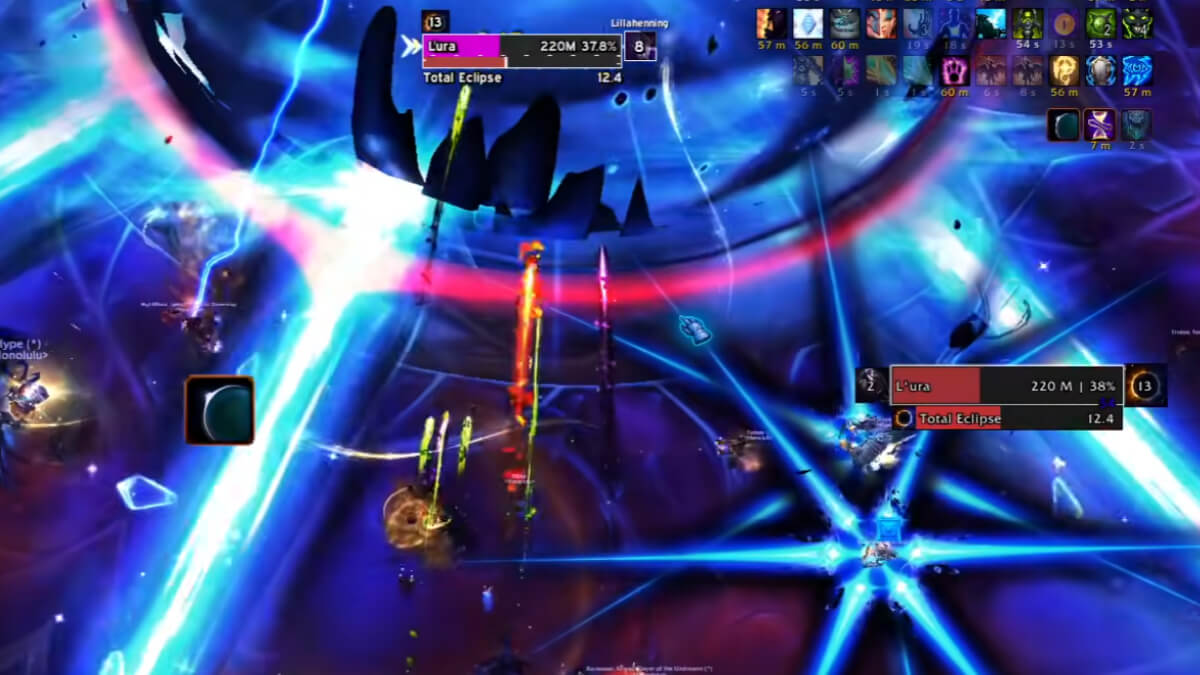
- Total Eclipse pulls everyone toward The Darkwell and applies a small absorb repeatedly.
- Dodge rapid Dark Quasar.
- Handle Starsplinter by aiming spikes away and sidestepping.
- Crystal holders drop your crystal for Starsplinter, then pick it up again quickly.
Phase 2:
- You’re trapped by Iris Of Oblivion, don’t leave the circle.
- Split into 4 marker groups.
- Galvanize marks 4 players with beams. Place beams so they hit rotating Void Cores.
- Extra players soak beams to reduce Overkill Current raid damage.
- Hitting cores causes Cosmic Fission pulls, so hit cores from different sides to cancel it.
- During Core Harvest, avoid the indicated lines or you get one-shot by moving cores.
- At 100 energy, Dark Meltdown knocks you into Phase 3.
- If any core is still active, Decay wipes the raid.
- Stack up before the knock so Phase 3 starts clean.
Phase 3:
- Constant raid damage from Thunderous Well.
- Stay inside Torchbearer light from crystal holders or you take ramping damage and get slowed.
- The Dark Archangel wipes unless you use Dawnlight Barrier by consuming a crystal. Use one crystal per cast.
- After, dodge Black Tide frontal and don’t aim puddles badly.
- Dodge Dark Constellation spawns and beams.
- Soak Light Siphon fully within 22 seconds or Stellar Implosion wipes you.
- Repeat until the boss dies or you run out of crystals.
Mechanics
A laser fired from The Darkwell that rotates around the room, dealing heavy damage to anyone it hits.
Bayblade-looking glaives that get fired out around the boss. They deal heavy damage on contact, then ricochet around the room. The damage gets lower the longer they keep spinning.
Death's Dirge is a memory game.
Five players get marked with Dark Rune symbols in a random order. Those five players then need to get hit by the rotating laser in the same order the symbols were shown.
The laser starts at the current tank’s location and rotates clockwise.
Getting the sequence correct triggers Resonance, which is low raid damage. Getting it wrong triggers Dissonance, which is heavy raid damage for 5 seconds and usually causes a wipe.
The boss shields herself and takes 33% reduced damage for 20 seconds.
Three Safeguard Matrices rotate around the room and try to cast Safeguard, which restores stacks of the shield. Players need to interrupt or dispel the Matrices until all stacks are gone. Once a Matrix is depleted, it gets destroyed and the boss loses the damage reduction.
When a Matrix is destroyed, several Midnight Crystals spawn and attempt to cast Cosmic Fracture, which deals heavy damage. Stack these up and kill them before the cast finishes.
At the same time, Dusk Crystals spawn that must be healed to full. If they are not healed, they also trigger Cosmic Fracture.
Successfully healed Dusk Crystals become Dawn Crystals. Players need to pick these up. Holding a crystal deals low damage to the holder.
If a player holding a Dawn Crystal gets hit by any Cosmic ability, it triggers Tears Of L'ura, spawning two small soak circles. Someone has to soak them. If nobody soaks, it triggers Naaru's Lament, which deals heavy raid-wide damage.
Players can drop the crystal using the extra action button, but leaving it on the ground for longer than 3 seconds triggers Glimmering, which deals low raid-wide damage until the crystal is picked up again.
With each hit on the tank, L’ura gains a stack of Heaven's Lance. At 5 stacks, she unleashes a series of attacks on the tank and applies Impaled.
Impaled increases damage taken from Heaven's Lance by 50% for 25 seconds, so you swap tanks after each 5-stack cycle.
Applies a small absorb to every player for 30 seconds and slowly pulls everyone toward The Darkwell.
Random players get a debuff that deals medium damage, then fires spikes in the direction they are facing.
The spike only travels as far as the length of the beam, it does not shoot across the whole room. Getting hit deals heavy damage.
Players holding a Dawn Crystal should drop it before the spikes go off, otherwise they can trigger Tears Of L'ura.
A smaller pull toward the center. Stepping into The Darkwell still kills you.
Traps players inside a circle. Leaving it deals lethal damage.
The area is covered by Abyssal Pool, which deals constant raid damage during this phase.
Rotating Void Cores that need to be dealt with using Galvanize beams.
During Core Harvest, the boss pulls active cores in, and they deal heavy damage to any player they hit.
At 100 energy, L’ura casts Dark Meltdown, dealing damage to the entire raid. If any Void Cores is still active, it triggers Decay and wipes the raid.
Dark Meltdown also knocks the raid into Phase 3, so stacking for it is recommended so everyone starts Phase 3 in the same spot.
L’ura fires beams at four random players, dealing damage to anyone hit.
If a beam hits a Void Cores, it charges it, and it will eventually be consumed during Core Harvest.
Each time Galvanize happens, Overkill Current also triggers, dealing heavy raid-wide damage reduced by how many players got hit by Galvanize.
Hitting a core creates a pull toward that core’s location.
To prevent getting dragged out of Iris Of Oblivion, you need to hit cores on different sides to cancel the pull out. If you only hit cores on one side, the pull can drag players outside the Iris, which kills them.
Wipes the raid unless players are standing inside Dawnlight Barrier, which is created by consuming a Dawn Crystal using the extra action button.
After it completes, the boss casts Black Tide, a massive frontal that needs to be dodged by moving out, or using a Warlock gate.
Players holding a Dawn Crystal emit an aura that creates a safe zone in a 12-yard radius.
Anyone outside that safe zone takes increasing damage from Midnight every 1 second and is slowed by 30%.
Small stars that deal heavy damage when they spawn if you get hit.
They also create beams between each other that appear and disappear, dealing damage to anyone caught in them.
Two small soak zones appear. They must be fully soaked within 22 seconds.
If not, it triggers Stellar Implosion, which wipes the raid.
Strategy
L’ura is a three phase fight with a short intermission between Phase 1 and Phase 2. The early part of the encounter is on a set timer, so we recommend using Hero on pull and trying to get as much boss progress as possible before things get messy later.
One rule for the entire fight: The Darkwell in the middle kills you. If someone walks into it, they’re just dead.
Phase 1
Start by tanking L’ura where she stands and keep her facing consistent. She doesn’t have a frontal, but the memory game laser starts from the tank’s position and rotates clockwise, so having a stable reference point makes it easier for everyone to line things up.
Death’s Dirge
The signature mechanic is Death's Dirge. Five players get shown five Dark Rune symbols in a random order. After that, the boss fires the rotating laser clockwise, and those five rune players need to get hit in the same order the symbols were shown.
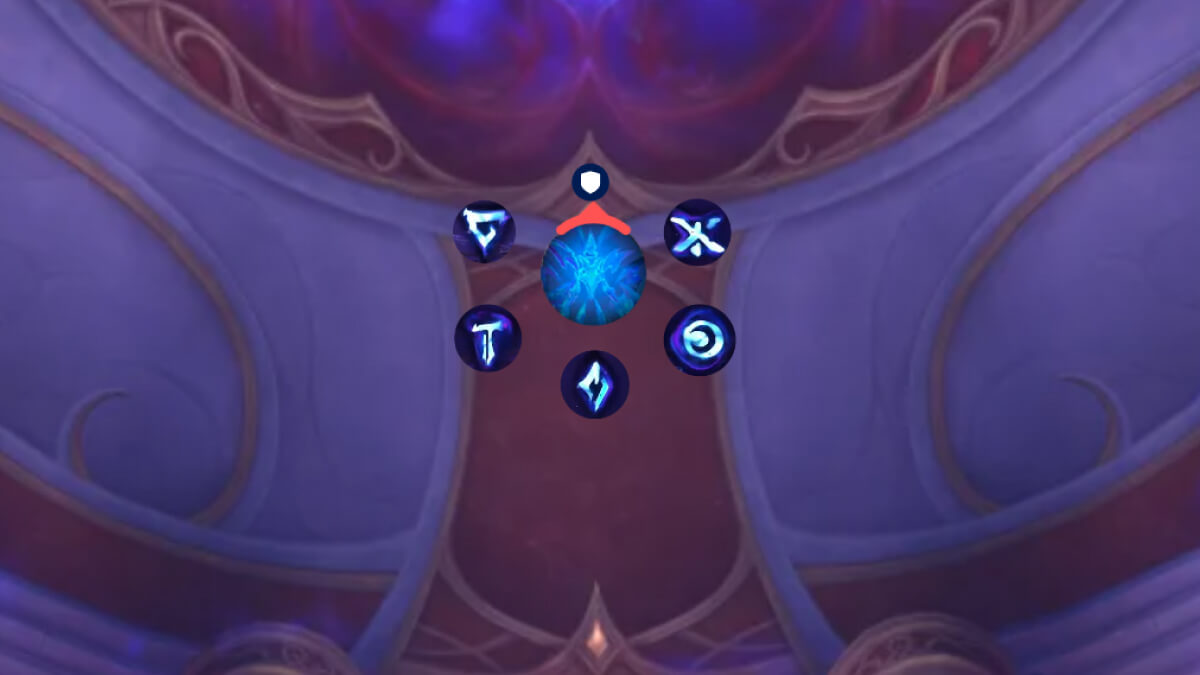
If you do it right, you get Resonance and the raid takes low damage. If anyone is out of order, you trigger Dissonance, which is heavy damage for a few seconds and usually ends the pull.
Quick tips that save pulls:
- Don’t do last-second movement if you have a rune
- You can move and dodge babyblades during this as long as you do not change the order
Heaven’s Glaives
After the memory game, you get Heaven's Glaives. These are the spinning glaives that shoot out around the boss and then ricochet off the walls. Find a safe gap on spawn, then keep dodging them while they drift around the room.
This is the main “random death” mechanic in Phase 1, because people relax and forget they still exist. They do less damage the longer they spin, but getting clipped is still unnecessary.
Dark Quasar
You’ll also deal with Dark Quasar, the rotating laser coming from The Darkwell. Just keep moving and don’t get hit. Direction is Random.
Safeguard Prism
At some point, L’ura casts Safeguard Prism. During this she takes 33% reduced damage and three rotating Safeguard Matrices appear. These Matrices try to cast Safeguard, which refreshes the Prism stacks.
Your job is to stop that from happening by interrupting or dispelling the Matrices until the stacks are gone and the Matrices are destroyed. If your group is slow here, you fall behind quickly because you’re hitting into damage reduction while the Matrices keep restoring it.
When a Matrix gets destroyed:
- Midnight Crystals spawn and start casting Cosmic Fracture. Stack them up with grips and kill them before the cast finishes.
- Dusk Crystals spawn and your healers must heal them to full. If they fail, those also trigger Cosmic Fracture.
- If healed successfully, they become Dawn Crystals.
Dawn Crystals are not optional. You need them for Phase 3, so pre-assign who picks them up and choose players that are actually good at dodging.
A few important rules for Dawn Crystals:
- Holding one deals low damage to the holder.
- You can drop the crystal with the extra action button, but leaving it on the ground for more than 3 seconds triggers Glimmering, which does raid damage until someone picks it back up. So if you drop it, pick it up again quickly.
- If the holder gets hit by Cosmic damage, it triggers Tears Of L'ura, spawning two small soak circles. If nobody soaks them, you get Naaru's Lament and heavy raid damage.
Tanks and Healing
For tanks, the swap is straightforward. L’ura stacks Heaven's Lance, and at 5 stacks she does the burst and applies Impale. Swap tanks after each Impale cycle.
Healers should also be ready for Shattered Sky, which is raid-wide damage for 25 seconds and overlaps with other mechanics often enough that it can catch people off guard.
Phase 1 ends when the boss hits 0 energy and intermission begins.
Intermission
Intermission starts with Total Eclipse. The raid gets pulled toward The Darkwell. If you let the pull drag you Into The Darkwell, you die, so you need to actively fight the pull the entire time.
During this phase, the entire raid gains a small absorb every second that stacks up.
While Total Eclipse is going, the boss will fire Dark Quasar in quick succession in random directions. Just keep moving and don’t get clipped.
You’ll also have Starsplinter on random players. This hits the player, then fires spikes in the direction they are facing.
- The spikes only travel as far as the length of the beam
- Still hurts a lot, so aim it away from people and sidestep it cleanly
Important crystal note: If a Dawn Crystal holder gets Starsplinter, they should drop the crystal, do their sidestep, and pick it back up immediately. You don’t want to trigger Tears Of L'ura, and you also don’t want the crystal sitting on the floor long enough to cause problems.
Once Total Eclipse ends, you get pulled Into The Darkwell to start Phase 2.
Phase 2
Phase 2 is short and simple, but extremely punishing if you mess it up.
You are trapped by Iris Of Oblivion. Leaving the outer circle kills you. On top of that, Abyssal Pool is doing constant raid damage, so your healers are working the whole time.
Place four markers around the ring and split your raid evenly between them. This entire phase revolves around Galvanize and the rotating Void Cores.
Galvanize targets four players with beams. Those players should position their beams at the markers so that when the beam fires, it hits a Void Cores. Extra players should also stand in the beam to help soak it, because each Galvanize triggers Overkill Current, and the more players get hit by the beam, the less raid damage you take.
When a core is hit, it triggers Cosmic Fission, pulling players toward that core. The reason you split beams to different sides is to cancel out the pull. If you only hit cores on one side, the pull can drag people out of the Iris and they just die.
After cores are charged, L’ura casts Core Harvest. During this, do not stand in the indicated lines, because the cores get pulled through those paths and will one-shot anyone in the way.
You repeat this loop until L’ura hits 100 energy.
At 100 energy she casts Dark Meltdown. Stack in front of her before it happens so the knock sends everyone into Phase 3 in the same spot.
Two important rules for Dark Meltdown:
- If any Void Cores is still active, it triggers Decay and you wipe.
- Stacking up makes Phase 3 way cleaner because everyone starts in the same place.
So Phase 2 is basically “hit cores correctly and make sure all cores are gone”.
Phase 3
Phase 3 is constant pressure and crystal management.
Thunderous Well ticks raid damage every 2 seconds for the entire phase. At the same time, Torchbearer becomes your positioning rule. Players holding Dawn Crystals create a 12 yard safe zone. Anyone outside that light takes increasing damage every second and is slowed, so the raid needs to stay stacked around the crystal holders.
Early in the phase, L’ura starts casting The Dark Archangel. This is a wipe unless players are standing inside Dawnlight Barrier, which is created by consuming a Dawn Crystal with the extra action button.
Crystal usage matters here:
- You want to use one crystal per Archangel cast
- If you waste crystals, you eventually run out and die
Right after Archangel, the boss casts Black Tide, a massive frontal. Move out or use a Warlock gate. This also leaves a permanent puddle, so don’t aim it in a way that cuts off your next movement.
While you’re dealing with that, you’ll also have Dark Constellation. Stars spawn that hurt if you’re hit on spawn, and then they connect with beams that come and go. Dodge the spawns and don’t stand in the beams.
Finally, you’ll get Light Siphon, two soak zones that must be fully soaked within 22 seconds. If you fail, it triggers Stellar Implosion and you wipe. This is a real priority mechanic in Phase 3.
From here the phase repeats. You keep stacking in Torchbearer light, you barrier every Dark Archangel, you dodge Black Tide and Constellations, and you complete Light Siphon.
You need to kill the boss before you run out of Crystals, or before the entire area gets covered in Black Tide.