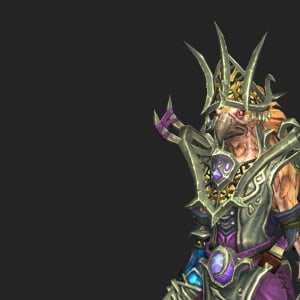
Introduction
Hey everyone, and welcome to the Skyreach dungeon guide for season 1 of Midnight! In this guide I’ll be going over the abilities of all the trash mobs and bosses throughout the dungeon, as well as how I recommend you handle them. I’ll be focusing on the mythic and M+ versions of the dungeon, but most of this article will apply to both normal and heroic difficulties as well. I’ll also be including my recommended, PUG friendly route via the Mythic Dungeon Tools addon for anyone interested.
Some background on myself, my name is Tactyks and I am an avid M+ player, achieving the 0.1% M+ title numerous times on 5 different specs, as well as competing in The Great Push in season 4 of Shadowlands. I also create M+, Raid, and tank guide content on my YouTube and Twitch channels, so be sure to stop by and say hi!
Socials:
- YouTube: https://www.youtube.com/@Tactyks
- Twitch: https://www.twitch.tv/tactyks
- Twitter: https://twitter.com/tactyks
Important Abilities
New: Try out the Mythic+ Dungeon Ability Tracker to filter for specific abilities within Skyreach!
Ability TrackerVideo Guide
Ranjit Trash
Soaring Chakram Master
- Ricocheting Chakram targets a random player and bounces to others nearby, beware of this additional damage intake
Outcast Warrior
- Tanks beware of the Rushing Winds buff and use a purge to remove it if possible
Raging Squall
- These mobs melee for bonus nature damage thanks to the Wind Claws passive
- Watch out for the Wrathful Wind enrage and use a soothe to remove it if you have one
- Avoid the Wind Blast AoE these mobs drop on death
Driving Gale-Caller
- Make sure to interrupt every cast of Repel
Adorned Bladetalon
- This mob is immune to CC
- Blade Rush dashes to 2 random players and the tank, use bleed cleanses if you have them otherwise be ready with defensives and healing cooldowns
- Shear targets the tank, beware if this debuff overlaps with Blade Rush and be ready with defensives
Dread Raven
- This mob is immune to CC
- Dread Wind targets a random player, make sure you don’t get knocked off the platform
- Dire Screech deals heavy damage, healers ensure the group is topped before this goes out and be ready with group defensives if needed
Ranjit Boss Fight
If targeted by Gale Surge, try to drop the wind orbs out of your path, plus position such that you don’t get knocked off the edge or into existing orbs in the process.
Fan Of Blades applies a bleed to all players, be ready with healing cooldowns or bleed cleanses if you have them.
Wind Chakram fires a projectile towards a random player that returns to the boss, make sure you are avoiding this. At the same time, you’ll want to be ready to dodge the tornadoes created by Chakram Vortex.

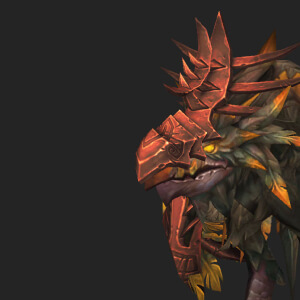
Araknath Trash
Blinding Sun Priestess
- Make sure to interrupt every cast of Blinding Light
- Solar Barrier will buff a random ally, purge it off or focus the mob to stop the damage
Adept of the Dawn
- Melee attacks stack up the Fiery Talon debuff, so be ready to use a defensive or kite if needed to drop stacks
Initiate of the Rising Sun
- Solar Bolt targets a random player, use spare interrupts on this cast
Solar Elemental
- This mob is immune to CC
- Be ready to swap to the Solar Orb when it spawns and kill it ASAP
- Avoid the circles created by Solar Fire
Solar Construct
- This mob is immune to CC
- Use defensives or combat drops if targeted by Solar Flame
- Get out of the Solar Nova AoE underneath this mob
Araknath Boss Fight
Tanks make sure to stay in melee of the stationary boss to prevent Blast Wave from casting. At the same time, all players should beware of the 5yd AoE Defensive Protocol creates underneath the boss.
Non-tanks should be ready to intercept the Energize beams Lesser Constructs shoot towards the boss in sets of 3, using defensives as needed. At the same time, tanks will need to point the Fiery Smash line attack away from these players while also stepping out of the effect yourself.
After 12s Energize ends, triggering a Heart Exhaustion frontal that all players should avoid, stepping into the AoE under the boss if needed.
At full energy the boss uses Supernova, which deals more damage if any Energize beams come in contact with them, so be ready with group defensives if this happens.

Rukhran Trash
Sun Talon Tamer
- Be ready to kite if debuffed with Mark Of Death and use defensives if needed
Skyreach Sun Talon
- Use CCs to lock these mobs down when they become Bloodcrazed
Rukhran Boss Fight
Make sure to quickly swap to the Sunwing mob spawned by Sunbreak, which fixates a random player with Burning Pursuit and pulses for heavy group damage. Avoid killing them on top of any eggs, which these mobs turn into on death, otherwise they will respawn.
For tanks this boss is also stationary, so stay in range to avoid having Screech cast. The only time you can leave is during Searing Quills, where everyone should hide behind the central pillar, just make sure you quickly get back to the boss when this ends. On top of that, make sure you’re using a defensive for every cast of Burning Claws.
High Sage Viryx Boss Fight
Scorching Ray targets 3 players at a time, healers watch these players, and if targeted multiple times in a row be ready to use a defensive.
Cast Down targets a random player and drags them off the edge of the platform, run towards the entrance (but don’t hug the wall as this can bug it out) if targeted to maximize the travel distance, while everyone else swaps to the mob ASAP and uses stuns to slow it down.
If targeted by a Lens Flare make sure that you run towards the sides of the platform, using movement cooldowns to avoid the beam that chases you down and leaves a trail of fire.
Finally, keep an interrupt rotation on Solar Blast to reduce your tank’s damage intake.