Introduction
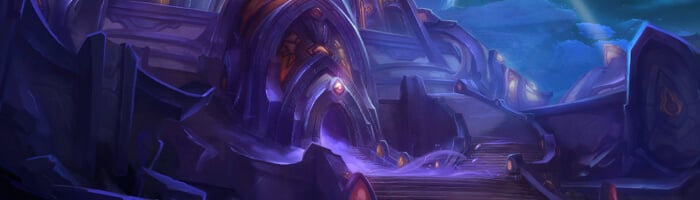
Hey everyone, and welcome to the Seat of the Triumvirate dungeon guide for season 1 of Midnight! In this guide I’ll be going over the abilities of all the trash mobs and bosses throughout the dungeon, as well as how I recommend you handle them. I’ll be focusing on the mythic and M+ versions of the dungeon, but most of this article will apply to both normal and heroic difficulties as well. I’ll also be including my recommended, PUG friendly route via the Mythic Dungeon Tools addon for anyone interested.
Some background on myself, my name is Tactyks and I am an avid M+ player, achieving the 0.1% M+ title numerous times on 5 different specs, as well as competing in The Great Push in season 4 of Shadowlands. I also create M+, Raid, and tank guide content on my YouTube and Twitch channels, so be sure to stop by and say hi!
Socials:
- YouTube: https://www.youtube.com/@Tactyks
- Twitch: https://www.twitch.tv/tactyks
- Twitter: https://twitter.com/tactyks
Important Abilities
New: Try out the Mythic+ Dungeon Ability Tracker to filter for specific abilities within Seat of the Triumvirate!
Ability TrackerSeat of the Triumvirate Mythic+ Dungeon Route
If you are using the Mythic Dungeon Tools (MDT) Addon, you can import our PUG Friendly Route for the Mythic+ difficulty of Seat of the Triumvirate below.
Seat of the Triumvirate M+ Dungeon Route: https://wago.io/9uOEdPCaw
Video Guide
Zuraal the Ascended Trash
As you enter the dungeon, you’ll notice 4 Merciless Subjugators channeling into the first boss, who is suspended in the air and cannot be engaged until all of them have been defeated.
Merciless Subjugator
- This mob is immune to CC
- Chains Of Subjugation targets all players, loosely spread to avoid cleaving and be ready with group defensives, healing cooldowns, or snare breaks to mitigate the damage
- Leeching Void targets a random player, healers focus the absorb off to remove the debuff
Famished Broken
- Beware that these mobs pulse for minor AoE damage thanks to the Rupture passive, which also spawns circles on death that you need to avoid
Shadowguard Champion
- Tanks should try and stay in melee range of these mobs as otherwise they’ll use Relentless Pursuit which can get dangerous with multiple stacks
- Be ready with soothes when these mobs gain Battle Rage, otherwise tanks will need to use a defensive
Dark Conjuror
- Make sure to interrupt every cast of Summon Voidcaller
- Use any spare interrupts on the random target Umbral Bolt
Bound Voidcaller
- These mobs constantly pulse for moderate group damage with Pulsing Void, so healers be prepared and DPS make sure you swap to them ASAP
Zuraal the Ascended Boss Fight
Decimate targets a random player, causing the boss to leap at them and create a puddle. Try to drop these near the edge of the room or overlapping existing puddles to conserve space, but don’t go too far from the current boss position so that melee DPS can maintain uptime.
Tanks be ready with a defensive for the Void Slash combo, and everyone should be ready to avoid the random target Null Palm frontal.
Oozing Slam applies a DoT to your group and spawns two Coalesced Void mobs around the room, which will explode if they reach the boss. Use slows, stuns, or knockbacks to hinder these mobs while swapping to them, or use long term CC’s like Freezing Trap or Paralysis on one of them so you can focus on one at a time. Also beware that these oozes form into a puddle on death for additional area denial.
Crashing Void speeds up Coalesced Void mobs while also pulling in players before exploding for a large hit of group damage and knocking players back. Make sure players are topped and try not to get knocked into a puddle. At the same time, you’ll want oozes to either be dead or CC’d for this cast, otherwise it’s likely they’ll contact the boss and explode.
Saprish Trash
Similar to the previous boss, in this part of the dungeon you’ll need to defeat 4 Rift Wardens in order to summon the boss, all of which are spread across this area in static positions.
Rift Warden
- This mob is immune to CC
- Beware that these mobs Stabilize a nearby rift, so you’ll need to fight them within 30yds or it explodes for lethal group damage
- Healers be ready for heavy group damage after Rift Tear (Void Expulsion), which also spawns circles players should avoid
- Rift Essence debuffs random players, use Magic dispels or dwarf racials to remove it if possible, otherwise be ready with defensives
Ruthless Riftstalker
- Occasionally teleports behind a random player and uses Backstab, if targeted be ready to use defensives if other damage comes your way
- Use an interrupt or CC to stop their Shadowmend healing
Umbral War-Adept
- This mob is immune to CC
- Void Burst aims a line of circles at a random player, make sure to avoid this
- Void Bash targets the tank, be ready with a defensive, especially if this knocks you out of range of any Shadowguard Champions
Ravenous Umbralfin
- Note that these mobs heal based on their melee hits thanks to Devouring Frenzy
Saprish Boss Fight
Note that the boss and his two pets share health, so tanks want to keep them stacked to allow their group to cleave as much as possible.
Avoid touching the Void Bomb that spawn, instead cleaving them with the circle created by Phase Dash to remove as many as possible. If any remain, have your tank or a player with an immunity soak them before the Overload cast completes to prevent additional damage. Healers will want to make sure the group is topped before both casts, particularly Overload as it also has a DoT attached to it.
For the pets, assign at least 2 interrupts to Shadewing’s Dread Screech cast, ideally having a ranged kick on every even cast since it can overlap with Phase Dash. As for Darkfang, beware of additional random target damage from Shadow Pounce, using bleed cleanses or defensives as needed.
Viceroy Nezhar Trash
Dire Voidbender
- Make sure to interrupt every cast of Abyssal Enhancement, or use a purge to remove it if it goes off
Void-Infused Destroyer
- This mob is immune to CC
- Eruption targets 2 players, avoid cleaving allies and be ready with a defensive or focused healing to handle the DoT
- Void Cleave aims a frontal at a random player, make sure everyone avoids it
Grand Shadow-Weaver
- This mob is immune to CC
- Avoid the Umbral Waves shot out by the Gate of the Abyss this mob spawns nearby
- Use a defensive or combat drop if targeted by Void Infusion
Viceroy Nezhar Boss Fight
Avoid the Umbral Waves created by three Gates Of The Abyss the boss spawns nearby, and be ready to use a defensive if needed if you’re one of the 3 players targeted by Mass Void Infusion.
Mind Blast targets the tank, keep an interrupt rotation on this to help mitigate the high damage it does.
Umbral Tentacles spawn in sets of 5, each channeling Mind Flay into a different player. Cleave them down as quickly as possible to reduce your group's damage intake, using a defensive if needed.
At full energy the boss teleports to the middle of the arena and uses Repulse to knock all players back, before starting to cast Collapsing Void. Use movement abilities to get underneath the boss which remains safe during the channel, and be ready with healing cooldowns and group defensives to deal with the heavy group damage.
L'ura Boss Fight
Dirge Of Despair does a group hit and spawns 6 Notes Of Despair around the arena that constantly pulse for group damage, healers will need to make sure they spread their cooldowns out to handle this consistent damage.
To help reduce this damage, players targeted by Discordant Beam can shoot an active Note in order to silence it, preventing it from dealing additional damage. Once all 6 Notes are silenced it triggers an intermission where the boss gets debuffed with Siphon Void, so make sure to save your damage cooldowns for that.
Beware that the position of the Notes can change when the boss casts Grim Chorus, which also creates a circle around active Notes that you should avoid and causes them to apply the Anguish debuff to all players every 2s, so you’ll want to transition to the intermission ASAP before the damage becomes unhealable.
Disintegrate creates beams that rotate around the boss, so everyone should be ready to move with them to avoid excess damage. Otherwise Tanks should watch the stacks of Abyssal Lance on the boss, being ready with a defensive whenever they hit 3 as that triggers a large shadow hit after a few seconds.