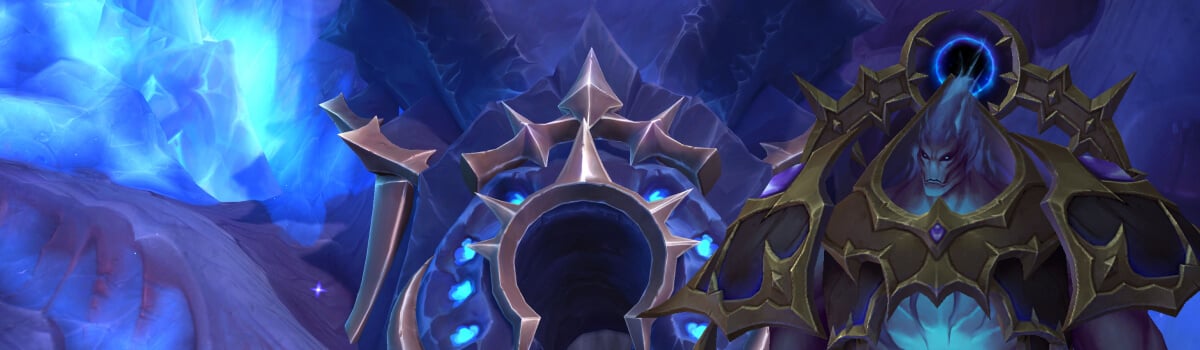
The Torment’s Rise Delve is the first Midnight Nemesis Delve, there is only one boss in the Delve, called Nullaeus. He has two difficulties Tier 8 and Tier 11, formerly known as "?" and "??". The recommended Item level for Tier 8 difficulty is 255 and for Tier 11 it is 274.
This encounter is very difficult and punishing, so you will probably die a lot while progressing through it, especially in lower gear levels. However, it could be worth doing especially as defeating him for the first time rewards 30 Hero Dawncrests, which do not seem to count towards the season maximum.
In this guide we show you where the Torment’s Rise Delve is located and how to defeat Nullaues on both Tier 8 and Tier 11 difficulty.
- Torment’s Rise Delve Location
- Nullaeus Delve Overview
- Nullaeus Delve Strategy
- Best Valeera Setup
- Torment’s Rise Delve Rewards
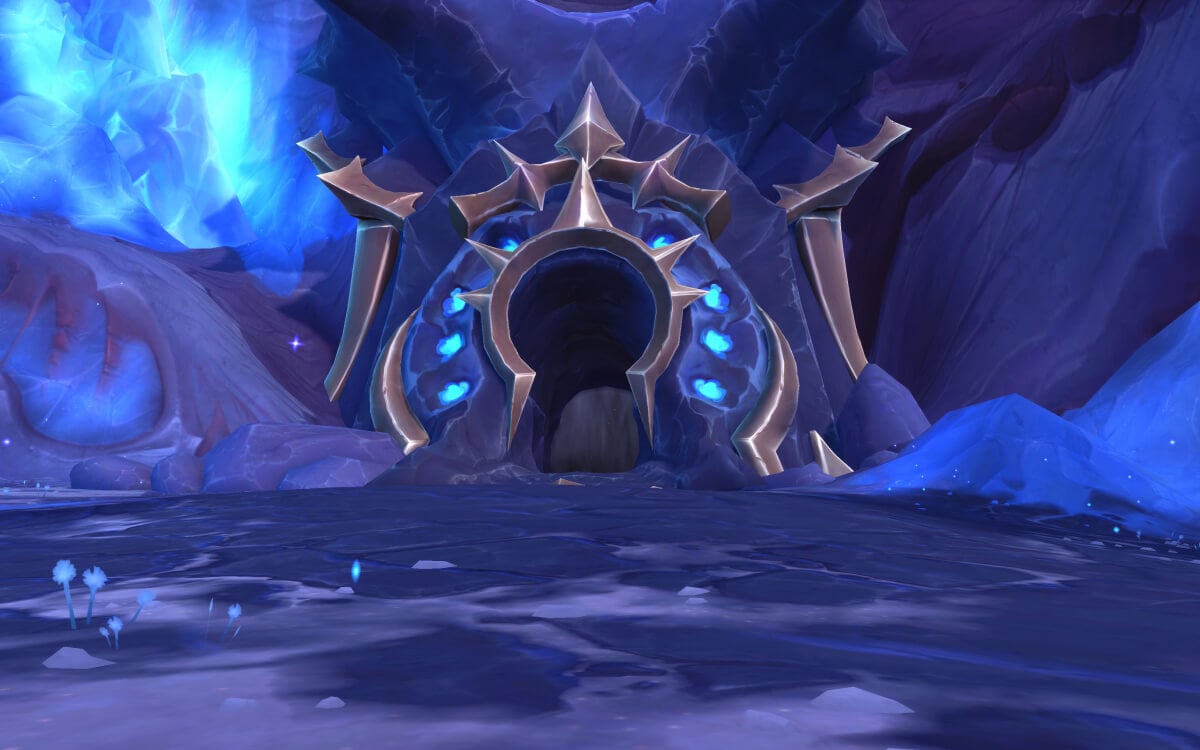
Torment’s Rise Delve Location
The Torment's Rise Delve is located in The Voidstorm zone, in the South East corner just a little north of Obscurion Citadel.
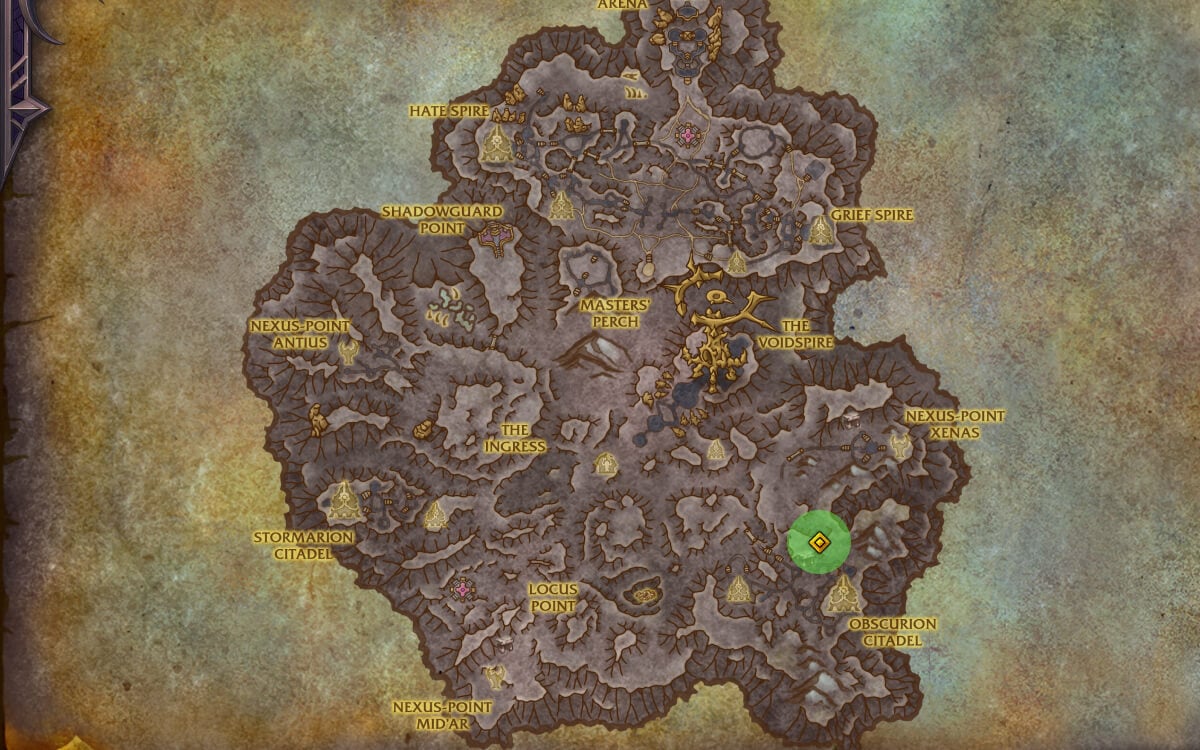
/way #2444 61.16 71.84
Nullaeus Tier 8 Difficulty Overview
If you have completed a Tier 8 delve you may have already encountered Nullaeus, as he can randomly appear in any Tier 8 or higher delve. He can also be summoned using the Beacon of Hope inside a Delve.
If you have already encountered him you will have seen a few of his mechanics.
Base Mechanics
The Nullaeus fight is divided into phases, as he becomes immune at 75%, 50% and 25% health. Whenever Nullaeus is active he will use the following abilities which all have around a 20 second cooldown:
- Imploding Strike - Hits a single person for moderate physical damage. He will always choose the highest threat target.
- Emptiness of the Void - An interruptable cast which deals massive AoE damage, and will probably one-shot most people (at least with the gear available at the release of this delve). This must be interrupted, unless it can somehow be outranged, which the tooltip alludes to, but we didn’t manage to do during testing.
- Devouring Essence - After a short uninterruptible cast he applies a magic DoT to a single person, dealing moderate shadow damage every 2 seconds over 18 seconds. If you can dispel this, you should, because damage adds up pretty quick in this fight.
Intermission 1
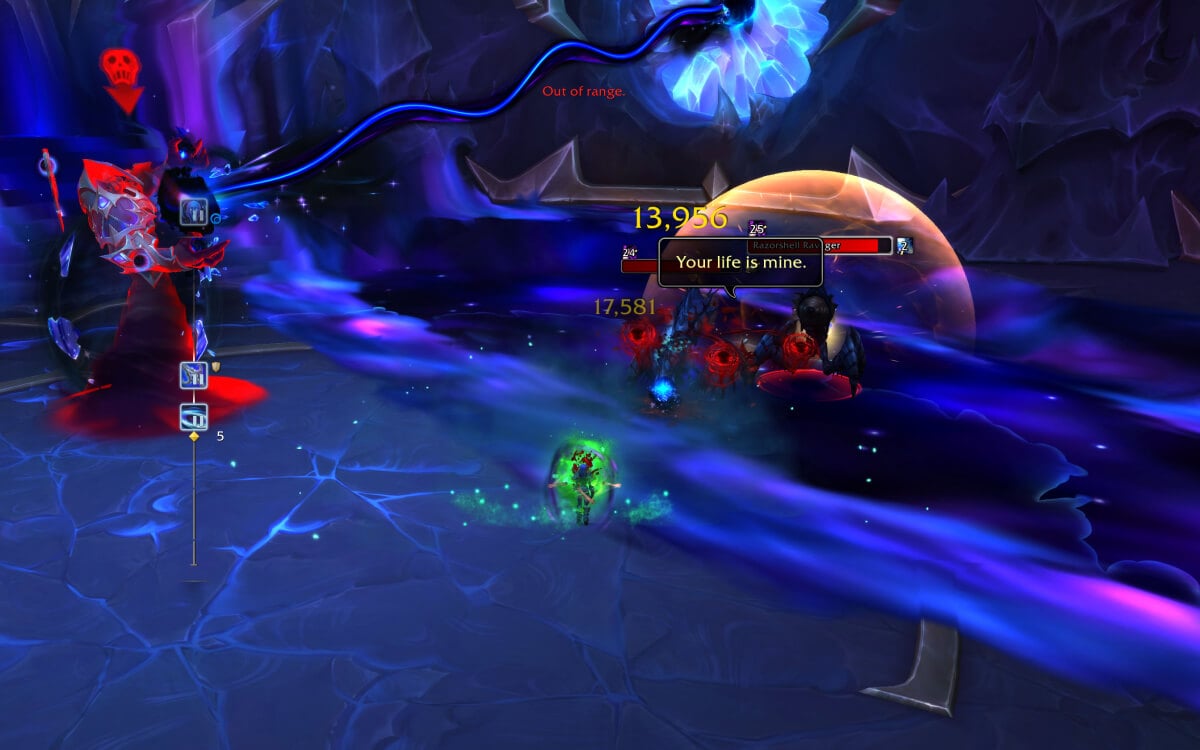
At 75% Nullaeus becomes untargetable and starts channeling into a Void Orb. This stops all his regular abilities for about 30 seconds. Instead two adds are summoned, called Razorshell Ravagers.
The Razorshell Ravagers have two abilities, which they use slightly off sync from one another:
- Spiny Leap - The add targets the furthest away player, or Valeera if she is furthest, and puts a circle at the feet of the person to indicate it will leap onto you. You can sidestep the circle and not be hit. If you are hit, you take a heavy chunk of nature damage.
- Jagged Rip - After a short cast the add applies a strong bleed to its closest target. You can move out during the cast to make the bleed go on someone else, or Valeera.
After about 15 seconds of the adds spawning, the Void Orb, which Nullaeus is channeling into, will fill a 3rd of the room with a voidzone. After a while the voidzone will go away and the orb will spawn a new zone. It doesn’t pick the same area twice, but this will keep going for the rest of the fight.
A while later Nullaeus will rejoin the fight, with the same abilities as before. If the adds are still alive you will now deal with all 3 enemies at the same time.
Intermission 2
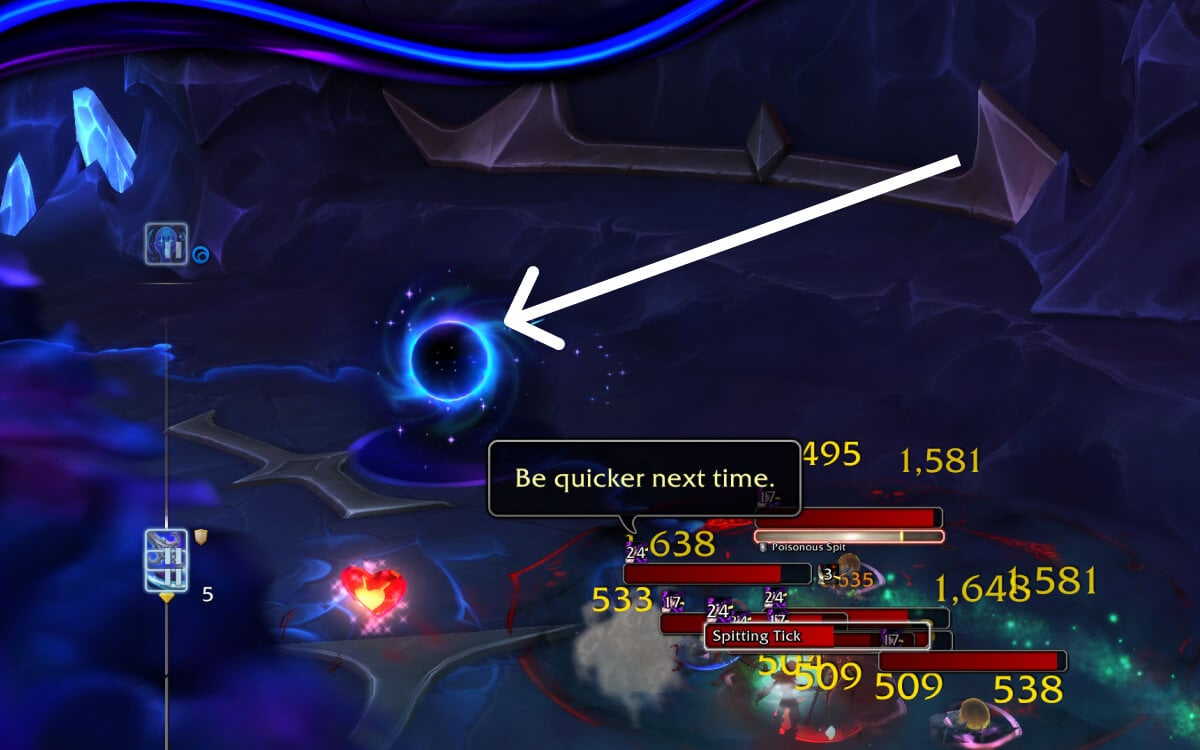
At 50% health Nullaeus starts channeling into a second Void Orb, again becoming untargetable. This time he will summon 7 adds called Spitting Tick. They have a single ability called Poisonous Spit, which deals moderate damage, but can combo you to death, because of the amount of ticks.
About 15 seconds after the adds spawn, the second Void Orb will spawn a small Black Hole which bounces around the room. The black hole pulls you towards it, and the pull is stronger the closer you are to it. It seems to not do any damage, even if you are directly in it, but the pull makes it really hard to move out of other mechanics.
A while later Nullaeus rejoins the fight, with the same abilities as before. However, now with both Void Orbs active: a voidzone covering a third of the room and the bouncing Black Hole. If all the Ticks are still alive at this point you will have 7 Spitting Ticks and Nullaeus to deal with, which can be very difficult.
Intermission 3
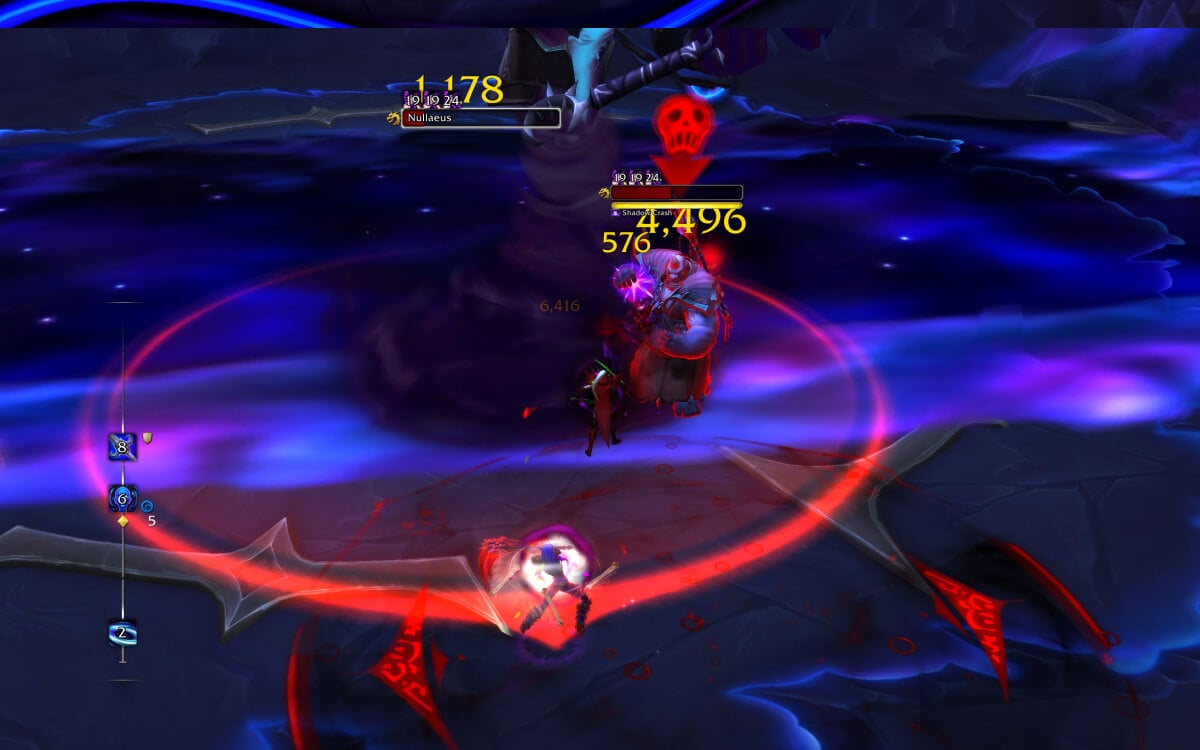
At 25% health Nullaeus goes untargetable for the final time. At this point he summons an Enslaved Voidcaster, who has a lot of health and three abilities:
- Shadow Bolt - Interruptible cast which hits a single target for a moderate amount of shadow damage.
- Shadow Crash - Interrupible cast which puts a circle under the target, which you can step out of. If you are caught, you get hit with moderate shadow damage.
- Curse of Hesitation - Applies a 5 minute curse which slows your movement by 30%.
There is no third Void Orb activating at this point, so you are just dealing with the add and the previous Void Orb mechanics, until Nullaeus rejoins the fight after about 30 seconds, with the same abilities as before.
Nullaeus Tier 11 Difficulty
The Tier 11 "hard mode" version is a copy of the Tier 8 version. The only major difference is that everything hits significantly harder. Emptiness of the Void for example will one shot if you miss an interrupt. In addition the Black Hole seems to have a slightly stronger pull on the harder difficulty.
Nullaeus Delve Strategy
The Nullaeus encounter can be overwhelming at first, so we have outlined what we think is the best way to tackle this encounter.
The beginning of the fight is relatively easy. Make sure to keep Emptiness of the Void interrupted, and if you can avoid or dispel Devouring Essence you should do so.
Note: Whenever Nullaeus is active between intermissions he will use these abilities.
Intermission 1
Once you hit the first intermission at 75% boss health, try to have cooldowns available to kill the Razorshell Ravagers as fast as possible, as the lower these adds are when Nullaeus becomes active again the better, as having both alive at the same time as the boss can easily result in a death.
Once the first Void Orb mechanic is active, try to keep Nullaeus near the border of the void zone, as when it disappears you can move into that part of the room and know you are safe for a while, as the Orb doesn’t pick the same area twice in a row.
You will now need to avoid the Void Zone for the rest of the fight.
Intermission 2
At 50% health, Intermission 2 starts. Try to have some form of CC ready for the Ticks, as they can easily combo you. AoE damage cooldowns can really help with getting rid of them as fast as possible. Make sure to use defensives if lots of casts are going through.
The Black Hole will slowly move around the room dragging you towards it. Try to save movement skills for when it is close to you, as the stronger pull can easily move you into other mechanics.
You will now need to avoid the Void Zone and move away from the Black Hole throughout the fight.
Intermission 3
Once Nullaeus hits 25%, and summons the Enslaved Voidcaster, interrupt the first cast then don’t interrupt it any more. Otherwise you won’t have an interrupt available for Nullaeus when he rejoins the fight and casts Emptiness of the Void.
Final Phase
As soon as Nullaeus is active after the last intermission, use all cooldowns (Heroism / Bloodlust / Drums and Potion if you have access to them) and nuke him as hard as possible before you get overwhelmed by the combo of enemies. The Voidcaster is immune to CC so you can’t bypass having him in the fight, other than by killing him, which likely is a waste of time. So focus all your damage on finishing off Nullaeus.
Nullaeus Delve Strategy Summary
- Phase 1 - Interrupt Emptiness of the Void, Dispel Devouring Essence and damage the boss to 75% health.
- Intermission 1 (75%) - Kill Razorshell Ravagers and avoid the Voidzone when it spawns.
- Phase 2 - Interrupt Emptiness of the Void, Dispel Devouring Essence, avoid Voidzones and damage the boss to 50% health.
- Intermission 2 (50%) - Crowd Control and Kill Spitting Ticks, move away from the Black Hole.
- Phase 3 - Interrupt Emptiness of the Void, Dispel Devouring Essence, avoid Voidzones, avoid the Black Hole and damage the boss to 25% health.
- Intermission 3 (25%) - Interrupt Enslaved Voidcaster once. Avoid Blackhole and Voidzones until Nullaeus is active again.
- Final Phase - Use all Cooldowns to kill Nullaeus (Ignore Enslaved Voidcaster).
Best Valeera Setup
Depending on what role you are playing when facing Nullaeus you will probably want to change whether Valeera is a DPS, Tank or Healer.
Melee DPS and Tank
If you are trying to defeat Nullaeus as a Tank or DPS we recommend setting Valeera to Healer. She will dispel the Devouring Essence, meaning you don’t have to deal with this mechanic, she also removes the bleed from the Razorshell Ravagers. You will have to make sure you interrupt Emptiness of the Void yourself.
Healer
As a healer you will need to set Valeera to DPS so that she can interrupt every Emptiness of the Void for you. However, this means you will need to dispel the Devouring Essence yourself.
Ranged DPS
What you set Valeera to, as ranged dps, will depend on the cooldown of your interrupt. If you are struggling to cover all of the Emptiness of the Void casts, set Valeera to DPS and make her do all the interrupts. Some ranged classes might need Valeera as a Tank, while pet classes might want her as a healer.
Best Valeera Curio Build
While we have suggested different ways to spec Valeera based on your role. We recommend going for specific curios to increase your damage and defensive capabilities during the Nullaeus encounter.
The best Combat Curio is the Porcelain Blade Tip, which increases your chance to critically strike targets. You could also run Sanctum’s Edict, which takes a long time to stack up, but does give a 30% health absorb shield once you reach maximum stacks.
The Time Lost Edict is a nice utility curio as it summons a bubble that increases your Movement Speed, Cooldown Speed and Cast Speed. The Cooldown Reduction is particularly nice for extra defensives if you need them.
Torment’s Rise Delve Rewards
Defeating Nullaeus in any difficulty during season 1 of Midnight will earn you the My Shady Nemesis achievement, which has the additional reward of the Nullaeus Domaneye helmet transmog, along with 30 Hero Dawncrests.
You will also complete the Nulling Nullaeus quest which rewards the Dominating Victory Toy.
If you manage to defeat him on the Tier 11 difficulty you will earn the Lighting the Dark Achievement which rewards The Ominous title. If you manage to do this solo, you also get the Let Me Solo Him: Nullaeus Achievement which rewards the Arcanovoid Construct Mount.
Nullaeus looks like an interesting encounter for the first season of Midnight. We hope this guide helped you better understand how to tackle this difficult encounter and earn some of the awesome rewards.