
Raid Setup
Introduction
Welcome to our Mythic Larodar, Keeper of the Flame boss guide!
Fight Style: Single Target (with light cleave in Phase 1)
Recommended Setup: 2 Tanks / 4 Healers / 14 DPS
Useful utilities: Rescue, Life-Grip, Guardian Spirit, Lay on Hands
Hero/Lust usage: Intermission or at 6 minutes
Easy Mode
- Hug the puddles during Igniting Growth
- Soak Blazing Coalescence orbs, but use personals if you have a stack already
- Kill the Treants/Root and quickly heal them up
- Clean the room with the remaining Seed of Life energy
- Stack up once the boss hits 35% for additional healing
- Move away from the raid with Ashen Devastation in Phase 2
- CC the Treant adds on the side of the room
- Do not stand on the tanks
Mechanics
This happens fairly early at the start of each ‘Phase 1’. It forces your entire raid to hug the fire puddles to prevent spreading more. To understand this better, a player simply spawns fire all around them, if you are hugging the fire puddle then half of that will simply be thrown into the existing puddle.
This lasts for 15 seconds, during that time your raid will need to be constantly moving as more fire will spawn around you.
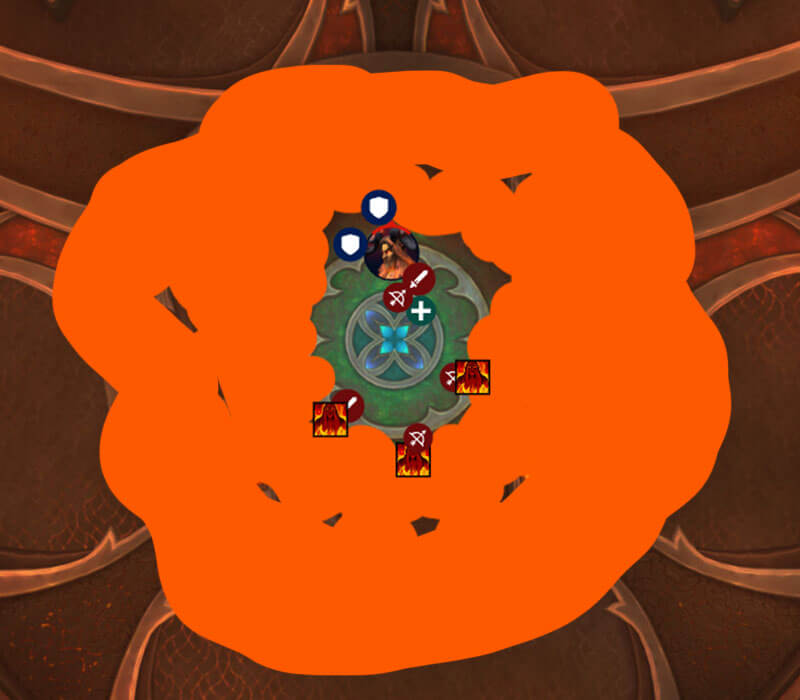
Orbs that buff you with 20% critical chance for 10 seconds. If it touches the boss, Larodar deals 20% increased fire damage for 10 seconds instead. Those orbs always spawn after Blazing Thorns cast, and there are 5 of them per set.
Targets several players who after 8 seconds will explode and deal raid wide damage based on distance. Move as far away as possible.
A Tank frontal that debuffs the tank and reduces healing taken by 100%. However, the Tank can move on top of other players and leech health from them.
It’s best done in turns, making sure that the stacks drop that were previously put on the players during the last leech.
Strategy
Larodar, just like Nymue, is another boss that feels like this should have been the Heroic difficulty version of the fight. The fight has only 2 extra abilities per phase, but none of them require any advanced gameplay or have a high learning curve.
Seed of Life Gameplay
First things first, you will need 3 teams of 3 players to deal with the ‘Vacuum cleaning’ of the fire on the floor.
You want to preferably use Ranged DPS and Healers for this, but make sure to put the healers as the first person to click, and mobile range as the last person in the chain.
Every set is identical to each other, but will be impacted by how well your raid deals with the Fiery Treants. As a general rule, you want to kill the 3 Treants quickly, then Life-Grip/Rescue them towards the middle. That way they won’t be standing in fire and take extra damage, and they will be in position to fill up the seed as soon as they get healed up.
If done correctly, each team should be good to go just as the Scorching Root is about to spawn. That is your time to start.
The 3 players need to be the closest to the middle when creating the chain, to avoid giving the Vacuum Cleaner to someone else by accident. They also need to make sure to move together, to not break the link. There is a visual indication (green line turns yellow) for this so just pay attention to that. If you want to break the link early, the player first in the chain should be the one to break it, avoiding other players accidentally getting linked.
You always need to hit the root first, then start clearing around the room. There is no specific pattern for where to clean, you just want to create a nice circle of safe space.
Blazing Coalescence Gameplay
This ability might seem confusing and feel like it needs extra attention, but in reality it doesn’t. Each time you soak, you gain a permanent debuff that increases damage taken from the next orb by 250%. This will last the entire fight (but the ability only occurs in Phase 1). Simply, this means that everyone can take 1 orb safely, the 2nd orb will hurt so using defensives is advised, a 3rd orb will kill you without a defensive and 4 stacks on a single player (apart from tanks) should never happen.
The best way to deal with this is to have a simple list of players that suggests in which set you should take it.
The orbs spawn at:
- 00:35 1st set
- 00:55 2nd set
- 01:25 3rd set
- 02:00 4th set
- 02:50 5th set
- 03:55 6th set
- 04:40 7th set
As you can see, most of the timers are not aligned with cooldowns, but worth putting some strong 2 minute cooldown classes on the 2:00 min sets because of the buff the player gets when soaking.
It is also not a big deal if 1-2 orbs reach the boss, he will just do more damage on the charge or inferno. But 3+ orbs reaching the boss is probably lethal.
Also, keep in mind that the thorns do hurt a lot on Mythic difficulty, so dodging those is very important.
Phase 1:

Igniting Growth will be cast almost on pull, so everyone needs to be hugging a puddle. Range should prioritise the one on the opposite side just to clear up some melee space.
You pull the boss to blue, spawn the Fiery Treants there and kill them quickly, then use Rescue and Life-Grips to get them to the middle of the room.
While this is happening, tanks will slowly move the boss towards orange, once you get there, the whole area is going to get filled with fire and Larodar will Furious Charge the tank. The Tank will always bait the charge into the fire, away from the raid. Once the boss is back, players need to stay towards puddles for a few more seconds and then it's over. The boss is then moved to the next open area and from there you just move clockwise around the room, filling the gaps.
For the 1st scorching root that spawns, it's recommended that you kite it closer to the boss before hitting it with the Vacuum cleaner, that way you can get more boss damage and cleave.
Healers should assign an external rotation for the root healing, just to guarantee this mechanic to not fail. You should be able to use Guardian Spirit for every set (if you have a Holy Priest) and you should also be able to set up some Lay on Hands while Guardian Spirit is active.
If everything was done correctly, Larodar will do his last charge before 100 energy, and tanks need to make sure to place Larodar right next to the safe green circle, otherwise melees will complain very loudly on voice-comms that they can’t hit the boss.
This will just repeat 3 times during Phase 1, until you hit 35%, at which point Phase 2 starts.
Note: With current gear and tuning, it is unlikely that you will get 3rd Raging Inferno cast. That means that you do not need to kill and heal the 3rd root, but you still need to Vacuum clean it so it stops following players (and to clear more space). You do not even need to kill it once it's cleansed, because it will de-spawn once the boss hits 35%.
Biggest issues in Phase 1
While all this seems simple enough, the first few pulls will feel very strange and possibly harder than expected. There are exactly 2 things that will make everything problematic, apart from some Seed team failures (which are also bound to happen).
Low damage on the Fiery Treants, late grips or low healing. This will make everything harder right away, because you won’t have enough energy (or any at all) to cleanse the root, then safe space will get limited, then once you finally do cleanse the root, now you have less time to kill it and heal it before the Raging Inferno cast.
Players getting hit by Thorns or accidentally soaking Blazing Coalescence. The biggest issue with this is that it mostly happens before the charge, so even if a player survives soaking an orb, or getting hit by thorns, the charge afterwards will most likely kill you, especially if the boss has eaten 1-2 orbs. You need to be aware of this and use strong defensives, healthstones or call for externals.
Intermission
The Mythic Larodar intermission is very much the same as Heroic, but hurts way more. Hero/Lust should be used here to help out with healing and to get the boss health lower. The only reason why you could delay Hero/Lust to 6 min is if you are struggling badly with damage to the boss. In that case, using Hero at 6 min with all cooldowns and pot is the most effective way to burn the boss.
One thing to keep an eye on is the boss's health when he is about to do a charge. What often happens now is that the boss might hit 35% when he is away because of the charge. If this happens, he will simply start casting his intermission spell in the fire and melees won’t be able to attack the boss.
Phase 2
This phase also comes with only a few subtle changes. The most important thing in Mythic compared to Heroic difficulty is using CC on the adds that spawn around the room. They will create additional fire once they reach the safe space and you will already be very limited. So using crowd control is the best way to handle this.

Use whatever CC you have at disposal, and make sure nobody is dotting the treants. It’s recommended to assign rough coverage of the room to players, and remind them to keep the CC renewed before it drops off.
If you miss a CC or it breaks, use knockbacks to prevent them from entering the room, while cleaving/dotting, so they die while still standing in the fire.
Other than the treants, you have to deal with the new ability, Ashen Devastation, which is range based damage to the entire raid (think of Raszageth circles in Phase 1, just not as annoying).
Ideally, you want your entire raid to stack up in melee, on one side of the boss and only move out if they need to soak Falling Embers or drop Ashen Devastation.
If you are a mobile tanky class and full health (or with immunity), it's worth running into fire during the last 1-2 seconds to explode with Ashen Devastation. This will just additionally reduce damage on the entire raid. Overall, this ability is not as problematic as it may sound, simply because the damage is not overwhelmingly high, even if those 3 players would stand much closer to the raid.
Apart from this, the only thing that might wipe the raid is missed soaks and tanks permanently leaching from the stack of players.
Tanks simply have to be a bit rational, and only go to leach from players once they drop below 50%, the raid is healthy and stacks have dropped.