Up to 84% Off VPN
Kindo’jan is the final boss of the very first Labyrinth, a new type of Delve content released in World of Warcraft Midnight, the Labyrinth of Kindo’jan. Kindo’jan feels very similar to a Seasonal Delve Nemesis Boss, having a very punishing encounter where messing up mechanics will result in you failing.
Kindo’jan Boss Guide Contents:
- Labyrinth of Kindo’jan Location
- How to access the Kindo’jan Boss
- Kindo’jan Abilites
- Kindo’jan Strategy
- Best Valeera Setup
- Best Corrosive Powers
- Kindo’jan Rewards
Labyrinth of Kindo’jan Location
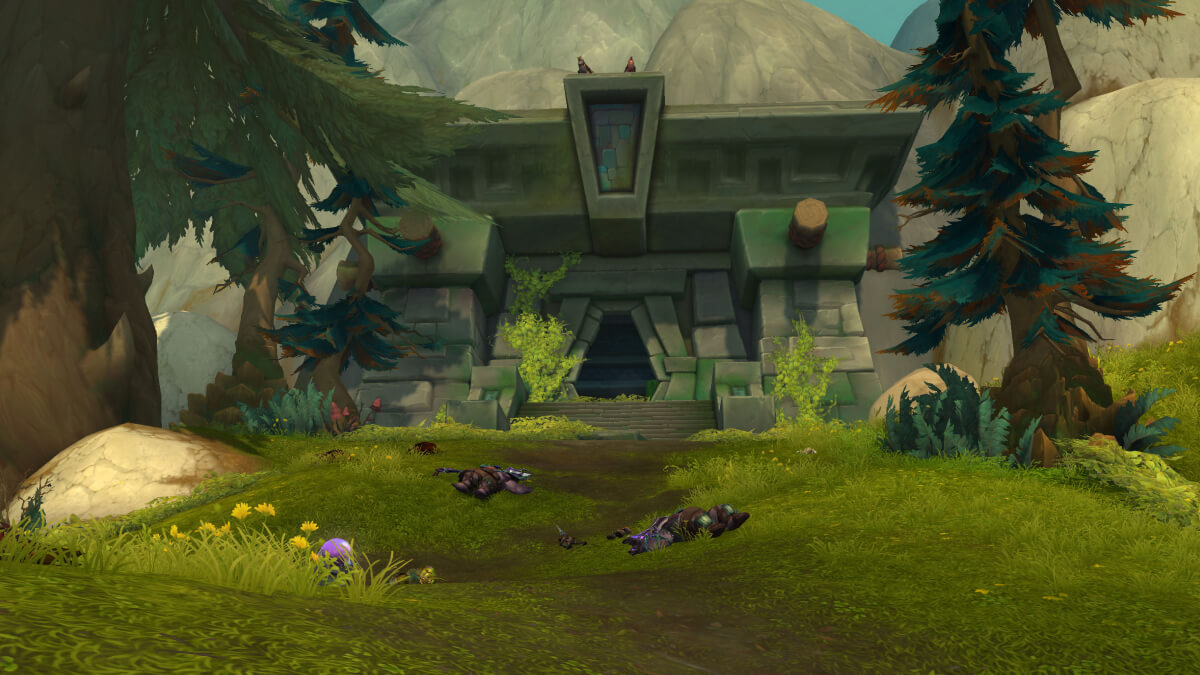
The Labyrinth of Kindo’jan is located in the south east of Eversong Woods, near the border to Zul’Aman.
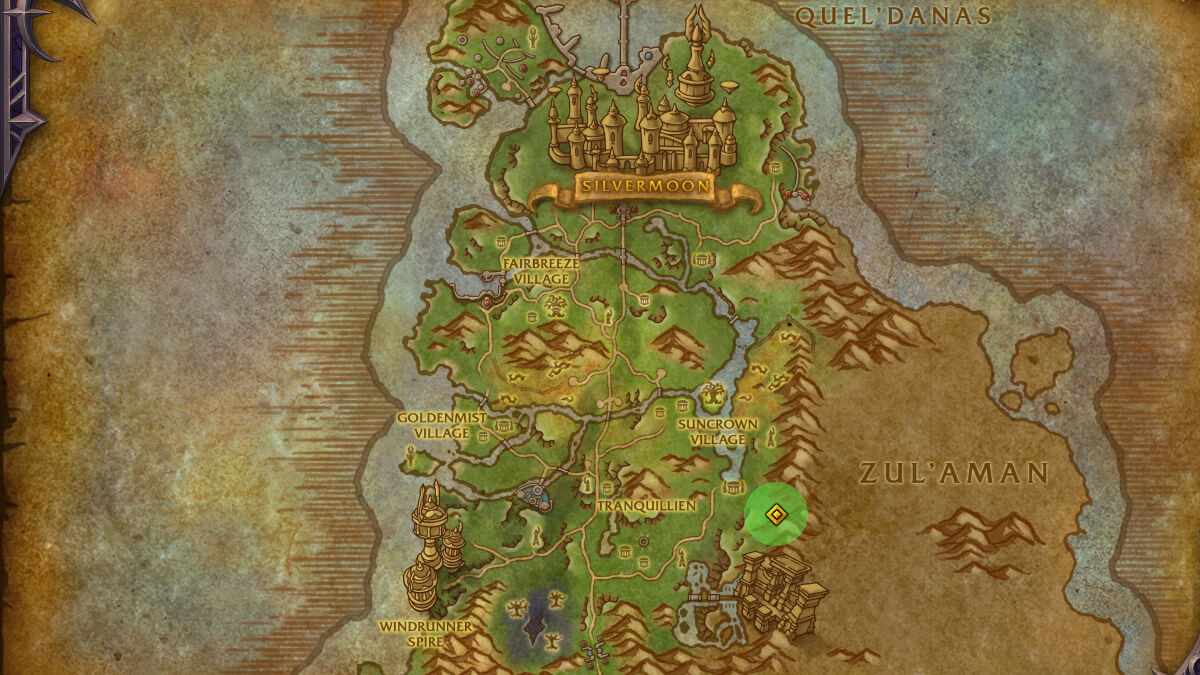
/way #2395 63.05 72.30
Note: You may have to do a quest to access the Labyrinth of Kindo’jan, which starts just outside the entrance.
How to Access the Kindo’jan Boss Fight
To access the Kindo’jan Boss fight you will need to complete all 9 of the other rooms within the Labyrinth of Kindo’jan on Tier 8 or higher. Once you have completed everything required, you will get a message saying that the door can be accessed in the most North chamber.
Upon entering the north chamber you will encounter the enemy Den’zara who is fairly easy to take down. Once defeated, Kindo'jan will spawn.
Kindo’jan Boss Abilities
Once Kindo’jan is active, he will be on the most northern part of the room, stationary and can’t be moved. He doesn’t seem to need a player in Melee range but will melee Valeera if she is in range. His melee hits are fairly low damage, but do add up if you don’t have passive health regeneration.
The Kindo’jan fight can be split into two phases and an intermission.
Phase 1 - Kindo’jan
During Phase 1 of the Kindo’jan Boss fight you will only be dealing with Kindo’jan and the adds he spawns.
Kindo’jan Abilities:
- Disgraceful Display - This is a debuff applied whenever a player is hit by a Avoidable mechanic. If you reach 3 stacks the fight ends immediately.
- Eruption of Mojo - Summons a circle around the player that deals minor damage and when the debuff runs out, it leaves a permanent void zone on the ground. He also summons a Large swirl and many smaller swirls which need to be avoided.
- Whirling Axes - Kindo’jan summons four Whirling Axes that spin around the room, being hit does heavy physical damage.
- Hash’ey’s Command - Summons 4 Amani Headhunters around the room. They use Axe Barrage, which summons circles under you, and being hit deals moderate damage.
- Crushing Blow - Kindo’jan spawns a large circle in front of him that deals heavy damage to targets in the circle. It also summons an Amani Juggernaut, which has two abilities:
- Phalanx Charge - Will target a player, deal minor damage and knock them back.
- Amani Aegis - An interruptible spell that will reduce damage taken of the Amani Juggernaut and nearby allies by 33% if the cast goes through.
Intermission - The Loa
At around 70% health, Kindo'jan will disappear and summon the four Loa. During the intermission these will always be in a set order of Akil’zon, Halazzi, Nalorakk and Jan’alai.
Kindo’jan Intermission Abilities:
- Akil’zon will summon winds that try to push you off the platform. While having 8 distinct areas, 4 of the areas are safe and 4 will instantly kill you. During our testing the smallest areas were always the safe spots.
- Halazzi will summon 4 cats that pin down Valeera, you will need to block one of the lines to free her.
- Nalorakk will summon a row of Bears that cover opposite sides of the room with a gap in between. You just need to move between the 2 gaps and not be hit by the bears.
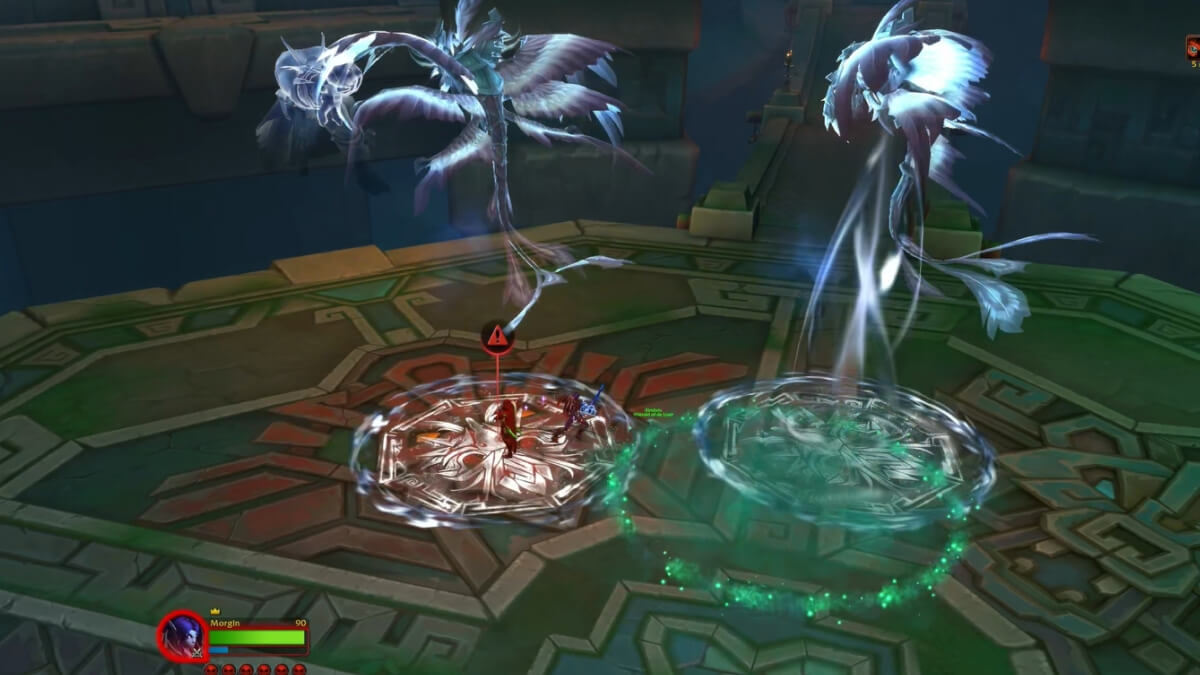
- Jan’alai will summon two circles which need to be soaked, Valeera will ping and stand in one. You will need to stand in the other one.
Phase 2 - Kindo’jan & The Loa
In Phase 2 Kindo’jan will continue to use all of his abilities and summons the loa randomly, so you will need to deal with all Phase 1 abilities and a random Loa at the same time.
Kindo’jan Boss Fight Strategy
Taking on Kindo’jan can be fairly difficult, he has some nasty overlaps of abilities that you need to be aware of. The strategy below will walk you through how to approach and defeat the Kindo’jan Boss fight in the Labyrinth of Kindo’jan.
Phase 1 - Kindo’jan
During Phase 1, make sure you drop the circles from Eruption of Mojo near the front and sides of the room, as this gives you the most room to move around when dealing with the other mechanics.
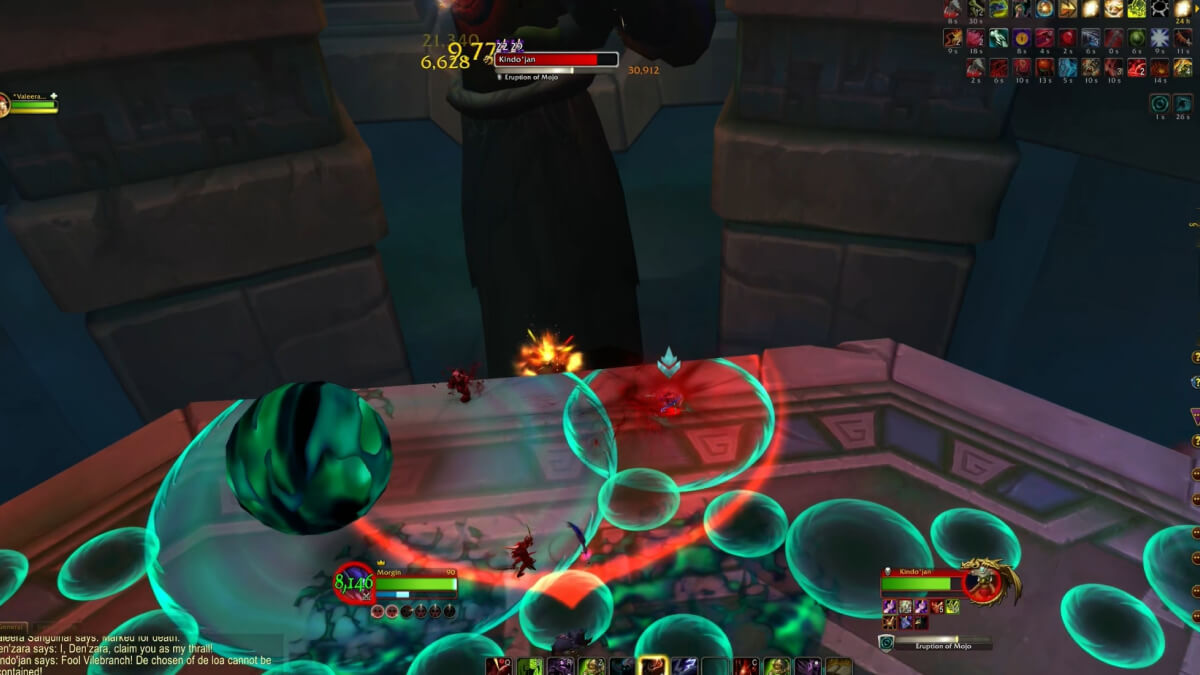
When he summons the Amani Headhunter, with Hash’ey’s Command, you should stay close to Kindo’jan until he summons the Whirling Axe. After the Axe has spawned, you can run towards the center to defeat the Amani Headhunter.
Depending on how quickly you kill them, Kindo’jan will most likely cast Crushing Blow and summon an Amani Juggernaut, which will cast Phalanx Charge. Position yourself so you will not be knocked off the platform, the knock-back is just under half the length of the room.
Make sure to interrupt Amani Aegis, otherwise the adds will be much harder to defeat.
This will continue until you hit 70%, where Kindo’jan will disappear.
Intermission - The Loa
The first Loa summoned in the Intermission is Akil’zon, who is probably the most difficult. When the winds spawn, make sure you are in one of the safe gaps between the winds. You can’t deal damage in this phase, so make sure to focus on your movement.

The next Loa is Hazzali, simply standing in one of the lines blocking the cat. Avoid standing in multiple lines, otherwise you will have to deal with an add, although they are fairly easy.

Nalorakk is fairly easy, move towards the center of the room and line yourself up with one of the gaps, then turn around and be ready to move towards the opposite gap. The row of bears move one at a time so you get plenty of time to avoid the second row.

The final Loa is Jana’lai, which will spawn two circles that need to be soaked. Valeera will ping the one she is going to soak with the Warning ping,you simply need to stand in the other. Missing it will cause you to die.
Phase 2 - Kindo’jan & The Loa
Once you have dealt with all four Loa in the Intermission, Kindo’jan will spawn back on the most northern platform. This area will be fairly messy from Phase 1, but Kindo’jan will move to another platform from time to time.
Note: We would recommend using Heroism / Bloodlust in this phase, to get him as low as possible as quickly as possible. This makes you not spend as long in Phase 2 and prevents you from running out of room or messing up on the combination of Kindo’jan and the Loa’s mechanics.
The fight is basically the same, but you will need to also do the Intermission Loa mechanics from time to time.
The only bad overlap that you need to worry about, is if you get the Amani Juggernaut at the same time as a Loa; overlaps with Jana’lai, Akil’zon and Nalorakk can be particularly difficult.
If this happens, you should generally try to position yourself to get knocked back into the area you need to be at; for example, if you have to soak a Jana’lai circle, try to get knocked back into the soak, otherwise you will most likely miss it and wipe.
At this point you just repeat until the boss dies.
Best Valeera Setup for Kindo’jan
Valeera is really good in this fight, we recommend having her as either Healer or DPS: Healer if you want to keep yourself healthy or damage so that she interrupts the Amani Aegis cast from the add.
Unlike the Nemesis Delve, there is no deadly missed Interrupt or Dispel, so just pick the Valeera role that you prefer.
The following Delve Curios are the best Valeera Curio options for Kindo’jan.
Best Damage Curio
The best Damage Curio to use against Kindo’jan is the Corrosive Bilespear. If you prefer, you could run Ouroboric Curse, but Corrosive Bilespear will be much higher damage.
Best Utility Curio
The best Utility Curio to use for the Kindo’jan fight is the Soul-Cracking Dreamcatcher. The others have no use in the Kindo’jan encounter.
Best Poisons Curio
Bursting Toad Toxin is by far the best Poisons Curio to use for the Kindo’jan fight; it deals a significant amount of damage.
Best Corrosive Powers for Kindo’jan
Corrosive Powers from the Vaults of Atal’utek do work on the Kindo’jan encounter. We recommend using Ula’tek’s Gift, and if you have unlocked a second corrosive power you should pair it with the Insidious Venom.
Ula’tek’s Gift and Insidious Venom are the Best Corrosive Powers for Kindo’jan because they provide the most damage, with Ula’tek’s Gift ramping faster with Insidious Venom.
Kindo’jan Rewards
Defeating Kindo’jan has a few rewards tied to it, including mounts, transmogs and titles.
The first time you defeat Kindo’jan you will receive the Loa-Blessed Victory toy.
The table below shows all of the Achievements you can complete by defeating Kindo’jan, their unlock requirements and what they reward.
| Achievement | Requirement | Reward |
| The First Hash'ey | Defeat Kindo'jan inside his Labyrinth. | “Loa-Blessed” title |
| Let Me Solo Him: Kindo'jan | Defeat Kindo'jan solo on Tier 11 during Midnight Season 2. | Loa-Blessed Wayfarer |
| The Labyrinth of Kindo'jan: One-Champion Army | Complete all nine chambers and defeat Kindo'jan solo on Tier 11 without losing a life during Season 2. | “Lone Raider” title |
| Fabled Let Me Solo Him: Kindo'jan | Defeat Kindo'jan solo on Tier 11 during the first reset he is released. | “Fabled Vanquisher of Kindo'jan” title |
Overall, Kindo'jan is a little easier than some of the Nemesis Delve bosses, but still a very fun and challenging encounter. We hope this guide helped you understand the boss fight better, letting you defeat Kindo'jan and earn the Loa-Blessed Wayfarer mount a little easier.
If you are looking for more WoW content, including Patch 12.1.5, you can check out more of our WoW Midnight Guides.