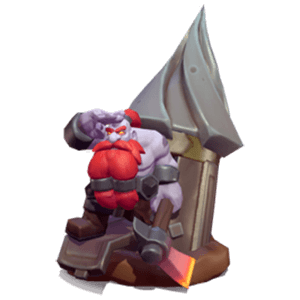
Baron Geddon and Golemagg Raid Guide
Learn how to complete Wing 3 of Molten Core in Warcraft Rumble. Follow our suggested build and strategy for Baron Geddon and Golemagg.
Within the third Wing of Molten Core you will encounter Baron Geddon and Golemagg.
Defeating each of the bosses awards you with 100 Valor. Valor is used for upgrading an army slot to Diamond (+4 levels). Defeat both bosses to earn yourself a Legendary Core.
LFR Builds
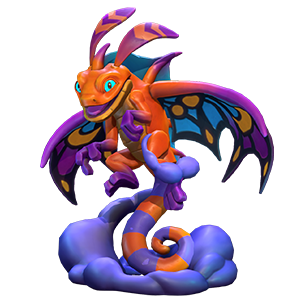
Fae Gargoyle Rend


rumblo:CEoQARoECBsQAhoECBEQAhoECAgQABoECBkQABoECCYQAhoECCsQAA==
Important Talents
Fae Blessing on Faerie Dragon enables you to give Resistant to your Chimaera and Gargoyle, helping them take Towers.
Strategy
Use Chimaera and Faerie Dragon (for Resist on Chimaera) to attack Towers.
Use Dark Iron Miner to get gold.
Use Banshee to defend.
Eclipse can help everywhere: assist in taking Towers, defend your base, or help your minis against Geddon's army.
Use Gargoyle and Faerie Dragon (for Resist) to attack Geddon when you have enough control of the map.
Rend (low-level support build)
rumblo:CEoQARoECBsQARoECFgQARoECDIQABoECCYQAhoECBEQAhoECBkQAA==
This build is a support build that needs a proper deck alongside it. It is a great option if your minis are low level and you cannot push through yourself: you can help defend the base and Towers, while your partner hopefully has a team that can take on Geddon itself.
If you are able to get a Gargoyle to a fairly high level (equal to Geddon or higher), you can use that instead of Chimaera to give this build a chance to also attack Geddon itself. If your Gargoyle is low level, it will be of no use anyway, and it is better to use minis that can do at least something.
Important Talents
Fae Blessing on Faerie Dragon enables you to give Resistant to your Chimaera, helping it to hopefully take some Towers.
Infectious Swipes on Harpies give them the damage they need to take out Fire Elementals.
Strategy
Use Chimaera and Faerie Dragon (for Resist on Chimaera) to attack Towers.
Use Dark Iron Miner to get gold.
Use Harpies and Banshee to defend.
Use Whelp Eggs and Dark Iron Miner to retake Towers before Geddon fully rebuilds them.
Watch it in action
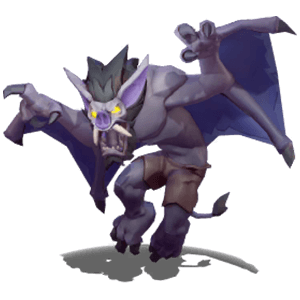
Sylvanas with Meat Wagon
rumblo:CFIQAhoECDoQARoECBsQARoECCYQAhoECEcQAhoECBkQABoECCsQAQ==
This build is designed for the 8-9 o’clock ambush strategy. It can also be used with other Leaders, such as Rend.
Important Talents
Fae Blessing on Faerie Dragon enables you to give Resistant to your Chimaera and Gargoyle, helping them survive longer.
Corrosive Breath on Chimaera gives it the damage it needs to take out Towers effectively.
Forsaken Fury adds damage to your Gargoyle and Meat Wagon.
Strategy
Use Chimaera and Faerie Dragon (for Resist on Chimaera) to attack Towers.
Use Dark Iron Miner to get gold.
Ambush Geddon at 8-9 o’clock if you have good map control: at least the top two Towers, preferably something going on at the bottom right Tower as well. If you had a slow start, let Geddon do another lap and take Towers behind it.
Send a Gargoyle followed by Meat Wagon at Geddon. Keep Geddon in place with Unbound minis at phase transitions. Send another Gargoyle when a new phase begins.
Watch it in action
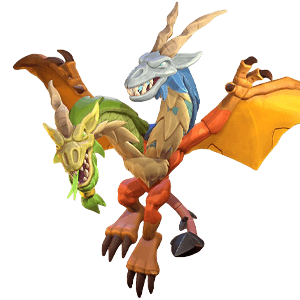
Ragnaros

rumblo:CEgQARoECBsQABoECCYQAhoECDEQABoECDIQABoECF0QARoECCsQAQ==
Important Talents
Fae Blessing on Faerie Dragon enables you to give Resistant to your Gargoyle, helping it survive longer.
Air Drop on Gryphon Rider is needed to give Ragnaros levels.
Empowered Renew on Priestess is necessary because it is the only effective heal on Ragnaros (once per Priestess).
Dark Iron Armaments give Dark Iron Miner Armored and thus damage reflect from Ragnaros.
Strategy
Towers are not too important with Ragnaros. You mainly want to give Ragnaros levels and then take on Geddon.
Use Dark Iron Miner to get gold.
Use Gryphon Rider with Air Drop to give Ragnaros levels.
Use Priestess to heal Ragnaros.
When Ragnaros is strong enough, use Gargoyle and Faerie Dragon (to give Gargoyle Resistant) to attack Geddon.
Watch it in action
Boss Strategy
Updated: June 2025
Minis in Baron Geddon’s Army
- Bat Rider - Enchanted Vials
- Drake - Engulfing Flames
- Gargoyle - Aerial Superiority
- Gryphon Rider - Odyn’s Fury
- Living Bomb - Blast Radius
- Vultures - Migration
Baron Geddon can only deploy minis at the Towers. If it does not control any Towers, it can only play up to one Living Bomb, after which its hand is locked. If Geddon regains the control of a Tower, it will rapidly play its hand.
The Boss and Other Minis
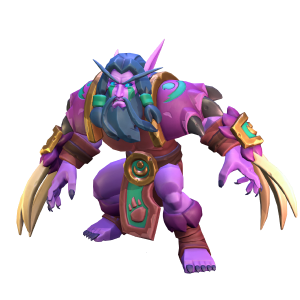
Baron Geddon
- 11,500 health
- Unstoppable, Special Resistant (75% Elemental damage reduction)
- Melee Sweep: 165 Elemental damage to minis, 365 Elemental damage to buildings, applies Burn that deals 45 Elemental damage per second for 8 seconds (360 overall), 2.7 seconds attack speed, 4.5 range, 9 radius
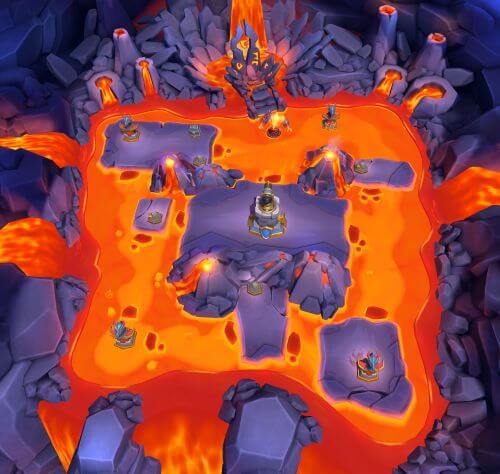
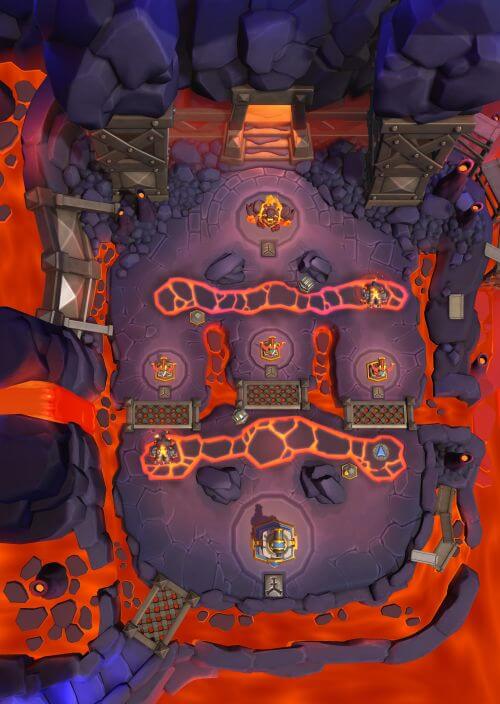
Map Mechanics
The floor is lava. The lava floor deals 80 Elemental damage every 0.5 seconds to ground minis that stand on it. It also instantly pops Whelp Eggs. The lava does not hurt Fire Elementals, Molten Giants, bosses (like Geddon itself), and Ragnaros.
Geddon does not mind the lava and happily walks around the map clockwise. His path goes by all four Towers, which he will retake as he passes.
Baron Geddon summons Fire Elementals. The first one spawns after 4-7 seconds, and new ones spawn every 15-18 seconds from there. These Fire Elementals are immune to the lava floor.
Baron Geddon also summons a Molten Giant at 5:55.
Phase 2 begins at 70% health
- Geddon cleanses itself of Burn and Poison
- Geddon gains a 90% damage shield for 5 seconds
- Geddon deals lethal damage to all enemy minis in a radius of 10
- Geddon spawns two Fire Elementals at every corner of the map. These Fire Elementals have Fan the Flames talent and are immune to the lava floor.
Phase 3 begins at 40% health
- Phase 3 transition has all the features of the phase 2 transition
- Geddon summons a Tornado (it used to summon one at p2 too, but was nerfed in June 2025)
- Additionally, Geddon gains +0.05 gold per second in additional income
Tornado spawns at the top of the map, and starts moving counterclockwise with a movement speed of 1.5. Geddon’s minis are immune to Tornadoes, but any of your buildings or minis that touch one take 80 Elemental damage every 0.5 seconds.
General Strategy
Baron Geddon is a challenging fight, but it can be a fairly short one. Your life becomes increasingly difficult as you push through the phases, so most strategies attempt to identify a good moment to push and then go through all phases in rapid succession. Because there is a short-range wipe at phase transitions, you need to send reinforcements at the start of each phase.
There are four main strategies to win the fight:
- A strong push on the first lap when Geddon is at 3 o’clock. This was an early strategy, but Blizzard has buffed Geddon considerably since, and I generally do not recommend such a hasty push. If you are at the encounter level cap, it can be worth considering still.
- Ambush at 8-9 o’clock on the first or second lap. This is a strong strategy, as long as you understand the preconditions for the attack (therefore the second lap option). I will go through it in more detail below. Meat Wagon is recommended for additional dps if pushing early.
- Capturing and retaining all Towers. Without Towers, Geddon cannot play minis. Then, you can comfortably wait until overtime, and push hard with the help of the extra gold. Pushing at 8-9 o’clock is strong with this plan.
- Growing a Ragnaros to help defend your base and then attacking Geddon when Ragnaros has gained some levels. Pushing at 8-9 o’clock is strong with this plan.
First, what does it mean to push at 8-9 o’clock? When you send your tank, usually Gargoyle, to the left when Geddon is moving upwards on the left side, you can meet Geddon before it reaches the path towards your Barracks. The Fire Elementals Geddon spawns will then start moving downwards and walk a long way before they threaten your base. If you send your mini too early, it will not attack Geddon, as it also wants to move clockwise ahead of Geddon. If you send your mini too late, the Fire Elementals move straight towards your Barracks. The timing is not particularly hard, but may take a bit of practice. At phase transitions, you can use Unbound minis to hold Geddon in place for a while.
When are you ready to attack Geddon? If you have no map control, the Fire Elementals that spawn in the corners of the map at phase transitions will reach your Barracks before you can kill Geddon. I like to control the top two Towers and either have the bottom right Tower too or have an army moving towards it. This secures enough time to win.
The Fire Elementals that spawn at phase transitions are able to destroy Towers, but it does not take much help to stop them. Especially at the first phase transition, deploying some minis to help the Towers can buy you extra time.
If you are not ready to take on Geddon, and it moves past Towers that you control, you generally want to take them back before Geddon manages to complete their construction. Whelp Eggs can be dropped into the lava and Quilboar or Dark Iron Miner can be played on land in the corner to start hitting a Tower before it is fully available to Geddon. These can sometimes be tricky to time correctly because Geddon sometimes lingers a while next to the Tower.
There is a lot of gold on the map, and you want to mine most of it. Dark Iron Miner is a good solution, and Trinket Collector Harpies are another option. When positioned correctly on the left side of your base, one Harpy will fly over the mountain to the south and also mine there. Sometimes you may also want Harpies with Infectious Swipes just for the additional damage.
When you commit to attacking Geddon, remember to be ready for phase transitions: your tank will be killed, so you need to send in another one.
LFR Builds
Sleepy Malf with Flying minis
rumblo:CDkQARoECCYQAhoECAMQABoECCsQABoECB4QABoECBkQABoECEcQAg==
Important Talents
Deep Slumber keeps Malfurion guarding your base, ready to cast Seeds on it if woken up.
Fae Blessing on Faerie Dragon enables you to give Resistant to your Chimaera or Gargoyle, helping them survive longer.
Corrosive Breath on Chimaera is important to get enough poison stacks on Golemagg.
Bramble Burst on Quilboar allows you to extend the duration of poison if all of your Chimaeras die.
Soundbite is useful on Dire Batlings to make them cleave ranged minis that Golemagg may summon. All Batling talents have some upsides in the fight though.
Strategy
- Push through the middle with flying minis.
- Core Ragers start at the left and right sides, and you do not want to pull them to the middle. This means absolutely no ground minis on the middle lane at the Core Rager areas.
- Position your Sleepy Malfurion on a side lane, as close to the base as possible.
- You can mine the gold mine on the right. The Core Rager will charge through the middle, but will not aggro minis there while passing through. The Immolate effect may hurt your fragile flyers if it passes through right underneath them.
- When you have a good feel for the damage you are taking, you can tank the middle Tower with a Quilboar, but it MUST die at the Tower and not walk up towards the boss. If in doubt, do not play it there. It is better to use Gargoyle to tank.
- Golemagg’s ranged units can be a problem, especially Pyromancer. Keep some spells ready to handle them and protect your flying minis.
- Golemagg can only attack flying minis one-by-one. This makes minis like Dire Batlings phenomenal at tanking Golemagg while your damage-dealers work on it.
- You can reinforce your push from the middle Tower after you have captured it. Note that you will lose it at the phase transition. If you play minis there right before you lose it, play them as far up as possible to avoid the incinerate zone.
- If you have the Bramble Burst talent on Quilboar, it can be used to extend the poison duration. Poison lasts for 5 seconds, so you need to play it in time.
- Even if your first attack does not kill Golemagg, you can often build a second attack through the middle again.
Charlga with Polymorph and Flying minis (Gargoyle variant)

rumblo:CBgQARoECBkQABoECAwQABoECB4QARoECCsQABoECEcQAhoECCYQAg==
Important Talents
Fae Blessing on Faerie Dragon enables you to give Resistant to your Chimaera or Gargoyle, helping them survive longer.
Corrosive Breath on Chimaera is important to get enough poison stacks on Golemagg.
Bramble Burst on Quilboar allows you to extend the duration of poison if all of your Chimaeras die.
Soundbite is useful on Dire Batlings to make them cleave ranged minis that Golemagg may summon. All Batling talents have some upsides in the fight though.
Strategy
- Push through the middle with flying minis.
- Core Ragers start at the left and right sides, and you do not want to pull them to the middle. This means absolutely no ground minis on the middle lane at the Core Rager areas.
- You can mine the gold mine on the right. The Core Rager will charge through the middle, but will not aggro minis there while passing through. The Immolate effect may hurt your fragile flyers if it passes through right underneath them.
- When you have a good feel for the damage you are taking, you can tank the middle Tower with a Quilboar, but it MUST die at the Tower and not walk up towards the boss. If in doubt, do not play it there. It is better to use Gargoyle to tank.
- Golemagg’s ranged units can be a problem, especially Pyromancer. Keep some spells ready to handle them and protect your flying minis.
- Golemagg can only attack flying minis one-by-one. This makes minis like Dire Batlings phenomenal at tanking Golemagg while your damage-dealers work on it.
- You can reinforce your push from the middle Tower after you have captured it. Note that you will lose it at the phase transition. If you play minis there right before you lose it, play them as far up as possible to avoid the incinerate zone.
- If you have the Bramble Burst talent on Quilboar, it can be used to extend the poison duration. Poison lasts for 5 seconds, so you need to play it in time.
- Even if your first attack does not kill Golemagg, you can often build a second attack through the middle again.
Ysera with Flying minis
rumblo:CFsQARoECEcQAhoECCYQAhoECB4QARoECFgQARoECAwQABoECBkQAA==
The spell slot is a flex slot. You can use Polymorph, Blizzard, or Eclipse as your answer to Golemagg’s ranged minis.
Important Talents
Corrupted Dream on Ysera adds more poison damage, which is highly preferable against Golemagg.
Fae Blessing on Faerie Dragon enables you to give Resistant to your Chimaera, helping it survive longer.
Corrosive Breath on Chimaera is important to get enough poison stacks on Golemagg.
Bramble Burst on Quilboar allows you to extend the duration of poison if all of your Chimaeras die.
Soundbite is useful on Dire Batlings to make them cleave ranged minis that Golemagg may summon. All Batling talents have some upsides in the fight though.
Strategy
- Push through the middle with flying minis.
- Core Ragers start at the left and right sides, and you do not want to pull them to the middle. This means absolutely no ground minis on the middle lane at the Core Rager areas.
- You can mine the gold mine on the right. The Core Rager will charge through the middle, but will not aggro minis there while passing through. The Immolate effect may hurt your fragile flyers if it passes through right underneath them.
- Note that Whelp Eggs are ground minis, but the hatched Whelps are not: do not play the Eggs on the Core Rager area. Whelps can safely fly over.
- When you have a good feel for the damage you are taking, you can tank the middle Tower with a Quilboar, but it MUST die at the Tower and not walk up towards the boss. If in doubt, do not play it there.
- Golemagg’s ranged units can be a problem, especially Pyromancer. Keep some spells ready to handle them and protect your flying minis.
- Golemagg can only attack flying minis one-by-one. This makes minis like Dire Batlings phenomenal at tanking Golemagg while your damage-dealers work on it.
- You can reinforce your push from the middle Tower after you have captured it. Note that you will lose it at the phase transition. If you play minis there right before you lose it, play them as far up as possible to avoid the incinerate zone.
- While fighting against Golemagg, you can play ground minis behind him where they will not pull the Core Rager. Whelp Eggs and Quilboar are both great.
- If you have the Bramble Burst talent on Quilboar, it can be used to extend the poison duration. Poison lasts for 5 seconds, so you need to play it in time.
- Even if your first attack does not kill Golemagg, you can often build a second attack through the middle again.
Watch it in action
Charlga with Blizzard and Flying minis
rumblo:CBgQARoECBkQABoECEcQAhoECCYQAhoECFgQARoECAMQABoECB4QAQ==
The spell slot is a flex slot. You can use at least Polymorph or Blizzard as your answer to Golemagg’s ranged minis.
Important Talents
Fae Blessing on Faerie Dragon enables you to give Resistant to your Chimaera, helping it survive longer.
Corrosive Breath on Chimaera is important to get enough poison stacks on Golemagg.
Bramble Burst on Quilboar allows you to extend the duration of poison if all of your Chimaeras die.
Soundbite is useful on Dire Batlings to make them cleave ranged minis that Golemagg may summon. All Batling talents have some upsides in the fight though.
Strategy
- Push through the middle with flying minis.
- Core Ragers start at the left and right sides, and you do not want to pull them to the middle. This means absolutely no ground minis on the middle lane at the Core Rager areas.
- You can mine the gold mine on the right. The Core Rager will charge through the middle, but will not aggro minis there while passing through. The Immolate effect may hurt your fragile flyers if it passes through right underneath them.
- Note that Whelp Eggs are ground minis, but the hatched Whelps are not: do not play the Eggs on the Core Rager area. Whelps can safely fly over.
- When you have a good feel for the damage you are taking, you can tank the middle Tower with a Quilboar, but it MUST die at the Tower and not walk up towards the boss. If in doubt, do not play it there.
- Golemagg’s ranged units can be a problem, especially Pyromancer. Keep some spells ready to handle them and protect your flying minis.
- Golemagg can only attack flying minis one-by-one. This makes minis like Dire Batlings phenomenal at tanking Golemagg while your damage-dealers work on it.
- You can reinforce your push from the middle Tower after you have captured it. Note that you will lose it at the phase transition. If you play minis there right before you lose it, play them as far up as possible to avoid the incinerate zone.
- While fighting against Golemagg, you can play ground minis behind him where they will not pull the Core Rager. Whelp Eggs and Quilboar are both great.
- If you have the Bramble Burst talent on Quilboar, it can be used to extend the poison duration. Poison lasts for 5 seconds, so you need to play it in time.
- Even if your first attack does not kill Golemagg, you can often build a second attack through the middle again.
Watch it in action
Cenarius with Plague Farmer


rumblo:CBcQABoECBUQAhoECAgQABoECCIQARoECB0QARoECEQQAhoECF0QAA==
Flying minis can beat the encounter at a lower level, but with a higher-level army, ground minis may be easier to play with.
Important Talents
Living Wood on Bog Beast is important to enable it to tank Core Ragers.
Splashing Pumpkins on Plague Farmer enable it to hit the casters in the back much more reliably.
Strategy
- Send a Bog Beast and Priestess to the right and tank the first Core Rager there. You want it to live as long as possible, do not send damage dealers. You can mine right next to the fight with Kobold Miner.
- Send Defias Bandits to the middle to pick up the chest when possible. Also use them to stun Earth Elementals that may spawn right at your Barracks.
- Send your main push to the left.
- Plague Farmer is your main damage dealer. Send them through the far left to keep them as safe as possible.
- Cenarius can sometimes stop the second Core Rager in a spot where it burns the middle lane when it dies. This can give you more time to reinforce your push from the left Tower.
- Play minis from the left Tower as long as it remains available. Play them in the top corners to avoid the incineration rune.
- You can mine the gold mine at the left Tower even while fighting a Core Rager there.
- Use Sunfire to take out Drakes.
Watch it in action
Boss Strategy
Updated: May 2025
Minis in Golemagg’s Army
- Drake - Engulfing Flames
- Earth Elemental - Shrapnel Blast
- Firehammer - Moultin’ Metal
- Fire Elemental - Molten Core
- Pyromancer - Conflagrate
Golemagg has a deck of only 6 minis (including Kobold), but it also has a reduced hand size of only 3 minis, which makes it harder for Golemagg to cycle to the right mini.
The Boss and Other Minis
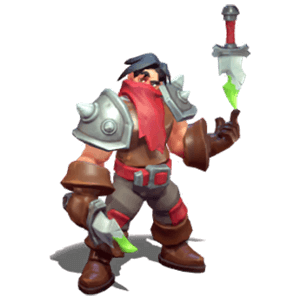
Golemagg
- 12,000 health
- Unstoppable, Armored
- Melee: 320 Physical damage, 2.1 seconds attack speed, 15 acquire radius (Golemagg will come after anyone who shoots at it, although it will not move further than 11 from its spawn point)
- Stomp: 300 Physical damage, 7 seconds cooldown, 4 radius, hits ground minis only
Core Rager
- 3400 health
- Resistant
- Bite: 200 Physical damage, 2.0 seconds attack speed
- Charge: Core Rager will charge at ground minis that cross its horizontal lane. Charge knocks back and stuns ground minis on a radius of 3 for 1.6 seconds. Cooldown 5 seconds.
- Immolate: Deals 10 Elemental damage every 0.5 seconds to enemy minis within a radius of 4.5
Map Mechanics
Core Ragers guard the horizontal lanes. They will charge at any ground minis attempting to cross the lanes, and will also attack flying minis that attempt to fly right over them. They will not charge at flying minis on another vertical lane.
When a Core Rager dies, the Incinerate Rune on the vertical lane it was on is activated and deals 60 Elemental damage every 0.5 seconds for 12.5 seconds on a radius of 6. The Core Rager is resurrected with 75% health after 24 seconds.
Phase 2 begins at 75% health
- Golemagg cleanses itself of Burn and Poison
- Golemagg gains a 90% damage shield for 5 seconds
- Golemagg activates all four Incineration runes (each Tower and the boss spawn zone) to deal 60 Elemental damage every 0.5 seconds for 12.5 seconds on a radius of 6.
Phase 3 begins at 50% health
- Golemagg cleanses itself of Burn and Poison
- Golemagg gains a 90% damage shield for 5 seconds
- Golemagg activates all four Incineration runes (each Tower and the boss spawn zone) to deal 60 Elemental damage every 0.5 seconds for 12.5 seconds on a radius of 6.
- Golemagg gains the Call Hound ability and will spawn Core Hounds with Guard Dog talent every 45 seconds
Phase 4 begins at 25% health
- Golemagg cleanses itself of Burn and Poison
- Golemagg gains a 90% damage shield for 5 seconds
- Golemagg activates all four Incineration runes (each Tower and the boss spawn zone) to deal 60 Elemental damage every 0.5 seconds for 12.5 seconds on a radius of 6.
General Strategy
Do not pull the Core Ragers on your partner’s flying minis!
With that out of the way, we can start talking about the strategy in more detail.
There are three main ways to beat Golemagg:
- Push through the middle with Flying minis
- Defend, and kill Golemagg with Unbound minis and spells
- Build a deathball that can brute-force its way through at least one of the Core Ragers
Push with flying minis requires the least levels, which makes it the most accessible strategy. With minis at the encounter level cap, building a deathball may be an easier strategy to execute though.
When you push with flying minis, there are a few things you want to keep an eye on:
- Core Ragers start at the left and right sides, and you do not want to pull them to the middle. This means absolutely no ground minis on the middle lane at the Core Rager areas.
- You can mine the gold mine on the right. The Core Rager will charge through the middle, but will not aggro minis there while passing through. The Immolate effect may hurt your fragile flyers if it passes through right underneath them.
- Note that Whelp Eggs are ground minis, but the hatched Whelps are not: do not play the Eggs on the Core Rager area. Whelps can safely fly over.
- When you have a good feel for the damage you are taking, you can tank the middle Tower with a Quilboar, but it MUST die at the Tower and not walk up towards the boss. If in doubt, do not play it there.
- Golemagg’s ranged units can be a problem, especially Pyromancer. Keep some spells ready to handle them and protect your flying minis.
- Golemagg can only attack flying minis one-by-one. This makes minis like Dire Batlings phenomenal at tanking Golemagg while your damage-dealers work on it.
- You can reinforce your push from the middle Tower after you have captured it. Note that you will lose it at the phase transition. If you play minis there right before you lose it, play them as far up as possible to avoid the incinerate zone.
- While fighting against Golemagg, you can play ground minis behind him where they will not pull the Core Rager. Whelp Eggs and Quilboar are both great.
- If you have the Bramble Burst talent on Quilboar, it can be used to extend the poison duration. Poison lasts for 5 seconds, so you need to play it in time.
- Even if your first attack does not kill Golemagg, you can often build a second attack through the middle again.
There are a few ways you can go about with the defence strategy. Typically, you want to attack Golemagg either with Whelp Eggs, Quilboar, and Execute, or you can use Arcane Blast with the Torrent talent to gain levels and deal increasing amounts of damage to the boss. With these strategies, you need to have a plan on how to defend, also against the Molten Giants that start appearing midway through the fight.
The deathball strategy is typically done with Drakkisath, Tirion, Cenarius, or Malfurion. With enough levels and a cooperating partner, it is possible to brute-force through both Core Ragers, but because they activate the incinerate rune on the lane where they die, you usually want to set up a distraction at least for the first Core Rager.
Send a tank with a healer (Malfurion healing may be enough) to keep the first Core Rager occupied. The right side is better because then you have access to both gold mines: you can mine right next to where you are tanking the Core Rager. Then, send your main army through the left side: this will also secure the left gold mine for you. It is important to use a side lane because there you have enough room for your army to move out of the Core Rager zone when fighting Golemagg. If you push through the middle, you may end up fighting in the middle of the Core Rager area. You can distract the second Core Rager too to get your army to pass unscathed, but it is often easier to simply fight the second Core Rager with your main army.