Playstyle Overview
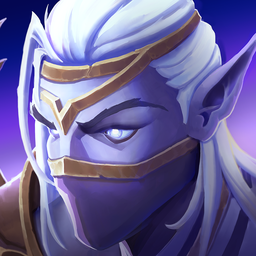
Ardeos is a ranged spellcaster who utilizes powerful damage over time effects. He focuses on DoTs to increase his damage through Detonate, which costs his unique mechanic to use: Cinders.
With Ardeos it’s all about your Detonate windows, so you want to time your cooldowns and abilities to maximize the damage this deals. The rotation doesn’t really change much on a single target compared to AoE and the main difference is the timing of your cooldowns enabling you to either do a “big burn” or a “small burn”.
Understanding Ardeos: Embers & Detonate
Before we get into the actual rotations, we need to understand Detonate and Embers.
Ardeos generates Cinders, once you get 100 Cinders you get an Ember which can be spent on Detonate. Detonate deals damage based on your active DoTs. The more you have applied, the more damage Detonate deals. The damage contribution is only from Ardeos's abilities and not from any other damage over time effects like those from weapons. The remaining duration of your DoTs is irrelevant for the damage Detonate deals, and a common misconception is that Detonate consumes your dots, which it does not.
You generate Cinders with your Searing Blaze, Engulfing Flames, Fire Ball DoTs and Infernal Wave casts. Assuming you have Searing Blaze applied to targets, Infernal Wave is your only spammable way to generate Cinders.
It's important to note that Fire Ball is the only DoT that generates per tick so it's incredibly important for our generation in AOE.
There are multiple talents that either buff your DoT duration, increase their damage, or apply new DoTs, essentially providing more generated cinders for more Detonates. It’s all Detonate, always has been.
Rotation
The only difference between Single Target and AoE is that you’ll spend more time reapplying Searing Blaze manually on AoE, whereas on Single Target you have more freedom to spam Infernal Wave casts.
Big Burn:
- Fire Frogs
- Apocalypse
- Engulfing Flames (x2 if talented into Undying Flame)
- Pyromania
- Fire Ball
- Wildfire
- Detonate spam
If Apocalypse isn’t available then you want to make sure you’ve manually applied Searing Blaze to as many targets as possible. You can do this while your Tank is setting up the pull. In-between your burn windows you want to avoid overcapping Cinders by Detonating any time you’re near the 4 cap.
Small Burn:
- Engulfing Flames
- Fire Ball
- Detonate spam
In-between burn windows you’ll take time to refresh any near-expiring Searing Blaze debuffs on targets, and spam Infernal Wave as much as possible to generate Cinders ready to enter burn windows. You’ll typically have a big burn every 60 seconds due to Apocalypse CD, or if you don’t want to wait for that you can manually apply Searing Blaze ready for the 45s Fire Frogs CD.
Your small burn revolves mostly around Engulfing Flames, which is a 20 second cooldown, meaning you’ll have 1 or 2 small burns in-between every big burn depending on if you wait for Apocalypse, which I recommend.
Incinerate (Ultimate) Burn:
With your Ultimate readily available it slightly changes how you’ll use your cooldowns. A general rule of thumb is that It should always be used as a part of your big burn.
- Fire Frogs
- Apocalypse
- Engulfing Flames
- Pyromania
- Fire Ball
- Incinerate
- Wildfire
- Detonate spam
Both Pyromania and Wildfire are off the GCD so this list is a little shorter considering you can use them in conjunction with other abilities.
Defensives & Utility
Outside of your damaging abilities you have Flame Ward, which is a huge 40% damage reduction on a very short 30 second cooldown, and Fireflash, which is a single target disorient that incapacitates an enemy, useful for stopping dangerous mob casts.
Tips
Let's start with a couple of helpful tips for Ardeos:
- ABC - Always Be Casting. This is a universal caster rule and the difference between an Ardeos who is always actively casting and one who is not is huge.
Interface Options
One of the most basic, but important things you can do in Fellowship is mark specific targets or locations. In the input settings you will notice you have the ability to keybind “Mark Unit” and “Mark location”. These can be exceptionally useful for designating targets to kill or important stack points on bosses.
Buffs and Debuffs
Buffs and Debuffs in Fellowship are extremely important, but unfortunately the base UI doesn’t place the display of these in a great location. As a result, I’d recommend moving them closer to the middle of your screen using the “EDIT HUD” feature in the game menu.
UI Import
Here is my UI import from the Image shown if you just want to pick up and play:
7BgAAAAAAAAAAAAAAAAAAHiczVjRbqM4FP0UxL62ETZgSN/STGem2qbNtmT7WDnESdAQiMCZtjPqx+8FYxJsk1RaaTftS+R7fDn3cs8B89veFvkySdk93TD7yuas5Mi+sLe04O9fC1j8VuSvfP0lKVjMkzwDzM3blmaLJFtZu20H+rSlMSzbV86FXWZ0+61IFk/JL8gbNrBZlvAaer1bLqcpjdmGZRxy3rElt1XQ0zp/nbIiriG82DET4DFPmYyytM43ptlPWk7zMqkYl/bVb/s6L0ur2mfVG+u1t5rou32FsPNxISBRsmFFaV1adznUN87zdJG/Zg36krjOICA48InrBcQn2K/34+EAefDvhDggLgnQUEsHTAuu53Pcge+7GON9MhS4gzAcOiSEqI9gXSYbzZM04e/WKGUF7xTgOlUBMrsVFTT+wYoGgp2wBvkuAdCXXbZieWbdZstc0kBEXJmILJs55XXcQhKBNZqXzmDoEuQHzaKyEx/ZCe3W9v61g8FTiEte0NiqBTAxZRtBJBygALkhdDsMmtvgBwPfRUPcLsM22bQxLfmcytTucOB6oRsebr9Enj+AReR7eEjE7u+syA/Gpi1q6A2IjwhCLg6RrAvr+6fVuBrmzne9QXO7HUcnHdFixbjhwsQz9BN7ntbPJkO+tMQvmcALPEMCHGoJZN8iGCqebLuCucR+PUtsfnhT/CAcEKjEQYQ4aK8OZLgtT+8lZxsL1L3Miw3N4rZELyQ6Qx8yh07oBYgEsrc3b7ygUhTXtLD+CGUOMfCOERR8BkQ+A/I/A/LakXWOoNzPpMKfASEd9IUt6S7lrX90cF5zRxFx+6BYgeLa32YwFhvKmcRKkG9Qluuqwpjku4wrWwnCAh4OVfh4TeUIe/viFwnPC6uaQrDqNaNcjqJHvIHn+AHMovjDzaYP5RkxymIw5p4nhB3l20mysE88GmzAPCarNdeAqulrSMXR9xfUrbyKNQ/JroVXAZlU8W64COf5xhTFWlRx4MO0jfUe0tdstckm6Gu22YkaTLFK3VRn8D6Fqe5tCkD3LgXQGpc9hlGAcs2GpOwyGs5hU4xmcxxATgH8UwDvFMA9BcCnAKgL6POTzk3uc5IOSPeQTlgxiSbWzImwhO6a0RGkqvbaH+1gC+VJLORfv7KaDEC8VB4Vvwmiyv4AowheRHSxi/WuziW2o3B9EctFRc8NCTH2S5qWzCBiAdLUK5YNshUBg2I7gQOhinVdn03BUpYNP5MmBdIoxb5Q0B8i/SG/P+T1h9z+EO4PoX0HzNI6Em3T6mIS64qKmpGp1dPwMammCoFiaMuyOmtdwzCtCsi3kHsXdENXbMLARCtA/QMdC2JDcFayu2pAIvbG25t/EH9OMtDHc7Lg6+otBF5DFkIa1cTD5kmSQeXp3yC/+oQqM+xB1eXHu6LcD60SHJVwyizFadEIqOQ7LfJVwcoWwuup7pxGb+M86wmP0lf6Xlag74ymfC2qNUKbgsTvfMF6YHXTqoN7p3EGVorABeJhKVRZAfojekEy2keyZOnS0JOGXSeqtuR+t5mzojRm+tTlzB3RGFXfDDqs4saCG7s8bIkhpMtABdUfPVxt/di3FJ5bfM2sonnIHgiPcQ6A+iV1cfN1NLuLXq5Hjy+PD8/1S3yZ5pVg4X0fssMPdFEvCQ4+HKFLoPwne5+DitrWwjTcZHSesraEn0mZzPefUuI0iX9Ea6hytW7blFcfeLg4tUJe+bkHgVEozPD5MItnT9HD5OXb48NserphxDtNq7nmv+DlKLxOt+v/4eWeKS/vTHn5Z8qLnCmv4Ex5hWfEq5zejG9Hd4LYy+Rhdh9dz6Lo4f6AIzJyDMP/wGJ1ivAYuJ2MopvzYvnx8Q90YQRC
