


Introduction
Hey everyone, and welcome to the Ransack of Drakheim dungeon guide for Fellowship’s Early Access release! In this guide I’ll be going over the abilities used by the trash mobs found inside, strategy tips and tricks for the boss encounters, as well as a recommended route that is both simple to execute and PUG friendly.
Some background on myself, my name is Tactyks and I am an avid M+ player in WoW, where I’ve achieved the 0.1% M+ title in every season it has existed. I also create Dungeon, Raid, and Tank guide content over on my YouTube and Twitch channels, so if that’s something you’re interested in make sure to stop by and say hi!
Video Guide
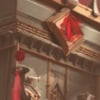
Fodir Kaldur Trash
Initially upon entering the city you’ll be given the choice of moving right or left in order to get to the first boss, with both sides having the same base trash mobs just in different quantities and compositions. My standard route has you pulling mobs from both sides, but to start I recommend heading down the right side.

Frenzied Looter
- On being hit these mobs will occasionally drop piles of gold on the ground that players can run over to gain a stacking damage buff, just beware that it also slows you!.
Pillager
- Try to cleave these mobs down evenly to reduce the value of the Blood Frenzy haste, damage, and health buff they gain when another nearby enemy dies.
Ashen Arsonist
- Big Oogha Flame puts a DoT on a random player, use an interrupt or CC to stop the cast or dispel the target.
- Flame Blast aims a frontal cone at the tank, point this away from your group and either step out of the effect or use an interrupt or CC to stop the cast.
Craven Hiisi
- Occasionally these mobs will leap on a random player and channel Bonk Noggin, use a CC to stop this damage or stay close to melee so they can still be cleaved.
Icebite Reaver
- This mob is immune to CC.
- Make sure to interrupt every cast of Frostbitten Strength to prevent the Reaver and it’s allies from getting buffed.
- This mob's melee swings apply the stacking Creeping Frostbite magic debuff, increasing damage taken by 5% per stack. Healers be ready to dispel this, and tanks watch your stacks and use a defensive if needed.
- Glacial Sunder aims three lines towards the tank, point this away from your group and step out of the effect yourself.
Bleakfrost Mystic
- Be ready to interrupt or CC the Invigorate cast to prevent its healing.
- Watch out for the rotating beams created by Eye Of Ul'morgat.
- Frost Bolt targets the tank and applies a Magic slow debuff, use any spare interrupts or dispels on this.
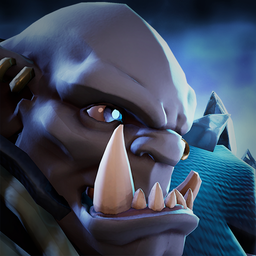
Outside of these standard trash mobs, there are also 2 mini bosses before the first boss, one ice themed and one fire themed. These mobs each share some abilities with the boss himself, plus they will actually empower the aura abilities of the boss if left alive, giving you a reason to take on these dangerous mobs outside of kill score. That being said, if you do opt to kill these mini bosses to remove their specific empowerments to Fodir, he will instead gain a general 5% damage increase in its place, so you need to decide which buff you’d prefer the boss to have. For PUG groups I recommend defeating both mini bosses, giving Fodir a flat 10% damage increase in the process.

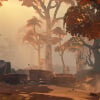
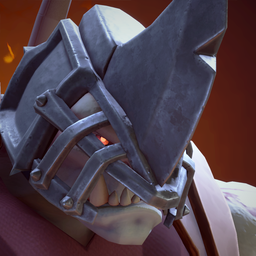
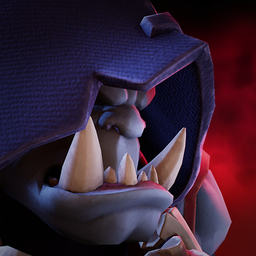
Kaldurson Eldsupptok
- This mob is immune to CC.
- While alive this mob buffs Fodir Kaldur’s Burning Aura damage by 50%. If killed this bonus is removed, however the boss instead gains a flat 5% damage increase to his other abilities.
- On pull this mob gains Burning Aura, applying a stacking Magic DoT to players whenever they move, so try to minimize excess movement.
- Blazing Slam leaves behind a puddle underneath the mob on top of shooting our several small circles that deal damage, avoid these effects while moving as little as possible to reduce Burning Aura stacks.
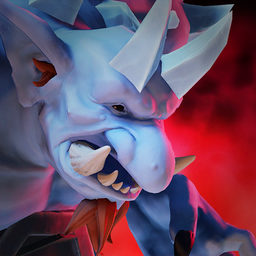
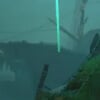
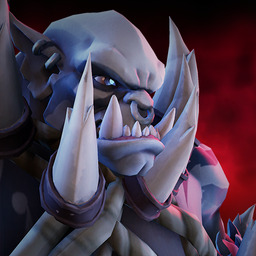
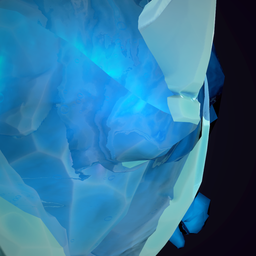
Kaldurson Isilagður
- This mob is immune to CC.
- While alive this mob buffs Fodir Kaldur’s Freezing Aura damage by 50%. If killed this bonus is removed, however the boss instead gains a flat 5% damage increase to his other abilities.
- On pull this mob gains Freezing Aura, applying a stacking Magic DoT and slow to stationary players. Move as much as is feasible for your hero to clear your stacks, and use things like Mass Dispel relics or defensives as needed.
- Ice Tomb targets a random player and stuns them until it is destroyed, use a defensive if targeted as you’ll be unable to move while frozen, and if not targeted make sure you swap to this tomb ASAP and destroy it.
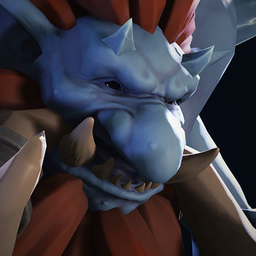
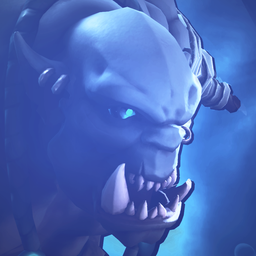
Fodir Kaldur Boss Fight
Fodir Kaldur Abilities
Fodir Kaldur targets Tanks with a strike that deals minor damage but applies a powerful DoT, dealing heavy damage over 4 seconds.
Fodir Kaldur's Blazing Slam leaves behind a puddle in addition to shooting out several small circles that deal damage.

Fodir Kaldur swaps between Burning Aura and Freezing Aura with Elemental Shift.
Fodir Kaldur targets a random player and encases them in ice, stunning them until the ice is destroyed.
Fodir Kaldur applies a stacking Magic Damage DoT to all players when they stop moving. Clears on movement.
Fodir Kaldur applies a stacking Magic Damage DoT to all players when they move. Stacks clear when players stop moving.

You are slowed.
Boss Strategy
That brings us to Fodir Kaldur himself, who combines the powers of the previously mentioned mini bosses into 1 encounter. First up the auras, where the boss will use Elemental Shift to swap between both Burning Aura and Freezing Aura, meaning you’ll need to alternate between minimizing movement and continuously moving to reduce your stack count and keep group damage low. Remember that you can dispel these debuffs, so healers can help less mobile players (or themselves) during the freezing phase, and mass dispel relics can be a powerful tool in general.
As for his other abilities, Blazing Slam is the most frequently used, which puts this fight on a bit of a timer as the puddles it creates never expire. This makes positioning extremely important, with my recommendation being to start on the edge of the room and slowly rotate around the outside, overlapping the puddles as much as possible. Doing this leaves a safe space for your group in the middle of the room, minimizing required movement during the Burning Aura while still giving you enough space to move during the Freezing Aura.
Outside of that, once per burning phase the boss will use Ice Tomb on a random non-tank player, stunning them until the ice is destroyed. Since this happens during the burning phase it isn’t as dangerous as the mini boss version of the ability, but you’ll still want to swap to this and break it as quickly as possible. You can also use the environment to help you break out quicker, as if the targeted player steps into the Blazing Slam puddle it’ll deal heavy damage to the tomb once it forms, so use that to your advantage!
For tanks, once per elemental phase the boss will use Frost Bite, dealing a relatively small initial hit but leaving behind a nasty DoT for 4s, so make sure you are always prepared with some sort of defensive ability.
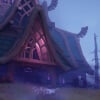
Chilgar the Drowned Trash
After defeating Fodir Kaldur, you’ll have the choice of heading up the hill towards Auga Handhafi the Blind, or around it towards Chilgar the Drowned. Each direction has a different set of mobs, but you’ll need to go through both areas eventually to defeat the remaining bosses. My recommendation is to head left towards the icy area and Chilgar first, so we’ll start with those trash mobs.
Bleakfrost Slaver
- Be ready to use an interrupt or CC the Barbed Chain cast to stop it, if successful have the linked players stand near each other to minimize the damage.
Coldbrine Fiend
- Make sure to use an interrupt or CC to prevent the Icy Annihilation random target cast.
- Brine Bolt targets the tank, use spare interrupts on this.
Outside of these new mobs, this area also contains all of the regular trash mobs that we discussed in the Fodir Kaldur section.
Chilgar the Drowned Boss Fight
Chilgar the Drowned Abilities
Chilgar will cause waves to crash through the encounter arena, applying huge DoT to anyone hit by them.
Throughout the encounter, Chilgar will create tornados near random players that slowly spiral out around the room, applying a knockback and DoT.
Chilgar targets the Tank with a strike that deals huge damage.
Chilgar causes a Pillar to erupt from the ground, chaining any players caught in its radius.
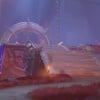
Boss Strategy
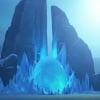
After leapfrogging across several icy platforms you’ll reach Chilgar the Drowned, which is a heavy movement fight with a lot of things to dodge. To start, throughout the encounter the boss will use Arctic Winds, creating a tornado near a random player that slowly spirals around the room, knocking back and applying the Freezing DoT and slow to anyone hit, so you want to avoid these as best you can.
If that wasn’t enough, occasionally the boss will use Freezing Flood, which causes many waves to sweep across the platform, also applying that same Freezing DoT to anyone they touch. Sometimes these waves come from a single direction, but sometimes they attack from multiple directions at once, so keep your eyes peeled and dodge as best you can.
While dodging all these projectiles, your group still has to handle a couple of different mechanics. First is the Glacial Slam hit, which is a circle around the tank that deals heavy damage to anyone inside, so tanks will need to be ready with a defensive while the rest of the group makes sure to avoid them.
On top of that, the other major ability is Grasping Pillar, which spawns a circle under the furthest player that explodes upwards after a few seconds. Once formed, this pillar will chain anyone who gets too close, preventing them from leaving its radius. If this happens the only way to free them is to destroy the pillar, but this is something you’d rather not do as it reduces your boss damage.
Instead, I recommend having 1 player bait these pillars towards the outside of the platform, preferably a single side if you can manage, giving you the rest of the platform as open space to dodge waves and tornadoes. If anyone accidentally gets chained or you have a bad spawn you can always destroy it, but the fewer of these you need to swap to the faster you’ll defeat the boss.
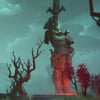
Auga Handhafi the Blind Trash
From here you can make your way up the opposite side of the hill and take on Auga Handhafi the Blind, where once again there are a few new mobs to deal with. Note that if you opted to go towards this boss after Fodir Kaldur, these mobs are also present on that side of the hill.
Nightmist Cutthroat
- Occasionally these mobs will teleport behind the tank to Backstab them, so be ready to reposition when this happens.
Nightmist Whisperer
- Make sure to use an interrupt or CC on every cast of Blinding Fear.
- Use a secondary interrupt or use a CC on Silence, or have your healer use a dispel to remove it if they aren’t targeted.
- Shadow Bolt targets the tank, use any additional spare interrupts on this.
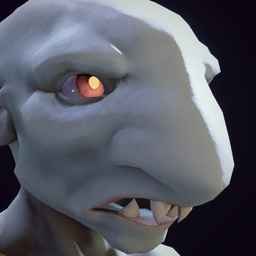
Shadow of Ulmorgat
- This mob is immune to CC.
- Dark Ritual spawns Nightmist Fiends based on the number of nearby totems which cast Devouring Darkness for ramping group damage. Focus the one that has a symbol that doesn’t match the totems to destroy them all and stop this damage.
- Shadow Slam targets the tank, be ready with a defensive.
In addition to these new mobs, all the mobs mentioned in the Fodir Kaldur section are also present in this area, so refer back to that section if needed.

Auga Handhafi the Blind Boss Fight
Auga Handhafi the Blind Abilities
Auga targets a random player, rooting them and creating a group soak at the target.
You will be stunned if you kill the wrong Nightmist Fiend during Dark Ritual.
Dark Ritual summons four Nightmist Fiends that cast Devouring Darkness. Each cast of Devouring Darkness deals more damage.
Auga targets the Tank for an attack that deals moderate damage.
Auga creates two lines a narrow X pattern that shoots through all players, dealing moderate damage on impact.
You are stunned because you killed trhe wrong thing.
Boss Strategy
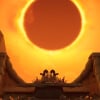
Once you get on top of the hill you’ll be able to take on the last boss, Auga Handhafi the Blind, which is a bit of a dance fight with a DPS check intermission.
For the actual boss phases there are 2 main abilities for your group to deal with. The first is Revelation, which targets a random player, rooting them and creating a group soak around them that everyone will want to step in.
The other phase mechanic is Shadow Conduit, which creates 2 lines in a narrow X pattern that shoot through all players. Non-tank players will want to make sure they don’t get cleaved by anyone else’s lines, so you’ll need to be ready to adjust quickly as needed.
In terms of how I recommend you position for these phases, they do not always occur in the same cadence, so you’ll need to watch the timeline and be ready to loosely spread or group up based on what ability is up next. Generally you’ll want to start each phase stacked and then loosely spread as it almost always begins with a Revelation into Shadow Conduit, but from there you’ll need to adjust depending on the order.
For tanks there’s one more ability to be aware of in this phase in Abyssal Offering, which just deals a moderate hit of damage, so make sure you’re topped and use defensives as needed, especially if this overlaps with either of the previously mentioned abilities.
The intermission mechanic of this fight is a familiar one in Dark Ritual, which just like the previously encountered trash mobs will create 4 Nightmist Fiends that cast Devouring Darkness, with each cast dealing more group damage until the correct one is killed. To figure out which one to focus, you’ll need to find the one that has the symbol that doesn’t match any of the 3 totems in the boss arena, so make sure you’re in a position to see those totems quickly after the cast completes so you can find the correct fiend ASAP.
This part of the fight also gets harder from the 2nd intermission onwards, as the Shadow Conduit lines will begin to appear on one player at a time, rotating through your group until you’ve defeated the correct Nightmist Fiend.