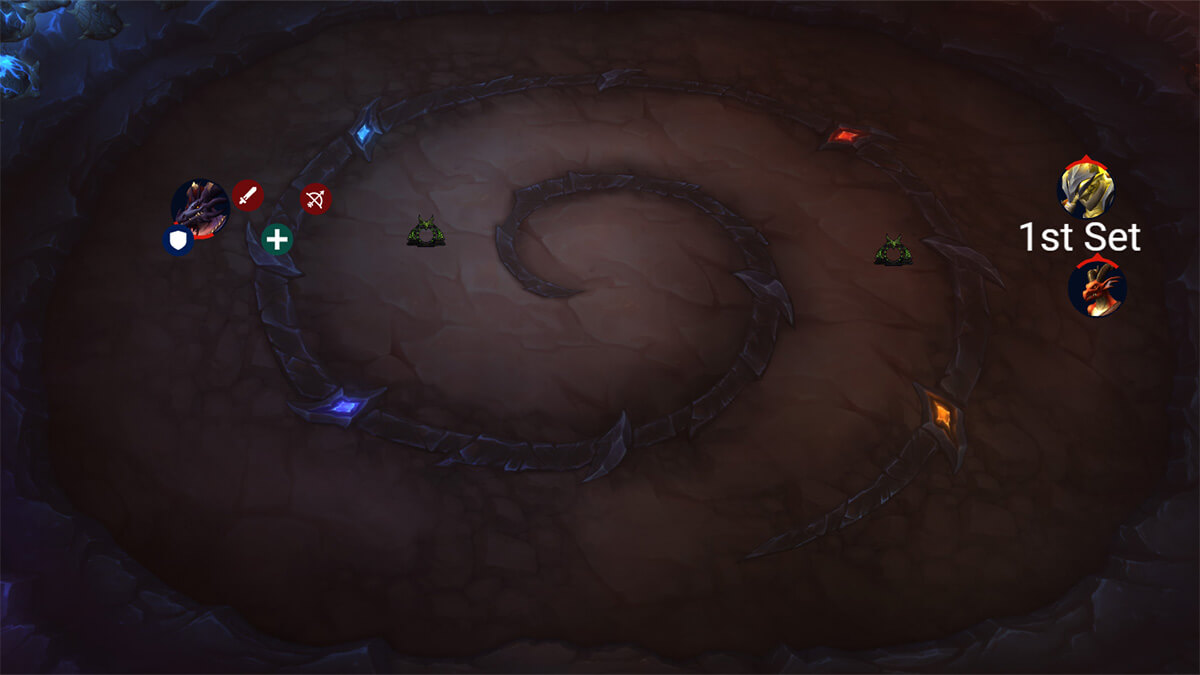
Raid Setup
Introduction
Single Target and AoE fight
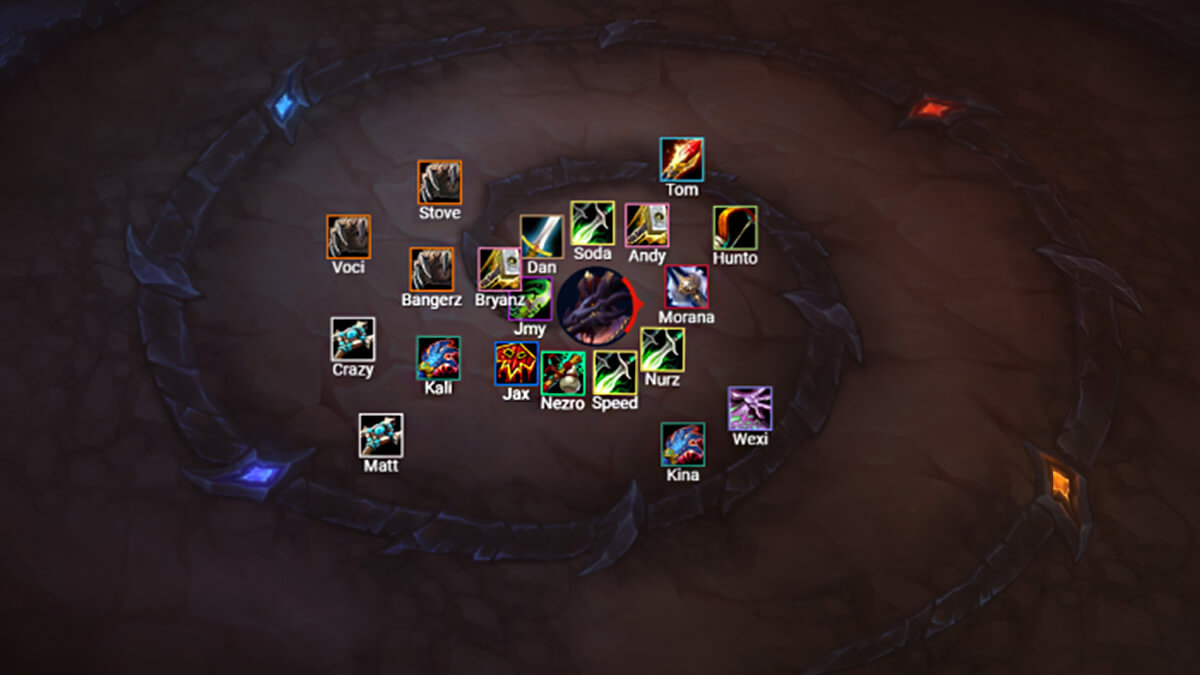
Recommended Setup: 2 Tanks (1 x DK) / 5 Healers / 13 DPS
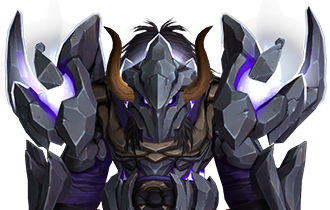
Death Knight Note: Since the nerf to Stoneslam Detonation (nerfed by 63%), the urgency of having a Blood DK is less. However, if you have access to one, they are still the best tank to handle that ability.
Useful utilities: DK Mass Grip / Druid Roar + Shaman Speed Totem /Immunities / AoE Stuns / Evoker Time Spiral
Special utilities: Shaman Purge / Mage Spellsteal / DH Consume Magic
Easy Mode
All Eggs need to be destroyed otherwise you can’t kill the boss
Phase 1
- 1 Tank takes the boss, the other the adds.
- Adds and the boss need to be very far away from each other
- Split into 2 groups (send AoE players to deal with adds, 5x single target players should stay with the boss)
- Follow the egg killing route (see strategy section)
- Assign 3 players to get close to Greatstaff of the Broodkeeper each time it's dropped on the ground, press the extra action button and move the beam to destroy eggs that are assigned
- Spread out for Wildfire cast
- Remove or Heal the Absorb effect of Icy Shroud
Phase 1 Priorities:
- Purging Flamebenders is the absolute biggest priority in Phase 1
- Purge Priority: Flamebender > Dragons > Legionnaire / Mages
- DPS kill Priority: Flamebender > Legionnaire / Mages > Dragons
- Interrupts: Stormbringers + Primalist Mages
Phase 2
- Tank swap each Mortal Stoneslam. The Blood DK player can pre-immune with AMS to skip it.
- Frozen Shroud will root all players, and may overlap with Wildfire. Make sure to dispel or destroy the ice-cubes to free the players.
- Kite the Greatstaff of the Broodkeeper lasers out of the group and don’t get hit by it
- Stack up in melee as often as possible to get extra heals
Mechanics
Kitting the Greatstaff of the Broodkeeper will leave an electric trace on the ground that gets reactivated every now and then. Lighting will hit there, this needs to be avoided.
There is special tech involving this ability. Make sure that the 3 players dealing with the eggs always press the action button as soon as possible. There is a hidden threshold on how much of the electric trace you can spawn on the ground. Once reached, no new ones will spawn. This usually happens at the end, when you are breaking the last 6 eggs. The benefit of this is that you won’t have any puddles in the middle of the room. You need the extra space for Phase 2.
In Phase 2, the tank ability Mortal Stoneslam will spawn a large golden circle that needs to be soaked. The best way to deal with this is to have your DK tank always tank the boss and use AMS mid-way through the cast, that way they will skip the ability. After that, the other tank should taunt before the next set and spawn the circle. 1 player with an immunity and 2 externals + personal cooldowns should be enough to keep the tank alive.
Strategy
Split the raid into 2 teams: Boss team and the Adds team.
Boss Team:
- 1x Tank (DK)
- 2x Healers
- 5x strong Single-Target DPS
They will deal with all the eggs in Phase 1 and only attack the boss.
Egg Destroyers:
- 1x Tank
- 1x Healer (Paladin is good)
- 1x DPS (BM hunter and Assasination Rogue are good)
Adds Team:
- 1x Tank
- 3x Healers
- 8x Strong AoE dps
Most of the time they will deal with only the adds, the boss will be attacked only on pull and some rare moments of downtime by ranged dps.
Dealing with Icy Shroud/Frozen Shroud
Before we get into the fight, it's very important for the entire progress that your players understand that removing the Debuff is much easier than healing the absorb.
- Hunters can Disengage
- Druids can Shapeshift
- Affliction/Destruction warlocks can Imp-Dispel
- And so on…
Basically, any spell that removes slows/roots will work. Use it as much as possible, each self removal will save a lot of Healer mana and won’t eat up the heals (100k absorb).
Egg Kill Order
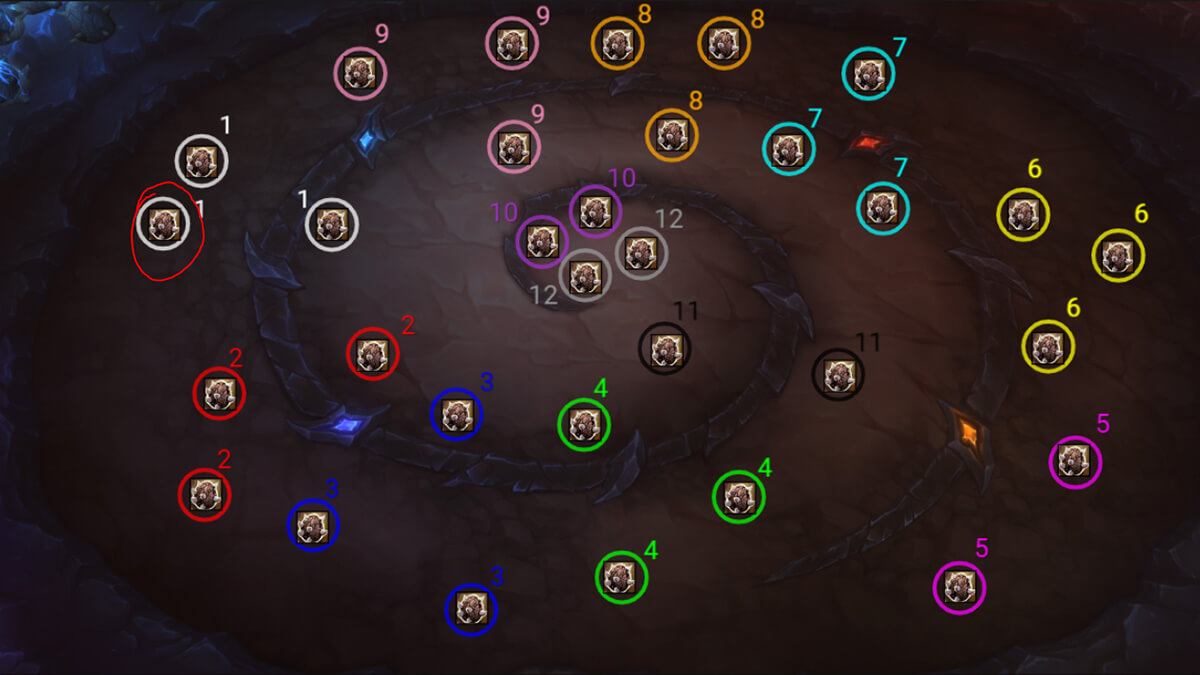
Opener
The whole raid should start on the Number 1 eggs.
Pop Hero/Lust and do as much damage as possible to the boss, the Adds team will stay until 2-3 sec before the first set of adds spawn.
The Adds team should take the gateway when there is 3-4 seconds remaining on the add’s spawn timer. The Tank should go a bit earlier to make sure they are the first target in range for easier aggro handling.
Boss Team Guide
Your tank should always destroy the egg that is the closest one in their path towards the next set.
At the start they should take the first egg marked with a circle.
The simple rules are:
- Tank never takes the egg that is behind the boss, or towards the middle of the room. So it's either the closest egg to the next set in between the middle and the wall, or the wall egg.
- The Paladin mostly takes the back/wall eggs.
- The Hunter mostly takes the eggs closest to the middle of the room.
All Egg destroyers need to make sure to use the Action Button as soon as possible to cheese Storm Fissure (check Mechanics breakdown section).
Set Number 3
This set Overlaps with Icy Shroud and 3x Egg pop’s, so make sure a strong healer cooldown is assigned here.
Set Number 5
This is your first 2x Egg pop set, but keep in mind that you should still use all 3 lasers to fill the room with Storm Fissure. The Tank should take the front Egg, the other 2 players should kill the back Egg.
Set Number 7
Here the tank should take the Egg at the Wall and the Paladin the forward egg (basically just next to the staff).
Set Number 8 + 9
This is your last two 3x Egg pop sets. Make sure to use any Healing CD’s/Personals that you have left, split between those sets, it hurts a lot and you will get those back in Phase 2 when you need them again.
Set Number 10
Even though this is a 2x pop only, it overlaps exactly at the same time with Icy Shroud. Have your Tank delay their pop by 2 sec (so wait like 2 seconds to use the action button) this will stagger the damage and it should be easy from there.
Set Number 11
Make sure the Boss is exactly in between the 2 eggs, otherwise you will have problems reaching them with the laser.
Set Number 12
Get the boss close to the eggs and have your Paladin + Hunter do the last 2 eggs. Tanks should not do them as it risks moving the boss a few extra yards. That movement would put the boss in range of the adds that are around the Set Number 8 spot and they will heal.
The moment the Boss Team is done destroying all the eggs, the Adds Team can bring all the remaining adds into the middle.
VERY IMPORTANT! Every single player should swap to the 2 Blue Dragons still alive as they are coming to the middle. They do pulsing AoE damage that overlaps with Phase 2 mechanics that started the moment you destroyed the last 2 eggs. Once the dragons are dead, you can deal with Phase 2 properly.
Adds Team Guide
The Adds Team will simply go around the room, killing each set of adds. You should always move to the next set regardless of if the adds from the old set are dead or not, just bring them with you.
Setting up an interrupt and purge rotation is the biggest priority.
- Set your ranged players to Interrupt Ice Barrage from Primalist Mages
- Set your melee players to interrupt Static Jolt from Drakonid Stormbringer
Your Priest should always Mass Dispel the first cast of Cauterizing Flashflames. If you have more than 1 Priest, you can use Mass Dispel for the second cast as well. If you don't, and the one Mass Dispel is on cooldown, you have to Purge the Debuff with single target Purges.
Purge Priority: Flamebender > Dragons > Legionnaire / Mages
DPS Kill Priority: Flamebender > Legionnaire / Mages > Dragons
Healers
Rotate externals on the Tank, they will take massive damage on big packs. Tank deaths will mostly lead to wipes. Since the adds will quickly start killing other players, or you will just get a frontal on top of your entire group.
Tank
Early into progress, it's a very good strategy to run a PvP trinket. You will get stunned a lot until you get the feel for the timings and such. Getting stunned will often result in death and a wasted pull. The PvP trinket lets you recover that pull that would otherwise be a wipe.
Ranged
Ranged players make sure to maintain a proper spread when Stormbringers are up, as you do pulsing damage around you (like on Heroic). Also, dodge the spinning fire lasers.
At around 4:23 into the fight, the adds team needs to take the getaway to reach the other side of the room to pick up the last 2 sets of adds. This is a pack of Flamebenders and Juvenile Frost-Proto Drakes.
Killing and purging Flamebenders here is the absolute priority. Once they are dead and the Boss team is done killing eggs, you can stack up the Drakes on top of the boss and nuke them down.
Phase 2
Strategy wise, there is not much going on in Phase 2, it is a raw HPS/DPS check. You will spend less time in Phase 2 if you do more damage in Phase 1, but ultimately it will come down to 1-3% in most cases.
Wildfire happens twice in Phase 2, each time you get hit you will get a stacking DoT that hurts a lot. Make sure to assign positions for wildfire so people aren't just running around wildly (even though the spell is called wildfire).
The spell Combinations:
- Wildfire - Greatstaff
- Wildfire - Root - Greatstaff
After each Wildfire cast, you should always look to go back to melee so you can get extra heals.
It will mostly be followed up by an empowered greatstaff of the broodkeeper. You need to pay attention to the lasers spawning, as several players get marked. Getting hit by it will most likely kill you.
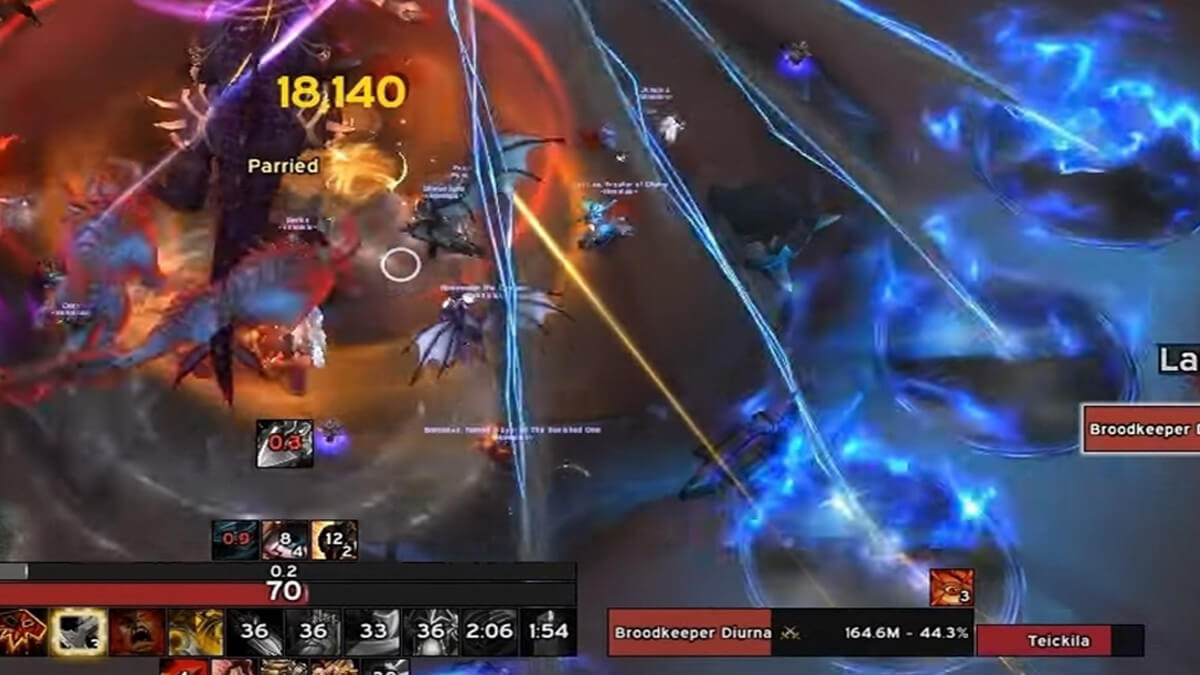
Players should kite it away, similar to the image, and have everyone else stack in between the boss and lasers so you can get healed faster.
On Wildfire / Frozen Shroud Root combos you need to make sure you play the Wildfire as clean as possible, whilst getting as close as you can to the melee stack.
Healer Notes
- Assign big cooldowns for Wildfire / Frozen Shroud Root combos
- Use zone defensives (Darkness / Barrier / AMZ) for Greatstaff of the Broodkeeper casts
- Make sure personals are used on the last 2 Wildfire / Frozen Shroud Root combos
Tank Soak

To skip the Mortal Stoneslam golden circle as a DK, you need to use AMS when the Mortal Stoneclaws cast is midway through.
Before the recent nerfs to this ability, you needed lots of externals available for non-DK tanks. After the nerf these aren't needed, the other tanks should be able to easily soak these alone now, all other players in the raid should avoid them. Giving you more freedom with your use of externals during this phase.