Raid Setup
Recommended Classes
- At least 2 for Mass Dispels
- / are great for throwing orbs off the edge quickly
Mechanics
Shatter
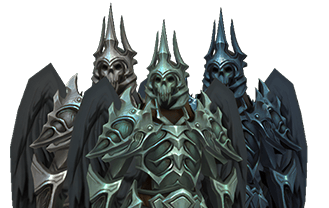
At 80%, 60%, and 30% the boss will cast Shatter, dealing 33k shadow damage to the entire raid and shed a piece of armour, causing the boss to enter a new “phase”.
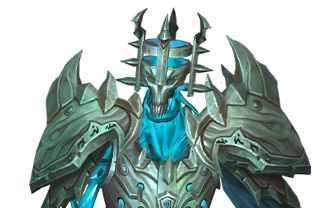
80%: Helm drops off the boss and casts duplicate Sufferings towards the tank.
60%: Gloves drop off the boss and cast duplicate Grasp of Malice.
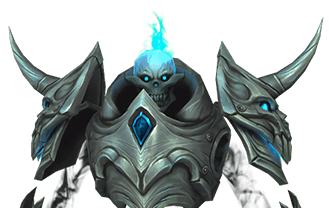
30%: Chest drops off the boss and casts duplicate Malevolence on itself.
Malevolence
The key mechanic of the fight, on Mythic, Malevolence knocks you a lot further than heroic, so you need to position at the edge of the room.
You should aim to handle this with a rotation of Mass Dispel from 2 , dispelling both debuffs at the same time resulting in the raid only being knocked once rather than twice. The important thing to note is that whichever player of the 2 who have the debuff is standing on the outside edge of the room (see positioning in image) will be knocked off the platform, and needs to use movement abilities such as Blink, Warlock Teleport, Disengage etc. to survive this.
Classes you should put low prio for being the “outside” player: Paladin, Shaman, Warrior (leap is a bit awkward)
Goblin jump works for this.
You need to be very wary of the Suffering timer when dispelling these as it will prevent the tanks being able to break Orbs and also could kill someone if they are knocked into the beam.
If you time the dispel as the pools are about to land from Aura of Spite, you will be knocked away from them as they spawn, this is a nice little min-max but is not vital.
Suffering
Tank mechanic from heroic, needs to be used to break 3 orbs at the same time at certain points (see image for positioning on how to do this).
Raid Leader needs to make sure Malevolence is not dispelled during or just before this is cast.
The Suffering beam is a lot wider than it looks and you can generally use the logic that placing the bosses hitbox on an orb (or two later into the fight) will ensure that they are always hit regardless of which direction the beam is aimed.
Grasp of Malice
The boss will spawn 3 cones that do 27k shadow damage and knockback if you are standing in them when they explode. Once past 60% the Gloves will cast more of these, cutting off more of the playspace when the mechanic occurs.
Aura of Spite
Aura of Spite is the mechanic that causes blue swirls to appear on the floor, more and more swirls appearing as you go further into the fight, each phase breakpoint causes this mechanic to spawn more swirls to dodge.
The swirls happen every 15 seconds on a fixed timer similar to Quaking in mythic +, however this timer is reset each time the boss casts Shatter and re-applies the aura on himself.
The raid-wide ticking damage portion of the mechanic ramps up, increasing by around 500 damage per tick each time the boss casts Shatter, and ticking every 3 seconds.
Orb of Torment
The Orbss are an important mechanic of the fight, however they have been severely nerfed in their HP values and are now far easier to kill quickly and throw them off the edge before they are able to start destroying the raid with Torment debuffs.
Whilst on the platform (alive or “dead”), the orbs apply debuffs to players called Torment which inflicts 8.2k shadow damage every 3 second for 15 seconds, and multiple applications of the debuff can be put on the same player.
This in combination with the ramping damage of Aura of Spite throughout the fight makes this boss quite healing intensive, hence the recommendation of 5 healers.
These orbs should be focused down immediately once broken by the tanks with Suffering, and carried off the edge.
, and Tanks should carry the orbs off the platform (any class with good mobility can do this) as soon as possible, careful that they are not out of position for the Malevolence dispels as a result.
Strategy
Phase 1 (100-80)
Simply nuke the boss, kill the two orbs he spawns and take them off the edge. If you push the boss before the first Malevolence cast he will skip it entirely but this is not particularly important.
Phase 2 (80-60)
Be aware of the Suffering cast beam from the Helmet to the tank (melee especially), otherwise the same as P1 with swirls on the ground to dodge from Aura of Spite.
Phase 3 (60-30)
The boss will begin to cast 3x Orbs of Torment each time from 60% onwards, these should be killed as a priority and taken off the edge by mobile classes before the next Malevolence dispels happen. If you are slow and have to wait it will result in more raid damage from the orbs and it can be easy to get behind with healing here.
Also keep an eye out for the extra cones during Grasp of Malice.
Phase 4 (30-0)
Don’t be scared of using Bloodlust early to push into this phase cleanly and beat the Malevolence timer, the boss won’t cast Malevolence for a while once he is pushed past 30% and it allows your raid to stabilise before dealing with it.
When Malevolence happens, handle the debuffs on your players quickly and make sure you position opposite the Cage so that you are knocked towards it, then wait for the debuff on the Cage to expire, or Purge it to be knocked again.
If you have very good DPS you will only have to handle one Malevolence in P3, however expect to potentially have to deal with a 2nd one towards the end of the fight, and make a very careful judgement call as to whether or not you will kill the boss before the debuffs expire, as if they go off in an unplanned manner it will instantly wipe the raid.
Healing Strategy
 By Dragnio
There are 4 main sources of raid damage on the fight: rot damage from Aura of Spite, rot damage from Orbs of torment, burst raid-wide damage from Shatter cast and burst raid-wide damage from dispelling Malevolence debuffs. While out-healing rot damage on this fight should not be an issue most of the time, having a lot of Torment debuffs on players while dispelling Malevolence or during Shatter cast can put a strain on your healers, so it is advised to cover big spikes of damage with DR cooldowns, while using Healing throughput CDs either before the burst parts to guarantee that everyone in the raid is topped, or afterwards to stabilise the players, depending on Raid HP shortly before the big hits and overlaps with Orbs of Torment.
It is recommended to have 5 healers on this fight (even though going 6 healers is also a perfectly viable option) with a healthy balance of strong healing throughput and Damage reduction CDs. There is no class that falls behind on that fight so almost any healing composition would work well, provided that you have some Damage Reaction CDs from a Holy Paladin or a Discipline Priest. Having access to Rallying Cry, Darkness and Anti-Magic Zone can also be a big help. A generalist composition I would recommend for this fight would be (just a personal recommendation, not by any means the only viable comp):
- 2x
- 1x
- 2x fill (anything can work here: / / / are all good)
Tips for raid cooldown assignments:
- DR CDs with positioning requirements (like Barrier and Spirit Link Totem) are better used for Malevolence rather than Shatter since you naturally stack the raid in one position before dispelling.
- CDs like Rallying Cry and Aura Mastery are really good for Shatter since you always need to dodge swirls on the ground after the damage has gone out, which makes use of other raid CDs complicated.
- Damage ramps up over time, so generally you want to plan some big cooldowns (like Ashen Hallow) to be used early in the fight and later on, when raid takes heavy damage.
- Depending on your DPS, a lot of 3minute CDs can only be used once on a fight, so plan them accordingly
- Malevolences comes roughly every 30 seconds, so depending on your composition, you might not be able to have DR for every set, make sure to allocate some healing throughput there instead if that happens. A couple of sets can be countered by coordinated usage of personal CDs / Healthstones
Raid Leader Tips
When calling the Mass Dispels, do a 3-2-1 countdown and make sure you time it so it doesn’t overlap with Suffering, if you wish to delay for the Aura of Spite swirls then do so but don’t delay so long they expire or the boss gets pushed into a Shatter cast while you are waiting.
Do not be scared to call for DPS to hold so you can dispel malevolence and then push the boss into a Shatter cast.
Remind the raid to position opposite the Cage with Malevolences in P3 - marking it with a world marker and the spot opposite it can be helpful.
Try and keep people’s mobility CDs in mind when calling which player should stand at the edge, always prioritise people with abilities that have a low CD as it should be up every time.
Make a clear and concise call when the boss is about to cast Shatter as the raid need to be aware of the incoming heavy raid damage that isn’t particularly telegraphed by anything other than the boss’ castbar.
WeakAuras & Addons
Sanctum of Domination WeakAura Pack
https://wago.io/slraid2


