

 Up to 84% Off VPN
Introduction
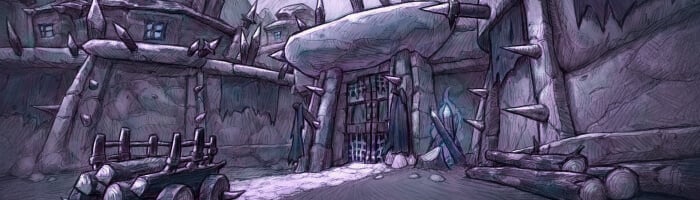
Hey everyone, and welcome to Method's guide for the Krol'dok Stronghold Dungeon in World of Warcraft: Forever. In this guide we’ll be going over all trash, bosses, loot, and quests for this dungeon.
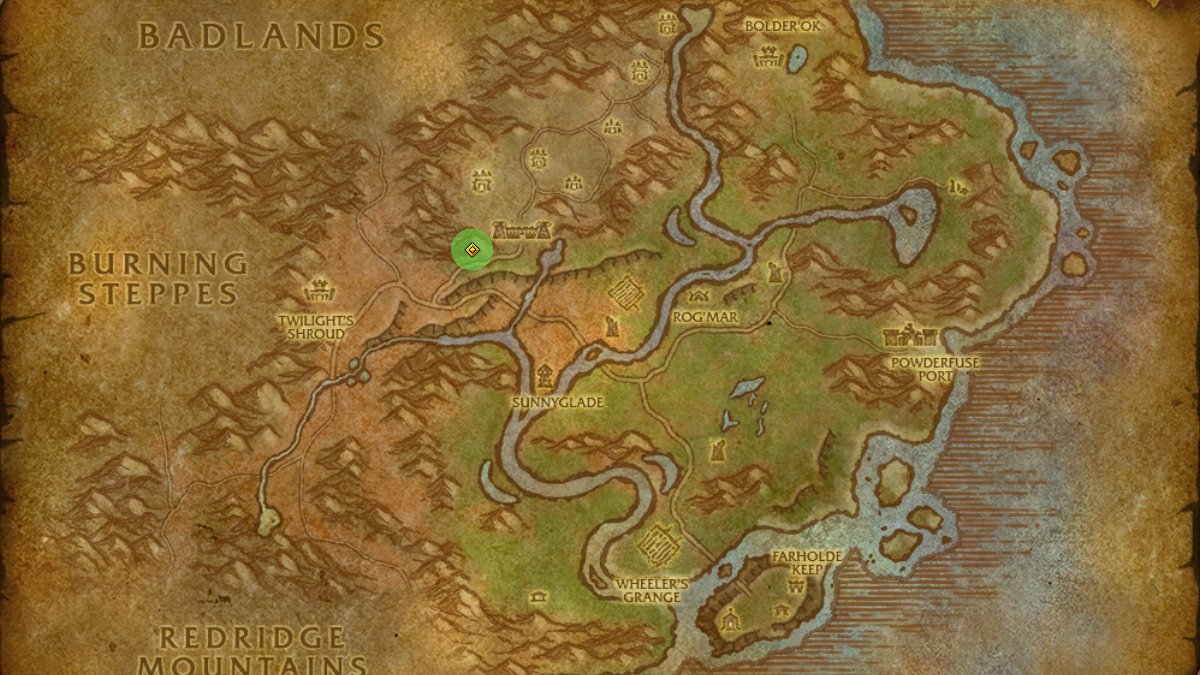
Krol'dok Stronghold Location
The Drowned is located in the northern central area of the Riverglades, a new zone in WoW Forever. This dungeon is the capital of the Krol'dok Ogres, and also houses the assisting Twilights Hammer and Shadowhide Gnoll clan.
Krol'dok Stronghold Dungeon Quests
Krol'dok Stronghold has quests for both Horde and Alliance. The main quests are locked behind chain quests starting in each factions main quest hub.
It should be noted however that these chains are quite extensive, so make sure before you plan to enter this dungeon that you have started these quest chains.
Tip: Bring 12x Iron Bar and 4x Thick Leather as you'll need it for a quest found within Krol'dok Stronghold.
| Quest | Faction | Level | Location |
| Vengeance of the Highborne | Alliance | 37 | Ranath Nightstride - Dalaran, Alterac Mountains |
| Twilight Mementos (leads to Curios of Curiosity for quest item rewards) | Alliance | 38 | Seargant Riftan - Twilights Shroud, Riverglades (Starts with several quests: Curious Trinkets, Scraps of Knowledge, and Saving Sunnyglade - Ashe Amberhall and Demar Brant in Farholde Keep) |
| Tome of Twilight | Alliance | 39 |
Ashe Amberhall - Farholde Keep, Riverglades
|
| Eye of Mugg | Alliance | 40 | Demar Brant - Farholde Keep, Riverglades (Starts with Curious Trinkets, Scraps of Knowledge, and Saving Sunnyglade from Ashe Amberhall and Demar Brant) |
| Krol'dok Moulding (leads to Key Ingredients for Key reward) |
Alliance | 38 | Drops from Tunk - Krol'dok Stronghold |
| Quest | Faction | Level | Location |
| A Token of Vengeance | Horde | 38 | Da'grosh - Near Krol'dok Stronghold, Riverglades (Complete quests from Krom'rosh to get The Wayward Warrior, the quest that starts the chain) |
| Tome of Twilight | Horde | 38 | Tran'gul - Rom'gar, Riverglades (Complete quests from Krom'rosh to get The Wayward Warrior, the quest that starts the chain) |
| Eye of Mugg | Horde | 38 | Krom'rosh - Rom'gar, Riverglades (Complete quests from Krom'rosh to get The Wayward Warrior, the quest that starts the chain) |
| Krol'dok Moulding (leads to Key Ingredients for Key reward) |
Neutral | 38 | Drops from Tunk - Krol'dok Stronghold |
Krol'dok Stronghold Dungeon Map
Krol'dok Stronghold is a massive dungeon that will take players some time to clear out. The dungeon does emulate a true capital city for a faction.
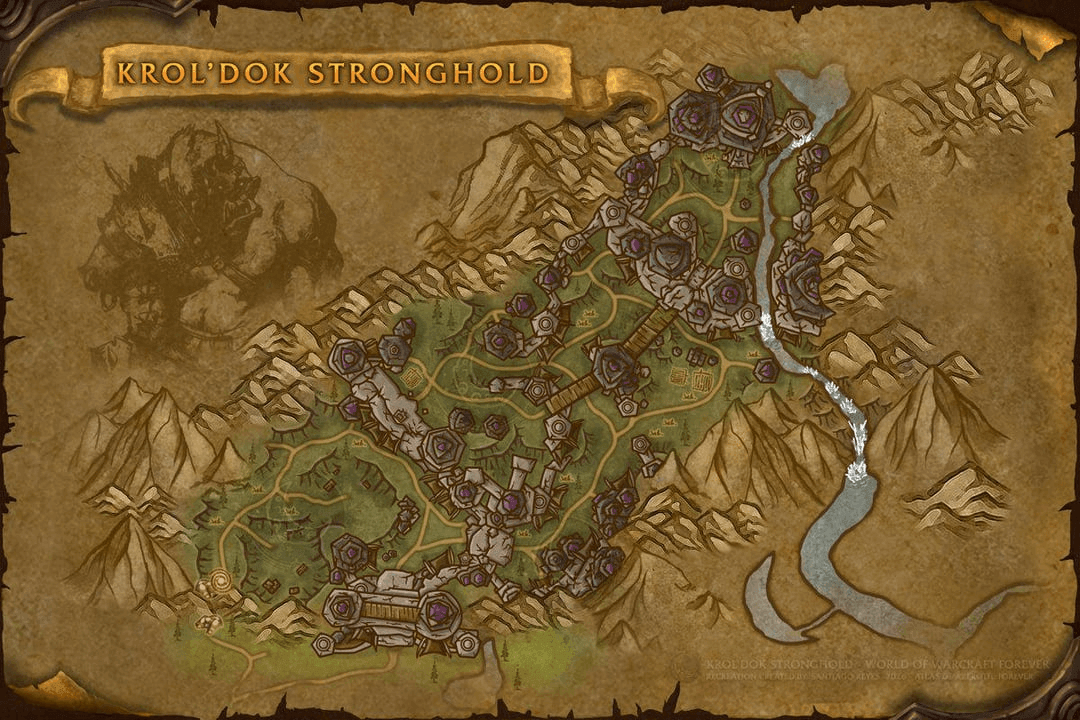
Map created by Santiago Reyes.
Krol'dok Stronghold Important Trash
The trash mobs found throughout Krol'dok Stronghold include the Twilight's Hammer, imprisoned Redridge Gnolls, the Shadowhide Gnoll Clan, and Krol'dok Ogre denizens.
Twilight Grunt

These mobs alone are not too powerful, however, in groups of 2 or more, can quickly shred through players HP. Take these mobs out ASAP and use all possible stuns.
- Bladestorm - deals AoE physical damage to all nearby players for 2 seconds.
Twilight Outrider
These mobs do not have very powerful abilities, but travel on ground mounts in groups of 3 across long roads in the dungeon. Scout ahead and look out for any of these mobs when along roads in the dungeon to avoid pulling them with additional packs
- Shoot/Multi-Shot - These mobs are Hunter mobs that will shoot their targets within range. Get within the deadzone to bring them closer to you if you're the tank.
- Hooked Net - Will immobilize the tank and move to shooting range afterwards. Use Blessing of Freedom on the tank if you have a Paladin.
Twilight Peon
These are non elite mobs that will run to alert nearby trash packs of intruders when you aggro them. Use stuns and slows to keep them from pulling more mobs. They move incredibly fast.
Krol'dok Shaman
Powerful Shaman Ogres that are usually in groups of 2-4.
- Lightning Bolt - Will spam Lightning Bolts on the primary threat target. Tanks should use Line-of-Sight (LoS) areas to bring them closer to your party when you aggro them
- Bloodlust - Will buff themselves and their allies with a 30% attack speed buff. Very dangerous with physical trash mobs.
Krol'dok Centurions
Warrior type Ogre mobs that will deal powerful physical damage. These mobs are more dangerous when Bloodlust is cast on them from Krol'dok Shaman.
- Mortal Strike - Powerful physical ability that reduces healing received by 50%.
- Thunderclap - Reduces movement and attack speed to all players nearby.
- Demoralizing Shout - Reduces attack power to nearby enemies.
Krol'dok Stronghold Bosses
The bosses of Krol'dok Stronghold all display fun mechanics to push the players to think and react. This dungeon, along with the Drowned City, start to provide players with more challenging encounters.
Slavecrusher Grox
Slavecrusher Grox is the first boss of the dungeon. He controls the Redridge Prisoner mobs nearby, and will "ask" for their help with Force Compliance throughout the fight. Even if you've cleared off an area, it will grab at least one of the nearest prisoners in the area.
He will also Bloodlust himself and nearby enemies, and Knockdown the primary threat target (the tank), stunning them for two seconds. Make sure you have cleared out a spot of prisoners before pulling this boss, as he patrols the mines he oversees.
Quickly take out any prisoners that are called to help, and make sure the healer keeps the tank alive when he gets stunned from the Knockdown. and this boss should go down.
Twilight Commander Zarmok
Twilight Commander Zarmok guards the entrance to the Ogre city. He is found training several Twilight Grunts, and players will need to clear out most of these mobs before pulling the boss. He patrols the area, so players will need to time their pulls on the trash to prevent pulling the boss.
Zarmok himself does not have very complex abilities, but does deal some hefty damage. He'll Strike the tank, taking out a good portion of his health, and will Rending Whirl, dealing instant AoE damage to all melee players nearby.
At 30%, he'll Enrage, buffing himself and all of his abilities. This fight is not hard, but requires your healers full attention. The less melee players in your party, the easier this fight is. Quickly take this boss down.
War Handler Ashka
War Handler Ashka is accompanied by two powerful pets: Snarlfang and Terrorhowl. Her adds do not have any unique abilities, but Ashka will send her pets to fixate on random players with Command: Kill!. Her only other ability is Strike, dealing damage on the tank.
For this fight, focus the adds first and use all available stuns. Paladins Hammer of Justice and Rogues Cheap Shot/ Kidney Shot wiil make this easy. Once the adds are down, take down the boss. If Command: Kill! focuses a caster or healer, you can use Blessing of Protection on the fixated target to remove the fixate and have the adds go back to the tank.
Nar'gurk
Nar'gurk is a powerful Ogre that is accompanied by Shadowhide Gnolls and Twilight's Hammer members. It is advised to try to pull some of the mobs and take them down before starting the encounter, as this boss has some abilities that will make it hard to handle with adds. Use any crowd control like Polymorph and Sap to temporarily remove the mobs from the encounter.
If you do not have any crowd control, you will need to take these mobs out ASAP. During this encounter, the boss will Convert a player, mind controlling them until they are reduced to 50% HP. be careful to not use powerful burst damage to accidentally kill the player.
Nar'gurk will also will cast Shadow Bolt Volley, dealing AoE damage to all party members. Take control of the mind controlled players and this boss will go down.
Tip: If you do wipe on this encounter, any adds around Nar'gurk will not respawn if killed, making the fight easier each attempt.
Bossman Toof
Bossman Toof's encounter will start once players aggro the two Krol'dok Centurions at the start of the bridge. As players cross the bridge, two Krol'dok Brutes will keep spawning. Once players get to the the boss, they can start the encounter.
Bossman Toof's only abilities mimic Krol'dok Centurions: Mortal Strike, Thunderclap, and Demoralizing Shout, just more powerful.
He's accompanied by two Krol'dok Shaman that can buff him with Bloodlust. Take out the Shaman fast and then focus the boss. You may get another wave of Brute adds during this fight, so use any crowd control or take them down fast. If it's getting hectic, take the boss down fast and ignore adds.
Overlord Mugg
Overlord Mugg is the final boss of the encounter. He's not alone, however, as two Krol'dok Centurions guard him. Similar to our other encounters, we recommend taking these adds down ASAP as this boss hits hard and fast.
If you have a Druid or Warrior in your party, it is highly recommended to use Demoralizing Shout/Demoralizing Roar and Thunder Clap at the start.
Overlord Mugg has mini "phases" in which he'll swap weapons with Mugg's Fury, similar to Mr. Smite from the Deadmines. He'll start with Set of Maces and then finish with Set of Mauls. Again, if you have a Warrior or Druid, use those debuffs to reduce incoming damage to your tank.
He'll also Crushing Slam a ranged target, jumping to them and dealing damage to all nearby players, as well as knocking them back. Keep the tank alive, reduce the bosses damage, and quickly take out the adds to overcome the ruler of Krol'dok Stronghold.
Krol'dok Stronghold Dungeon Loot
Slavecrusher Grox Loot
The loot table below shows all drops from Slavecrusher Grox in Krol'dok Stronghold.
| Type | Item | Boss |
|---|---|---|
| Mail Waist | Chain of Binding | Slavecrusher Grox |
| Mace One-Hand | Slavecrusher Scepter | Slavecrusher Grox |
| Mail Shoulder | Resistance Breaker Spaulder | Slavecrusher Grox |
| Cooking | Blueprint: Expert Campfire | Slavecrusher Grox |
Twilight Commander Zarmok Loot
The loot table below shows all drops from Twilight Commander Zarmok in Krol'dok Stronghold.
| Type | Item | Boss |
|---|---|---|
| Cloth Legs | Shadecaster's Leggings | Twilight Commander Zarmok |
| Dagger Main Hand | Shadowlight Athame | Twilight Commander Zarmok |
| Finger | Zarmok's Plated Signet | Twilight Commander Zarmok |
War Handler Ashka Loot
The loot table below shows all drops from War Handler Ashka in Krol'dok Stronghold.
| Type | Item | Boss |
|---|---|---|
| Sword Two-Hand | Bloodied Gutslicer | War Handler Ashka |
| Leather Head | War Handler's Gaze | War Handler Ashka |
| Plate Feet | Worgbinder's Treads | War Handler Ashka |
Nar'gurk Loot
The loot table below shows all drops from Nar'gurk in Krol'dok Stronghold.
| Type | Item | Boss |
|---|---|---|
| Neck | Chain of the Corruptor | Nar'gurk |
| Plate Head | Krol'dok Warplate Helmet | Nar'gurk |
| Plate Chest | Krol'dok Warplate Chest | Nar'gurk |
| Quest Item | Tome of Twilight | Nar'gurk |
Bossman Toof Loot
The loot table below shows all drops from Bossman Toof in Krol'dok Stronghold.
| Type | Item | Boss |
|---|---|---|
| Finger | Band of Bossman | Bossman Toof |
| Cloth Waist | Big-Belly Belt | Bossman Toof |
| Mace One-Hand | Toofbreaker | Bossman Toof |
Overlord Mugg Loot
The loot table below shows all drops from Overlord Mugg in Krol'dok Stronghold.
| Type | Item | Boss |
|---|---|---|
| Cloth Head | Strongly Scented Hood | Overlord Mugg |
| Fist Weapon One-Hand | Mugg's Crosser | Overlord Mugg |
| Trinket | Emblem of Slamming | Overlord Mugg |
| Fist Weapon One-Hand | Mugg's Jabber | Overlord Mugg |
| Quest Item | Eye of Mugg | Overlord Mugg |
| Quest Item | Krol'dok Ogre Key | Overlord Mugg |