

 Up to 84% Off VPN
Introduction
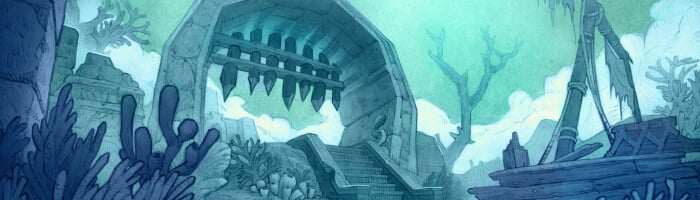
Hey everyone, and welcome to Method's guide for the Drowned City Dungeon in World of Warcraft: Forever. In this guide we’ll be going over all trash, bosses, loot, and quests for this dungeon.
The Drowned City Location
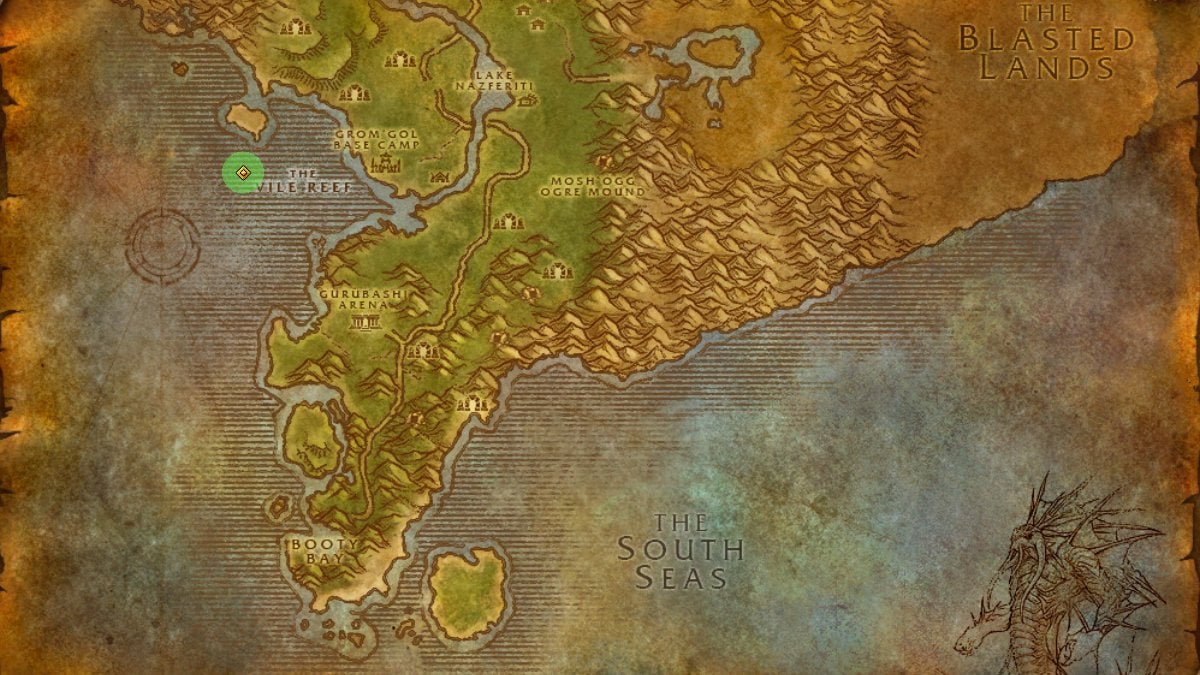
The Drowned is located south of the Haunted Isle in Stranglethorn Vale, with the dungeon portal actually being deep within the ocean.
This dungeon hosts the trolls of the lost city of I'lalai, where they, along with the invading Saltseer Pirates, are not too happy with you and your party's intrusion.
The Drowned City Dungeon Quests
There are five quests for both Horde and Alliance for the Drowned City in WoW Forever.
| Quest | Level | Location |
|
(leads to The Web of Magic for quest item rewards) |
30 | Loremaster Dibbs - Southshore, Hillsbrad Foothills (Starts with The Second Rebellion and Bad Medicine. Completing Troll Witchery will direct players to Loremaster Dibbs in Southshore for this quest) |
|
(leads to Findings for the Explorer's League for quest item rewards) |
30 |
Loremaster Dibbs - Southshore, Hillsbrad Foothills |
| Ancient Gurubashi Secrets | 34 | Archmage Timear - Dalaran, Alterac Mountains |
| Shady Saltseers | 34 | Krazek - Booty Bay, Stranglethorn Vale |
| The Saltseer Captain | 34 | Krazek - Booty Bay, Stranglethorn Vale |
| Quest | Level | Location |
| The Drowned City | 30 | Kin'weelay - Grom'gol, Stranglethorn Vale (Starts with The Vile Reef from Kin'weelay) |
| The Only Good Brinescale... | 30 | Commander Aggro'gosh - Grom'gol, Stranglethorn Vale (Starts with The Vile Reef from Kin'weelay) |
| Ancient Gurubashi Idol | 28 | Mazu'kon - Skywatcher plateau, Mulgore |
| Shady Saltseers | 34 | Krazek - Booty Bay, Stranglethorn Vale |
| The Saltseer Captain | 34 | Krazek - Booty Bay, Stranglethorn Vale |
The Drowned City Dungeon Map
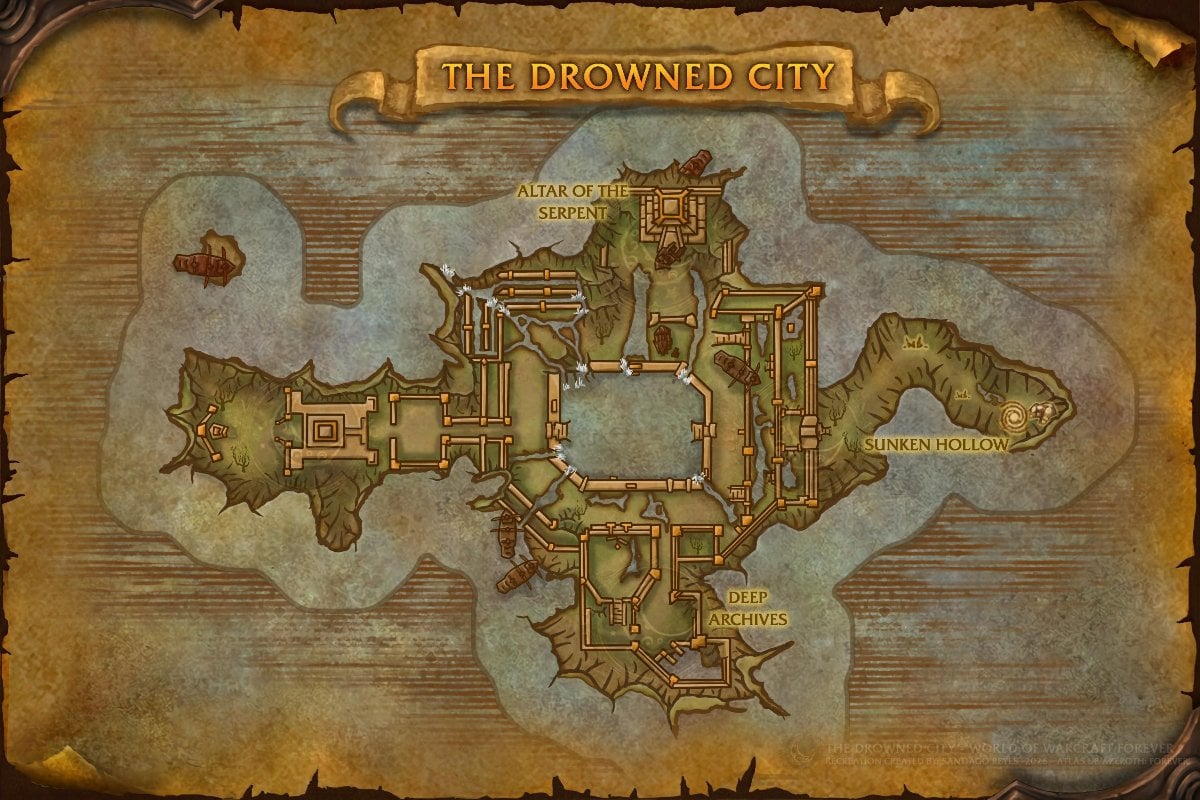
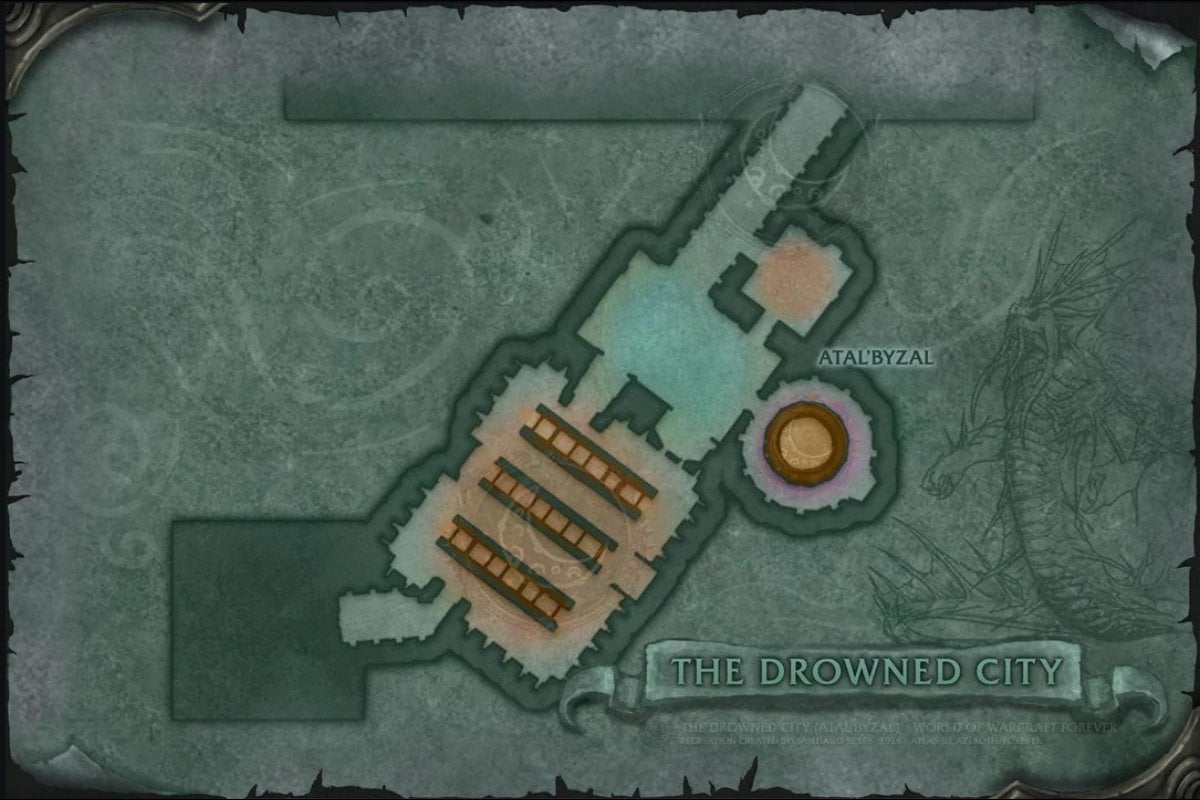
Maps created by Santiago Reyes.
The Drowned City Important Trash
The dungeon primarily has Undead and Humanoids, along with some mobs having deadly abilities. There is a handful of diseases and curses here, and along with that, an underwater section. We recommend brining a Warlock or Shaman to your party for their underwater breathing buffs: Water Breathing and Unending Breath.
Makrura Snapper
- Will apply Sunder Armor on their target. Make sure to not continue pulling other trash mobs with high stacks of this debuff, especially Chasm Crawlers!
Chasm Crawlers
- Deal VERY powerful physical auto attacks, come in packs of 2-3.
- Apply Muscle Tear to the primary threat target, reducing strength and dealing instant damage.
Risen Sentry

- Come in packs of 3-4, and will Shield Charge members who are 8 or more yards away, knocking them back.
- Players should stack up to negate Shield Charge from happening, as it could accidentally push them into other trash packs.
Profane Necromancer
- Will attempt to Conjure Spirit, interupt and stun these targets, do not let them get this cast off.
- Will apply Curse of Tongues to targets.
- Will cast Shadow Bolt on the primary threat target.
Brinescale Sorceress
Brinescale Explorer
- Will apply Poisonous Stab to the primary threat target, dispel this debuff ASAP, as it not only deals ticking damage, but also significantly reduces attack and movement speed.
Saltseer Coronor
These are the most powerful of the Saltseer Pirates found within the dungeon. Focus these first over others.
- Will deal a very powerful Chain Lightning that can be interrupted.
- Will attempt to heal themselves and their allies with Healing Wave.
If limited on interrupts, focus primarily on Healing Wave and Chain Lightning.
The Drowned City Bosses
The Drowned City has 6 bosses with 2 potential Rare Spawn bosses. These bosse are primarily Humanoid type bosses, with some having very powerful mechanics and abilities.
Zul'Alai
Zul'Alai is the first boss of the Drowned City and deals powerful physical damage. He'll cast Monstrous Slam, stunning those nearby for 3 seconds. Players can move out before this cast finishes, as the boss remains stagnant when casting.
He'll hit the tank with Rotted Strike, an instant attack dealing damage to all nearby and slowing their movement and attack speed. Priest's can dispel the slowing effect and Paladins can use Blessing Of Freedom. Healers and ranged should out-range this ability.
At 30%, he'll cast Undying Oath, increasing attack speed by 30% and healing himself over time until defeated. Use defensive cooldowns if possible, and any attack speed slows like a Warrior's Thunder Clap. It's not a long fight, but the damage is intense on the tank!
Var'Taka
This boss is accompanied by two Brinescale Priestess adds, that can heal themselves or the boss. You can either use crowd-control to remove them temporarily from the encounter, or focus them down first to take them out fast.
The boss himself has two abilities: Harpoon, and Cleave. Var'Taka will pick a random target to Harpoon them, dealing instant damage and pulling them to the boss. For the Cleave, simply have the tank face the boss away from the rest of the party to avoid anyone else but the tank to eat that damage.
Be careful as you engage this encounter, as there are trash mob packs on the left and right that you can accidentally pull. You can use the pillars by the staircase to Line-of-Sight the Brinescale Priestesses and have the encounter take place in a safer spot. Once the Brinescale Priestesses are taken out, this is a fairly easy encounter.
Once the encounter is over, click on the Glowing Pearl to partially weaken the Barrier to Deathless Marrow's room.
Primeval Elemental
This boss is located underneath the Deep Archives. Players can find this bosses room by entering the water in this area. When you find the Undying Offerings you are in the bosses chamber. To summon the boss, slay all the offerings.
Primeval Elemental is a very easy boss with two mechanics your party really won't notice: Waterbolt and Freeze Water. Waterbolt is cast on the primary threat target, and Freeze Water deals damage to everyone and slows their attack, casting, and movement speed.
The only challenge here is to make sure you don't run out of breath, if you are getting close, swim directly above you as there is an opening above water. If you brought a Shaman or Warlock, then this mechanic is negated with their water-breathing buffs: Water Breathing and Unending Breath.
Captain Dreadrise
Captain Dreadrise patrols near the crashed ship, so be careful when clearing out trash as you do not want to engage him early or with other trash packs. Once you have a secure spot to pull, start the encounter.
The boss only has two abilities: Embrine and Waterbolt Volley. Embrine will trap a player in an Abyssal Bubble that needs to be killed by players before that player drowns.
Waterbolt Volley deals damage to all players, but this can be interrupted. Interrupt his casts and break out players in Abyssal Bubbles and this fight will be simple!
Once the encounter is over, click on the Glowing Pearl to partially weaken the Barrier to Deathless Marrow's room.
Deathless Marrow
Deathless Marrow is one of the more difficult encounters players will face in WoW: Forever dungeons.
This boss's main mechanic is balancing never-ending waves of adds while taking down the boss. The boss himself only has one ability: Bloodbolt. They will summon Deathless Guardians and Deathless Sorcerers, and when summoned, players should take out the Guardians first as they stun players with a powerful Shield Slam.
We recommend taking down the first wave of adds ASAP and then full sending all damage on the boss, ignoring the rest of the incoming adds. However, if they start to get overwheliming, using AoE Fear abilities such as Intimidating Shout/ Psychic Scream or individual crowd-controls like Polymorph will greatly help.
Min'loth The Serpent
Min'loth The Serpent is the final encounter of the dungeon and has two phases: a Troll phase and Serpent phase.
- Troll Phase Abilities: Drench and Deluge
- Serpent Phase Abilities: Fear and Poison Bolt Volley
In Phase 1, the boss will hit the primary threat target with Drench, dealing powerful instant damage. When approaching low HP, he'll channel Deluge, dealing AoE damage to all party members.
The healer needs to make sure the tank is topped back to full health in between Drench casts, and then divvy up heals as Deluge is going out. Health Potions and Healthstones can be very helpful here! Once the boss reaches 1% HP in Phase 1, he'll enter his Serpent Phase and start Phase 2 at 100% HP
In Phase 2, Min'loth now has an AoE Poison Bolt Volley, dealing powerful ticking poison damage. Anyone who can dispel this needs to do so ASAP over damaging the boss. He'll also pick a random target to Fear, so bringing a Shaman to drop Tremor Totem will negate this mechanic. This fight ends when Min'oth reaches 0% HP in Phase 2.'
Important: Once defeated, travel to the nearby ship wreckage, as a treasure chest with additional loot awaits you!
Umbra (Rare Spawn)
Umbra is a potential Rare Spawn Boss that players can find in The Drowned City in the Deep Archives area. Umbra only applies a Rend to the primary threat target, and is accompanied by 5-6 Saltscale Muckdwellers that also apply Rend.
This encounter is not difficult, simply AoE down all the adds and then take down the boss. Make sure there's no additional trash packs nearby.
Gill (Rare Spawn)
Gill is a Rare Spawn Boss that only has one mechanic: Throw Dynamite. He will appear on the right side of the center area of the dungeon as players approach the Deep Archives. Heal through the bomb damage or simply move from where he's going to throw them, and take this boss down.
The Drowned City Dungeon Loot
Zul'Alai Loot
The loot table below shows all drops from Zul'Alai in The Drowned City.
| Type | Item | Boss |
|---|---|---|
| Mail Wrist | Berserker Shackles | Zul'Alai |
| Leather Wrist | Oathbound Bracers | Zul'Alai |
| Axe One-Hand | Bloodslash Axe | Zul'Alai |
Var'Taka Loot
The loot table below shows all drops from Var'Taka in The Drowned City.
| Type | Item | Boss |
|---|---|---|
| Polearm Two-Hand | Harpoon of Command | Var'Taka |
| Leather Legs | Brinebelly Leggings | Var'Taka |
| Back | Priestess Cloak | Var'Taka |
Captain Dreadrise Loot
The loot table below shows all drops from Captain Dreadrise in The Drowned City.
| Type | Item | Boss |
|---|---|---|
| Cloth Waist | Briny Sash | Captain Dreadrise |
| Sword Main Hand | Dreadfrost Saber | Captain Dreadrise |
| Gun Ranged | Frosty Blunderbuss | Captain Dreadrise |
Deathless Marrow Loot
The loot table below shows all drops from Deathless Marrow in The Drowned City.
| Type | Item | Boss |
|---|---|---|
| Staff Two-Hand | Bloodspine Staff | Deathless Marrow |
| Finger | Knucklebone Ring | Deathless Marrow |
| Mail Shoulder | Viscera Spaulders | Deathless Marrow |
Primeval Elemental Loot
The loot table below shows all drops from Primeval Elemental in The Drowned City.
| Type | Item | Boss |
|---|---|---|
| Trinket | Heart of the Primeval | Primeval Elemental |
| Cloth Chest | Robe of the Drowned | Primeval Elemental |
| Back | Waterlogged Burial Shroud | Primeval Elemental |
Min'loth the Serpent Loot
The loot table below shows all drops from Min'loth the Serpent in The Drowned City.
| Type | Item | Boss |
|---|---|---|
| Leather Hands | Ritual-Binder's Gloves | Min'loth the Serpent |
| Mail Head | Serpentbane Crown | Min'loth the Serpent |
| Shield Shield | Maw of Min'loth | Min'loth the Serpent |
Umbra (Rare) Loot
The loot table below shows all drops from Umbra (Rare) in The Drowned City.
| Type | Item | Boss |
|---|---|---|
| Cloth Hands | Deep-Dweller's Grips | Umbra (Rare) |
| Mail Waist | Umbral Scaled Belt | Umbra (Rare) |
Gill (Rare) Loot
The loot table below shows all drops from Gill (Rare) in The Drowned City.
| Type | Item | Boss |
|---|---|---|
| Dagger Main Hand | Tidebound Dagger | Gill (Rare) |
| Trinket | Gill's Gills | Gill (Rare) |