Raid Setup
Introduction
This fight has 3 phases, 100-40% is the Automa Phase, 40-15% is focused on the boss and 15-0% you have to burn the boss before the damage gets too high.
Automa Phase (100%-40%)
Volatile Materium:
These adds don’t really do a lot, just Misdirect them to your tanks and cleave them down.
Point Defense Drone:
These adds will teleport around and cast Blast on members of your raid - try and use Death Grips to keep them in the cleave as much as possible, otherwise have ranged finish them off when they teleport away.
Pre-Fabricated Sentry:
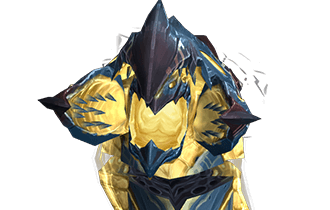
These large adds will debuff your tanks with Dissonance, and also cast a frontal called Wave of Disintegration that should be faced away from the raid at all times.
Automated Defense Matrix:

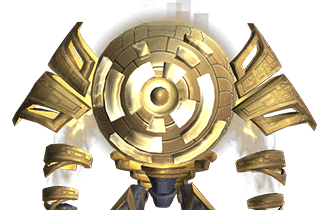
There are 3 of these adds placed around the room in a triangle, as you kill adds in the fight they will fill up the energy of these Defense Matrix adds, starting with the right-most one, then the bottom, and then the left-most. You need to make sure you have killed enough adds before the boss casts Exposed Core, so that the Defense Matrix adds have started casting Force Field, in order for your raid to protect itself.
Once Exposed Core is over, the Defense Matrix will become attackable, and needs to be killed in order to spawn the Unstable Core that you will then pick up and throw at the boss to deal 15% of it’s HP and remove any stacks of Optimal Core Temperature.
40%-15%
Once you have pushed the Boss below 40% HP he will stop doing Exposed Core and Deresolution. You can stand with the boss and just nuke him to 15% without worrying about moving to the next Automated Defense Matrix at this point.
Keep popping the bombs and moving out with Matter Dissolution.
Core Overload (15%-0%)
At 15% the boss will deactivate, casting no other mechanics other than Core Overload.
Mechanics
Exposed Core
Upon reaching max energy the boss will cast Exposed Core, dealing massive raid damage to your raid - everyone needs to stand in the Force Field provided by the Automated Defense Matrix adds until this cast has fully completed. It is recommended to use Healing CDs during the Exposed Core.
Refracted Blast
The boss will shoot several lasers at the feet of your raid members, these need to be dodged as they hit for 60K damage.
Afterwards they will spawn Spike of Creation bombs at the point of impact.
Spikes of Creation
This is the mythic mechanic of the fight, these bombs will deal 1.5k damage every 1 second for 6 seconds when they are popped. You should have your healers pop these in sets of 3 or 4 and heal through the damage so that you are not overrun by them and run into a situation where you could have more than 4 going off at once.
These bombs are also set off by the boss’ Deresolution and Split Resolution mechanics if they hit them.
Deresolution
A player will be targeted by a laser that comes from around the centre of the room, they need to move so that this beam does not hit any raid members or any Spike of Creations.
The beam will hit any player for 75K damage so it is important to be avoided.
Watch the line as you move away from the group.
Matter Dissolution
Two players will be given a debuff, slightly staggered in timing - they need to move far away from the raid (and each other) before this expires as it will spawn a ring of orbs around them that slowly converges toward the point they were standing when the debuff expires, they are then slowed and have to run between the orbs to escape a Star Wars garbage disposal situation.
This mechanic is active from the start of the fight on Mythic.
Split Resolution
The boss will smack the tank for 60K damage and spawn lines around it that deal 45K damage to those who are hit, also setting off any Spike of Creation bombs that happen to be in it’s path.
This mechanic is active from the start of the fight on Mythic.
Pneumatic Impact
The tank swap mechanic for the fight - the boss will smack the tank at 50 energy for 112,000 Physical damage and give them a 45s debuff, increasing their damage taken from this ability by 200%.
Core Overload
At 15% the boss will deactivate, casting no other mechanics other than Core Overload, which deals ramping AoE damage to your raid, starting at 7.4K every 3s, and increasing by 25% every 3s.
Stand under the boss and burn him down, use all remaining healing cooldowns, keeping in mind that the damage is strongest right at the end.
Strategy
The strategy here varies fairly wildly depending on the strength of your raid group.
For example if you have a strong group with 4sets and double legendaries equipped etc - I’d recommend using Bloodlust as soon as the boss comes out of the wall, and pushing him to 40% before the second cast of Exposed Core even happens.
If your raid group is a bit weaker then you can hold Bloodlust for the 15% burn, but you will have to heal through 2, maybe 3 casts of Exposed Core if you are too slow, which makes the fight exponentially harder.
Other than that there isn’t much to say - drag the boss over towards the top-right Automated Defense Matrix add, cleave the adds down on the boss with lust and throw the core in as soon as possible after the first Exposed Core. This should bring him somewhere in the 45-30% HP range depending on dps and you can then just sit there and bring him down to 15%.
Just keep in mind it can get a bit congested with the bombs if you choose not to drag the boss away from them - in theory once he has pushed past 40% there isn’t really any actual need to pop them so you can drag the boss away from them each time Refracted Blast is cast - but this isn’t really necessary as long as your raid group can avoid unintentionally walking over them.
WeakAuras
Sepulcher of the First Ones WeakAura Pack
https://wago.io/slraid3