Mechanics
Imprinted Safeguards
On Mythic difficulty any Necrotic Ritualists and Withering Seeds will have a shield on them (Imprinted Safeguards), reducing the damage and healing they receive.
These shields can only be broken by placing a Night Hunter line over the top of them. These lines will go on 4 random players in tandem with the Ritualist and Seed mechanics.
You will need a WeakAura/bossmod assigning players to each of the 4 different Ritualists/Seeds.
Ritualist/Seed Spawns:

Necrotic Ritual
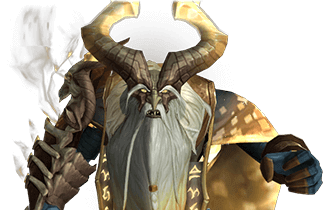
The Prototype of War will spawn 4 adds called Necrotic Ritualists, these adds will channel a spell that creates a zone in the centre of the room which grows until all 4 of them have been defeated. The zone will deal 11k damage every 2s and reduces all healing received by 100%.
These adds need to be killed before the expanding green circle pushes you off the platform - generally you want to assign at least 2 Ranged DPS to each of the 3 adds that are not close to the boss, and melee can handle the one under the bosses.
If you really want to min-max this, you can put Spellwarding on a Boomkin while they stand in the centre of the room and Starfall all of them, however this isn’t really needed following nerfs to fight/higher levels of gear.
Runecarver's Deathtouch
The Prototype of War will place 2 Runecarver’s Deathtouch debuffs on random players. These players need to look for the blue circles on the ground (Bastion’s Ward). These circles are generally on the opposite side of the room to where the bosses are being tanked.
Each player should pick a different Ward and run to it, and then they need to be dispelled when inside it.
If this is dispelled outside of the Ward it will deal large damage to the player and likely kill them.
It’s important not to be standing on top of someone when it is dispelled, even if you are both inside a Ward.
Gloom Bolt
The Prototype of War will repeatedly attempt to cast Gloom Bolt at random players in the raid, if it hits it will deal 30K damage and put a 120K healing absorb debuff on them.
This should be kicked at all times and you should set up a kick rotation that includes ranged backups incase melee players are forced away by other mechanics when they are supposed to kick.
Windswept Wings
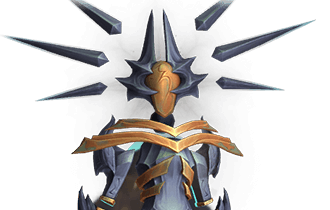
The Prototype of Duty will cast Windswept Wings, pushing everyone back for 12 seconds and firing out Pinning Volley - if someone is hit by this you need to DPS the spear to free them.
Humbling Strikes
The Prototype of Duty will cast Humbling Strikes, smacking her current target, with 30% of this damage radiating to everyone else in the raid. The raid damage is reduced if the tank mitigates the initial hit on themselves.
Wild Stampede
The Prototype of Renewal will periodically spawn lines of beasts that travel across the room, dealing small damage and knocking back any player that is hit.
If these spawn in line with where you are tanking the bosses you should move them away.
Withering Seeds
The boss will spawn Withering Seeds in the same positions as the Necrotic Ritualists from P1. These seeds have shields that need to be broken with Night Hunter.
These seeds need to have their HP managed, healing them up to full one-by-one, extending the duration of the 30s 20% healing done buff they give when fully healed, just before the previous buff is about to expire. If it is done properly you can have this buff up pretty much permanently through the phase.
You need to also make sure they don’t die as they will deal heavy raid damage and you will be unable to get the buff from healing them to full, if this happens it is very bad and will often result in a wipe.
Have someone call out the seeds by raid marker, and manage their HP through vocal calls - dictating which seed is being healed to full next, and communicating if any are about to die and need some topping up.
Animastorm
The Prototype of Renewal will periodically send out blue Animastorms spiralling into the room - melee in particular need to be aware of these and dodge them actively.
Anima Bolt
The Prototype of Renewal will attempt to repeatedly cast Anima Bolt, dealing 13K damage and leaving a painful DoT behind on any target it successfully hits.
This should be kicked with a kick rotation similar to Gloom Bolt.
Ideally set up different players to kick Anima Bolt and Gloom Bolt so that they can both be kicked in P3 without any need of reassignment.
Hand of Destruction
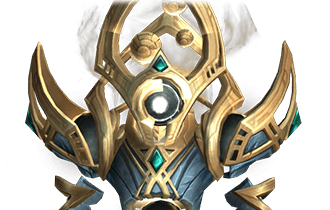
The Prototype of Absolution will grip the entire raid in, dealing 45K damage after a 6s delay. This damage is falloff damage which is reduced the further away you are when it explodes.
Once gripped - every player will have Sinful Projection applied to them, sending out 4 circles after a 4 second delay. When hit, players are briefly stunned and gain an extra stack of Burden of Sin, which can be quite deadly. 2 stacks is mostly fine, but any more than that and these players will need serious healing attention until the phase ends.
Burden of Sin
At the start of P2, the Prototype of Absolution will apply a stack of Burden of Sin to every member of the raid, this deals 10K damage per stack every 2s.
Wracking Pain
The Prototype of Absolution will cast Wracking Pain at the active tank, a frontal which increases damage taken by 25% for 40 seconds.
Raid members should be careful not to get hit by this.
This ability will also apply it’s damage increase to Necrotic Ritualists in Phase 3, a good countermeasure should someone mess up the breaking of the shield on one of them.
Complete Reconstruction
Once a boss dies, they will begin a 20s cast, if the cast succeeds they will heal for 100% of their health, effectively causing a wipe.
There is a grace period where the bosses will not cast this if all of them are below a certain HP threshold - somewhere in the 1.5% - 2% HP range but I am not sure about the exact rules of this.
Strategy
Phase 1
The first mechanic you need to handle is the Necrotic Ritual - use a Druid Roar to make sure everyone reaches their designated ritualists with Night Hunter to break the shields, and then have your ranged players focus the back 3 down whilst melee cleave down the melee Ritualist.
Once this is over you will need to dispel 2x Runecarver’s Deathtouch debuffs, and then dodge Pinning Volley during Windswept Wings.
After this, another Necrotic Ritual will be cast, but you should have the bosses low enough that you can push them both to 40% HP and end the phase before the second Ritual forces you off the platform. You need to make sure that the raid soaks the Night Hunter lines here, as not taking them through the Ritualists means the fixated players will take the full 112K damage unless someone stands in their line.
Keep in mind that Prototype of Duty will usually need more DPS focus in this phase as she teleports away, and melee dps have a tendency of preferring to main target the Prototype of War as they are kicking him.
Phase 2
Here you need to use another Druid Roar on the Seeds so that players fixated by Night Hunter can break the shields, and then manage their HP as described in the mechanic description above.
There is not a lot else going on in this phase, just dodge Animastorms and Wild Stampede whilst your healers manage the Seed health.
The boss will do one cast of Hand of Destruction which you need to run from and spread out, dodging carefully.
On the second cast of Withering Seeds - you shouldn’t need to actually worry about healing these as you should end the phase before the seeds die, so just soak the Night Hunter lines so your raid members don’t die from the damage.
Phase 3
Once again - use a Druid Roar for the Seeds/Ritualists combo - make sure not to miss breaking the shield on both the seed and the Ritualist with your lines.
Once the shields are broken, use Bloodlust to help the ranged kill the Ritualists in time, and then gather up by the bosses.
You will have to handle each mechanic from the fight once before they die - there will be a second cast of Withering Seeds but you shouldn’t need to worry about breaking the shields, just stand still and nuke the bosses down.
WeakAuras
Sepulcher of the First Ones WeakAura Pack
https://wago.io/slraid3