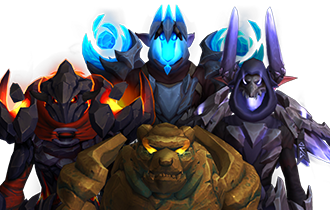
Raid Setup
Introduction
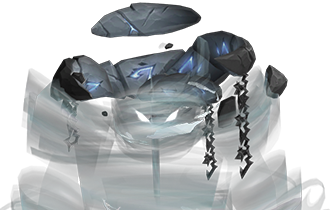
Hectic Cleave Fight
Recommended Setup: 2 Tanks / 4-5 Healers / 13+ DPS
Useful utilities: Druid Roar/Shaman Totem, personal movement abilities, Warlock Gates, Knock-back prevention skills and Evokers Time Spiral talent
Mobile Immunities: Turtle, Bubble, Cloak (and Ice skates)
Easy Mode
Phase 1
- Tank swap every 5-8 stacks of Web Blast
- The Off-Tank should pick up Frostbreath Arachnid and face it away from the raid
- DPS need to kill Frostbreath Arachnid as soon as possible
- Spread for Chilling Blast circles and do not stand in Icy Ground (white puddles)
- Drop Enveloping Webs in between ranged and melee camps
- Use Sticky Webbing to prevent getting pulled by the boss, otherwise don't stand in it
- Gossamer Burst will grip you off the map if you don't run against it. Use movement abilities, stand far away from the boss or use Sticky Webbing.
- If players are Wrapped in Webs (10 stacks of Sticky Webbing) the tank should place a spiderling on them, when spiderlings die they explode and remove any form of Webbing
Intermission
- Run up the stairs as fast as possible
- Dodge swirls
- Be ready for Gossamer Burst
Phase 2
- Interrupt Apex of Ice
- You will permanently slide in this phase because of ice, be careful
- Tank swap every 5-8 stacks of Web Blast
- Place the Chilling Blast circles to the side, for better Glacial Plume positioning
- Suffocating Webs targeted players get close to melee to get freed from Webs faster
- Repelling Burst will knock you away, don’t fall of the platform or hit a Glacial Plume
- Kill the boss before damage taken becomes too high
Mechanics
Sennarth blasts her current target with a ball of webs, inflicting 100% of normal attack damage and causing them to suffer 50% increased damage from Web Blast for 20 sec. This stacks.
Simple tank-swap mechanic, recommended to swap at 5-8 stacks.
Sennarth exhales a frozen vapor that creates patches of Icy Ground. Simple swirl ability, dodge them.
Standing in Icy Ground inflicts 12,016 Frost damage every second and causes players to slide.
Just avoid standing in white patches as much as possible. If you do run through it, you will slide, so do not think your game is lagging.
Several players get targeted with volatile rime, inflicting 19,226 Frost damage every 1 sec for 5 sec and causing a Frost Expulsion upon expiration or removal. The Expulsion will deal 108,103 Frost damage to all players within 4 yards.
Players get marked with a circle, and need to spread to not hit other players with it.
This is kind of the Signature ability of this fight. Sennarth inflicts 19,200 Physical damage to several players and causes them to drop Sticky Webbing at their locations every 1 second for 6 seconds.
Once you have this debuff, you will be dropping a puddle of Web every second. You want to move with it, to spread the webs a bit, but also to prevent standing in the same web puddle and gain extra stacks of Sticky Webbing.
Standing within sticky cobwebs provides resistance to displacement and sliding, as well as reducing the player’s movement speed by 25% for 30sec. It can be removed by Caustic Eruption.
Upon reaching 10 stacks, the target becomes Wrapped in Web.
This is a type of ability that is both good and bad for you. While you should avoid it most of the time to prevent yourself from gaining more stacks + reduced movement speed, you also can/should use this to prevent getting pulled off the map when Sennarth uses Gossamer Burst. If you are standing in Sticky Webbing when Gossamer Burst is cast, you will not get moved at all.
Attaches all players in gossamer webs, inflicting 156,211 Physical damage and draws them inwards after a short delay.
So you will first get the web attached animation, and after 5 seconds she will rapidly pull you towards her until you will fall down. You will need to use some kind of movement ability, to prevent falling down. The safest way to do this is if you're playing a class without teleports/blinks is to stand all the way to the back, and run against it. However, if you want to maximize damage done, it's best that players that have a hard time fighting against the grip, simply use Sticky Webbing to prevent the grip. That way you can stand still, attack the boss, and once it's done move out of the Sticky Webbing to not get additional stacks.
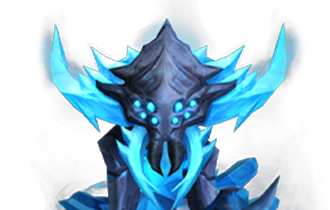
Frostbreath Arachnid attacks players with a Freezing breath, inflicting 96,103 Frost damage in a frontal cone and creating patches of Icy Ground.
This is basically the same ability as Breath of Ice but with an added frontal, so just face it away from the raid.
While alive, The Frost breath Arachnid effuses a chilling vapor, increasing its Frost Damage done by 20% and inflicting 36,039 Frost damage to all players. This stacks.
It makes the Frostbreath Arachnid your biggest kill priority when it's up. This add spawns once on each platform, so the entire raid should simply nuke it down as soon as possible to prevent Chilling Aura stacks from getting out of hand. (The spider also grows in size with more stacks and it looks very scary).
Spiderlings erupt upon death, inflicting 48,065 Nature damage to players within 5 yards. The Eruption destroys and removes webbing from the ground, as well as Sticky Webbing and Wrapped in Web from the players stuck.
Those Spiderlings will spawn constantly and do a very weak melee hit on the player they are targeting, which should be the tank (or the boomkin). They get passively cleaved most of the time and die easily. Once they die, they will get a swirl around them which explodes after a few seconds.
You can use the explosion to:
- Free Trapped players (Wrapped in Web)
- Remove your stacks of Sticky Webbing (7-9 stacks recommended)
- Clear Sticky Webbing from the ground (will often happen accidentally, no need to worry about it)
You will mostly use it to free players Wrapped in Web. The Tank just needs to make sure at least one Spiderling dies on top of the wrapped player.
The boss will cast a chilling storm, putting the entire platform under the Icy Ground effect. As long as the storm persists, Sennarth takes 99% less damage and inflicts 2,403 Frost damage to all players every 1 sec for 4 sec. This effect repeats and becomes stronger every 3 seconds.
This serves as your Phase 2 trigger. Once Sennarth reaches the top platform, she will get in position and start channeling this. Once you interrupt her, Phase 2 will start. You should interrupt the cast before it goes off.
Players suffer 10% increased frost damage until Sennarth dies. This stacks.
It's basically a soft enrage that pushes you to kill the boss as soon as possible, before you take too much damage.
Several players get targeted with volatile rime, inflicting 19,226 Frost damage every 1 second for 4 seconds and causing a Frost Expulsion upon expiration or removal. The Expulsion will deal 108,103 Frost damage to all players within 4 yards.
It's the same Chilling Blast ability from Phase 1, however, it now drops Glacial Plume after it explodes.
Inflicts 96,130 Frost damage and knocks back players who come into contact with it.
Glacial Plume is dropped after the Chilling Blast ability explosion. They act like bombs on the ground that get triggered if you step on them. Both the damage and the knock back are spicy, so try to avoid them as best as possible. You are able to clear them with immunities (Cloak, Turtle, Bubble, etc). They will also cause problems when Repelling Burst is cast.
Sennarth releases a burst of webs, inflicting 96,130 Physical damage to all players and pushing them away.
It's the same ability as Gossamer Burst from Phase 1, but now it pushes you away instead of pulling you in. Since the entire ground has the Icy Ground effect, you will also slide a bit after the pushback, and you will have Glacial Plume on the ground. Getting pushed into a Glacial Plume will do nearly 200k Physical damage total, so you need to avoid this as best as you can. You can use Sticky Webbing to prevent the pushback.
Several players are targeted with spiderwebs, inflicting 19,226 Physical damage every 1 second for 6 seconds. At the end of the duration, she knocks them back while instantly causing Wrapped in Web and releasing Sticky Webbing at their locations.
Players will get marked with an arrow, those players should pick a good position to get Wrapped in as you will most certainly need the little spiderlings explosion to get free. DO NOT stand on the side of the platform (edge) or you will be knocked off the platform as a cocoon.
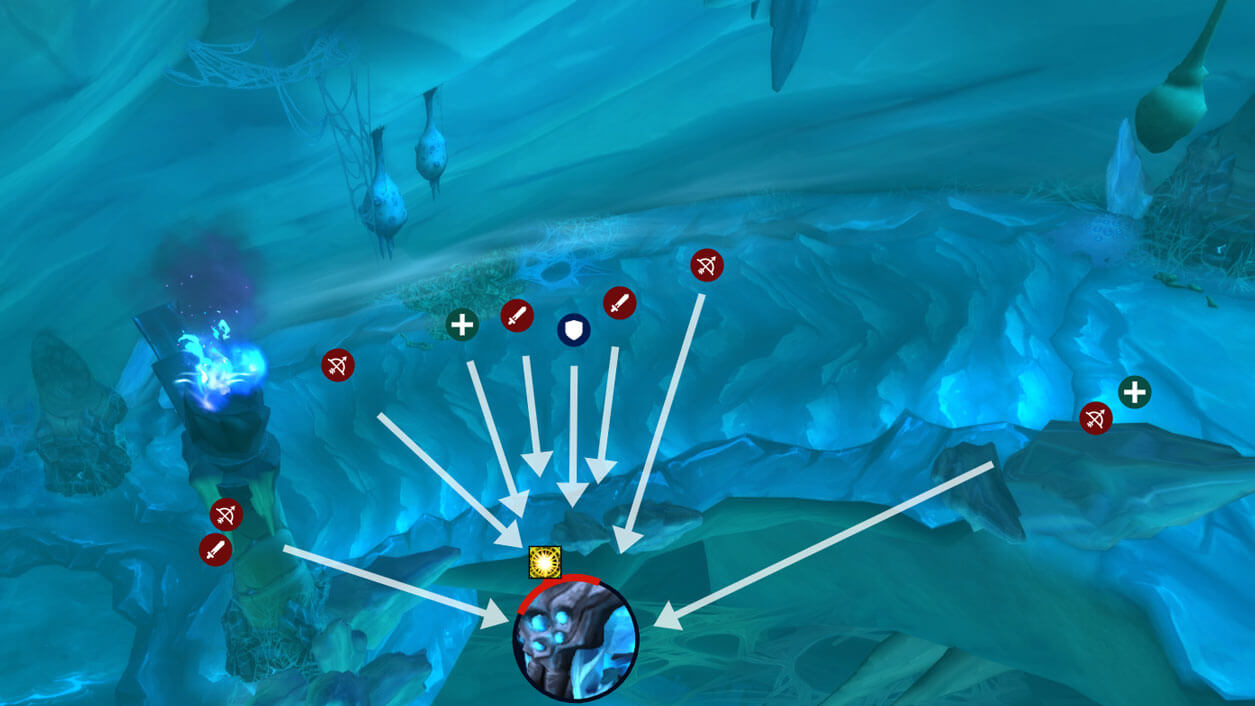
Phase One
Positioning will be the same on each platform except for the last one. Overall positioning does not matter much but some positional tips will help you deal with certain abilities easier, thus increasing your damage.
Make sure there is always 4-5 yards between each player, since you will have to deal with Chilling Blast and Enveloping Webs constantly.
Tanks should swap every 5-8 stacks of Web Blast.
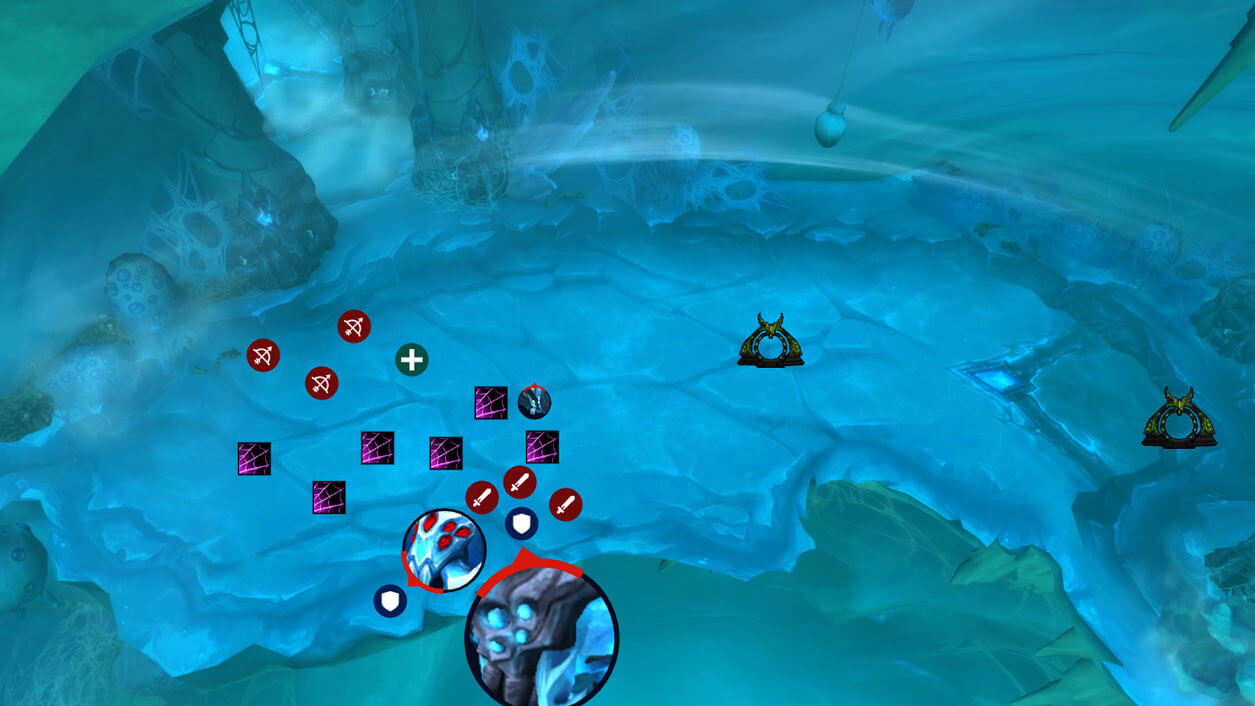
Once you pull the boss, tank the Frostbreath Arachnid close to Sennarth for extra cleave damage and nuke it down as soon as possible. Make sure it's faced away from the raid to avoid the frontal cleave. When the Arachnid is dead, the off-tank should run around and pick up Spiderlings; you will only get one Frostbreath Arachnid per Platform. Spiderlings should be tanked in cleave range, unless you need to go to free someone from a Web.
Players should place Sticky Webbing from the Enveloping Webs ability in between the melee and ranged camp, this will make it easy for you to step into it if needed, and it will also add a potential fail-safe for Gossamer Burst. On testing, if you would get pulled towards the boss and hit a Sticky Webbing on the way, it would stop you, however, that did not always work/happen.
Avoid standing in Icy Ground and dodge swirls.
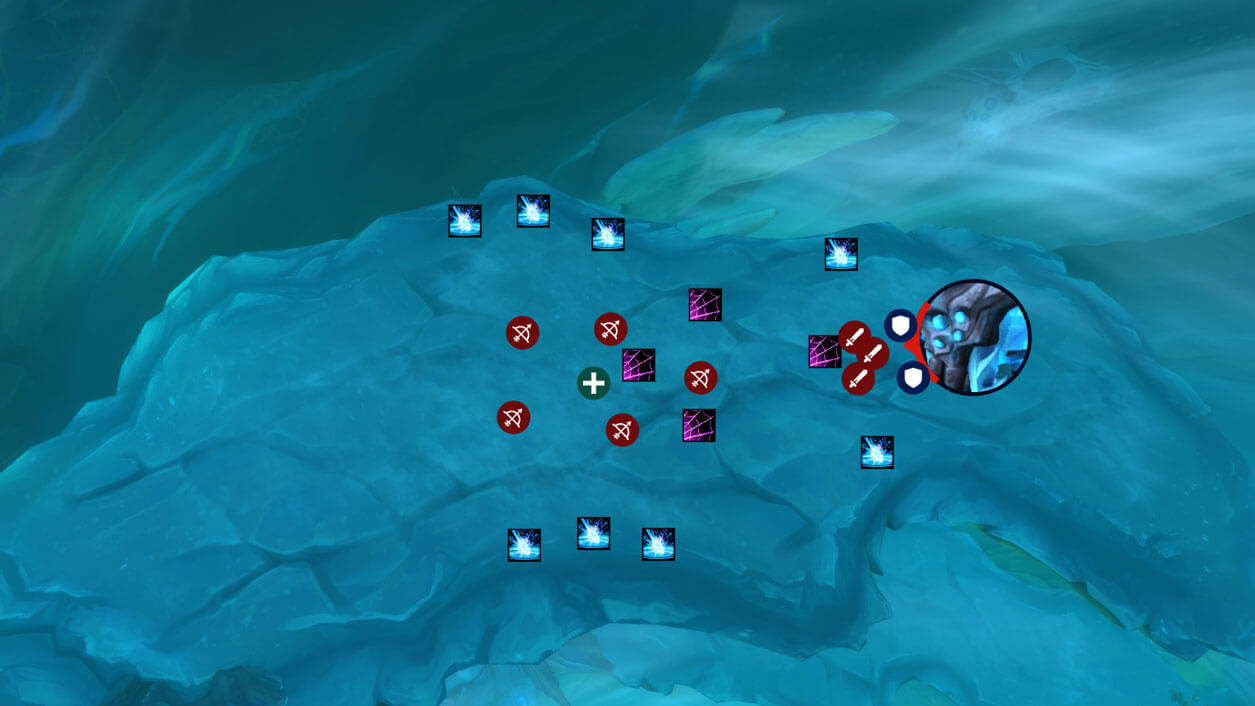
The Boss is moving on a set timer, after a set of abilities. Once the boss starts moving towards the second platform, the entire raid should follow. Using the Warlock gates to reach the stairs faster is advised, since the boss will cast a Gossamer Burst shortly after she starts moving. In General you should try not to be behind too much, in order to avoid not being in range of the healers and the rest of the raid.
(Yes, that's a lot of arrows, I know)
When she is moving, she will cast one Gossamer Burst and several Breath of Ice swirls.
You can use the bottom and upper pillar depending on how fast or slow you are to block the grip. Others that are standing in the middle of the stairs need to make sure to go as far back as possible and use movement ability to fight against the pull.
You won’t have Sticky Webbing on the ground at the stairs since she will cast Enveloping Webs after the Gossamer Burst.
Your biggest priority during this ‘Intermission’ is to reach the next platform as soon as possible.
Once on Platform 2 you will do exactly the same things you did on Platform 1. All the ‘Intermissions’ and Platform Phases are the same except the last one.
Phase Two
Sennarth will get into her final position and start casting Apex of Ice. Interrupt it!
Tank’s should keep swapping at 5-8 stacks of Web Blast.
The boss is not hanging from the ceiling anymore, so she can be moved around the platform, but I wouldn't suggest moving her too much.

There are multiple ways to deal with this phase, positioning wise. This is probably the cleanest one and will reduce the random deaths by a lot.
Tanks simply tank Sennarth where she starts the Phase. The off-tank should continue picking up Spiderlings as much as possible. Tank them in cleave range unless an explosion is needed to remove Wrapped in Webs (which will happen constantly in this phase).
Once players are targeted by Chilling Blast (circles) they should position themselves to the edge of the map. The reason for this is that every Chilling Blast in Phase 2 drops Glacial Plume on the ground (bombs). By placing them on the side/edges, you will not need to clear/dodge them for Repelling Burst, which pushes players away (the reverse of Gossamer Burst).
You can clear any badly positioned Glacial Plume with immunities.
When Sennarth casts Repelling Burst, all players should stand in the middle of the room.
This way, everyone will get knocked away through the middle, and if done correctly there will be no Glacial Plume to worry about.
Having the bombs on the side will also serve as a fail-safe mechanic in case a player starts sliding towards the edge of the room or stands in the wrong position and gets knocked by Repelling Burst. If they hit a Glacial Plume it will knock the player back into the direction they came from. You will take extra damage in that case, so be prepared to pop a Defensive / Health Potion.
Players targeted by Suffocating Webs (Grey arrow) should look to run towards the boss, mainly in the middle. You will get Wrapped in Webs after a few sec so you want to make sure you are close to cleave range as that is where most of the Spiderlings will be.
Repeat this until the boss is dead.