Up to 84% Off VPN









Raid Setup


Introduction
Welcome to our Reliquary of Souls guide, the fifth boss of the Black Temple raid in The Burning Crusade Phase 3.This guide covers the fight mechanics and the strategy we recommend to defeat this boss!
Reliquary of Souls holds three essences: Essence of Suffering, Desire, and Anger. Each encounter is its own phase with its own unique mechanics.
This fight ranges from mechanics that prevent all healing, spell reflections, and a DPS check in the final phase. There’s a large variety of mechanics here, making this an engaging fight for all players.
Fight Style: Single-target encounter with mechanic-changing fights every phase
Recommended Setup: 2-3x Tank /5x Healer / 17-18x DPS
Required utilities: Healthstones, Personal Damage Reductions, and Dispel
Hero/Lust usage: Phase 3
Method Boss Review
This fight has some interesting mechanics and lasts a while. Players will have to fight through three unique phases, and essentially each could be their own “classic” boss fight. The final phase also brings out a slight DPS check, pushing players to want to max out their potential. Overall, a huge step up in terms of meaningful mechanics from some of the earlier encounters.
(3/5)
Video Guide
Easy Mode
This is a 3-phase fight with each phase focusing on a specific “aura” debuff. Every phase is over when you defeat the essence. In between each essence is an intermission phase, where players are given mana and health back for killing ghosts that spawn. The fight is over after the 3rd essence phase: Anger.
Phase 1: Suffering
- Alternate tanks every 5 seconds during Fixate
- Use any external/internal defensive cooldowns/trinkets during Enrage
- Dispel Soul Drain
- Healers help DPS on this phase
Phase 2: Desire
- Interrupt Spirit Shock
- Interrupt/Spell Reflect Deaden
- Spell Steal/Purge Rune Shield
Phase 3: Anger
Mechanics

Healing effects reduced by 100%. Regeneration effects reduced by 100%. Armor reduced by 100%. Defense reduced by 500.
Essence of Suffering will swap threat targets every 5 seconds depending on who is closest to him. If his current target is the closest, they will remain on that target until the next 5 seconds.

Every 45 seconds, Essence of Suffering Enrages. Physical damage dealt is increased by 25%. Attack speed increased by 50%. Lasts 15 seconds.


Damage taken when damage dealt. Healing increased by 100%. Decreases maximum mana over time.

1-second cast that confuses the primary threat target for 5 seconds. While confused, Essence of Desire will swap to whoever is next on threat.


Affects 3 targets, causing them to become immune to all damage for 2 seconds, but also causing them to take 7,444 damage after.

Deals 2,625 Shadow Damage to the tank, while also draining Mana to the primary threat target.

Strategy
Reliquary of Souls has 3 phases, each with their own strategy. Phase 1 is rotating Fixate throughout your tanks to keep them alive during each fixate while dispelling Soul Drain.
Phase 2 is all about interrupting every single cast the boss does and spell stealing his Rune Shield.
Phase 3 is all about burning the boss down fast before his ramping shadow damage is too much for the raid to handle. Do not worry about mana management, as there are intermission phases between phases, where killing ghosts that spawn will replenish your mana and health.
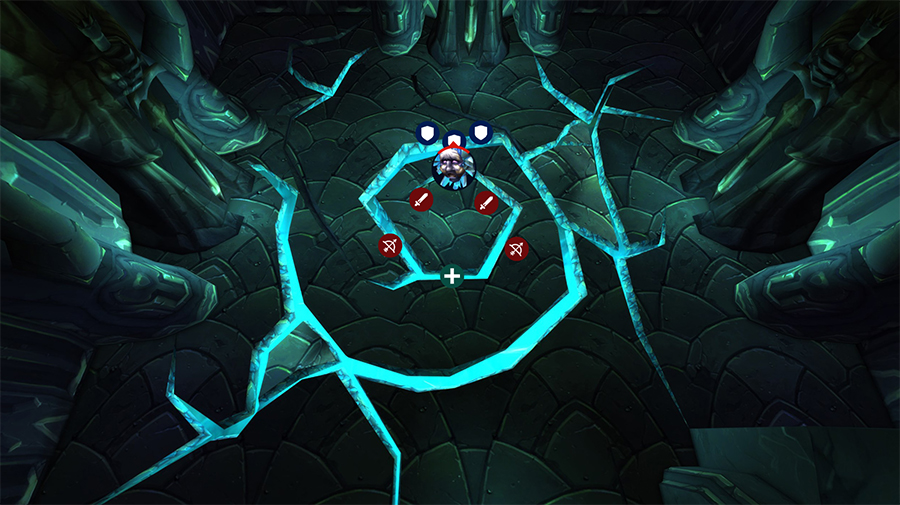
Phase 1: Suffering
Have 3 tanks ready to alternate who’s closest to take the next Fixate. No healing happens in this phase so all healers need to help contribute DPS during this phase. During Enrage, tanks need to use all defensive cooldowns available or have a Rogue tank it with Evasion.
Three things to get right here:
- Tanks alternate every Fixate
- Survive Enrage.
- Dispel Soul Drain ASAP
Your tanks will want as much Avoidance and Stamina as possible for this phase, as they must survive the entire phase without any heals. 2-3 tanks should alternate every 5 seconds for Fixate, and when Enrage happens, they should pop any avoidance trinkets like Moroes' Lucky Pocket Watch or Badge Of Tenacity
Priests can and should use Power Word: Shield on tanks to absorb some damage, as thats the only "heal" that can be used here.
Phase 2: Desire
The damage reflected really isn’t noticeable, so mainly focus on getting all interrupts down on the boss. Set up a rotation to ensure every kick is accounted for. All spells are on predictable timers, so nothing should be coming out of nowhere here.
Three things to get right here:
- Interrupt all Spirit Shock casts.
- Interrupt all Deaden casts.
- Mages need to spell steal all Rune Shield casts ASAP.
A Warlock should apply Curse of Tongues to the boss to allow for more reaction time to kick the boss's casts. Rune Shield needs to be spell-stolen ASAP, as the boss will cast one of his 2 spells after. If the boss gets Deaden off, and then gets Spirit Shock off after, it will one-shot your tank.
Phase 3: Anger
Raid-wide shadow damage will be going out throughout the phase, increasing over time, eventually killing everyone.
Three things to get right here:
- Do not take threat off the tank to prevent Seethe.
- Heal those hit with Spite, and make sure they are at high HP before Spite goes off.
- Use all damage cooldowns, including Bloodlust on this phase to beat the DPS check.
A "safe" strategy you can do is to have your off-tank get initial aggro on the boss, then your main tank taunt off to gain the 200% threat buff, while your DPS wait for the main tank to build threat at double the rate. After 3-6 seconds, the rest of the raid can then start dealing damage.
Players hit with Spite will need to make sure they are close to full HP before the damage goes out, as they are also taking ticking shadow damage that could kill them right after the cast is finished. Besides that, this is just a DPS check, burn the boss before the ramping shadow damage becomes unhealable and it's GG!