Control Resonant brings you an open-world Manhattan to explore as Dylan Faden. This world is divided into zones, each with its own quests, collectibles, and layout. On the map, these zones will be blocked out of view until you map them.
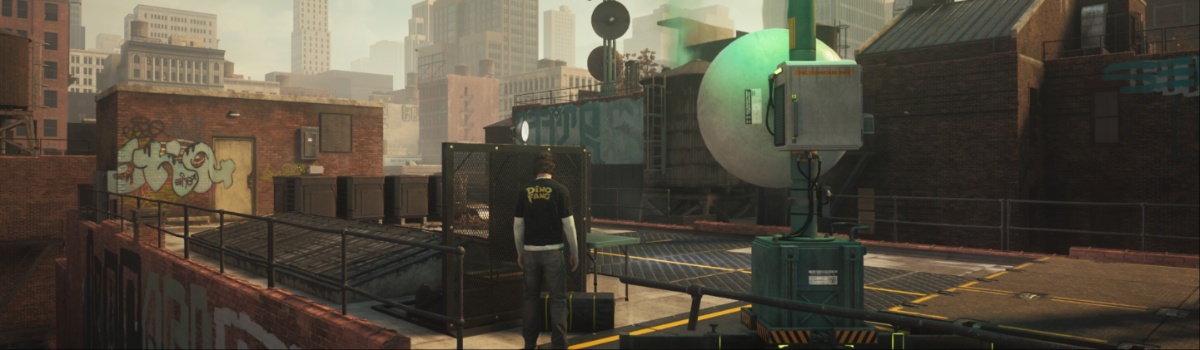
For that, the FBC has set up Map Kits across each zone. These Kits consist of a Pylon/Tower and three Sensors that need to be online for the Tower to work. However, these are offline, and it is up to Dylan to activate them. In this guide, we'll make it easier for you to find each location of these Towers and their Sensors.
Quick Links
- Downtown Map Kit
- Central Map Kit
- West Incursion Zone Map Kit
- Evacuation Zone Map Kit
- The Park Map Kit
- Underpass Map Kit
- Unknown Map Kit
Downtown Map Kit
The first Tower that you can unlock is the one in the initial zone of Downtown since it is tied to the main quest of the game. Even though the map will be blurred before activating the Tower, the Kit's location will still appear on your map.
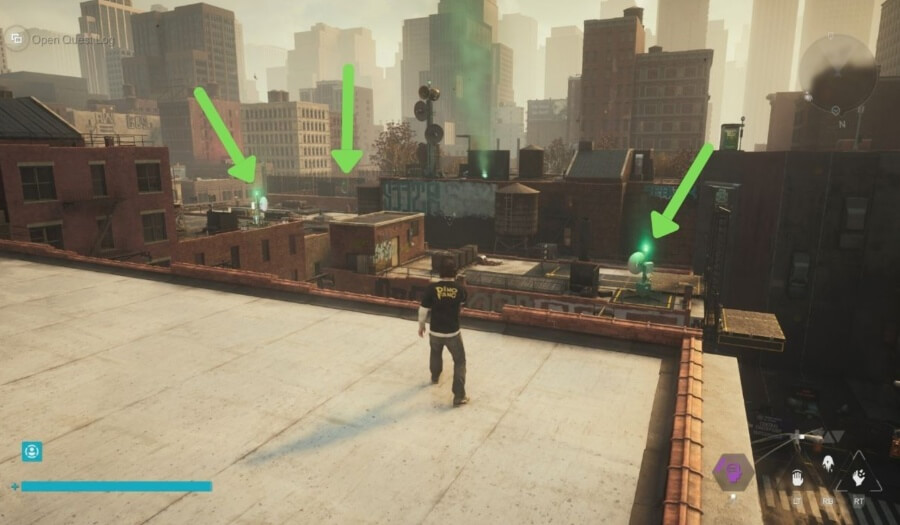
Your goal will be to locate the Sensors. These do not appear on the map, but have a blinking red light that helps locate them, though some are harder to spot than others.
For the ones in the Downtown Zone, you will find one Sensor on the basketball court south of the Tower, just by the Fast Travel Door. The other two are just on the rooftops to the north side of the Tower. When activated, the Sensors' light will change to green.
Central Map Kit
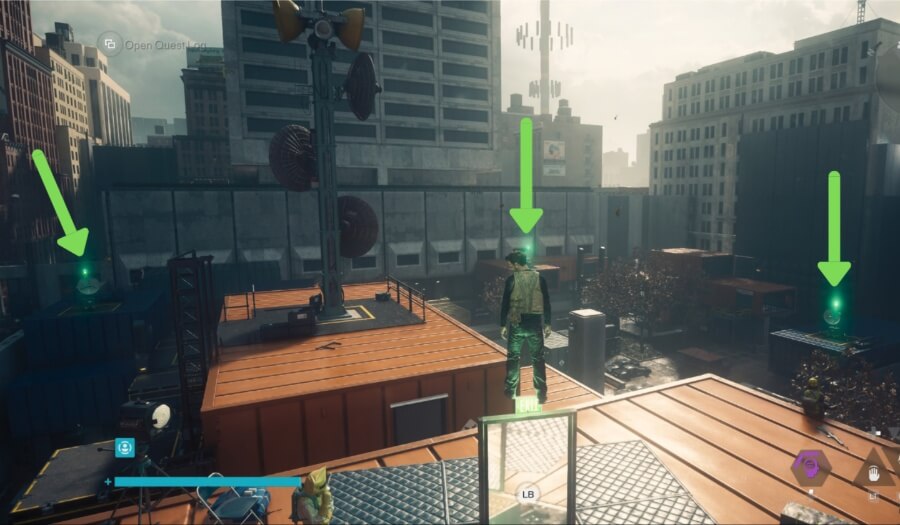
Central is the second zone you are introduced to in Control Resonant. Central connects with most of the other zones, so it is one of the most important to clear the map for.
Thankfully, it is one of the easiest Towers to activate. To get a full view of the Sensors, head to the Fast Travel Door overlooking the Field Office building. The Tower will be just in front, with all three Sensors behind it, each one at the top of the FBC structures' rooftops.
West Incursion Zone Map Kit
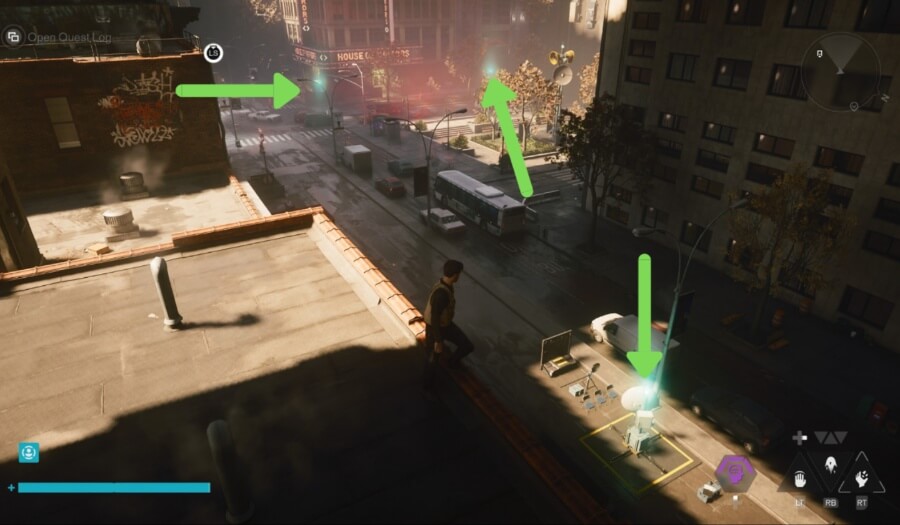
To locate the Sensors more easily, we recommend getting onto rooftops or using Dylan's jump abilities for a better vantage point. This will be very helpful for the remaining Towers, such as the one in the West Incursion.
For a good view of the West Incursion Sensors, head to the rooftops north of the House of Mirrors building. From there, you will see all three Sensors: one on the main street to the north, and two just by the side of the Mirrors theater. Careful, though, since you will have to clear the area of enemies and a mini boss.
Evacuation Zone Map Kit
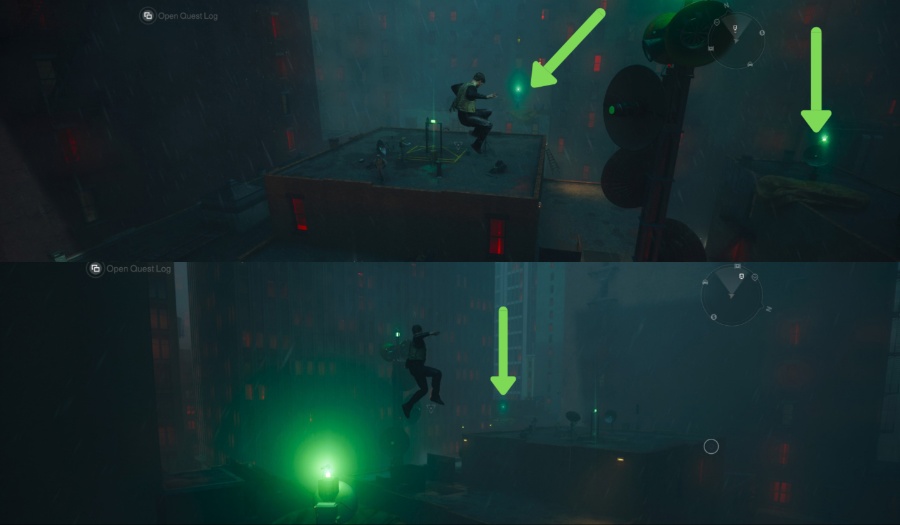
In the Evacuation Zone is where things start to get tricky, with enemies around the area and other buildings blocking the view of the Sensors.
For the Tower in the Evacuation Zone, you will find a Sensor just in the building beside it. Another is further behind the Fast Travel Door to the side of the Tower, and the last one is on the rooftops on the other side of the street to the west.
The Park Map Kit
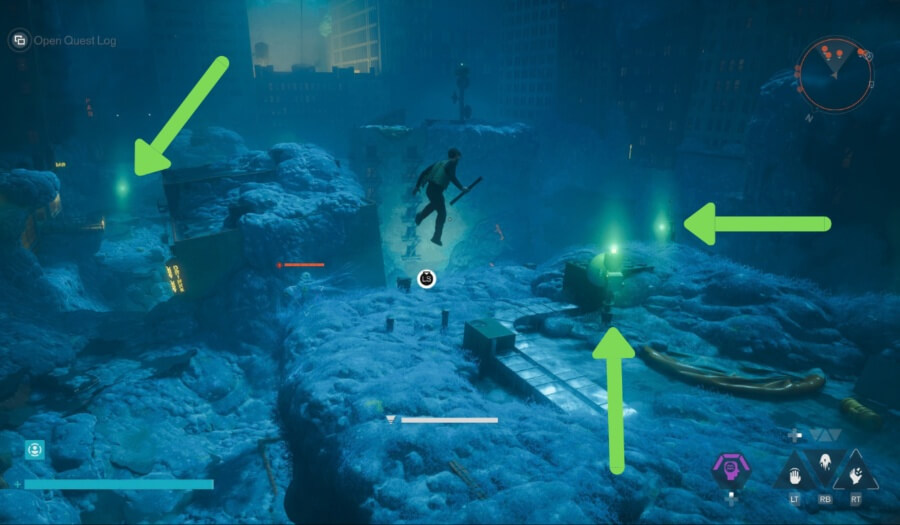
The Park Zone is infected with Mold enemies, and the Tower area will be no exception, so tread carefully. You'll find this zone's Tower in the center of the region, by the middle building of some structures that are overcome with Mold.
Go to the rooftop of the building northwest of the Tower. There, you will not only find the first Sensor but also have a better view of the others. From there, look at the Tower to find a second Sensor on the rooftop to the right, and a third Sensor to the left on the ground by the "BAR" neon sign.
Underpass Map Kit
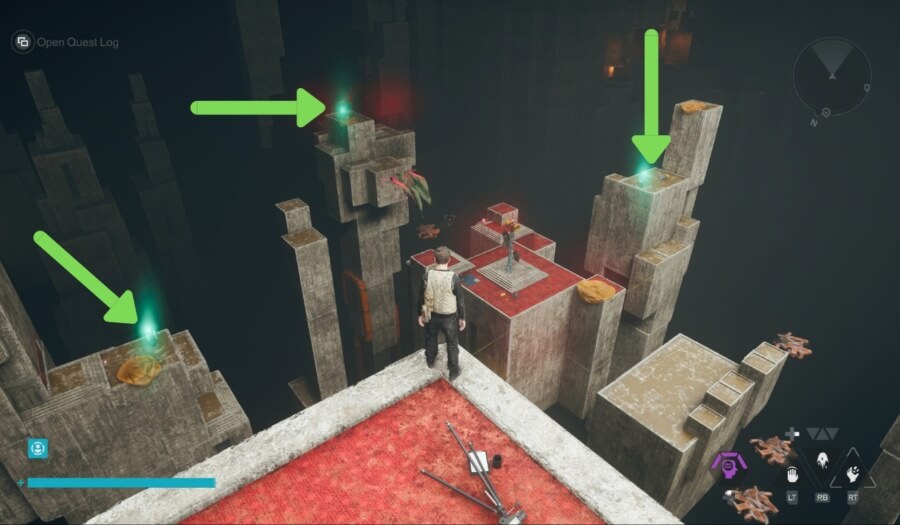
Be ready for the Underpass Map Kit, since not only is it guarded by Hiss enemies and a mini-boss but also divided by structures with a void around them.
The Reach ability will be very helpful here after clearing the enemies to get to each of the structures without a problem. The Tower and its Sensors are just behind The Spire Fast Travel Door. From that same structure, you will have a complete view of the Tower and its Sensors.
Spoiler Warning: The next is a secret zone unlocked by late-game story progression. Make sure to read only when you have reached it.
Unknown Map Kit
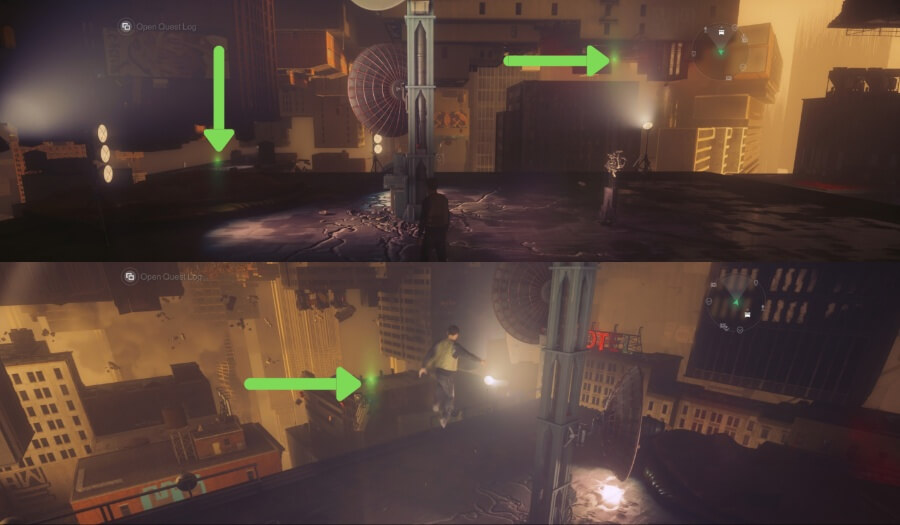
The Unknown kit is the hardest one to activate because of the zone's upside-down layout. Here, you will need to make use of the Shift ability, but also ready your combat abilities since every area of the Tower and its Sensors will be surrounded by strong enemies.
The Tower will be in front of the Fast Travel Door at the center of the zone. However, while it is in front, it is up on the other folding side. So, use either Shift or Reach to flip sides. From the Tower, you will find two Sensors on the rooftops where the first lower antenna is pointing. The third Sensor will be on the other side, left of the building with the big "HOTEL" neon sign.