Introducing a new eight-part Mythic+ content series! My name is DanWarr and I will be taking you through each of the Shadowlands dungeons, giving you tips for each that may make your runs go smoother. These tips are primarily for fairly new players to the dungeon or Mythic Plus, but stick around even if you’re a Keystone Master! Who knows, you might pick up something new!
The first dungeon in this series is The Necrotic Wake.
1. Kyrian Goliaths
3 deactivated Goliaths appear in the dungeon in the same locations. Any member of the Kyrian Covenant can use Summon Steward to fix this Goliath. To do so, interact with your Steward while standing next to the Goliath for a dialogue option to repair it.
Upon being repaired, the Goliath will throw down Orbs which can be collected by players, 1 orb each. This orb grants a 1 minute buff (Anima Exhaust) that causes pulsing AoE damage and healing which scales with key level.

The Goliath’s don’t have particularly special timing to make them more effective, they are just a nice bonus to help the dungeon go quicker.
2. Necrotic Wake Items
Scattered around the dungeon are various weapons that can be picked up and used by anyone in the party:
- A Spear (Bloody Javelin) that can be cast at a target, dealing damage and applying an increased damage taken debuff to every mob it passes through.
- A Hammer (Forgotten Forgehammer) that deals considerable damage and stuns a target (this includes stunning Prideful mobs from the Seasonal Affix).
- An Orb (Discharged Anima) that causes heavy pulsing Arcane AoE damage that also interrupts casting every time it ticks.
- A Shield (Discarded Shield) that can be channeled to reduce damage taken by the player that used it and nearby allies by 50% for a few seconds.

The shield is mostly useless, as nothing in the dungeon hits hard enough that it would need to be mitigated in this way. Not to mention you cannot perform any other actions while channeling the shield.
It's also worth noting that the Orb scales with some effects that the player using the Orb has on them. This includes effects such as the 100% crit buff from Rogues when using the Master Assassin legendary or the increased Arcane damage from a Balance Druid’s Mastery while in Lunar Eclipse, making Celestial Alignment a very strong cooldown to use when holding an Orb.
3. Amarth, the Harvester add control
While this has been made slightly easier to deal with in recent changes to the dungeon, causing the army summoned by Amarth to spawn closer to the boss, you can control the number of adds you need to kill quite easily with well placed CC.
A common practice is to CC one or both of the summoned Mages while quickly killing the rest of the adds. As they are undead, the amount of CC that can be used is limited; abilities such as Hunter’s Freezing Trap, Paralysis and Turn Evil all work.
On top of this, if you are in a panic moment and the Final Harvest cast is about to complete with adds still alive and not in CC, you can throw a stun on them as the cast is about to end and they will also not explode, possibly saving a wipe for your group.
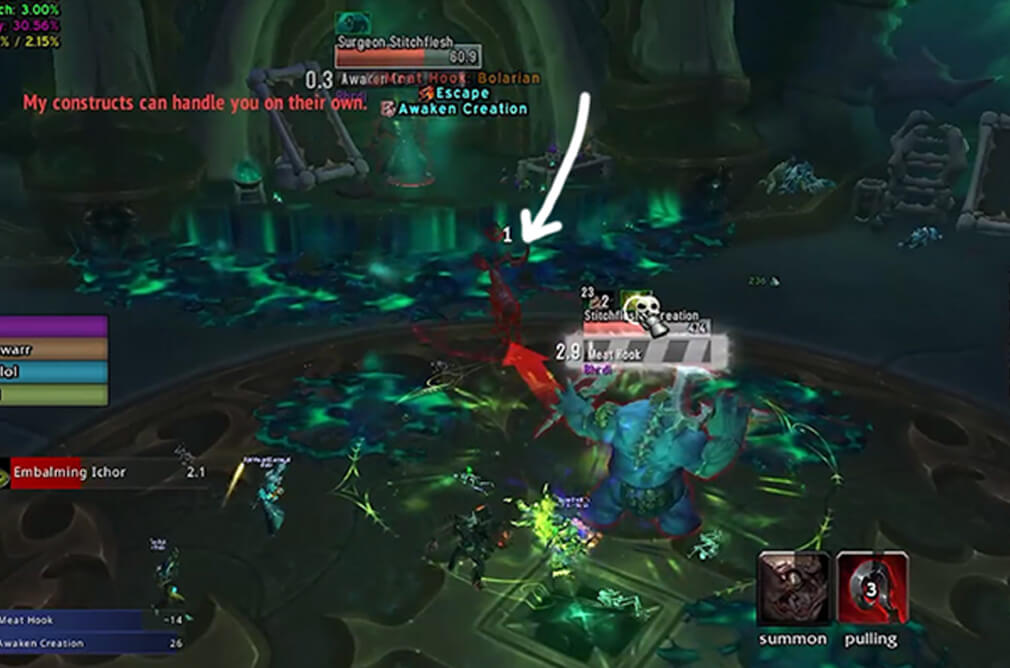
4. Surgeon Stitchflesh
Timing is key when dealing with the Surgeon. The creations he spawns are the key to killing the boss quickly. Ideally, you will be looking to kill the boss before more than 2 creations are in the fight.
When the first creation pulls Stitchflesh down at the beginning of the fight, focus all of your cooldowns specifically into the boss as best you can while attempting to keep the creation alive the whole time.
The second hook of the fight should be aimed into the boss to interrupt his Morbid Fixation ability.
The creation's third hook is the most important, which is why you want the first creation to still be alive until at least this point. The third hook lines up with Stitchflesh jumping back onto his platform and being immune. This timing never changes. As such, you can move before the cast to aim the hook towards the middle of the platform to pull the boss back down again immediately.
He will have enough time to spawn a second creation, so the first one should be killed off fairly quickly if possible as the tank damage ramps up significantly at this point.
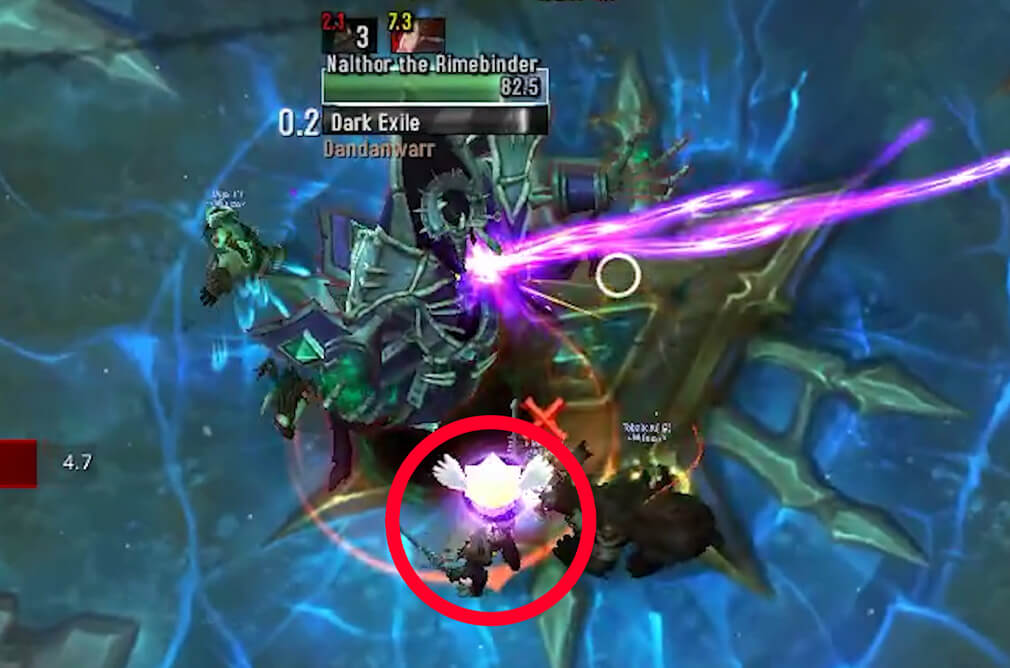
5. Nalthor the Rimebinder
The final boss of Necrotic Wake can take quite some time. With the Dark Exile mechanic removing a DPS from the fight, it results in one of the longest dungeon bosses in Shadowlands so far. However, there are some tricks that can be used to avoid the Dark Exile cast.
The safest and most consistent way is a Paladin using Blessing of Protection on the targeted player before the cast completes. This completely immunes the ability and keeps the player with the rest of the party.
Other abilities can be used, but they require very specific timing. These include: Charge, a Priest’s Leap of Faith and a Warlock’s Demonic Gateway. You must be in motion from one of these abilities at the point-in-time the Dark Exile projectile hits your character, as such the timing can be very difficult to land.
It’s important to note that if you avoid Dark Exile in any of these ways that are not Blessing of Protection, the player will still be affected by the Dark Exile debuff and will be instantly killed when the debuff ends, so make sure you have a combat ress ready if this is successful.
.jpg)