Raid Setup
Introduction
Welcome to our Heroic Plexus Sentinel Boss Guide, for the Manaforge Omega Raid. Learn about the fight mechanics and the strategy we recommend to defeat this boss on Heroic difficulty!
Plexus Sentinel is the intergalactic bouncer for Manaforge Omega. You didn’t schedule an appointment, you don’t have clearance, and now this oversized security turret is going to show you exactly why trespassing into a magical intake vent was a bad idea.
When it's not launching obliteration beams at the tank or covering the room in landmines, it's teleporting everyone into a death maze full of slow puddles, laser beams, and instant-fail dashes. Because nothing says “welcome to the first boss” like an intermission that wants to see how many ankles it can break.
Warm up those legs, sharpen your dodges, and please, for the love of the raid, soak the second missile.
Fight Style: Single Target fight
Recommended Setup: 2x Tank / 4x Healer / 14x DPS
Required Utility: None
Hero/Lust usage: On Pull
Method Boss Review
While we’re used to first bosses having some fun little gimmick that keeps things simple and gives a taste of something cool, Plexus Sentinel kinda forgets the “fun” part.
The intermission maze is visually neat the first time, but that’s about where the novelty ends. The rest of the fight feels like a tutorial for mechanics you’ll see done better later in the raid.
Nothing really sticks out, nothing really surprises, and honestly, if the biggest thrill is dodging a wall with an extra action button, we’re in trouble.
Method Boss Rating: (1/5)
Easy Mode
Phase 1:
- Tank targeted by Obliteration Arcanocannon must run far away from the raid, swap tanks after it goes off
- Drop Manifest Matrices (traps) on the sides, never in the group
- Eradicating Salvo (2-hit split soak):
- Group A soaks first hit, gets knocked
- Group B instantly jumps in to soak the second
- Players who can ignore knockbacks (like DKs) can soak both
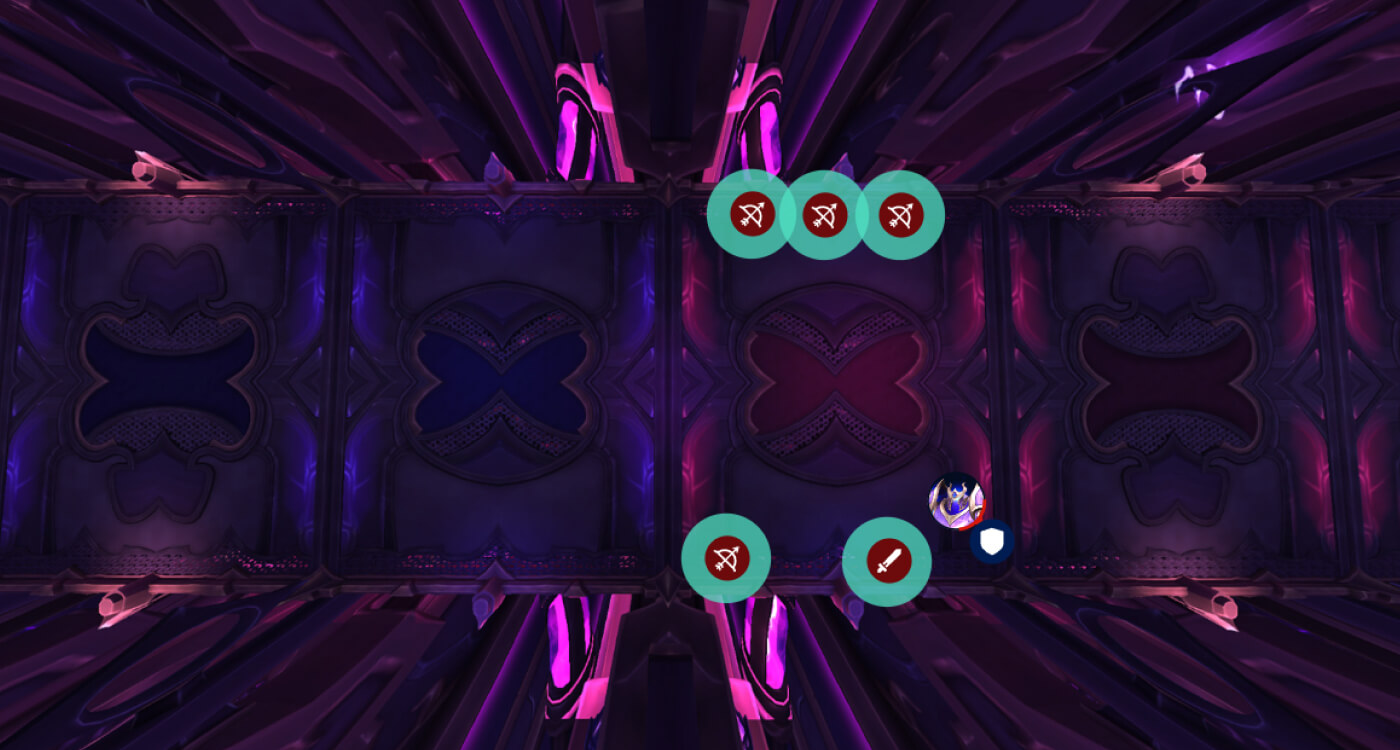
Intermission:
- Stack near boss before 100 energy to avoid getting knocked into the death wall
- Navigate the maze without stepping in purple puddles or beams
- When the arcane wall appears, use your extra action button to blink through it
- Kill boss shield to return to Phase 1
Mechanics
The boss marks players with a DoT, and when the DoT ends, it spawns a Displacement Matrix at the player’s location, which:
- Stuns and deals ~5.7 million Arcane damage to anyone within 8 yards
- Teleports the triggering player randomly
- Leaves Potent Mana Residue, which deals ~4.9 million damage every 2 seconds and slows by 50%
The Sentinel marks the current tank to receive a massive bomb.
Upon impact, it deals ~22.5 million Arcane damage to the raid, reduced by distance, the target takes full damage and leaves Potent Mana Residue at the impact zone.
The Sentinel periodically emits arcs of lightning. Hits players for small nature damage and jumps to up to 5 additional players within 10 yards.
Two missiles are fired at a targeted player, dealing massive damage split between all players standing within.
Each missile knocks players away as soon as the first rocket hits, forcing you to soak with two groups.
It doesn't leave a debuff on the players soaking, so if players can prevent knockback, they can stay inside for the second rocket as well.
At the start of the intermission, players are teleported far away from the boss and have to navigate through the maze which is filled with Arcane Radiation circles that deal damage and slow the player and leftover traps from Phase 1.
The boss will also send out a wall of energy, passing through it triggers Atomize, instantly dealing ~43.5 million Arcane damage to the player.
Players must blink through using Phase Blink to survive (action button).
Strategy
This first boss doesn’t throw too much at you at once, but what it does throw will absolutely slap you if you don’t respect the few mechanics it has. Phase 1 is basic, Phase 2 is a movement check, and both together they are just enough to wake you up before the real pain begins later in the raid.
Phase 1
Don’t die to the obvious stuff. You’ve only got three mechanics to care about here, but they all require some coordination.
Obliteration Arcanocannon (Tank Nuke)
Obliteration Arcanocannon is the mechanic that wipes raids that aren’t paying attention.
- It always targets the active tank, so tanks must swap after the cast, as it applies a 100% damage taken debuff for 45 seconds.
- The targeted tank needs to run far away, ideally back toward where you started the fight.
- This explosion deals full damage to the tank and reduced damage to the raid based on distance, so distance means life.
- It also leaves a puddle, don’t drop it in the middle of the room or anywhere people are standing.

Tank Tip: While one tank is kiting the cannon away, the other should keep the boss parked comfortably near the opposite wall to create breathing room for the raid.
Manifest Matrices (Player Traps)
Several players will get a 6-second debuff (Manifest Matrices) that drops a trap when it expires.
- You’ll want to run out and drop it on the side, away from others.
- These traps don’t need to be popped, so just get them out of the way and move on.
- Really avoid getting stunned in the middle of the group.
Eradicating Salvo (Split Soak Missiles)
During Eradicating Salvo, one random player will get a circle around them, they’re marked for two back-to-back missile strikes.
- Each missile must be soaked by at least 3-4 people or the player takes massive damage.
- The catch? The missiles hit ~2 seconds apart and do a knock back.
- So you need Group A to soak the first, get yeeted, then Group B immediately jumps in for the second.
- No debuff applied, so if you can cheese knockbacks (like DK’s Death’s Advance or warlock portals) you can soak both like a hero.
Intermission
The Knock, The Maze, The Panic. At 100 energy, the boss stops whatever it’s doing and launches players into the worst sprint of their lives.
Intermission Flow
Stack close to the boss before 100 energy, because you’re about to get yeeted back, and there’s a death wall behind you.
Use movement abilities to avoid getting pushed into the energy field.
Once the maze forms, weave your way around traps and beams.
- Purple puddles slow you and tick. Avoid them, there’s always a safe path.
- Avoid spinning beams
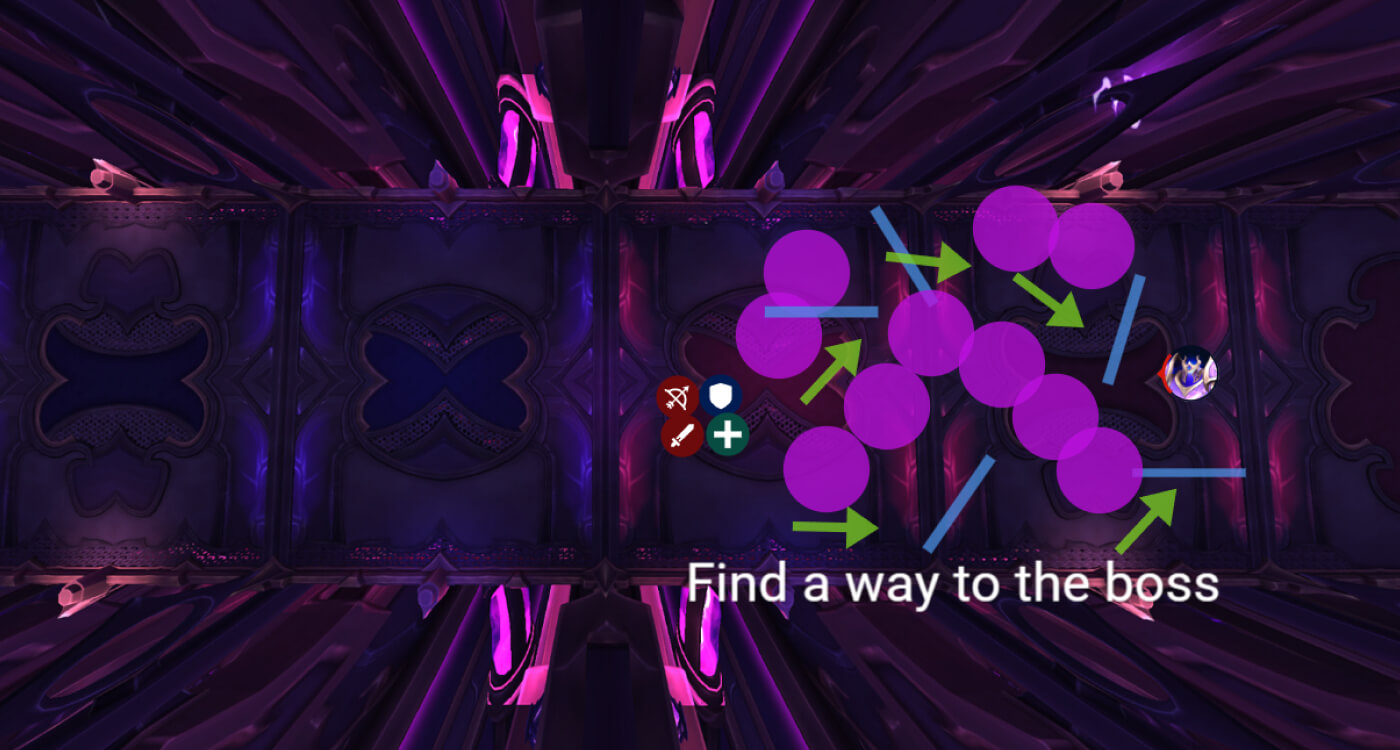
A giant arcane laser wall will approach once per intermission. Use your extra action button to get through.
Once you reach the boss, nuke the shield to stop the purge and bring back Phase 1.
Important Note: Each intermission, the maze gets longer and more punishing. Same mechanics, just more distance and more chances to mess up your pathing.
WeakAuras
Northern Sky: Manaforge Omega WeakAura Pack
This WeakAura also requires the Northern Sky Anchors WeakAura and the Northern Sky Raid Tools Addon.
https://wago.io/NSManaforge