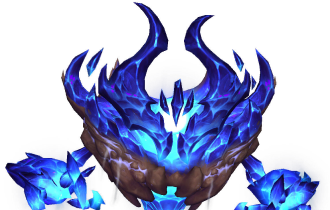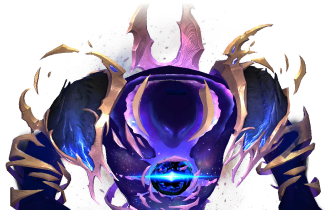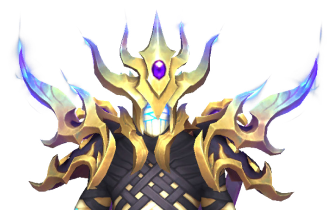
Raid Setup
Introduction
Welcome to our Heroic Nexus-King Salhadaar Boss Guide, for the Manaforge Omega Raid. Learn about the fight mechanics and the strategy we recommend to defeat this boss on Heroic difficulty!
The Nexus-King experience is basically a magic show designed to actively ruin your life. First, he slaps the entire raid with oaths, then punishes you for breaking them. Tanks? You’re juggling random combos like you’re auditioning for a circus. Healers? Enjoy the constant background damage while also managing explosions, knockbacks, and the occasional “oh great, that player is mind controlled now”.
Just when you think you’ve seen the whole act, he mounts his dragon, fills the arena with portals shooting death beams in every direction, and makes your tank’s personal pain level decide whether the rest of you live. Survive that, and you’re treated to two intermissions with adds that all have “wipe the raid” buttons.
And Phase 3? That’s the grand finale. Giant space bombs that pull you in, explode if mishandled, and wipe the raid if two go off together. By the end, you’ll swear you’ve just sat through the world’s longest magic show, except the only thing disappearing will be your raid team.
Fight Style: Single Target fight (with cleave during the intermission)
Recommended Setup: 2x Tank / 4x Healer / 14x DPS
Required Utilities: None
Hero/Lust usage: 2nd Intermission
Method Boss Review
This is easily one of the coolest encounters in recent WoW history. The fight’s pacing is fantastic, every phase feels distinct, but still flows naturally into the next, keeping players engaged from pull to kill.
That 30-second intermission where you pop Hero/Lust and unload every cooldown without worrying about extra mechanics? That’s every DPS player’s dream scenario.
Phase 2 and Phase 3 bring some of the most spectacular visuals Blizzard has pulled off in a raid boss, and on Mythic, the extra mechanics make the encounter even better rather than just more punishing.
Method Boss Rating: (5/5)
Easy Mode
P1 - Oath Management & Tank Combos:
- Everyone starts with 3 stacks Oath-Bound; must clear all before Invoke The Oath after 3 tank combos.
- Conquer: tank soaks with their group to remove stacks. Alternate groups each cast.
- Vanquish: frontal cleave, face away from raid.
- Tanks taunt during the cast of the next ability.
- Behead lines: targeted players move out, don’t clip others.
- Dying equals Mind Controlled (King's Thrall), raid explosion on death.
P2 - Dragon Mount Phase:
- 4x Dimensional Portals place them far apart.
- Dimension Breath on tank + portals shoot beams in random directions, dodge it.
- Raid damage from Glare based on tank’s breath damage.
- Swap tanks after Cosmic Maw.
- Repeat until the boss hits 100 energy.
Intermission 1 - Split Sides:
- Split into the same Phase 1 groups and take portals to each side.
- Kill priority: Manaforged Titan > Reapers > Everything else
- Dodge beams from Princes, interrupt Netherblast.
Intermission 2 - Burn the Dragon:
- Boss drains Dragon for 30s, Dragon takes +100% damage.
- Use Hero/Lust and Cooldowns here.
- Salhadaar heals for any Dragon HP left.
P3 - Dark Star Control:
- Galactic Smash: 6 players drop stars at set markers to cancel pulls.
- Starkiller Swing: 3 beams aim each missile at a different star to destroy it.
- Don’t stack stars
- Dodge star rings (Silken Court style).
- Never stack stars close enough for 1 missile to hit 2.
- Pattern: 2x Starkiller Swing, Galactic Smash, then repeat until dead.
Mechanics
Salhadaar tests the raid’s loyalty with a burst of shadow damage over time and applies the Oath-Bound debuff (3) on everyone.
This debuff has to be removed with the Conquer ability before Invoke The Oath is cast. On Heroic, instead of dying, you are turned into a King's Thrall if this damage would kill you.
Mind control for 12 seconds. The player is healed to full and, when control ends, explodes for heavy raid-wide shadow damage.
Breaking your oath damages the entire raid with a large shadow burst. This is just unavoidable raid wide damage when stacks are removed with Conquer.
A massive AoE damage burst that hits the entire raid. Any players still Oath-Bound at the end are turned into King's Thrall.
A frontal cleave that knocks players back and increases damage taken from the next Vanquish, must be faced away from the raid.
A shadow DoT on several players. When it expires, each target bursts for extra damage to nearby players.
Images swipe nearby players, knocking them back.
It happens if players stand too close to the edge.
A blaze-like ability on several players that “claws” all players standing in the line, and knocks them back.
Will also leave a Cosmic Rip line on the floor that deals heavy ticking damage.
The Voidwing reforms from below, knocking the raid back and damaging anyone in its path.
At the start of Phase 2, two players get marked by this ability. These players get hit with a mace after a short delay and spawn dimensional portals at their location.
A 4-second breath, dealing rapid cosmic damage in the direction the boss is facing.
Additionally, Portals will also shoot the same breath / laser in the indicated direction, so just dodge this.
Two seconds later, after Dimension Breath, Dimension Glare deals cosmic damage to the raid; the damage is based on the target’s Dimension Breath damage taken.
A tank hit that deals massive physical damage, applies a DoT, and makes the target take increased Dimension Breath damage. Perform a tank swap when affected with this.
A blaze-like ability on several players that “claws” all players standing in the line, and knocks them back.
Will also leave a Cosmic Rip line on the floor that deals heavy ticking damage.
Summons elite Shadowguard enemies on the side platforms. The Raid needs to split into two groups and take a portal to reach them.
At full energy, the Titan explodes for massive raid-wide damage and applies a dangerous damage-taken debuff.
Salhadaar drains the Voidwing, dealing heavy raid-wide ticking shadow damage for 30 seconds and healing himself based on the Voidwing’s remaining health.
The Dragon takes 100% increased damage during this time.
A blaze-like ability on several players that “claws” all players standing in the line, and knocks them back.
Will also leave a Cosmic Rip line on the floor that deals heavy ticking damage.
Targets 6 players at the start of the phase that spawn a Dark Star. Those stars have to be placed around the room, equally spread to cancel out the pull they do (Nexus Princess style).
Pulls players in for 5 seconds. Anyone inside is Atomized, this deals massive damage and slows players.
Additionally, Twilight Spikes come out of the Dark Star, dealing heavy damage on contact.
On Heroic, Dark Star move around the arena, creating shifting hazards.
A tank debuff that increases damage taken from further Starshattered hits.
Targets 3 players, indicated with a beam (if you are targeted, your beam will be red). Players need to hit a Dark Star with the missile, otherwise it explodes into a Starkiller Nova, which is a massive 2-second cosmic damage burst to the raid.
If a Starkiller Nova is absorbed too quickly twice in a row, the Dark Star explodes for massive raid-wide damage.
This prevents you from stacking up Dark Star.
Final phase collapse where Twilight Spikes close in from all sides, flooding the arena.
Phase 1
At the very start, the entire raid gets 3 stacks of Oath-Bound. Your main objective in this phase is to remove all three stacks before the boss casts Invoke The Oath, which happens after three full sets of tank combos.
Dying is especially punishing here, any player who dies becomes mind-controlled at full HP, must be killed, explodes for heavy raid damage, and only then can be resurrected.
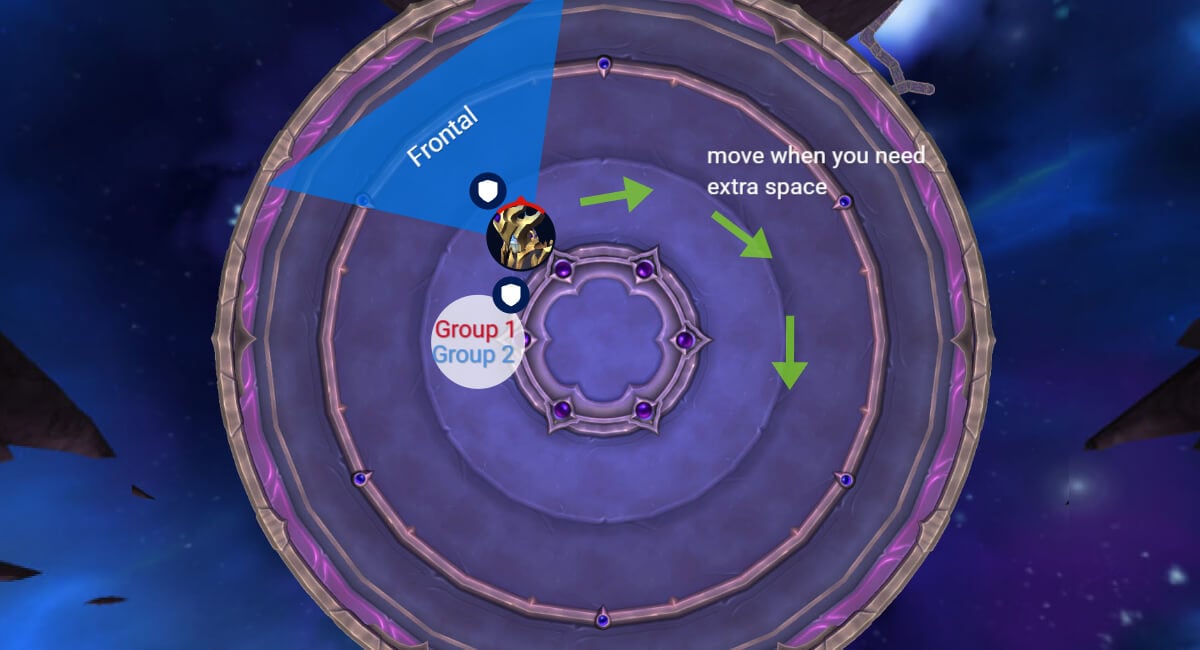
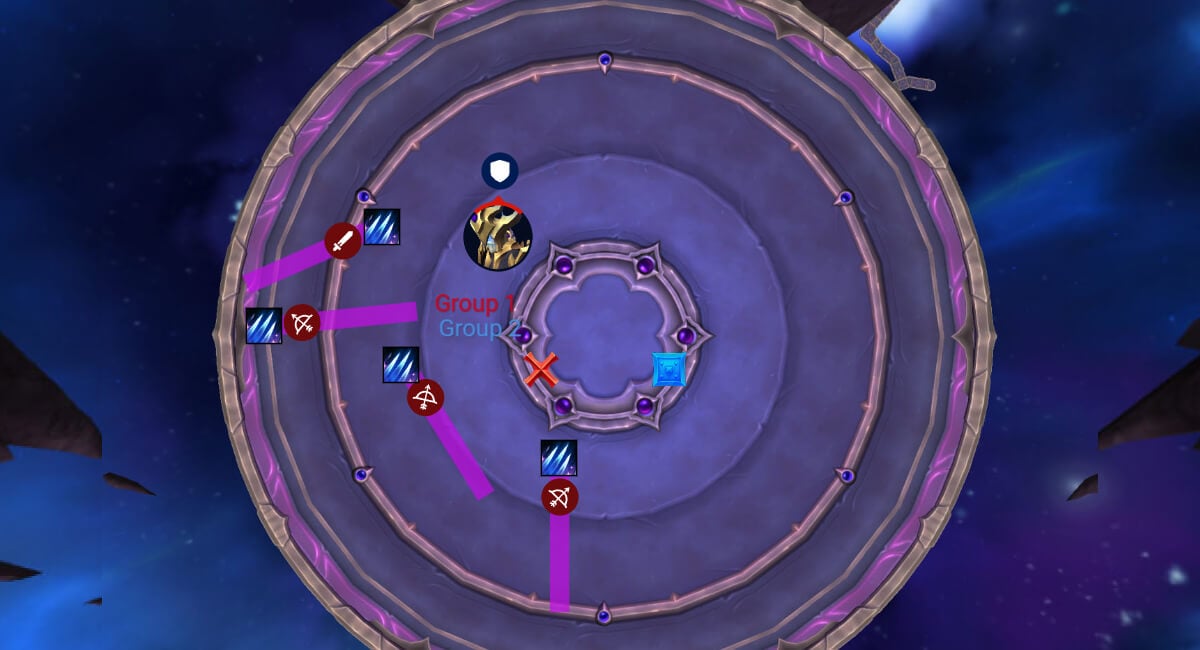
Positioning: Tank the boss close to the center of the room. Divide your raid into two groups so you can split up later for the intermission, and to rotate the groups soaking Conquer. You can use the same spot to soak it, just make sure that the correct group is soaking it. There is plenty of time to adjust.
The tank combo has no set order. The active tank must react on the fly:
- Vanquish: Face away from the raid to avoid cleaving them.
- Conquer: Run to your assigned soak group.
- Always taunt during the cast of the next ability, the boss won’t swap targets mid-cast.
After each tank combo, several players will be targeted by Behead. They need to quickly move out and drop the line away from the group. Anyone not targeted should avoid getting clipped.
Tanks should also move the boss away from these lines to create more space, as Behead leaves damaging puddles behind that will limit safe positioning.
This sequence repeats until three sets of tank combos are complete, at which point the boss casts Invoke The Oath. Anyone still with stacks becomes a mind-controlled King's Thrall.
Phase 2
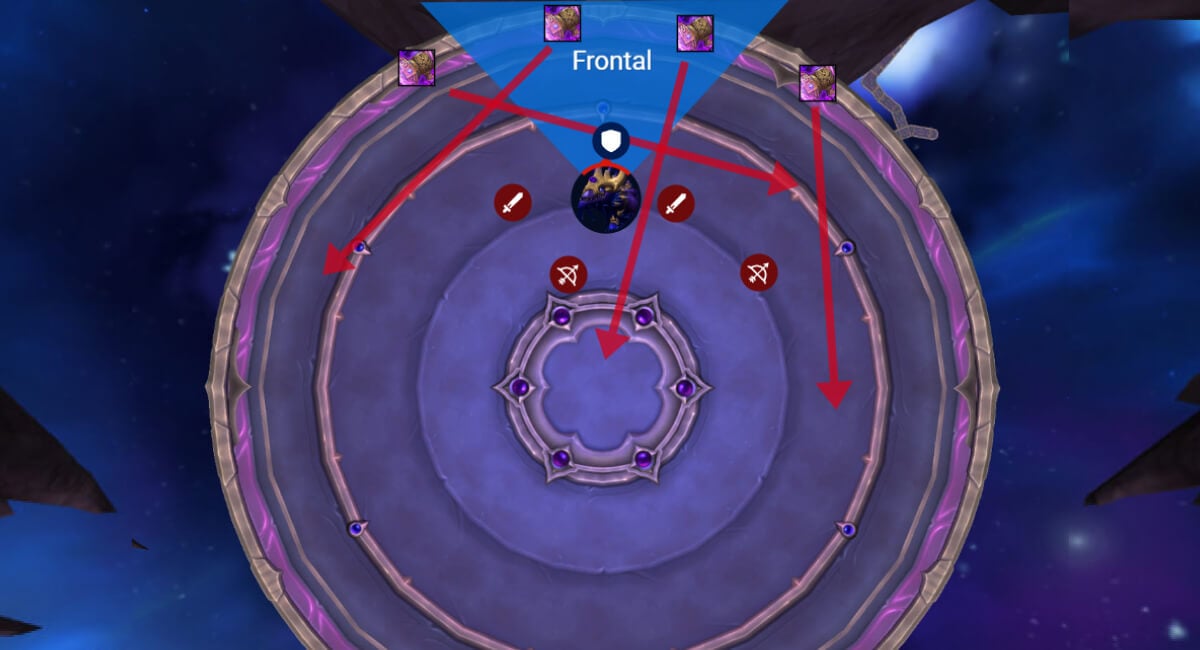
The Nexus-King mounts the Royal Voidwing. Immediately, four players are marked with circles that spawn Dimensional Portals after a short delay. You want to place these at the edge of the room, close together but without clipping each other. Move the boss toward this spot and face him toward the portals for the upcoming breath.
The dragon then casts Dimension Breath on the tank. Simultaneously, each portal fires its own breath in a random direction. Dodge these beams, the raid’s damage intake is based on how much damage the tank took during their breath.
After the beams, Intermission 1 will start.
Intermission 1
The boss becomes immune. Portals appear to the left and right sides of the arena; your raid should use the same Phase 1 groups to take each portal separately.
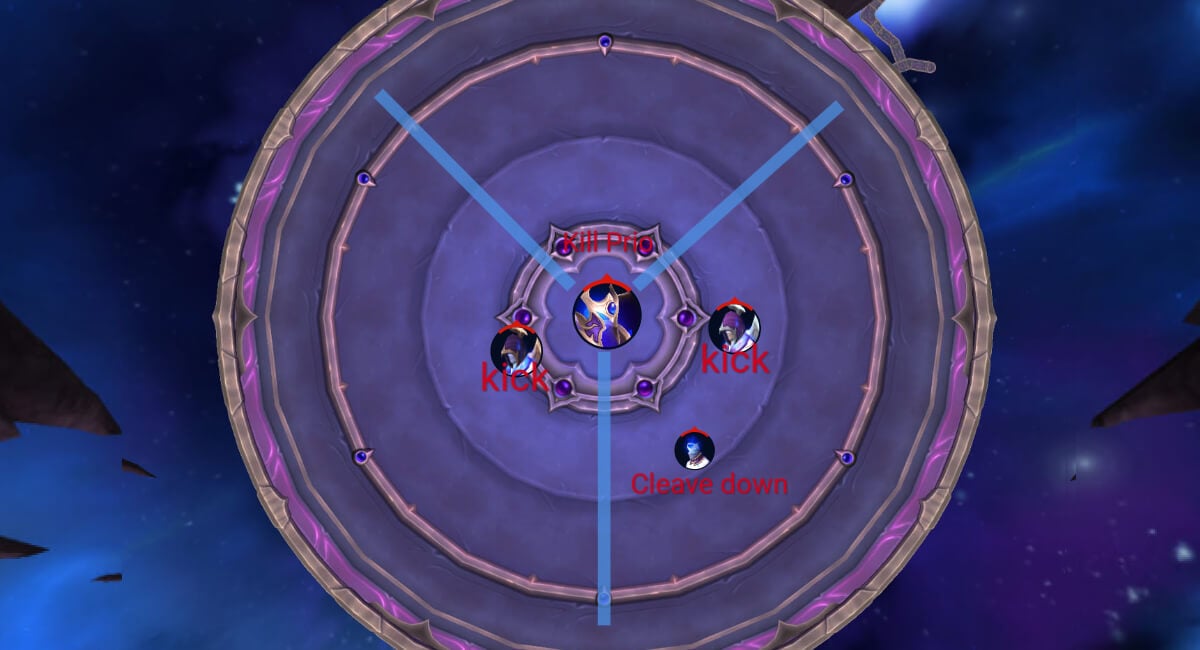
In each area / platform:
- Manaforged Titans are your top kill priority. If they reach full energy, they Self-Destruct and wipe the group. It will also cast 3 beams that rotate clockwise and anti-clockwise, dodge them.
- Shadowguard Reapers deal heavy damage to random players but can be cleaved down.
- Nexus-Prince Ky’Vor & Xevvos shoot beams in several directions that need to be dodged. Both cast Netherblast, which deals massive damage to a player if not Interrupted.
Once you go back to the main platform, you will have another set of Dimension Breath + Portals, handle it the same way as the first time.
The dragon will then move to the middle, and Intermission 2 begins.
Intermission 2
The boss is still immune and channels a 30-second drain on the Dragon, transferring any remaining health to himself. During this channel, the dragon takes 100% increased damage; this is where you want to use Heroism / Bloodlust and your best DPS cooldowns.
You will have to dodge blaze lines during this, and also be ready for heavy healing!
After 30 seconds, the dragon is consumed and Phase 3 begins.
Phase 3
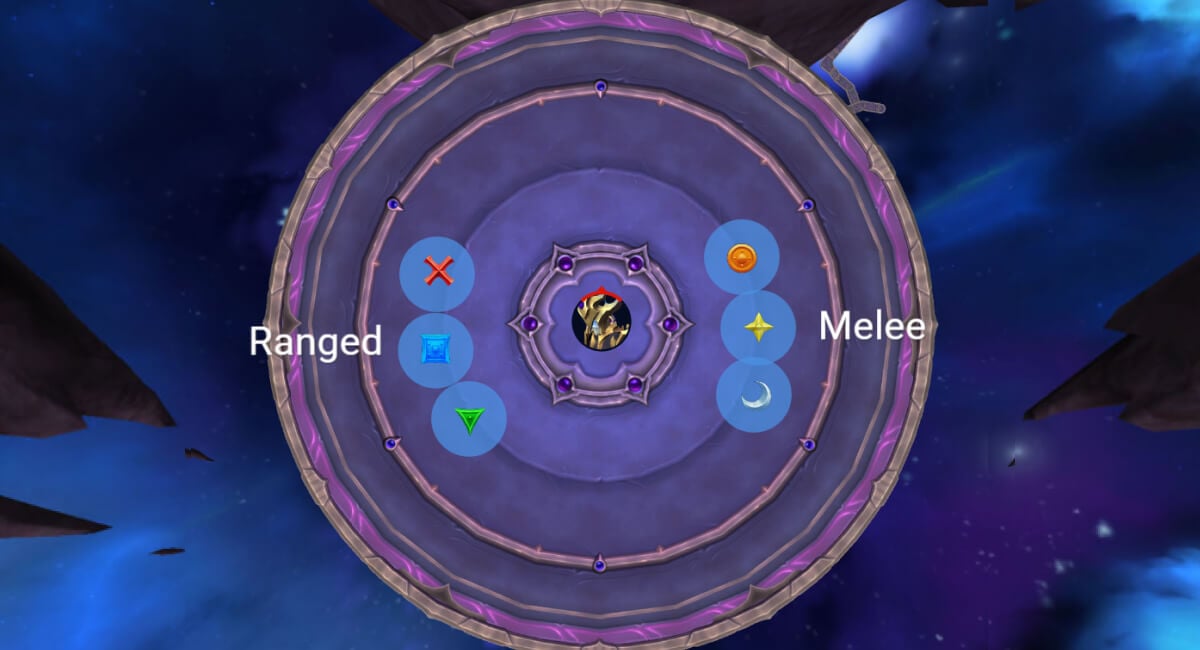
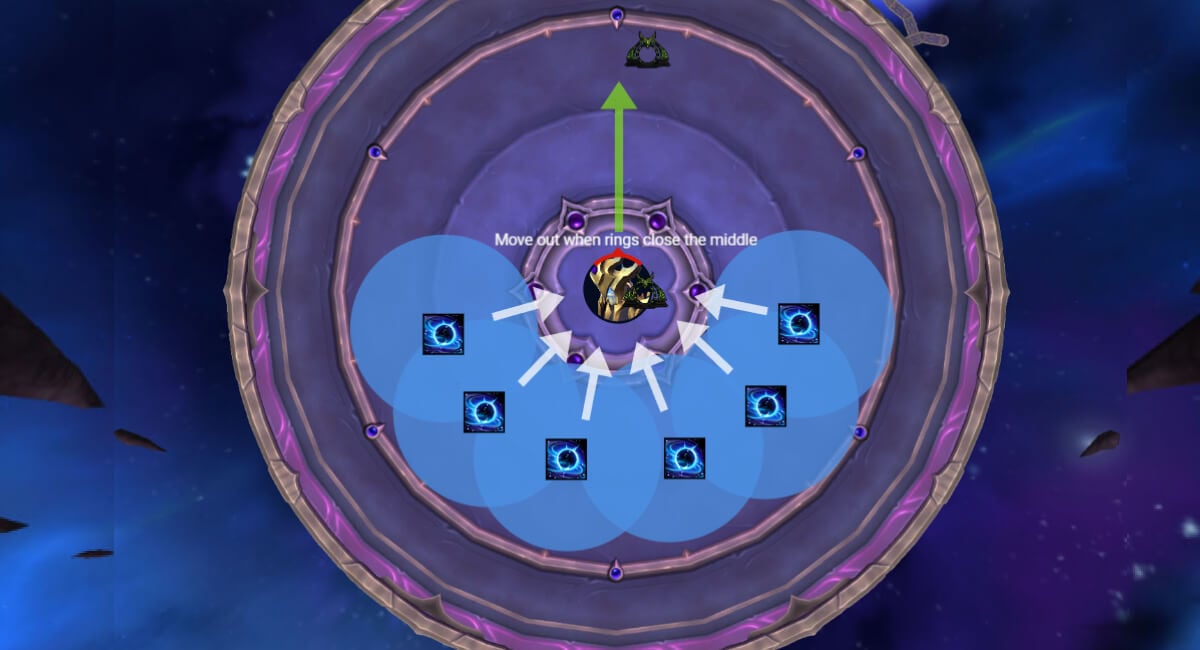
The phase opens with Galactic Smash, targeting six players.
Each spawns a Dark Star on impact. Have six predetermined markers around the room so each player knows exactly where to drop theirs, this positioning cancels out the pull effect of the stars.
3 Ranged players will get it first, followed by 3 melee players.
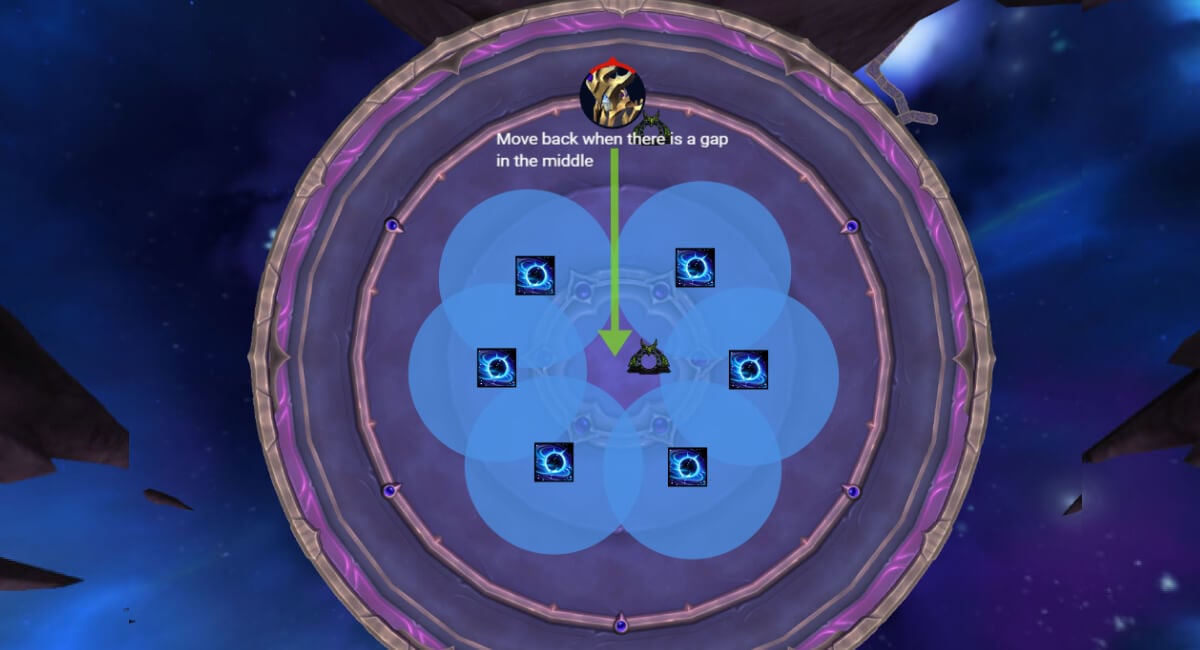
After you place the stars like this, there will be a natural “exit” created as the circles start closing in towards the middle, once it gets tight, move away from the middle with the boss. Once the rings start moving outwards, move back in as soon as you spot a nice safe opening.
Once the rings cover the middle, they will start spreading and move outwards, at that point there will be gaps towards the middle, which you can use to move back in. Always wait for a “pop” to start moving back.
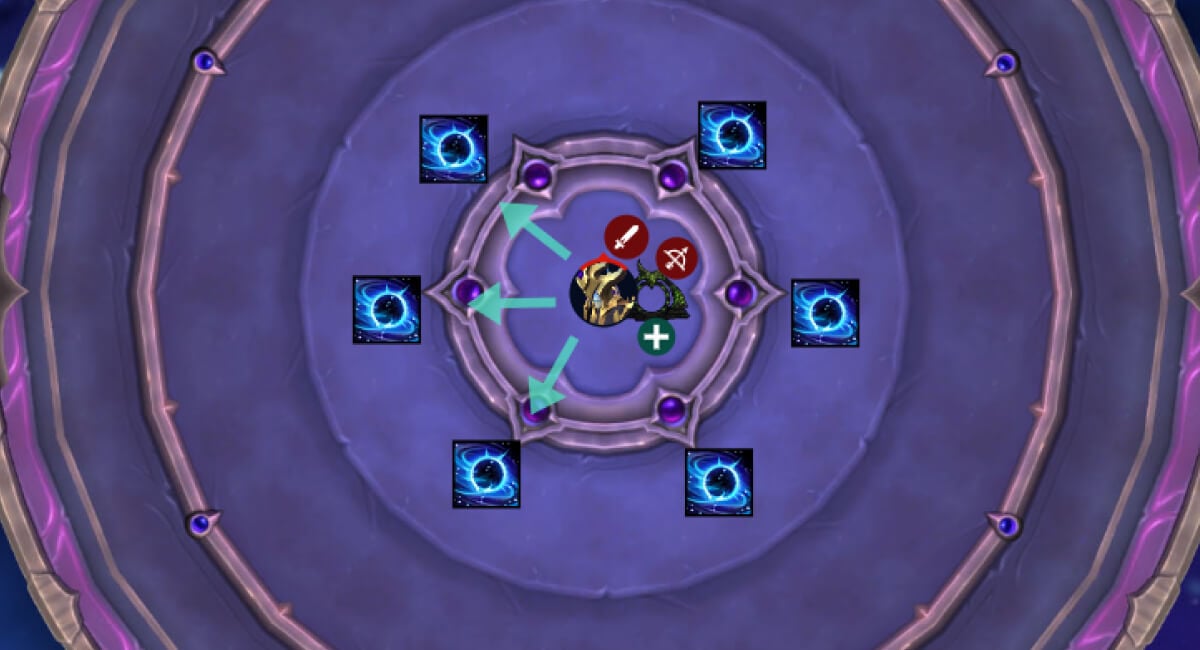
Starkiller Swing
Three players are targeted with a very visible beam. After a short delay, the beams go off in the direction you are facing them. Your goal here is to hit one Dark Star with each missile. This is the only way to destroy them.
If two missiles accidentally hit the same Dark Star, one Dark Star will remain alive and another set of Dark Stars will have to survive longer than intended, this quickly becomes dangerous.
You do not have to go behind the star, as the beam goes through players, but avoid standing in the beam unless targeted by it since it does heavy damage to the player it hits.
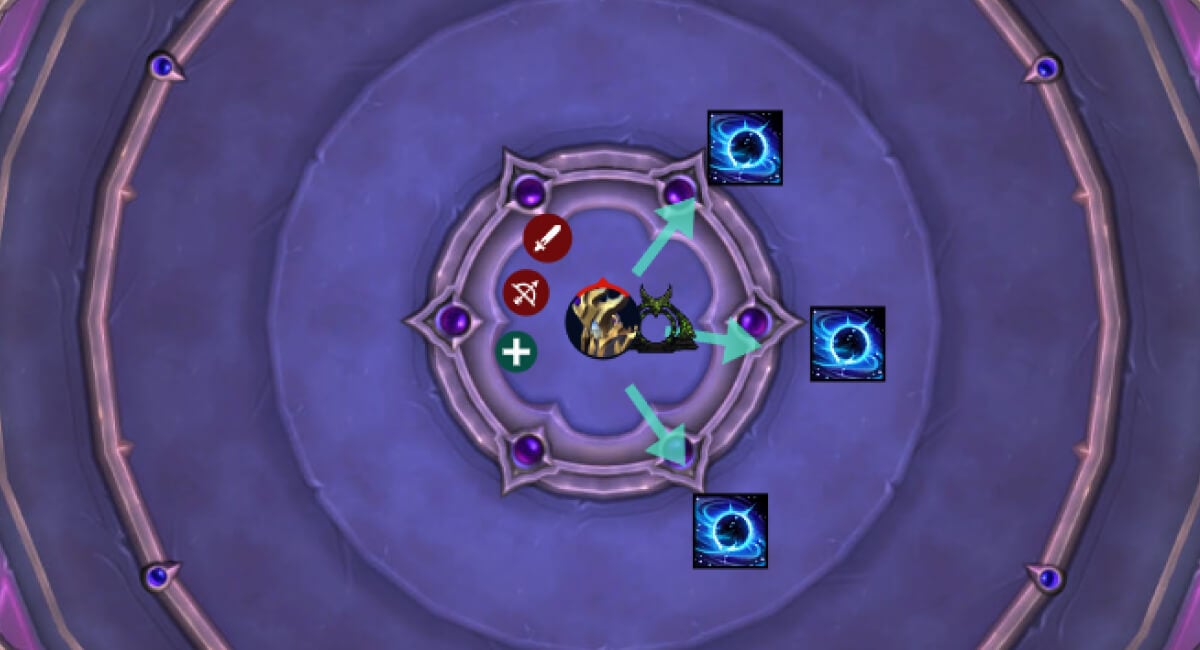
Even worse, if two Dark Stars are destroyed simultaneously, such as one missile clipping two at once, the boss triggers a massive raid-wide explosion that can easily wipe the group.
The safe execution is:
- Call which Dark Star you are taking the moment you are targeted.
- Move in-line with that Dark Star, making sure there is no other star in the missile’s path.
- Fire your missile cleanly into the star, others should avoid getting hit
After two sets of Starkiller Swing, the boss repeats Galactic Smash and the cycle continues until the fight ends.
WeakAuras
Northern Sky: Manaforge Omega WeakAura Pack
This WeakAura also requires the Northern Sky Anchors WeakAura and the Northern Sky Raid Tools Addon.
https://wago.io/NSManaforge