Raid Setup
Introduction
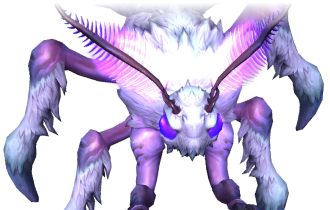
Welcome to our Heroic Soulbinder Naazindhri Boss Guide, for the Manaforge Omega Raid. Learn about the fight mechanics and the strategy we recommend to defeat this boss on Heroic difficulty!
Soulbinder Naazindhri has one job: stuff a bunch of souls into arcane canisters and turn them into her private Ethereal army. Your job? Break those canisters using massive glowing soul orbs the size of a wrecking ball, sounds easy, right?
Well, somehow it’s not. Despite the orb being large enough, all it takes is one overeager melee standing in the wrong spot to block the shot and doom the add phase. Precision mechanics at its finest.
Fight Style: Cleave Fight
Recommended Setup: 2x Tank / 4x Healer / 14x DPS
Required utilities: None
Hero/Lust usage: On Pull
Method Boss Review
This is a fight that feels like it was meant to show up much later in the raid, and in another timeline, it probably would’ve been a mid-tier highlight. Unfortunately, it landed as an early boss, and with that, you can really feel the missing complexity. Even on Mythic, the fight doesn’t evolve much outside of tighter checks.
That said, there’s a decent foundation here. The canister mechanic is a cool idea, and cleave-heavy raid comps will enjoy how the fight opens up during the add phase. Healers also get a satisfying moment to shine during Essence Implosion.
Expect some cheese strategies in the future; full canister skips, burn setups, and wild cooldown rotations to brute-force the intermission. Honestly? Could be fun.
Method Boss Rating: (3/5)
Easy Mode
Phase 1 – Canister Cleanup:
- Positioning is key: Boss always casts Soulfray Annihilation (2 orbs). Stand behind 2 canisters with no one in between to destroy them.
- Clear one full side first (4 canisters = 2 casts), then gate across the room and destroy 2 more on the opposite side.
- If orbs hit players instead of canisters, you failed the mechanic, the adds won’t spawn and Essence Implosion will be nastier later.
Intermission – Add Wave:
- Any remaining canisters explode via Essence Implosion, a massive raid DoT based on the number of active machines.
- Pick up all adds (especially mages), interrupt, and spread loosely to avoid cleave or chain damage.
- Cleave everything down fast.
Repeat Phase:
- Canisters respawn.
- Start on the opposite side you ended on, then repeat your clear plan.
- By this point, the room is mostly covered in puddles, focus on the boss and burn before 3rd intermission.
Extra Mechanic Notes:
- Soulfire Convergence: Spread out if targeted, orbs fly out in a line, don’t get clipped by someone else’s orb (big haste and movement loss).
- Assassins (Voidblade Ambush): Watch for teleport-strike; avoid stacking when they're out.
- Don’t fail Soulfray Annihilation. Missed canisters means more adds and a heavier DoT later.
Mechanics
At the start of the fight, the boss activates soulbinding machines around the room that begin wrapping Unbound Souls.
These Souls slowly transform into Shadowguard adds if not interrupted in time.
The souls can transform into: Unbound Mage, Phaseblade, or Assassins.
Unbound Souls
Shadowguard Mage
Void Burst: Targeted cast that applies a 15s Shadow DoT. Interruptible, and should be interrupted.
Shadowguard Assassin
Voidblade Ambush: Teleports behind a random player and strikes, dealing AoE damage and applies a long duration DoT to everyone nearby. Spread when targeted, don’t stack up.
Shadowguard Phaseblade
Phase Blades: Hits target with Shadow damage that jumps to nearby players. Spread loosely during Phaseblade spawns to avoid chain damage.
Boss launches a projectile across the arena. It deals moderate Arcane damage and hits adds and machines in its path.
Dodge the orb and aim it to hit machines to be able to attack the souls.
Heavy tank hit that applies a stacking debuff, increasing Lash and Physical damage taken.
Requires regular tank swaps at ~2 stacks.
Big raid-wide AoE and knockback.
Players are thrown away from the boss and take ticking damage after.
Leaves behind a puddle at the spot where players land.
Targets several players with a DoT. After a few seconds, they explode with orbs in random directions.
Getting hit by a Soulrend Orb reduces movement speed and haste.
Strategy
This fight is all about killing soul canisters, dodging orbs, and not accidentally body-blocking your own progress. The rest is filler.
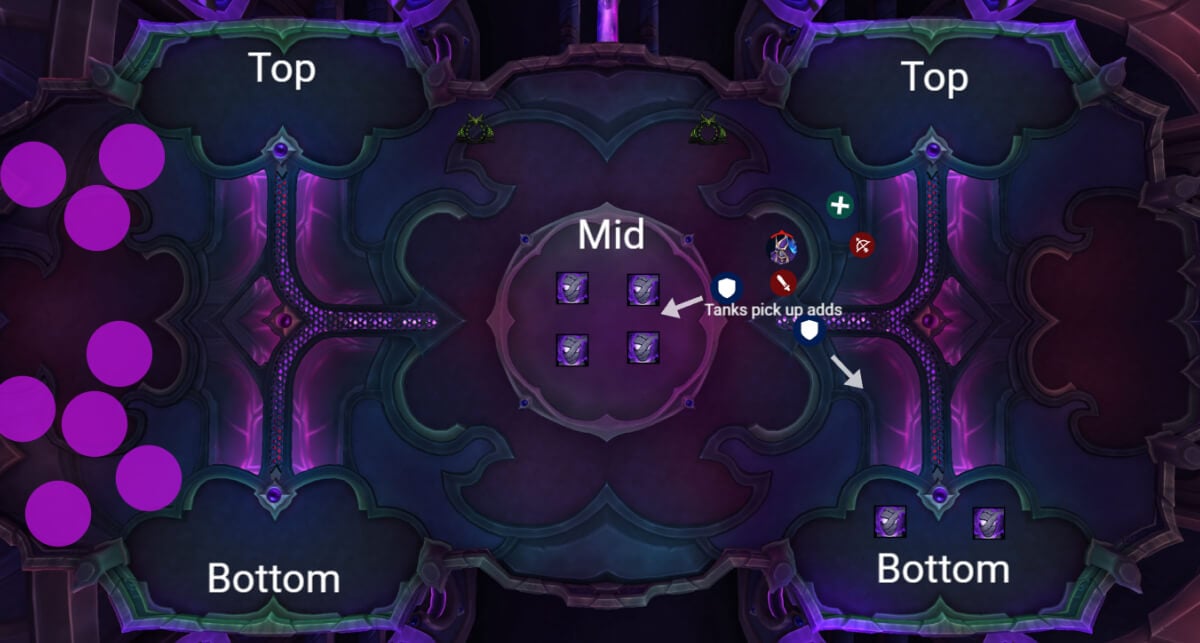
The Core Mechanic: Soul Canisters
Around the edges and center of the room are 12 Binding Machines (canisters), each holding an Unbound Soul. You can’t kill these adds unless their canister is destroyed first, and the only way to do that is with Soulfray Annihilation, a big orb the boss fires twice per cast.
- Two canisters per Soulfray Annihilation cast
- 12 canisters total
- You do 3 full casts, ideally killing 6 canisters and a final room-wide explosion that clears the rest
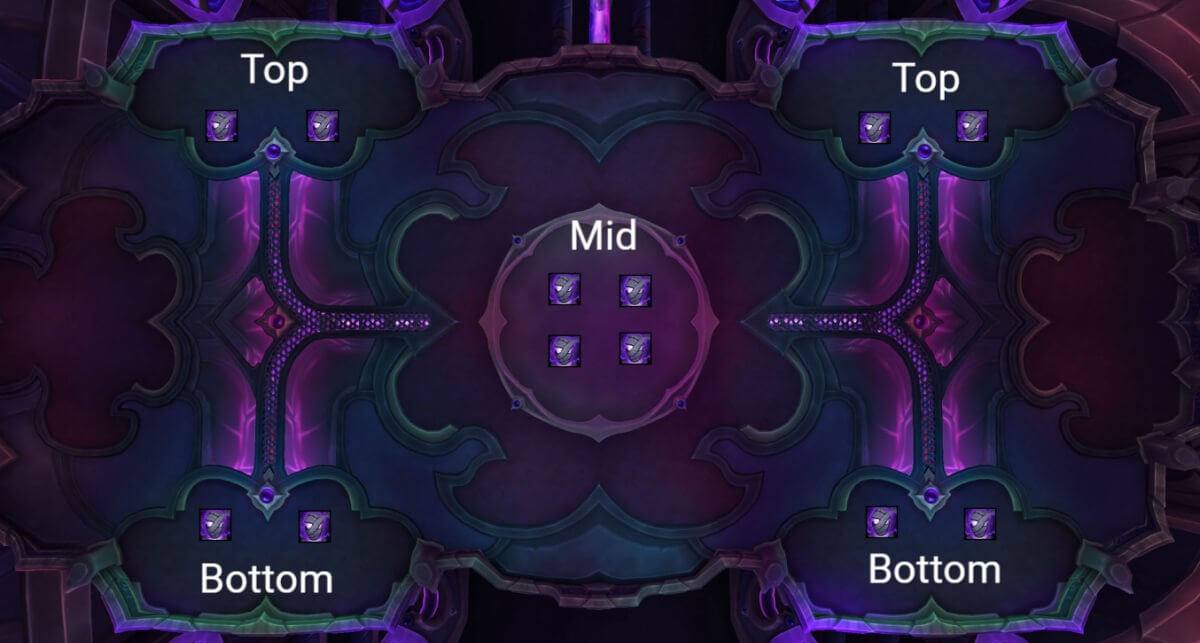
Layout TL;DR:
- Left: 2 top, 2 bottom
- Right: 2 top, 2 bottom
- Middle: 4
Phase 1 – Freeing Souls (Intentionally)
Start on One Side (Left or Right) and position the boss between the two side canisters, this allows your raid to cover both.
The 2 players targeted stand behind each canister, no one else can be in between or the orb gets eaten and wasted.
If you miss a shot, the add stays immune and you’ll be punished in the intermission.
Do this setup for 2 Soulfray Annihilation casts, and you should destroy 4 canisters on one side. So kill 2 Canisters on bottom, then switch to top.
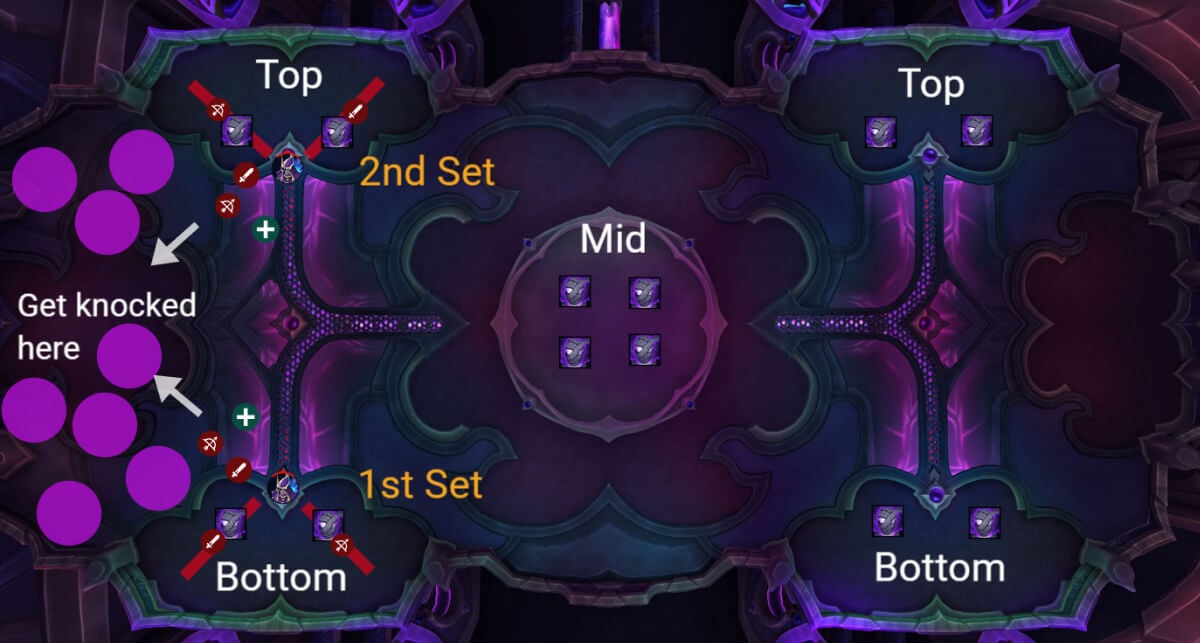
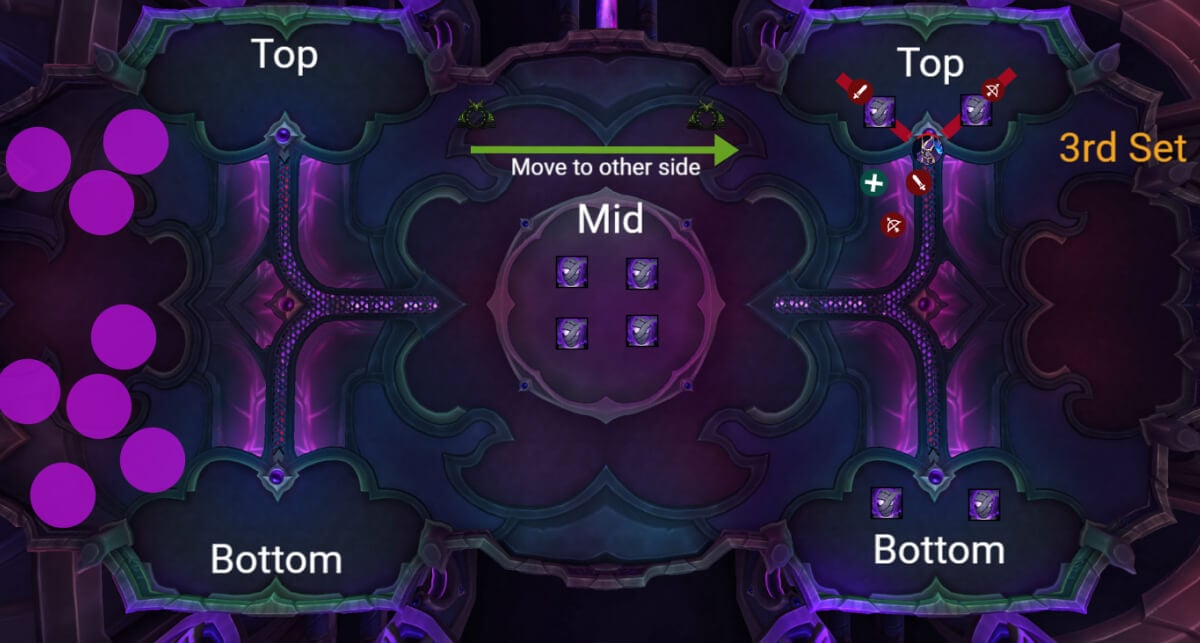
Then, Swap Sides.
After the second cast, use mobility abilities and Warlock Gateway to cross to the other side of the room, skipping the middle. The Boss follows the raid.
Do one final Soulfray Annihilation, then break 2 more canisters.
Handling Soulfire Convergence and Soulrend Orbs
Every so often, several players will be targeted by Soulfire Convergence, this is a DoT that pulses Arcane damage every second and eventually expels a Soulrend Orb from the afflicted player. These orbs travel in a straight line outward from the player’s body and will hit the first person they collide with, applying a nasty 30% movement speed slow and 25% haste reduction.
Essence Implosion
After that, Essence Implosion triggers and breaks the remaining canisters. This is the big intermission moment, every add that’s still bound will be freed.
If you messed up Soulfray Annihilation earlier, the more canisters explode the heavier ticking raid damage.
Adds spawn from middle and side canisters you didn’t clear, tanks need to grab everything.
Interrupt Shadowguard Mages, stay spread for Phaseblade bounces, and use cleave/AoE to mop them up.
Phase 2 – Just Kidding, It’s Phase 1 Again
After all adds are dead, the canisters respawn. The fight loops from here.
You’ll now be standing closer to the right side (assuming you started left), and that side is likely cleaner from puddles.
Repeat: 2 Soulfray Annihilation to break 4 canisters, swap sides, break 2 more.
Deal with the knocks the same way you did on the left side.
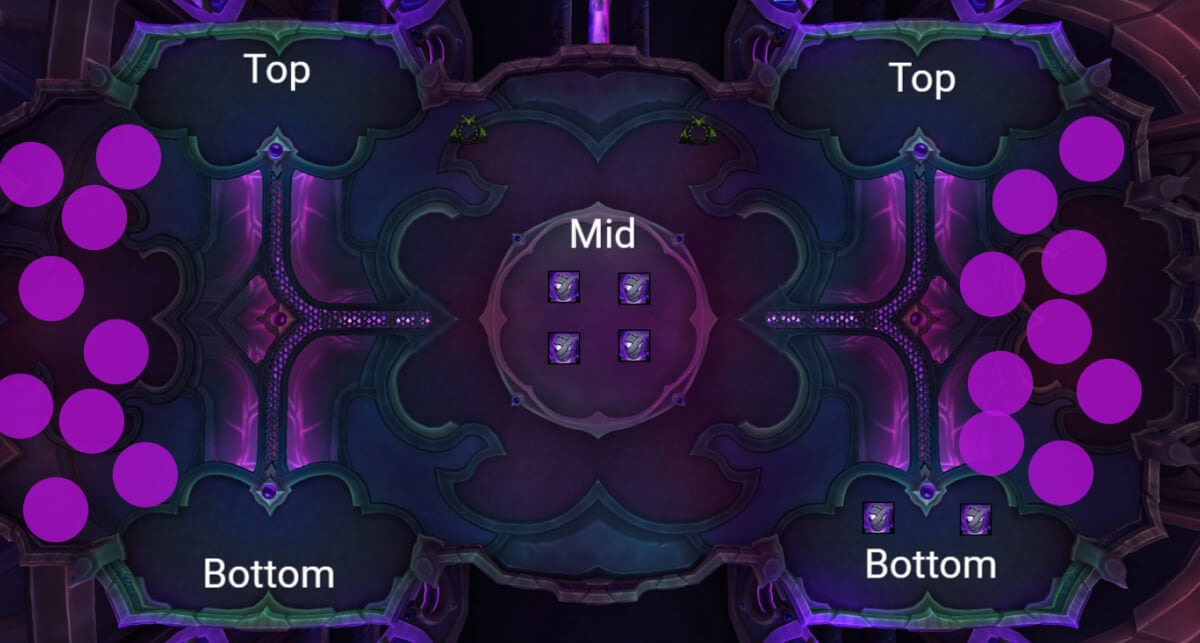
You will still have random puddles in the room due to some players standing wrong, but since the puddles do not grow, this is not a problem as long as the majority of puddles are placed to the sides.
You’ll get another Essence Implosion, survive it, clean up the final wave.
You don’t need to do this a third time, just kill the boss during or after the second Implosion phase.
WeakAuras
Northern Sky: Manaforge Omega WeakAura Pack
This WeakAura also requires the Northern Sky Anchors WeakAura and the Northern Sky Raid Tools Addon.
https://wago.io/NSManaforge