The Twilight Crypts Delve is one of the two Midnight delves in Zul'Aman, which is where the Witherbark trolls are conducting experiments. In this guide we will go over the Delve mechanic, Trash mobs and Boss mechanics, as well as all the story variations and Sturdy Chest Locations for the Twilight Crypts.
There are 3 Variants of the Twilight Crypts Delve:
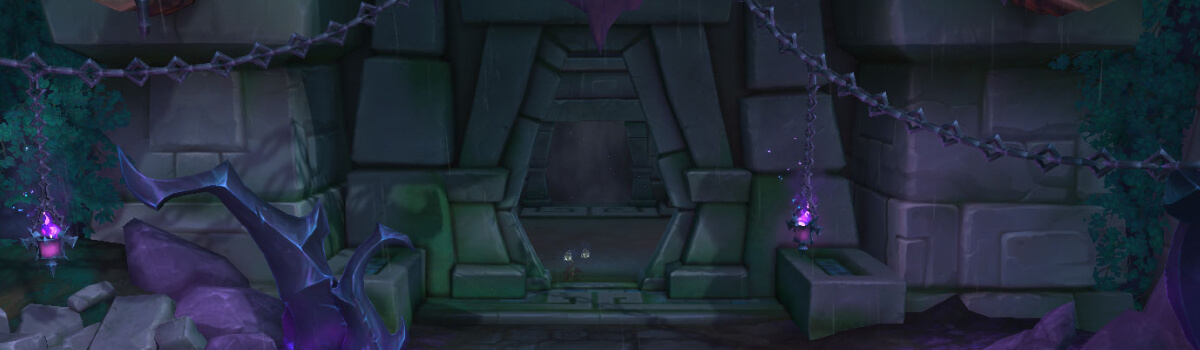
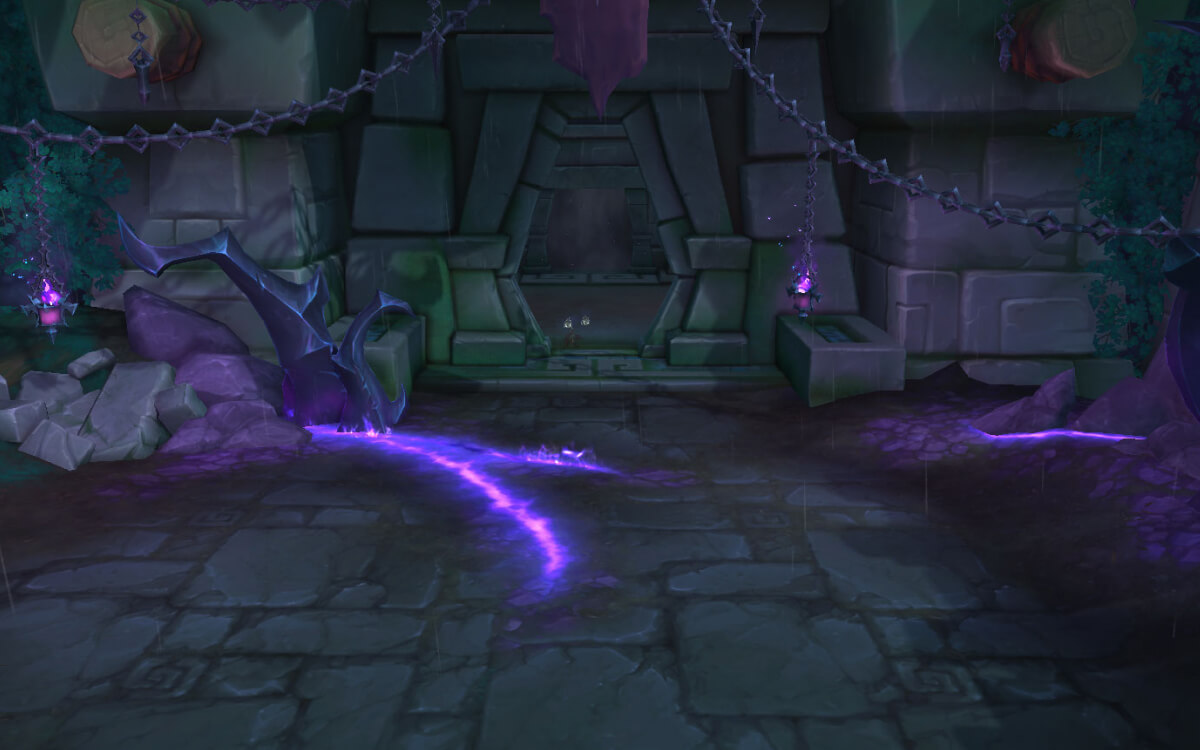
Twilight Crypts Delve Entrance Location
The Twilight Crypts is a delve located in the south west of Zul’Aman, hidden within some troll ruins.
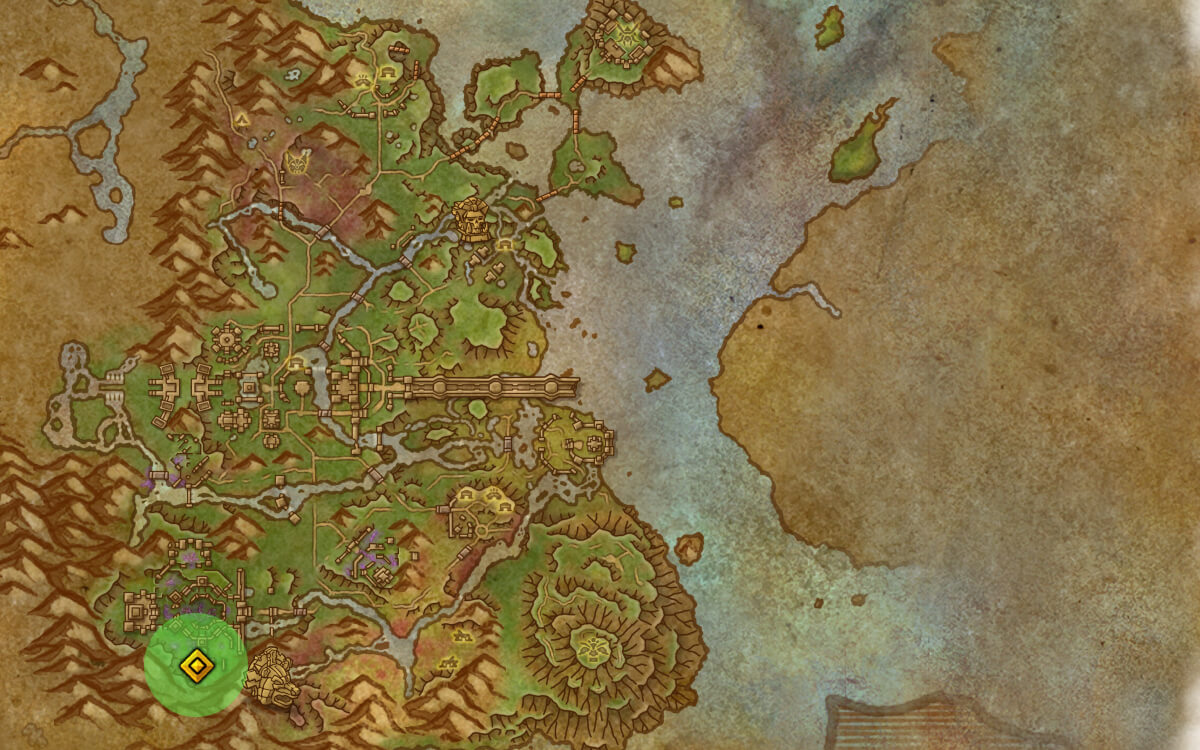
/way Zul'Aman
Twilight Crypts Delve Overview
This section covers things relevant to all versions of the Twilight Crypts Delve.
Delve Mechanic
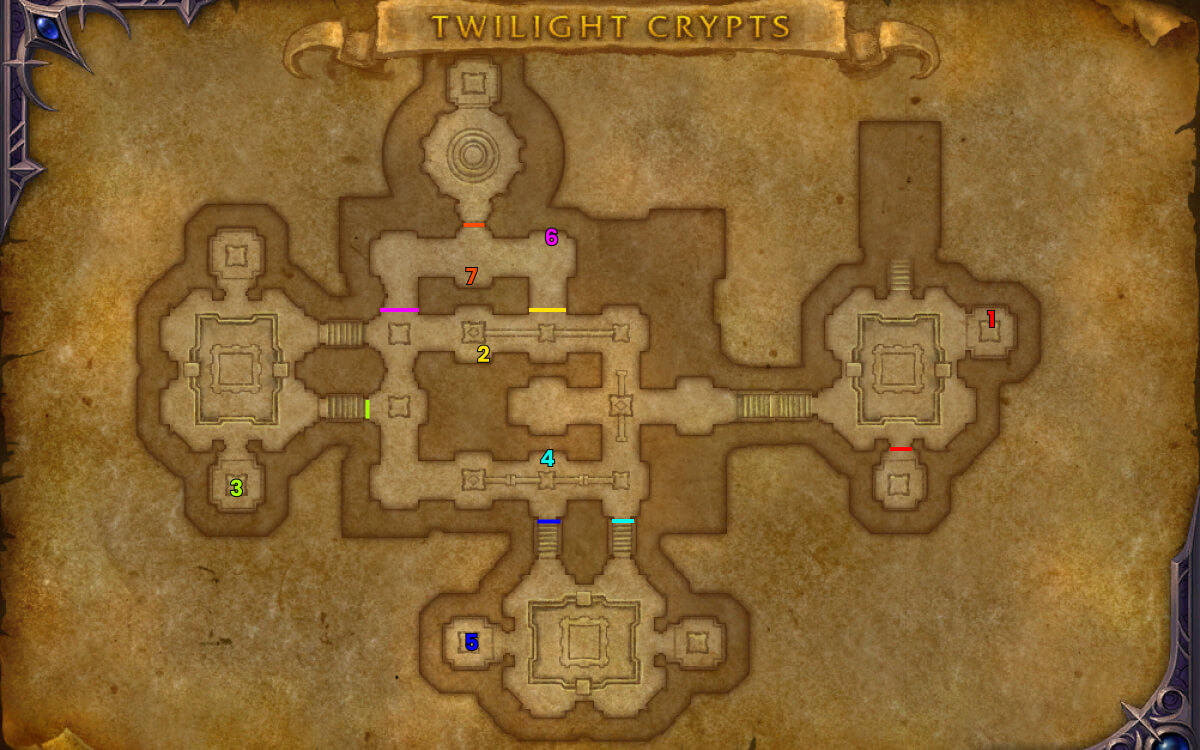
Spear Trap is the mechanic for the Twilight Crypt Delve. Throughout the delve certain routes will be blocked by Spear Traps. Trying to walk through the trap will cause a small amount of damage and knock you back. You can switch off the spear traps by clicking on levers in the delve. We have included a map below to show the locations of all the levers, and which spear trap they open.
Delve Mobs
These are the mobs that we feel were worth highlighting in Twilight Crypts.
Hexbound Necrowraith is a caster who casts Necrotic Bolt, which deals significant single target damage. It can be interrupted. They also use Necromantic Upheaval, which spawns stationary circles around all players and Valeera. Remaining inside the circle when the cast finishes deals heavy damage and knocks you back also leaving a puddle on the ground.
Fleshwarped Abomination is a large elite who melees. The basic attacks do not hit that hard. However, it has the ability called Ghoulish Strength, which after a short cast gains 100% increased damage but is slowed by 90%. For tanks the 100% increased damage is barely noticeable but you may need to kite as a dps or healer. The Abominations also use Reconstitution when low on health, which heals it for 90% of its health after a long cast. You can’t interrupt the spell but you can CC/stun him to stop the cast.
Leering Skulltaker is a melee mob with a single ability called Hex Strike. This causes a small amount of shadow damage and applies a debuff which reduces all of your stats by 5%. Be careful when pulling them into groups as the reduced stats can easily make you weaker than you expect.
Delve Boss
The boss for this delve is Blademaster Darza. She has several abilities that you need to keep an eye on.
- Charge is only used if a player is at a distance from Blademaster Darza. It deals a small amount of damage and knocks you back a small distance.
- Shade Cleave is a frontal cone that locks on to a location, meaning you can sidestep and avoid it.
- Bask in Twilight is a fairly long cast where Blademaster Dazra spawns a circle around herself. If you remain inside the circle you take heavy damage and are knocked back. The circle will also spawn puddles that deal damage over time.
Dealing with Blademaster Darza on higher difficult delves can be difficult as the puddles she spawns take up more and more of the room. We recommend taking her to the edge of the room and moving around the edges every time she casts Bask in Twilight. Sticking close to her makes it slightly easier to avoid Shade Cleave and stops her from charging altogether.
Loosed Loa - Story Variant
In the Loosed Loa Version of Twilight Crypts you will be freeing Mot’amra the Loa of Pestilence, who has been bound by the Witherbark Trolls.
To start the Delve you first speak to Scout Lok’aemon. Lok’aemon will tell you to take the Evasive Elixir that's nearby. The Evasive Elixir gives you an extra action button, which when clicked will turn you into a pot for 4 seconds. While you are a pot you are immune to damage and knockback nearby enemies.
Once you make it to the central area you will notice an unattackable Mot’amra rampaging around the center. You even see a red outline of him, through walls. If anything (including enemies) is hit by him, it will take a substantial amount of damage and be stunned for 2 seconds. Use the extra action button to avoid being hit by Mot’arma, while letting him damage your enemies. Don’t overpull though, as the enemies aren’t oneshot.
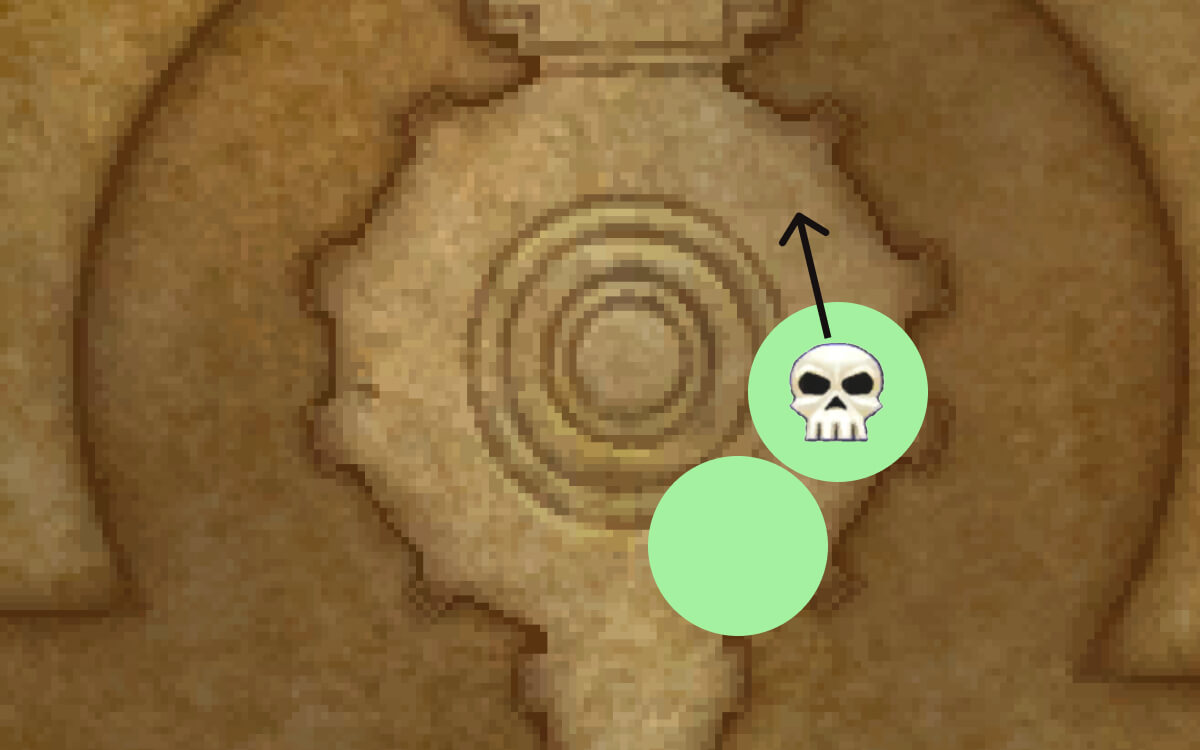
The main goal of the delve is to defeat Vilebranch Skeleton Charmers and destroy 6 Hex Totems located around the map.
We have included a route we like to take when clearing this version of Twilight Crypts delve. You follow the green route until you reach the arrow. If you, at this point, still need Totems, Enemies, or want to fully clear the delve check the room with the arrow. If you already have all the totems and enemies required for the delve, ignore the room with an arrow and follow the red path to the boss.
Party Crasher - Story Variant
In the Party Crashers version of Twilight Crypts you initially meet Dulgor Legstuck who has surprisingly got his leg stuck in a trap. These traps appear in several locations around the delve. If you stand in one you get stunned for a couple of seconds.
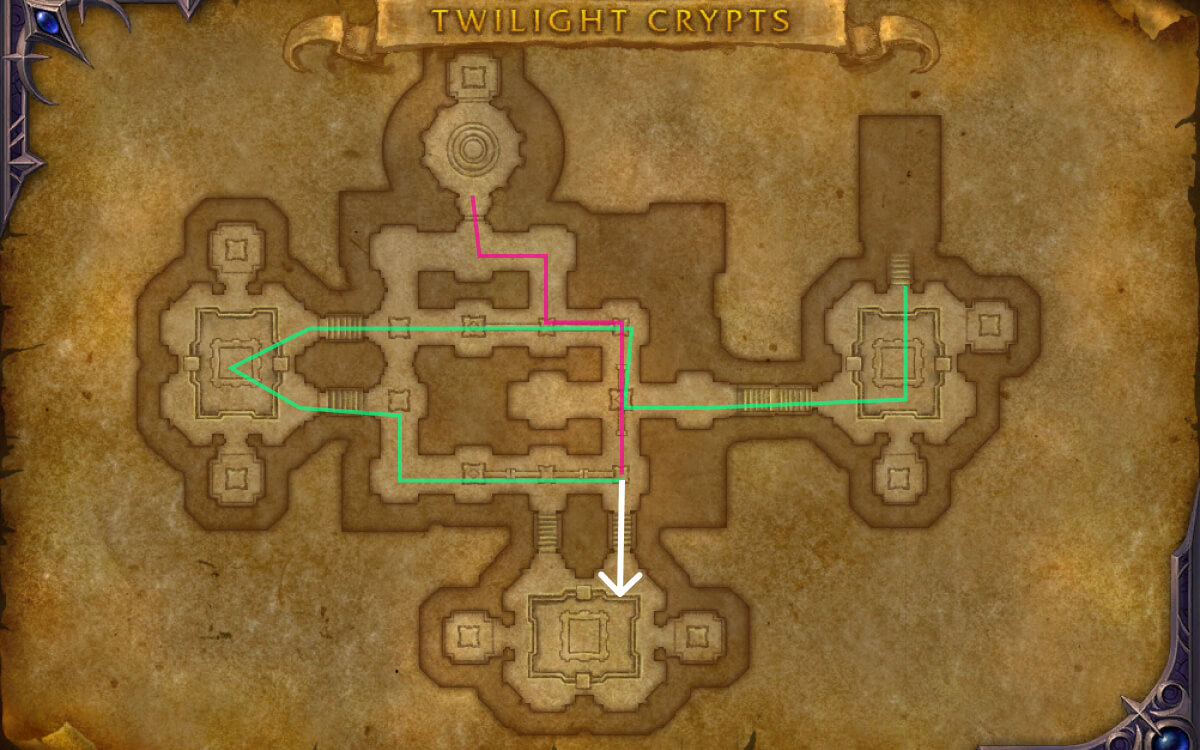
The next objective is to kill 4 Twilight Summoners, who can be easily located on your map. We have laid out the route you follow in order to defeat all of the Twilight Summoners and avoid the spear traps. While following the route you activate the 7 suspicious levers around the delve, these do exactly the same as the delve mechanic and remove a spear trap.
Once you have killed all 4 summoners and clicked all 7 levers you can take on the boss.
Trapped - Story Variant
In the trapped version of Twilight Crypts you will be saving groups of hostages of the Twilight’s Blade.
This delve is slightly different from the other two. When you first enter you will try to save a hostage. However, when you click on the key, the screen will go black and teleport you to the most southern room.
From here you make your way around the delve in a slightly different direction. You need to open all of the side rooms to free the hostages. Once you have freed all of the hostages you can take on the boss, although you will be in a slightly smaller room near the entrance of the delve.
Twilight Crypts Sturdy Chest Locations
There are a total of 3 Sturdy Chests located within the Twilight Crypts.
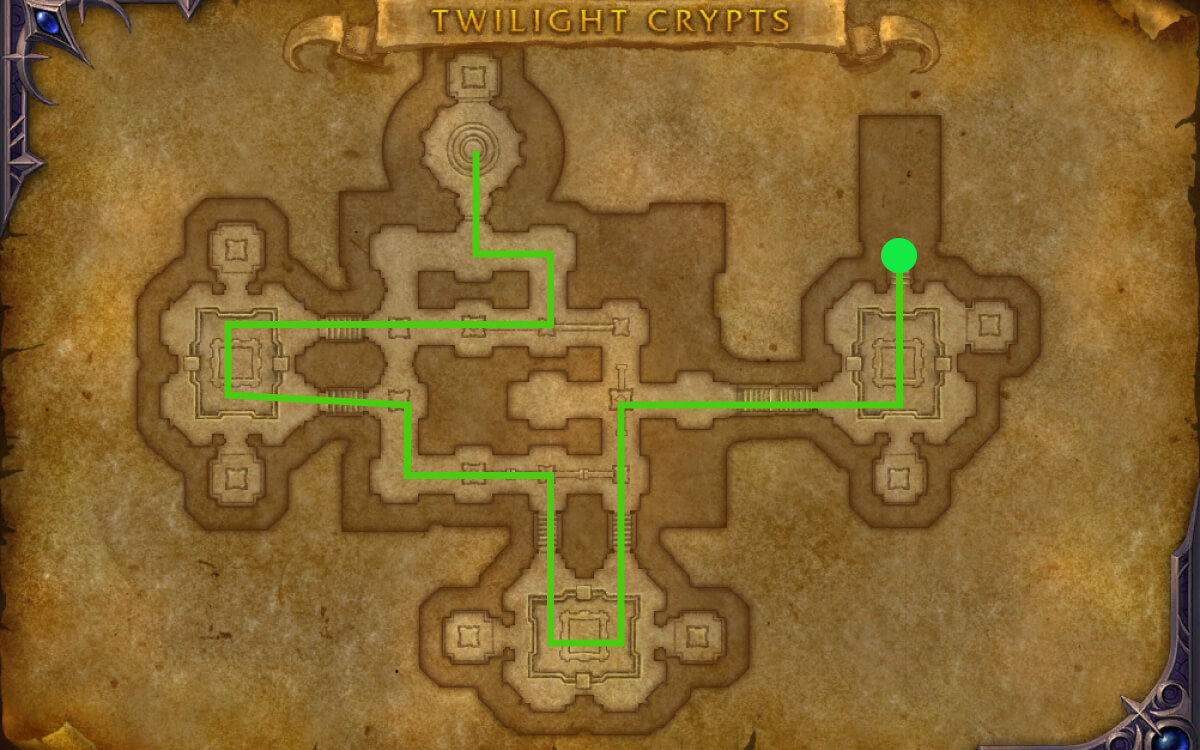
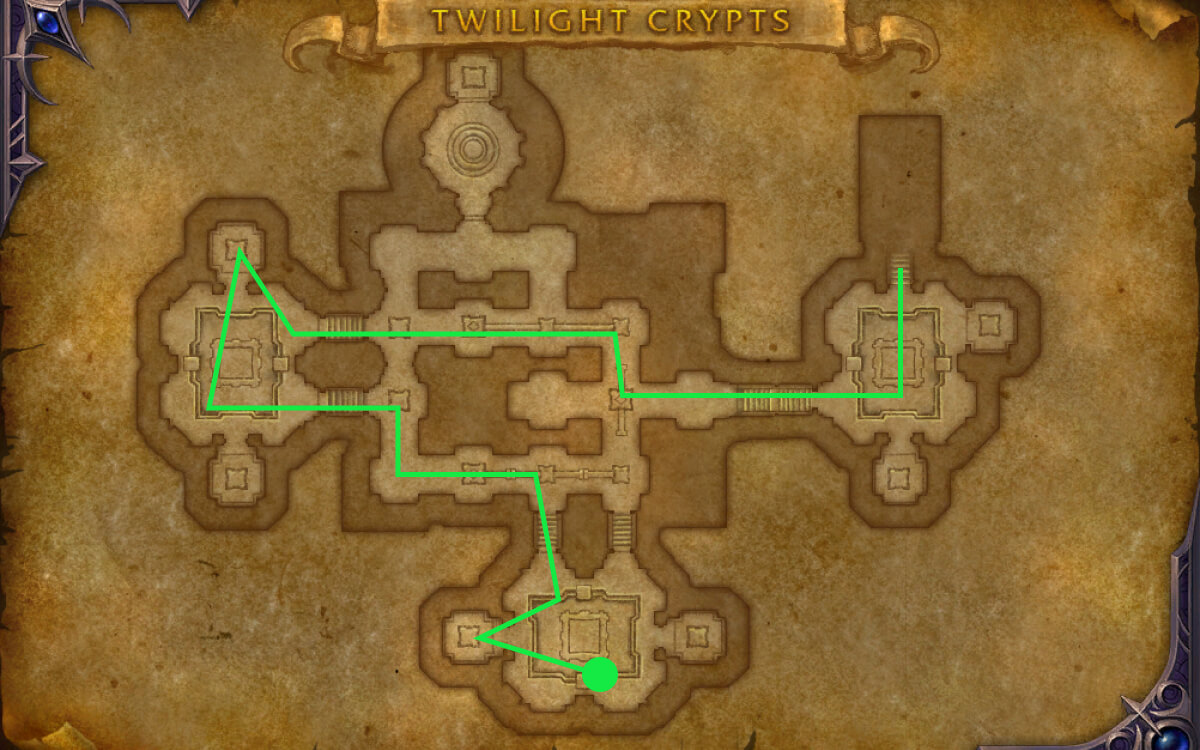
You don’t need any special delves to be active in order to access them. You will need to use the levers to get past spear traps, make sure to use our image in the delve mechanic section locate the correct levers. We have also included an image and waypoints to help you find all the sturdy chest locations.
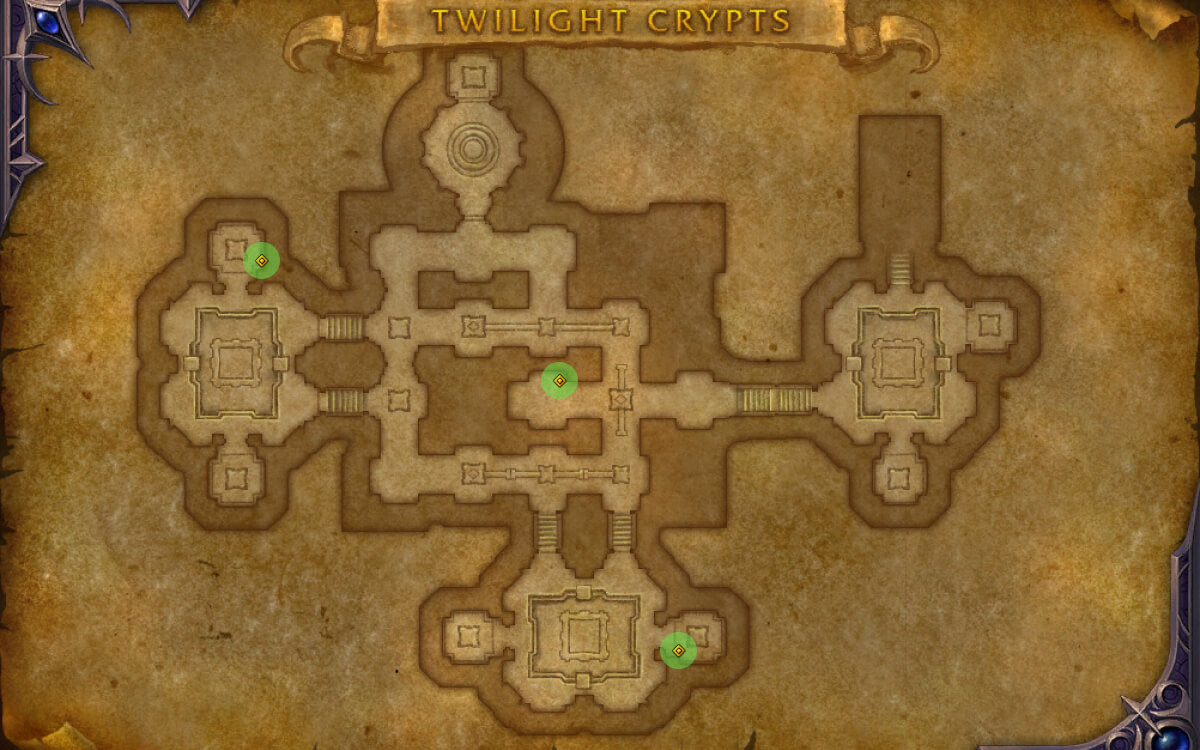
/way 57.23 85.52 Sturdy Chest 1
/way 46.96 49.84 Sturdy Chest 2
/way 21.72 36.21 Sturdy Chest 3
If you found this delve guide helpful, we have a full catalogue of Midnight Delve Guides, as well as our Midnight content hub that has a wide range of guides help you quickly get up to speed with the Midnight expansion.