
The Atal’Aman Delve is one of the two Midnight delves in Zul'Aman, which is where the Witherbark trolls are conducting experiments. In this guide we will go over the Delve mechanic, Trash mobs and Boss mechanics, as well as all the story variations and Sturdy Chest Locations for Atal’Aman.
There are 3 variants of the Atal’Aman delve:
Atal'Aman Delve Entrance Location
Atal’Aman is located in the west of Zul’Aman, near the border of Eversong Woods.

/way Zul’Aman 63.78 80.15
Atal’Aman Delve Overview
This section covers things relevant to all versions of the Atal’Aman Delve.
Delve Mechanic
All three versions of Atal’Aman have their own delve mechanic. What two of them have in common is that they require you to interact with objects around the delve to receive a buff. The third is about avoiding a ground effect.
Delve Mobs
These are the mobs that we feel were worth highlighting in Atal’Aman.
Hexbound Necrowraith is a caster who casts Necrotic Bolt, which deals significant single target damage. It can be interrupted. They also use Necromantic Upheaval, which spawns stationary circles around all players and Valeera. Remaining inside the circle when the cast finishes deals heavy damage and knocks you back also leaving a puddle on the ground.
Fleshwarped Abomination is a large elite who melees. The basic attacks do not hit that hard. However, it has the ability called Ghoulish Strength, which after a short cast gains 100% increased damage but is slowed by 90%. For tanks the 100% increased damage is barely noticeable but you may need to kite as a dps or healer. The Abominations also use Reconstitution when low on health, which heals it for 90% of its health after a long cast. You can’t interrupt the spell but you can CC/stun him to stop the cast.
Leering Skulltaker is a melee mob with a single ability called Hex Strike. This causes a small amount of shadow damage and applies a debuff which reduces all of your stats by 5%. Be careful when pulling them into groups as the reduced stats can easily make you weaker than you expect.
Delve Boss
The endboss in Atal’Aman is Spiritflayer Jin’ma, and these are his key abilities:
- Flayed Knife - puts a circle around all players and spawns 3 souls. Deals damage around you to other players and the souls.
- Running over souls makes you collect the soul, and increase your damage by 10%. If a soul dies, before you have collected it, the boss gains 10% damage instead.
- Collect Souls - an uninterruptible cast where the boss will collect all remaining souls alive in the room.
Spiritflayer Jin’ma spawns in different places depending on which version of the delve you are doing. We recommend pulling him to a fairly open area, with some room for the souls to spawn, so you don’t instantly kill them with the circle from Flayed Knife. Allow the Flayed Knife circle to disappear before moving towards any souls. You may need to use movement skills in order to make it to the souls before Jin’ma’s Collect Souls cast.
Toadly Unbecoming - Story Variant
Ritual accessories is the delve mechanic specific to the Toadly Unbecoming version of Atal’Aman. Throughout the instance you will find Troll Ritual items, which if interacted with, grants powerful buffs, such as 30% haste.
To start the delve talk to Kasha and collect a Vilebranch Hexstick. This will give you the ability to decurse Cursed Toads found in the delve, through an extra action button which appears when you are close enough to one.
The objective will be to fill up a Vilebranch progress bar by killing mobs, and use the hexstick on 20 Cursed Frogs, which are neutral NPCs. Keep an eye out for the Giant Cursed Bullfrog, which carries three Cursed Frogs, however beware of its Venom Bite which leaves a nasty DoT.
Once you have filled up the bar and freed 20 Cursed Frogs the boss will spawn.
Totem Annihilation - Story Variant
The Totem Annihilation version of Atal’Aman revolves around the Witherbark trolls capturing a Loa. In this version you have to pay attention to the ground, as the captured Loa is spawning lightning in the area, which appear as circles that deal heavy damage to anyone inside them. They activate very soon after they spawn, which makes it easy to get hit, and also hard to kite mobs into. If something spawns right by you when fighting, try to leave the mobs inside the circle for a big chunk of damage taken.
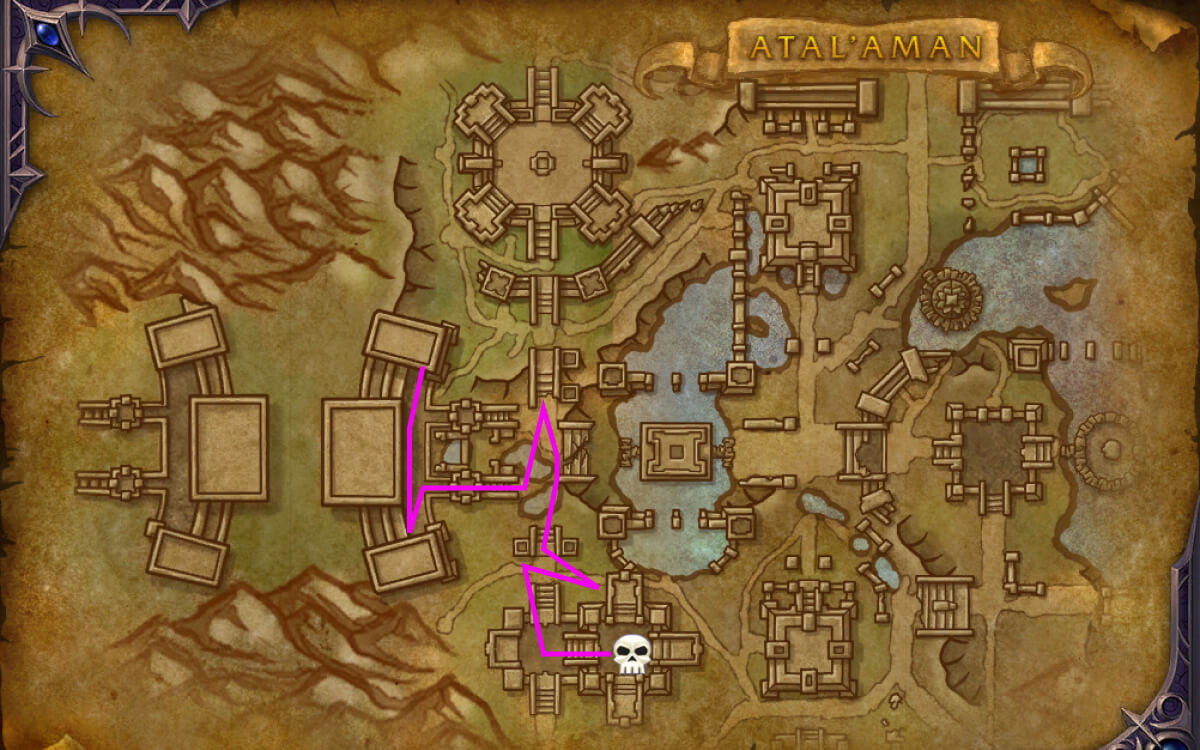
The first stage of the Totem Annihilation will require you to destroy six totems around the area and fill a progress bar by defeating Witherbark trolls. We recommend riding the optional bird at the start, and then following the route below to hit the 6 totems.
Once you have destroyed all the totems and filled the bar you can fight the boss.
Ritual Interrupted - Story Variant
Haunted Weapon is the delve mechanic specific to the Ritual Interrupted version of Atal’Aman. Clicking on weapon racks in the area summons weapons which follow you around and deal significant damage to enemies, similar to Dancing Rune-Weapon for Blood DK. This is a strong buff so it’s worth having it up as much as possible.
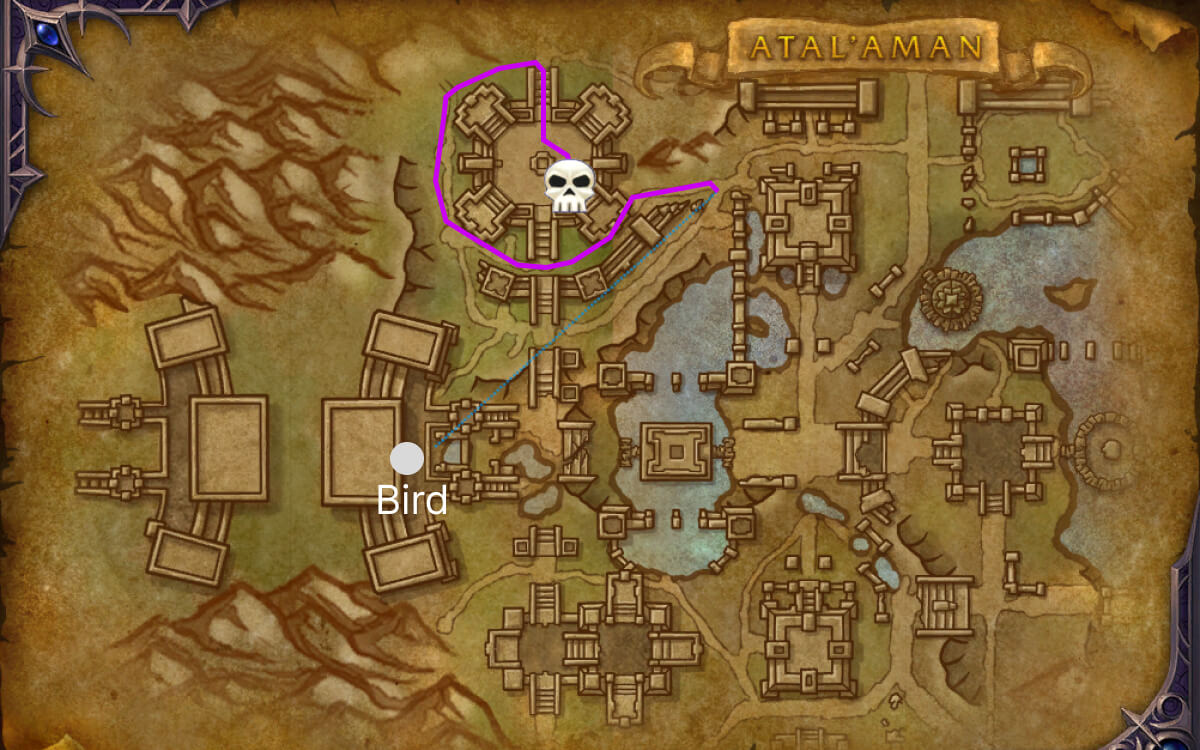
To begin with you need to speak to the Furbolg Fleek, who will ask you to free Spiritclaw Cubs from cages around the delve. We have included the route we thought was most efficient for opening the cages.
The second objective is to stop a ritual. To do this you need to defeat several waves of enemies at Nalorakk’s shrine, ending with Consumption of Nalorakk. Once completed you can take on the boss.
Atal’Aman Sturdy Chest Locations
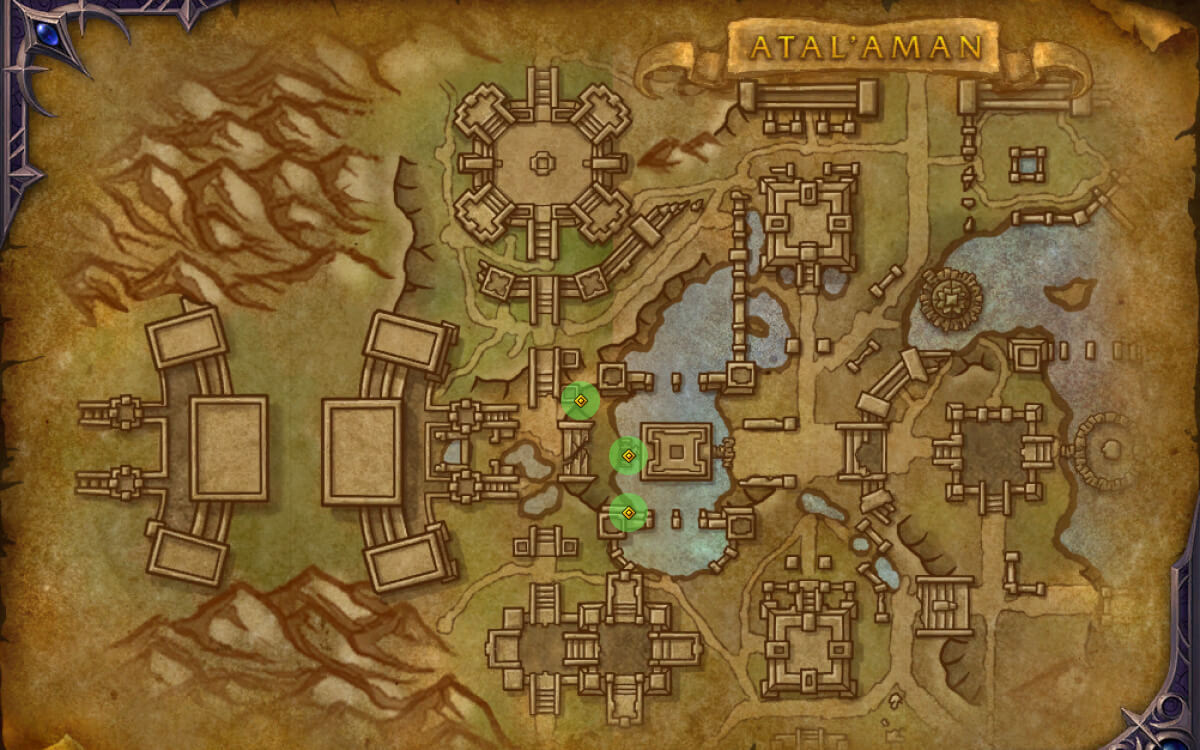
There are a total of 3 Sturdy Chests in the Atal’Aman. You don’t need any special delves to be active in order to access them, and we have included a map and coordinates to help you.
/way 48.33 50.44 Behind a statue
/way 53.15 57.99 In the water under bridge
/way 52.98 65.38 On a ledge near the water
If you found this delve guide helpful we have a full catalogue of all the Midnight Delves in our Midnight Delve Content Hub.