Lucifron and Magmadar Heroic Raid Guide
Learn how to complete Wing 1 of Molten Core (Heroic) in Warcraft Rumble. Follow our suggested build and strategy for Lucifron and Magmadar.
Within the first Wing of Heroic Molten Core you will encounter Lucifron and Magmadar.
Defeating each of the bosses awards you with 100 Valor. Valor is used for upgrading an army slot to Diamond (+4 levels). Defeat both bosses to earn yourself a Golden Core Hounds Skin. For repeat clears in the subsequent cycles, one reward per cycle, you will get 150 Coins instead of the golden skin.
LFR Builds
Anub'arak
rumblo:CBAQARoECB4QARoECEcQAhoECAkQABoECE0QAhoECFgQARoECDIQAA==
Important Talents
Explosive Shells on Anub’arak is mandatory to have enough damage output from the Beetles.
Bloodthirsty on Execute adds more damage when used near Unbound minis.
Strategy
Use Quilboar to distract a Dominator Lieutenant. Use Unbound minis to take it down. Whelp Eggs will pop from the damage aura, but Whelps will not be damaged by it, making them an excellent option. (The aura is bugged so that it will not be present from phase 2 onwards)
Capture the Towers and then attack Lucifron. Save gold for the phase transition, be ready to play your Anub’arak and to Execute the Dominator Lieutenant. Wait until the Dominator Lieutenant is close to the Tower and hit both the Tower and the Dominator with the Execute before the Tower is fully constructed after a phase transition.
If you are playing with another Anub'arak, note that only one Anub is needed on the board at a time. Spend your gold on troops, if there is an Anub alive.
Repeat the process of taking out the Dominators, capturing the Towers, and then attacking Lucifron three times, and you’re done.
Watch it in action
Maiev
rumblo:CDgQAhoECEcQAhoECFoQARoECCQQABoECDIQABoECFgQARoECAkQAA==
Important Talents
Bloodthirsty on Execute adds more damage when used near Unbound minis.
Infectious Swipes on Harpies are important to add more damage to take out Fire Elementals and Molten Giants.
Strategy
Use Quilboar or Earth Elemental to distract a Dominator Lieutenant. Use Whelp Eggs to take down the first one with the damage aura, it pops the Eggs but does not hurt the Whelps. At release, the damage aura is bugged and missing from subsequent Dominators. Use Worgen on those. Add Execute according to taste.
Defend with Harpies as needed.
Capture the Towers and then attack Lucifron. Save gold for the phase transition, be ready to Execute the Dominator Lieutenant. Wait until the Dominator Lieutenant is close to the Tower and hit both the Tower and the Dominator with the Execute before the Tower is fully constructed after a phase transition.
Repeat the process of taking out the Dominators, capturing the Towers, and then attacking Lucifron three times, and you’re done.
Watch it in action
Boss Strategy
Lucifron map (normal version)
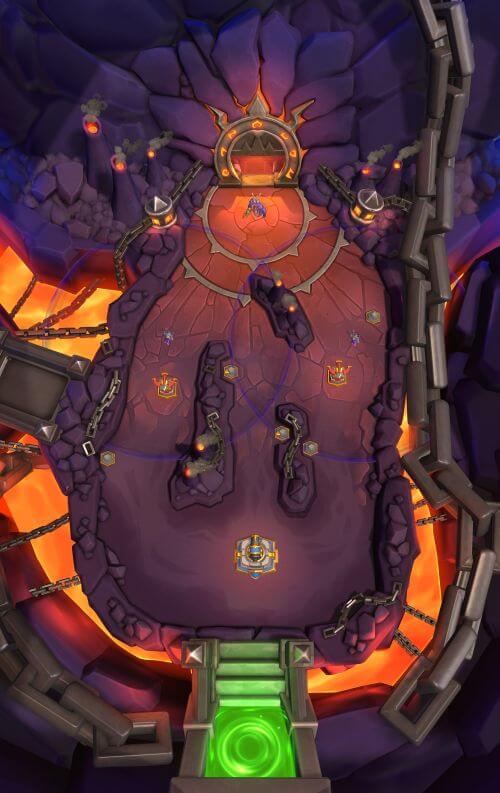
Minis in Heroic Lucifron’s Army
- Dark Iron Miner - Dwarven Ambition
- Firehammer - Moultin’ Metal
- Living Bomb - Blast Radius
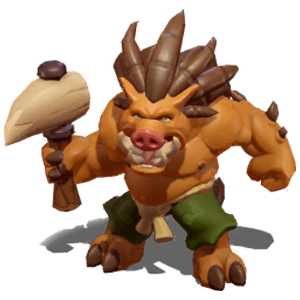
- Molten Giant - Bolster
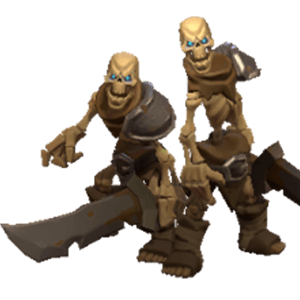
- Necromancer - Breath of the Dying
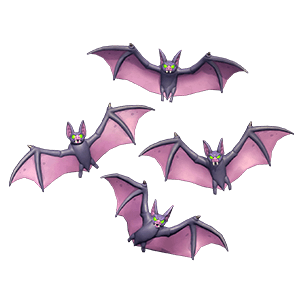
- Spiderlings - Envenom
Living Bomb is a major threat to large groups of minis.
The Boss and Other Minis
Lucifron
- 30,000 health
- Unstoppable
- Shadow Splash: 160 Elemental damage, 1.4 seconds attack speed, 12 range, 4 radius
- Base killer (phase 3, targets Barracks): 120 Elemental damage, 10 seconds cooldown, 100 range, 4 radius
Dominator Lieutenant
- 2000 health
- Resistant, Unstoppable
- Dominates the nearest enemy mini within a range of 22 - ignores dominated minis, Whelp Eggs, and Ragnaros
- Dominated minis have permanent Bloodlust
- Heals itself for 2% of maximum health every second
- Shadow Aura: 26 damage every 0.3 seconds, 3.5 radius, cannot hit flying minis
- Tower killer (targets Towers and Ragnaros): 60 Elemental damage, 4 seconds cooldown, 14 range, 4 radius
- Base killer (targets Barracks and Ragnaros): 60 Elemental damage, 6 seconds cooldown, 29 range, 4 radius
Map Mechanics
Lucifron summons 3 Fire Elementals every 90 seconds.
There are two Dominator Lieutenants on the map at the start of phase 1. They will mind control the closest mini in range, and immediately mind control a new one when their previous target dies. They stay behind the Towers and do not respawn during this phase if killed.
Phase 2 begins at 70% health
- Lucifron summons two Dominator Lieutenants, and this time they will move closer to your Barracks and can shoot at it
- Lucifron destroys enemy minis and buildings on a large radius
- Lucifron cleanses itself of Poison and Burn
- Lucifron resets its own gold to 0
- If you are still in the same phase 120 seconds after phase 2 starts, Lucifron will summon another pair of Dominator Lieutenants
Phase 3 begins at 40% health
- Lucifron summons two Dominator Lieutenants, who will again move closer to your Barracks and can shoot at it
- Lucifron itself gains the Base killer ability and starts shooting at your Barracks every 10 seconds
- Lucifron destroys enemy minis and buildings on a large radius
- Lucifron cleanses itself of Poison and Burn
- Lucifron resets its own gold to 0
- If the battle is not over 120 seconds after phase 3 starts, Lucifron will summon another pair of Dominator Lieutenants
General Strategy
It is not possible to race Lucifron down in Heroic like you can do in Normal. Instead, you want to take the Dominator Lieutenants down and capture the Towers in each phase, and then attack Lucifron.
In the first phase, it is easier to start with the right Dominator because the left one has a Fire Elemental next to it.
You can first send an Unbound mini to a faraway location that is still within range of the mind control ability to make the Dominator focus on that one while you send others to attack it. Earth Elemental with Taunt can also be nice as it can be played next to the Dominator and the Tower and remain the target of the Tower thanks to Taunt, even after getting mind controlled.
It is also possible to use a Banshee to recapture a dominated mini, which will confuse the Dominator and make it ignore new targets while the original mini is alive. It may not be worth bringing a Banshee for this, but it is an option.
Be ready to defend against the timed Fire Elemental spawns and save gold for the phase transitions. If you use Execute for the Dominator Lieutenants (they take full damage from it), you can wait until the Dominator Lieutenant is close to the Tower and hit both the Tower and the Dominator with the Execute before the Tower is fully constructed after a phase transition.
Repeat the process of taking out the Dominators, capturing the Towers, and then attacking Lucifron three times, and you’re done.
LFR Builds
Doomhammer with Starfall (any Leader will do)


rumblo:CB8QABoECBwQABoECFgQARoECB0QARoECAcQABoECAgQAhoECEQQAg==
Important Talents
Celestial Focus on Eclipse gives more levels to Starfall.
Moonfury on Earth and Moon further improves Starfall damage.
Pick Lock on Defias Bandits increases your income from chests.
Splashing Pumpkins on Plague Farmer enables it to outrange Towers.
Strategy
Take control of the Towers, which also gives you control over both chests. Note that you can use Defias Bandits also on your partner’s side, if they have captured the Tower, as you can get them to walk to the chest from the Tower’s side.
Cast Eclipse followed by Starfall on Magmadar. It is important that you do not get the two Cenarion spells out of sync: you want the bonus level spell to always be Starfall. If you need to use spells for defense early on, use one of each or re-sync them later so that you will get the full damage on the boss.
Bonus points for dropping Whelp Eggs behind Magmadar: Immolate pops the Eggs and Magmadar needs to turn slowly to actually hit the Whelps.
After some spell cycles, Magmadar will fall.
Watch it in action
Grommash with Execute (other Leaders are OK too)
rumblo:CDAQARoECBwQABoECAkQABoECB0QARoECFgQARoECEQQAhoECEcQAg==
Starfall is the most effective strategy against Magmadar, but if you don't have it at a good level, you can also kill some Hounds and use Execute and Whelp Eggs with a Quilboar distraction with a build like this one. Note that the Heroic Ancient Core Hounds gain a level each time another Ancient Core Hound resurrects them (not from the phase transition resurrection by Magmadar), so if you struggle to take them down, they can gain levels rapidly. Execute and Eggs can still save you when used on the boss even if you can no longer push through the overleveled Hounds.
Important Talents
Pick Lock on Defias Bandits increases your income from chests.
Strategy
Take control of the Towers, which also gives you control over both chests. Note that you can use Defias Bandits also on your partner’s side, if they have captured the Tower, as you can get them to walk to the chest from the Tower’s side.
Use Execute on Ancient Core Hounds and Magmadar as needed.
Drop Whelp Eggs behind Magmadar. Immolation Aura will pop the Eggs open, and the Whelps can attack Magmadar. You can also tank and distract Magmadar with Quilboar. You can also attack Magmadar with Troll and Plague Farmer and have Quilboar tank it. If you use Grommash as your Leader, he can give Bloodlust to nearby minis.
Watch it in action
Ysera with Starfall

rumblo:CFsQARoECAgQAhoECAcQABoECEQQAhoECBwQABoECCwQABoECB0QAQ==
If you want to save Doomhammer for another boss, Ysera is a viable Leader for Magmadar. Do note that Ysera minis will cycle the forms of Eclipse and Earth and Moon, so you need to be a little careful with how you use them to have Starfall available for the boss.
Important Talents
Celestial Focus on Eclipse gives more levels to Starfall.
Moonfury on Earth and Moon further improves Starfall damage.
Pick Lock on Defias Bandits increases your income from chests.
Splashing Pumpkins on Plague Farmer enables it to outrange Towers.
Strategy
Take control of the Towers, which also gives you control over both chests. Note that you can use Defias Bandits also on your partner’s side, if they have captured the Tower, as you can get them to walk to the chest from the Tower’s side.
Cast Eclipse followed by Starfall on Magmadar. It is important that you do not get the two Cenarion spells out of sync: you want the bonus level spell to always be Starfall. If you need to use spells for defense early on, use one of each or re-sync them later so that you will get the full damage on the boss.
Bonus points for dropping Ysera Whelps behind Magmadar: Magmadar needs to turn slowly to attack the Whelps.
After some spell cycles, Magmadar will fall.
Watch it in action
Boss Strategy
Magmadar map (normal version)
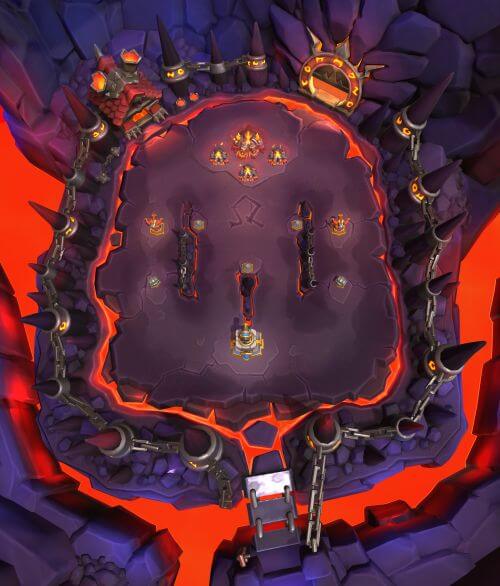
Minis in Heroic Magmadar’s Army
- Drake - Engulfing Flames
- Execute - Bloodthirsty
- Firehammer - Moultin’ Metal
- Fire Elemental - Molten Core
- Pyromancer - Conflagrate
- Skeleton Party - 5-Man
The Boss and Other Minis
Magmadar
- 20,000 health
- Unstoppable
- Fire Breath: 5 times 80 Elemental damage (400 damage overall), 2.4 seconds attack speed, 7 range, 90 degrees arc
- Immolate: Minis within a radius of 6 from Magmadar take 20 Elemental damage every 0.5 seconds
Ancient Core Hound
- 3800 health
- Resistant
- Bite: 230 Physical damage, 2 seconds attack speed, melee range, aggro range 12
- Immolate: Minis within a radius of 4.5 from Ancient Core Hound take 10 Elemental damage every 0.5 seconds. This ability persists in death.
- Resurrect: Resurrects dead Ancient Core Hounds back to life at 50% health on a radius of 9 (walks to a range of 5 to begin the 3-second resurrection cast), adds a level to the resurrected Ancient Core Hound (up to +10 levels)
- Rebirth: When resurrected, deals 200 Elemental damage to enemy minis on a radius of 9.5
Map Mechanics
Magmadar summons an Earth Elemental every 30 seconds, starting from 5:59. There are four spawn spots that take turns with each one spawning an Earth Elemental every 120 seconds. The first one spawns in mid-left (5:59), followed by right (5:29), mid-right (4:59), and left (4:29).
At phase transitions at 70% health and 40% health, Magmadar:
- Gains a 90% damage shield for 5 seconds
- Cleanses itself of Poison and Burn
- Reduces its current gold to 0
- Destroys enemy minis on a radius of 10 around it
- Heals all Ancient Core Hounds to full
- Resurrects any dead Ancient Core Hounds and heals them to full
- Spawns one additional Ancient Core Hound
General Strategy
The key to defeating Magmadar is to take control of the Towers, which also gives you control over both chests. The chests will keep your economy rolling, especially if you bring some Defias Bandits with Pick Lock. Note that you can use Defias Bandits also on your partner’s side, if they have captured the Tower, as you can get them to walk to the chest from the Tower’s side.
When you have control of the Towers, you still need to handle various direct attacks against your base through the middle, but the overall pressure level is low. Just watch out for a surprise Skeleton Party because they are Unbound.
When mining the gold mines in the middle, deploy your Kobold Miner at the edge where the target gold mine is. A single Kobold is unable to grab both the middle mine and the side mine.
Because the Ancient Core Hounds gain levels in Heroic whenever they are resurrected by the other Ancient Core Hounds, you want to skip them altogether. Use Eclipse and Starfall to hit Magmadar directly. Bonus points for dropping Whelp Eggs behind Magmadar: Immolate pops the Eggs and Magmadar needs to turn slowly to actually hit the Whelps.