Up to 84% Off VPN
As we’re approaching the latter half of Tier 5, we wanted to offer some help for those who may still find themselves struggling or taking additional time in Serpentshrine Cavern and Tempest Keep in TBC Classic Anniversary. Below, we’ll be providing a large source of tips and tricks for players to speed up either their overall raid or boss kill times.
General Trash Tips:
- This automarker still works for TBCA and will save a lot of time when you want to mark your trash. Having this and using this for the rest of TBC will eliminate a lot of downtime between trash pulls!
- If you struggle with threat on trash, you can assign your raid to focus down Skull first and then proceed to AoE after. Doing this will eliminate one of the more dangerous mobs out of the equation quickly and allow for more secure threat on your tanks during Trash.
- To continue from this, if your trash packs have Nethermages, Fathom Witches, Scryers, Star Scryers, or Centurions, you should ALWAYS fully single-target these mobs down before swapping to AoE, as they are all incredibly dangerous the longer they live.
- Every Mind Control cast from trash can be prevented with a Grounding Totem, EXCEPT for the Scryers in Astromancer Solarian’s room.
- You can also use Bloodlust on several trash packs where you know you’ll have extended time between bosses. Along with that, you can use Drums of Battle pretty frequently on trash packs as they only have a two-minute cooldown.
- Most downtime from raiding is from unnecessary drinking for mana replenishment. Drink-walking, and using Mana Potions during trash will greatly speed up time on trash. Mana users should only drink once they've caught up to the tanks and absolutely need to replenish Mana before more pulls.
Serpentshrine Cavern
Hydross Positioning
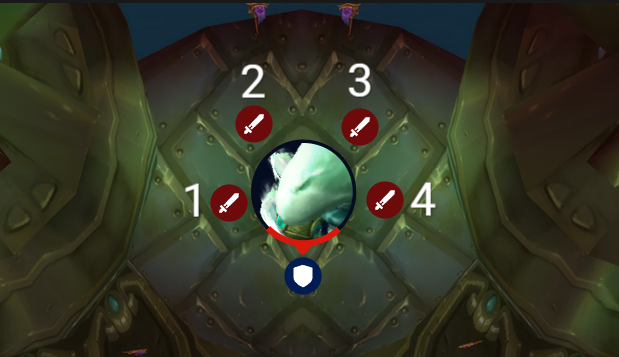
A popular positioning for Hydross is to make sure you are in 2 melee groups behind the boss, to prevent your entire melee from getting hit with the water tomb. You can actually separate into 4 groups without any sort of player size modifier and still be behind the boss. One group on the far left, far right, and 2 groups in the back. If positioned correctly, this will greatly reduce DPS loss from a melee group getting hit with Water Tomb.
Lurker's Whirl
Lurker's Whirl is on a strict timer, like all his mechanics are, and the actual ability does not go off until after he finishes his spin animation. The only unpredictable ability he has is his Geyser, which will target a random player and knockback them and those near them.
Tip: Melee can enter the water before each Whirl to prevent getting knocked back, or simply move towards the boss as he starts the animation to still be in melee range when knocked back.
Healing Aggro On Morogrim
Your add tank generating threat can be an issue due to the high amount of healing aggro generated after Earthquake goes out. Typically, the Holy Priest will be the Murlocs' number 1 target when this happens. The add tank should be geared for threat as he will not be on the boss at all throughout this encounter.
Tip: Whenever Morogrim casts his earthquake into murloc summons, avoid AoE healing at the start, as you do not need to immediately top off the raid once this goes out. Once your murloc tank gets threat, THEN you can start healing the raid.
Fathom Lord Karathress's Cataclysmic Bolt
Fathomlord Karathress is somewhat of an RNG fight, especially if you are opting to not kill Caribdis. Because Karathress will gain a 65% damage increase from Blessing of the Tides if Caribdis is active, if he gains that while also getting Sharkiss’s 30% damage buff from The Beast Within at the same time, it'll make his Cataclysmic Bolt deal 107.25% of a target's HP, meaning they’ll always get one shot if targeted by this. Shadow Protection Potions, a Priest's Shield, or Shadow Resistance can prevent this. The overkill is typically only around 700 HP.
| Damage Modifiers | Baseline | + The Beast Within | + Blessing of the Tides | + Blessing and Beast |
| Cataclysmic Bolt Damage | 50% HP | 65% HP | 82.5% HP | 107.25% HP |
It is argued it is worth the risk to go this method of leaving Caribdis alive, as opting into killing Caribdis instead seriously prolongs the encounter and thus pushes the limit on your mana users in the raid. It also gives Karathress her Tidal Surge ability, freezing members of your raid for four seconds periodically.
Controlling Leotheras's Whirlwind
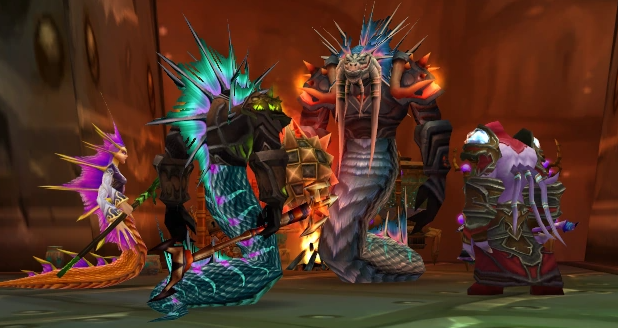
Leotheras can be a struggle for raid teams as his whirlwind can be quite deadly. However, the issue comes from improper healing assignments. Leotheras does not deal intense damage on the tank at all, and one healer can easily keep him topped off. Every other healer should be focusing on the raid during whirlwind and while the debuff is active.
Tip: Jumping during whirlwind if Leotheras is targeting you will change his target, so you can actually keep him close to the same spot and prevent him from moving completely by having ranged jump during his whirlwind cast, making the damage output very predictable and very easy to heal with resto shamans and holy priests AoE/group healing.
Phase 2 Lady Vashj
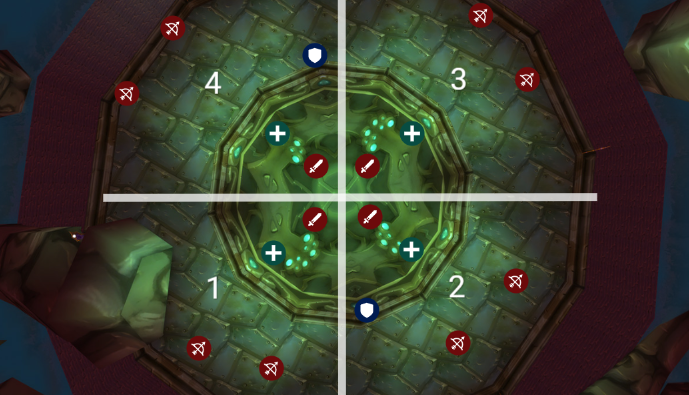
Lady Vashj can give groups trouble in Phase 2 of her encounter, but simply assigning everyone one of 4 quadrants and having them move less will make this much easier. When you realize the encounter is simply just DPS all enemies near you and call out where a tainted elemental is, it greatly reduces the panic of this phase. Nobody should be going down the stairs unless looting a Tainted Elemental for its core, as you'll be out of Line of Sight from any healers.
Tempest Keep
Two-Tanking Alar
Alar can easily be two-tanked if you struggle finding a 3rd. There are multiple ways to do this, but having one tank above, preferably a bear or warrior, can easily solo tank the first phase, thanks to their charge abilities. If the raid eats 1-2 Flame Buffets, it's very easy to heal.
If for some reason the Flame Buffets start to get past that, a priest can cast their Shadowfiend on Alar, which will make him stop casting his Flame Buffets temporarily, since there's something within his melee range.
Tip: You can also attack Alar while he's up in the air picking a target to Dive Bomb in Phase 2, so when he begins doing this, spread out until you're in a good spot, and if you’re a ranged DPS, immediately start casting again on Alar.
Void Reaver Tips
Void Reaver trash can be VERY annoying, especially with the Mechanics and their Saw Blades. However, they only cast this in a frontal, so if your tanks start the pull with the rest of the raid on a different side, they will avoid getting hit by this, allowing your warlocks to banish them with ease.
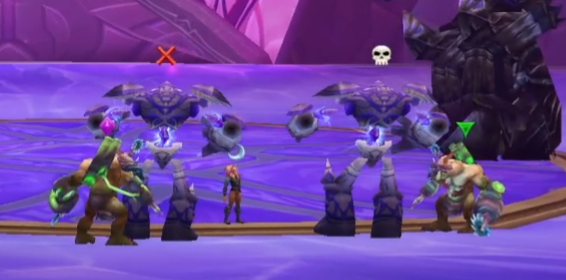
Tip: Tanks on Void Reaver should make sure they are hard geared for threat, as his damage on tanks isn't severe, but the fight will prolong if your DPS are threat-capped. Make sure your raid team is utilizing your Hunters' Misdirects as much as possible.
Reset Bosses For Better Positioning
Both Void Reaver and Astromancer Solarian can be reset by having a Hunter use Eye of the Beast on their pet, use their pet to pull, and then release the cast. If the Hunter is positioned far in the previous hallway, the boss will chase them until they reset, and during this, players can move into position to get set up early. You can summon the Hunter before he starts the encounter so he can get back into the room quicker. This allows for your raid to position itself correctly before the encounter starts, and not during the encounter.
Tip: Healers on Solarian should have target of target on to be able to immediately heal who she is going to hit with her arcane missiles. If you wait to see who gets hit on your raid frames, then you are healing reactively, which can lead to preventable deaths.
Kael'Thas and His Trash
For Pre-Kael'thas trash, if your Mages struggle with keeping the Centurions sheeped, a Retribution Paladin's Repentance and a Rogue's Gouge will also temporarily stun them.
For Kael’thas, if you struggle with Phase 3, where all the advisors are active, you can Bloodlust here instead of Phase 4 or 5, as those phases are relatively easier and way less chaotic than Phase 3. Capernian is bugged with her Conflaguration, but for Phase 3, make sure all players who equipped the legendary staff enable its on-use ability ASAP, as even if you get conflagged, you will ignore the incapacitated part of it and just take ticking Fire damage while still having control of your character. Don't panic if it hits a large portion of your raid; it is very easy to heal through.
Tip: Phase 3, where all advisors are active at once, can be the most chaotic. Typically this is where most groups struggle on this encounter. If your team struggles here, we recommend using Bloodlust on this phase as opposed to Phase 4 or 5, as those phases are more controlled.
Know any more tips that can help on Tier 5 raiding? Did these tips help you out? Let us know in the comments!