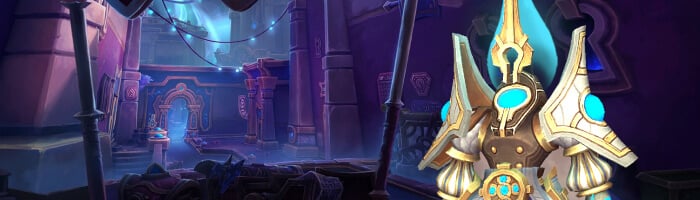
Introduction
Hey everyone, and welcome to the Tazavesh: So’leah’s Gambit dungeon guide for season 3 of The War Within! In this guide I’ll be going over the abilities of all the trash mobs and bosses throughout the dungeon, as well as how I recommend you handle them. I’ll be focusing on the mythic and M+ versions of the dungeon, but most of this article will apply to both normal and heroic difficulties as well. I’ll also be including my recommended, PUG friendly route via the Mythic Dungeon Tools addon for anyone interested.
Some background on myself, my name is Tactyks and I am an avid M+ player, achieving the 0.1% M+ title in every season it has existed, as well as competing in The Great Push in season 4 of Shadowlands. I also create M+, Raid, and tank guide content on my YouTube and Twitch channels, so be sure to stop by and say hi!
Socials:
- YouTube: https://www.youtube.com/@Tactyks
- Twitch: https://www.twitch.tv/tactyks
- Twitter: https://twitter.com/tactyks
If you are using the Mythic Dungeon Tools addon, you can import my recommended route using the following link: https://wago.io/ZtxrAFcgL
Tazavesh: So'leah's Gambit Mythic+ Dungeon Route
If you are using the Mythic Dungeon Tools (MDT) Addon, you can import our PUG Friendly Route for the Mythic+ difficulty of Tazavesh: So'leah's Gambit below.
Tazavesh: So'leah's Gambit M+ Dungeon Route: https://wago.io/ZtxrAFcgL
Video Guide
Hylbrande Trash
Murkbrine Fishmancer
- Water Bolt targets random players, use all spare interrupts on these casts
- Avoid the random target circle created by Volatile Pufferfish
Murkbrine Scalebinder
- Swap to the Invigorating Fish Stick when it spawns and destroy it quickly to remove the buff and healing it provides nearby murlocs
Murkbrine Shellcrusher
- Make sure to interrupt every cast of Cry of Mrrggllrrgg and use Soothes on dangerous mobs if it goes off
- Shellcracker targets the tank, use a defensive if needed and don’t get knocked into ground effects
Coastwalker Goliath
- This mob is immune to CC
- Watch your health before Tidal Stomp and use a defensive if needed
- Avoid the random target circle created by Boulder Throw
Stormforged Guardian
- This mob is immune to CC
- Crackle aims a line at the tank, point this away from your group and move away from the puddles it creates
- Make sure to get away from the mobs when Charged Pulse begins
Hylbrande Boss Fight
For group damage on this fight the boss will cast Purifying Burst, which deals a hit of holy damage to 2 random players. Since you don’t know who is getting targeted beforehand, you’ll want to make sure you’re topped before this hit goes out, otherwise you’ll need to press a defensive.
For tanks you’ll want to use a defensive on the Shearing Swings channel, plus make sure the boss is facing away from your group to avoid hitting your teammates with the Titanic Crash frontal.
To force some additional movement the boss will target random players with Purged by Fire, causing a beam to chase them dealing heavy damage to anyone it touches as well as leaving behind puddles for 2mins. To handle this I recommend being loosely spread towards the entrance of the room and just kiting along the wall or near existing puddles in order to conserve space near the consoles around the room as you’ll need those later.
On top of his own abilities, Hylbrande will intermittently spawn 2 Vault Purifiers to join the fray, which you’ll want to have your tank pick up and then keep interrupts on their random target Valorous Bolt ability, especially when it overlaps with Purifying Burst. On top of this, you’ll want to use CC abilities like stuns and knockups when they begin to channel Empowered Defense, as this puts a 25% damage reduction on the boss while being channeled.
Once the boss reaches full energy he’ll begin Sanitizing Cycle, running to the centre of the room and going immune as he channels. When this happens 4 titan symbols appear around the boss that players can run over to pick up, which must be deposited in the correct security panel in order to end this phase. To see which panel is correct, one person from your group must run to the console at the back of the room and channel into it, which will show the correct panel for each symbol to everyone. After dunking all 4 in the correct spot the boss ends his channel and you repeat the initial phase.
Timecap’n Hooktail Trash
Burly Deckhand
- Use soothes on Super Saison if you have them, otherwise tanks rotate defensives and kite if needed
Hourglass Tidesage
- Brackish Bolt targets a random player, interrupt as many casts as possible
- Tidal burst spawns under a random player, be ready to avoid it
Corsair Officer
- Sword Toss targets a random player, loosely spread to avoid cleaving this ability
Timecap’n Hooktail Boss Fight
Throughout this encounter you’ll be attacked by the captain’s ship in the water nearby, which is important for your positioning for many of the abilities.
To start, waves of 4 Corsair Brutes occasionally run ashore and fixate random players, gaining stacks of Double Time every 2s which make them very difficult to deal with. Instead of focusing these mobs down, you’ll want to hit them with the tank frontal, Infinite Breath, which locks into place after a few seconds and instantly kills any Brutes inside it.
To make hitting the mobs easier, I recommend positioning as far away from the ship as possible and pointing the boss towards it, creating a larger frontal cone to hopefully allow you to easily hit the Brutes. Don’t be afraid to use things like stuns, slows, roots, and knockbacks to help with this as well!
Positioning away from the boat also helps with the Anchor Shot ability, which targets a random player and tries to drag them into the Deadly Seas for 6s. If targeted by this make sure to run against the pull in, using movement speed abilities if needed.
To force you to move you’ll occasionally be bombarded by a Cannon Barrage, which shoots out 8 circles towards random players that leave behind a puddle for 2mins. Make sure you play as a group as much as possible so that you can cluster all these puddles together, allowing you to minimize your overall movement and maximize the safe space you have on the limited platform.
Outside of the ship mechanics, the boss himself will occasionally debuff 2 players with the Time Bomb magic debuff. While this debuff does give you a large haste buff, the damage ramps up quickly and they explode for group damage on removal, so you’ll likely still want to get both dispelled relatively quickly just to make it safer for your group.
So’leah Trash
Adorned Starseer
- This mob is immune to CC
- Drifting Star shoots a line towards a random player, be ready to avoid it
- Wandering Pulsar spawns a mob nearby that pulses for heavy damage, swap to it quickly and be ready with defensives or healing CDs
Focused Ritualist
- Make sure to interrupt every cast of Unstable Rift
- Hyperlight Bolt targets random players, use any spare interrupts on this
So’leah Boss Fight
This is a 2 phase encounter where to start you’ll be dealing with an unempowered version of So’leah until you push her to 40% health, at which point she draws on her relics to transform herself and gain new abilities.
In the initial phase you’ll need to deal with 2 adds when the boss casts Summon Assassins, tanks make sure to pick them up and have 1 interrupt assigned to each to stop their Shuriken Blitz cast when they teleport away from the group.
As for the boss herself, her group damage comes from Hyperlight Spark, which shoots a bolt of arcane damage at a random player that bounces to the rest of the party. On its own this isn’t particularly scary, however it can be quite dangerous if it overlaps with her other ability, Collapsing Star. This creates a circle somewhere in the room for 30s which has 4 charges, which will expend a charge if a player touches it to knock them back and apply a stacking DoT to the group. You want to make sure you empty at least some of these charges as anything remaining will apply to your group when the star expires, so have a ranged player assigned to soak 3-4 hits in a staggered fashion, ensuring your group never gets 2 stacks of the DoT.
After pushing the boss to 40% health phase 2 begins, with the boss returning to full health and beginning Power Overwhelming. When this happens the boss spam casts Hyperlight Jolt, which shoots a line from the boss that chains between all 5 players, dealing arcane damage and increasing their damage taken from this ability by 25% for 15s. To stop this from happening you need to hit all 5 relics surrounding the boss with a jolt, so when this phase begins make sure you spread out and use the ping system to call out which relic you plan to hit, which will ideally let you finish this phase with a single cast of Hyperlight Jolt.
In terms of other abilities in this phase, many of them also focus on these relics, which the boss randomly moves intermittently. Energy Fragmentation shoots a bolt to all 5 relics, one at a time, causing them to explode and shoot out projectiles you need to avoid. Make sure you give yourself space to dodge here, so don’t stand right next to a relic! That also helps for the Hyperlight Nova ability, which creates a 14yd circle around all 5 relics as well as the boss that you’ll want to avoid.
Outside of that, Collapsing Star continues to happen in this phase, so the assigned player will need to make sure they are depleting at least 3 charges from it before the 30s expires, just be careful not to get knocked into one of the Energy Fragmentation projectiles or the Hyperlight Nova circles. Otherwise this phase just repeats until the boss is defeated.