
After defeating the first four Nightlords, you will gain access to the final expedition of Elden Ring: Nightreign — the Night Aspect. On the 3rd day of this expedition, you will be facing off against the Primordial Nightlord himself, known as Heolstor. This encounter has two phases, with the first one intended to act as a warm up before the climactic duel in phase 2.
Preparation
Before attempting the final fight, it’s important to be well prepared with the right gear and armaments. Since Heolstor is weak to Holy damage, prioritise acquiring at least one Holy weapon in the first two days, whether it be a greatsword with that elemental effect or a spell like Discus of Light.
Having the right Talismans equipped can also turn the tides in your fight against Heolstor. A must-have is the Sacred Scorpion Charm, which increases the Holy damage you do by a significant amount, albeit at the cost of slightly lower defense. If your weapon has an Ash of War that does Holy damage, then you can also consider the Warrior Jar Shard Talisman as well.
Phase 1: The Shape of Night
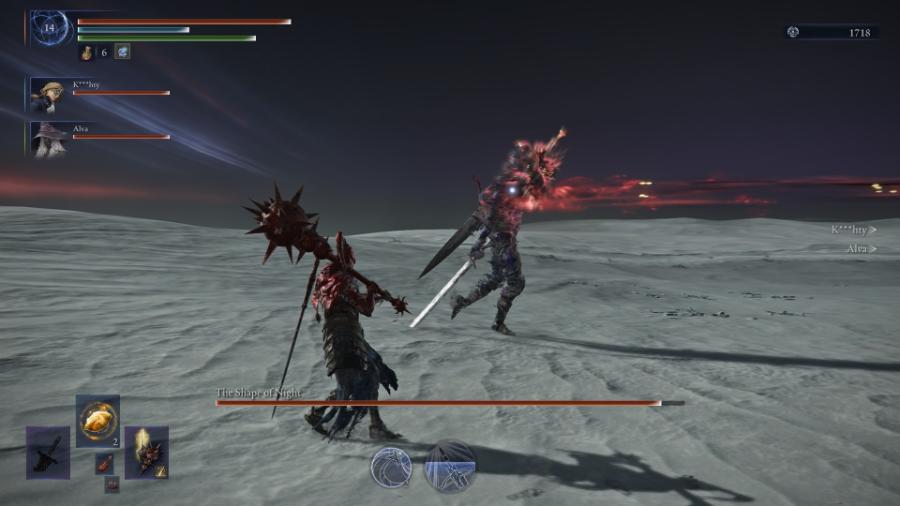
As soon as you enter the fight, you’ll see a shadowy figure in the distance walking towards you, sword dragging along the ground and seemingly harmless until you engage. That figure is the Shape of Night, and this is the first phase of the Night Aspect boss fight. Use this phase to get used to his rhythm and timing, as you will ideally want to conserve all your flasks and Ultimate Arts for phase 2.
The Shape of Night’s attacks are simple, but they hit hard. He will start off by using only his broken straight sword — long, winding swings and thrusts that will take away half your health if you’re not careful. At around 75% health, he will unravel a greatsword from his back, along with a dagger on his right arm, drastically increasing the tempo of his attacks.
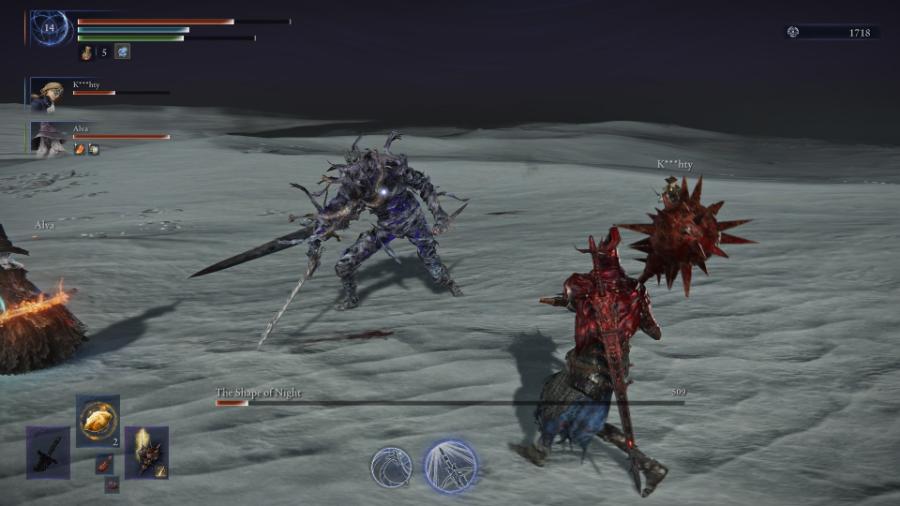
During this phase, his swings will get faster, and you will have to watch out for his dashes, which close gaps in the blink of an eye. If you stay on your toes and take the time to learn his attack pattern, surviving this phase is straightforward since he does not have much health.
Phase 2: Heolstor the Nightlord
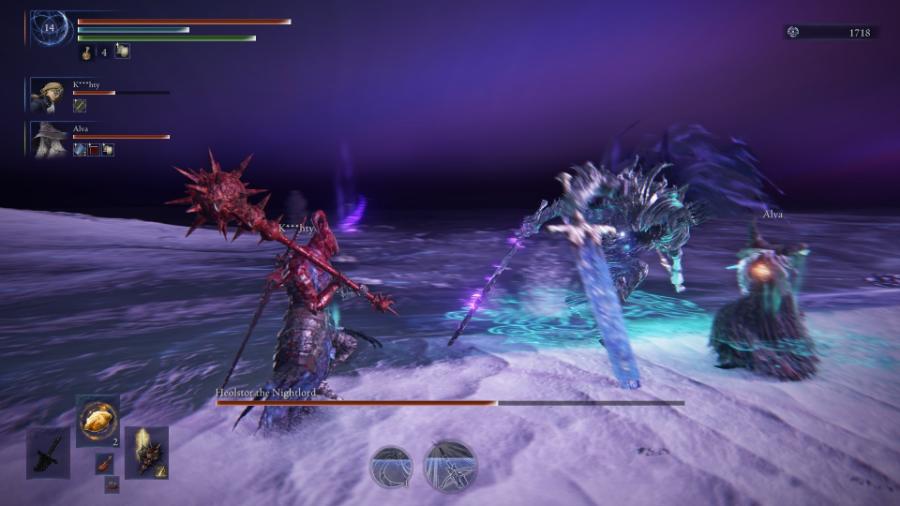
Once you deplete his health entirely, the screen gets engulfed in shadow, and shortly afterwards, reveals the night sky spiralling into an endless void — with Heolstor the Nightlord at the center of it.
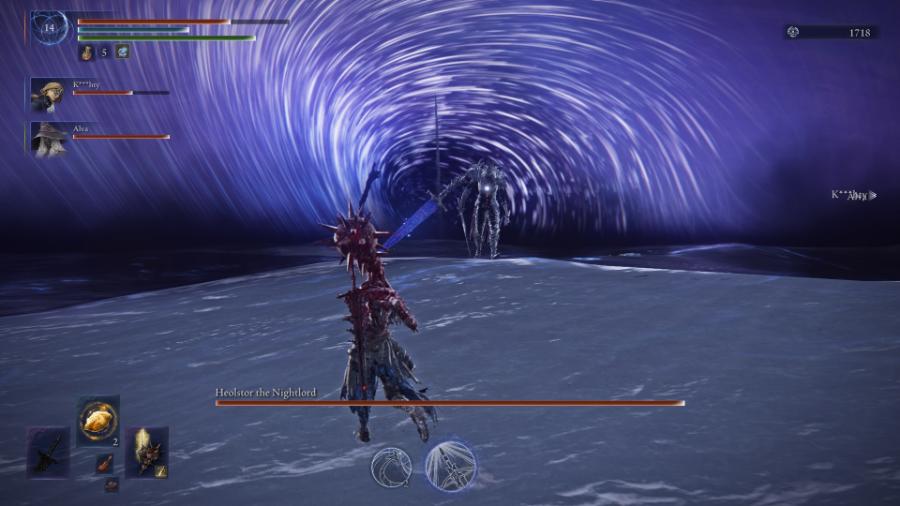
The real battle will now begin, as he opens immediately by charging up his greatsword and dashing straight into you, swinging it in a wide arc before stabbing it into the ground. The stab has an AoE effect, so make sure you roll a little bit late to evade the lingering hitbox.
Most of his attacks during this phase are very similar to the three-swing combos in phase 1, with the additional AoE attacks from his glowing greatsword adding to the danger.

Another move to watch out for is when the entire screen gets darker and small white bolts spawn in the area, homing into you and your teammates. These can be easily dodged with the proper timing and you can also outrun them by using Surge Sprint.
If you have heavy hitters like Wylder or Raider, this is the part where you should be as aggressive as possible. Getting in one or two ripostes is important since the Nightlord will get much more erratic in the last part of the fight, giving you far fewer opportunities for punishment.
Phase 2.5: Heolstor Tears the Night
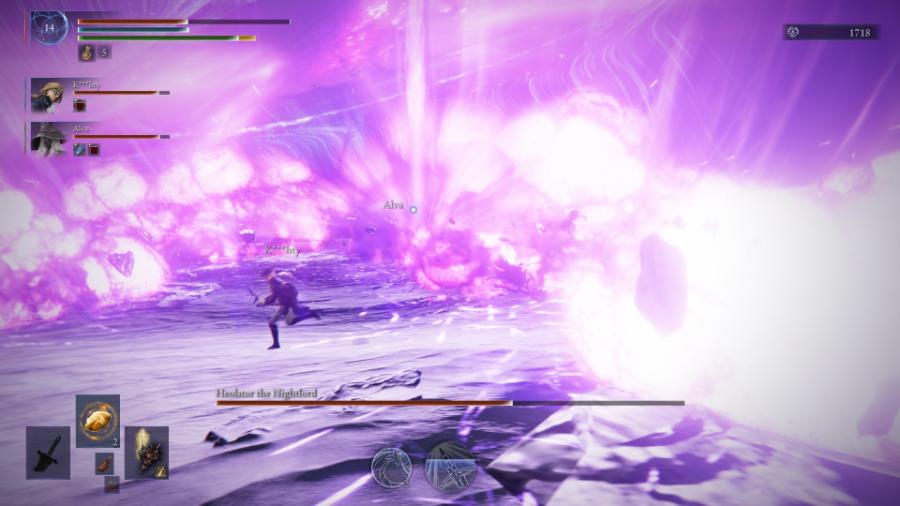
At around 50% of his new health, Heolstor will suddenly float up into the void-like sky and quite literally tear a rift through it. This beautiful move has 7 possible variations, with every one of them ending with Heolstor slamming his sword into the arena, causing elemental explosions to erupt from the ground underneath.
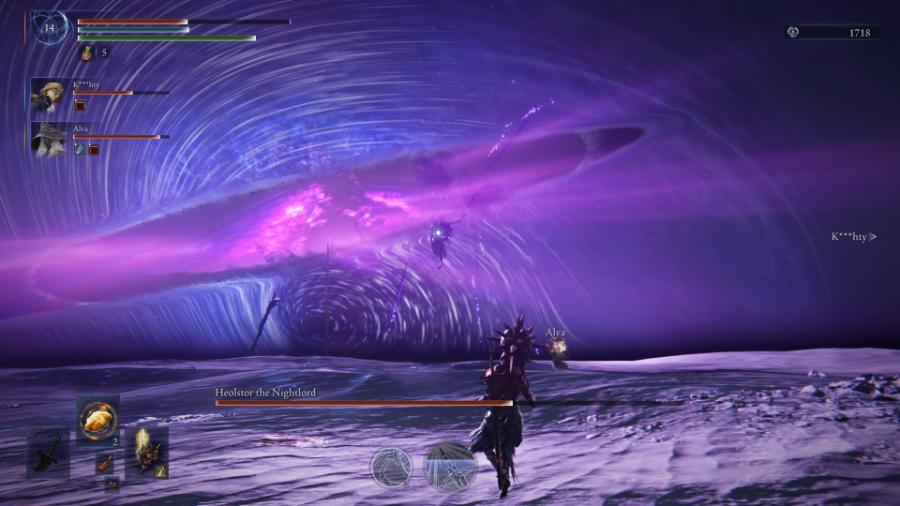
The elemental variations of this move can range from Fire, Lightning, Poison, Sleep, Madness, Holy and Frost — each of them corresponding to the elements of the Nightlords you fought before.
Heolstor enters an extremely aggressive phase after this, where his combos are noticeably faster. Attacks will also leave behind trails of elemental explosions that you need to be wary of. It is best to keep your distance during this phase and let the ranged character(s) on your team do the main damage. Getting too close is just too risky given how much damage his combos will do.
Shortly afterwards, Heolstor will go into an extremely slow but devastating 5-hit combo, which he ends by rising into the air and slamming his sword back into the ground again. The explosion can potentially one-hit you, so make sure you get the timing of the roll right. Dodging towards him seems to be the most effective.
Once he finishes this chain of attack, it’s time for your team to do all the damage you can as Heolstor’s tempo will finally slow down. If you have been saving those ultimates, now is the best time to let them loose, especially ones like Wylder’s Onslaught Stake or Ironeye’s Single Shot.
Nightlord Slain
Heolstor the Nightlord is known as the most brutal fight in all of Elden Ring: Nightreign, and this is rightfully so. With an incredible cinematic display of his power and an idiosyncratic moveset, he brings a fitting end to this Soulsborne. Conquering the final Nightlord will not only take resolve, but a lot of patience and strategy as well, so come prepared!