Mor'Ladim Mission Guide
Learn how to complete the Mor'Ladim mission in Warcraft Rumble. Follow our suggested build and strategy for Mor'Ladim, in Duskwood.
Best Builds
Mor'Ladim (all Leaders)


rumblo:CBQQARoECCwQABoECEQQAhoECBMQARoECFkQAhoECCoQABoECEYQAA==
The original army used Flamewaker and Drake instead of Plague Farmer and Witch Doctor, but the newer/buffed minis are stronger. Those old options do still work as well though.
Watch it in action
Boss Strategy
This guide focuses on the Heroic Mor’Ladim encounter in Duskwood but also works for the normal version.
Minis in Mor’Ladim’s army
- Abomination - Noxious Presence
- Banshee - Will of the Necropolis
- Blizzard - Icecrown
- Gargoyle - Wing Buffet
- Meat Wagon - Filet Trebuchet
- Plague Farmer - Splashing Pumpkins
- Vultures - Tendon Rip
Other minis and map mechanics
Mor’Ladim spawns a lot of Skeletons and Skeletal Mages.
At the start of the fight, there are 2 Skeletons and 3 Skeletons guarding the gold mines. These Skeletons respawn 60 seconds after being killed (120 seconds in Quests and Surges).
Mor’Ladim also summons 4 Skeletons and 3 Skeletal Mages on the left and 5 Skeletons and 3 Skeletal Mages on the right. In Heroic, both groups are joined by 2 Ghouls. These groups are resummoned every 35 seconds (70 seconds in Quests and Surges) even if the last group is still alive.
Furthermore, if any of your minis die near Mor’Ladim, he will summon a Skeletal Mage by his side.
Mor’Ladim:
- 4000 health
- Weapon (cleave): 160 Physical damage, 1.4 seconds attack speed, 2.5 range, 120 degrees arc, 5 radius, cannot hit flying minis
- Holy Shock: 130 Elemental damage, 1.5 seconds attack speed, 9 range
- Raise Dead aura: 9 radius, summons a Skeleton Mage when an enemy mini dies
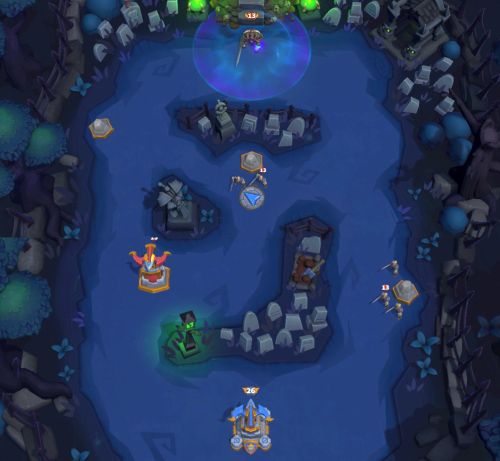
General strategy
Take the Tower and push up to the boss from the left side. Defend the right side as needed and try to mine the gold on the right.